Polaroid photo development involves understanding instant film, mastering exposure, and nurturing the developing print, which is why dfphoto.net is dedicated to providing comprehensive guides. We’ll help you navigate the nuances of instant photography and elevate your photographic expertise. By mastering these skills, you’ll be capturing and preserving moments in a unique, tangible way.
1. What Is A Polaroid Photo And How Does It Work?
Polaroid photos are instant photographs created using a self-developing film, producing a finished print within minutes of taking the picture; they’re named after the Polaroid Corporation, which first popularized this technology, and remain synonymous with instant photography. This immediacy is a unique charm in today’s digital world, offering a tangible memory almost instantly.
1.1 The Magic Behind Instant Photography
Instant photography relies on a complex chemical process contained within each film pack. According to research from the Santa Fe University of Art and Design’s Photography Department, instant film contains layers of dyes, developers, and other chemicals. In July 2025, instant film technology leverages a series of chemical reactions that occur within the film itself, without the need for external processing.
1.2 Step-by-Step: From Snap to Print
- Loading the Film: The film pack, containing plastic negatives covered in reactive chemicals, is inserted into the camera.
- Capturing the Image: Like analog cameras, when you take a photo, the shutter opens, allowing light to expose the negative.
- Chemical Reaction: The camera rollers eject the photo, simultaneously releasing a reagent chemical that initiates the development process.
- Developing the Image: Over a few minutes, the image appears as the chemicals react, transforming from a blank slate to a developed photograph.
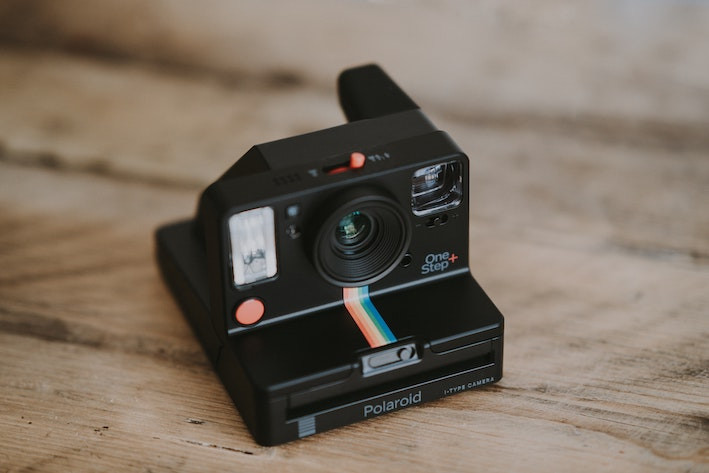 Polaroid Camera
Alt text: Capturing a moment with a classic Polaroid camera, embodying instant photography and retro aesthetic.
2. What Are The Key Factors Influencing Polaroid Photo Development?
Several key factors influence how a Polaroid photo develops, including temperature, light exposure during development, and the age and storage of the film. Control over these elements can significantly affect the final image quality.
2.1 Temperature’s Impact
Temperature plays a vital role in the chemical reactions necessary for Polaroid development. According to Popular Photography, optimal development occurs between 70-80°F (21-27°C).
- Too Cold: Reactions slow down, leading to washed-out colors and underdeveloped images.
- Too Hot: Reactions accelerate, potentially causing color distortions and an overexposed look.
2.2 Light Exposure During Development
Shielding the photo from light while it develops is critical. Exposure to bright light can cause overexposure and faded colors.
- Protecting the Image: Keep the photo in a dark place, such as a pocket or face down on a flat surface, during the initial development phase.
- Light Shields: Some modern Polaroid cameras have built-in light shields to protect the film as it ejects.
2.3 Film Age and Storage
The age and storage conditions of the film significantly impact the final result.
- Storage Matters: Store film in a cool, dry place, ideally in the refrigerator (but allow it to reach room temperature before use).
- Expiration: Expired film can produce unpredictable results, often with faded colors or uneven development.
3. How To Prepare Your Polaroid Camera And Film For Optimal Results?
Proper preparation of your Polaroid camera and film ensures the best possible results.
3.1 Camera Maintenance
Regularly clean your camera’s rollers and lens to remove any debris that might affect image quality.
- Roller Cleaning: Use a soft, lint-free cloth to gently clean the rollers, ensuring smooth film ejection.
- Lens Cleaning: Use a lens cleaning solution and cloth to remove any smudges or fingerprints from the lens.
3.2 Film Storage and Handling
Proper storage and handling of the film are crucial for optimal performance.
- Refrigeration: Store film in the refrigerator to prolong its life.
- Acclimation: Allow the film to reach room temperature for at least an hour before use to prevent condensation issues.
- Handling: Handle film packs carefully to avoid damaging the delicate chemicals inside.
3.3 Battery Check
Ensure your camera has sufficient battery power. Many Polaroid cameras use the battery to power the rollers and flash.
- New Batteries: Insert fresh batteries before shooting a new pack of film.
- Battery Type: Use the correct type of battery specified by your camera manufacturer.
4. What Are Step-By-Step Instructions On How To Develop A Polaroid Photo?
Developing a Polaroid photo involves several critical steps to ensure the best possible outcome. Following these instructions carefully will help you achieve optimal results.
4.1 Taking the Shot
- Compose Your Shot: Frame your subject carefully, considering the limited field of view and the square format.
- Check Lighting: Ensure adequate lighting. Polaroid film performs best in bright, well-lit conditions.
- Use the Flash: If necessary, use the built-in flash, especially indoors or in low-light situations.
- Hold Steady: Keep the camera steady to avoid blurry images, especially in darker environments where the shutter speed is slower.
4.2 Immediate Post-Shot Actions
- Shield from Light: As the photo ejects, immediately shield it from direct light.
- Warm Environment: Keep the photo in a warm environment to facilitate the chemical reactions.
- Avoid Shaking: Contrary to popular belief, do not shake the photo. Shaking can damage the developing image.
4.3 Developing the Image
- Protection: Place the photo face down on a clean, dry surface, or keep it in your pocket to protect it from light.
- Wait Patiently: Allow 10-15 minutes for the image to fully develop. The waiting time may vary depending on the film type and temperature.
- Observe the Progress: Watch as the image gradually appears. Avoid exposing the photo to light during this critical development phase.
 Developing Polaroid Picture
Alt text: Hands carefully holding a developing Polaroid picture, showcasing the delicate process of instant photography and tangible memories.
5. What Are The Best Lighting Conditions For Polaroid Photography?
Optimal lighting is crucial for achieving the best results with Polaroid photography. Polaroid film is most sensitive to lighting conditions, which can significantly impact the outcome of your photos.
5.1 Natural Light
Natural light is generally the best option for Polaroid photography, providing soft, even illumination.
- Outdoor Shooting: Shoot outdoors during the golden hours (early morning and late afternoon) for warm, flattering light.
- Cloudy Days: Overcast days offer diffused light, which is excellent for avoiding harsh shadows and highlights.
5.2 Artificial Light
When natural light isn’t available, understanding how to use artificial light is essential.
- Flash: Use the built-in flash in low-light conditions, but be mindful of potential overexposure.
- Indoor Lighting: Ensure adequate indoor lighting by using lamps or overhead lights to brighten the scene.
5.3 Avoiding Harsh Light
Harsh light can lead to overexposed or washed-out photos.
- Direct Sunlight: Avoid shooting in direct sunlight, which can create strong shadows and blown-out highlights.
- Diffusing Light: Use diffusers or reflectors to soften harsh light sources.
6. How To Troubleshoot Common Polaroid Development Issues?
Even with careful preparation, you might encounter issues during Polaroid development. Understanding common problems and their solutions can help you troubleshoot and improve your results.
6.1 Overexposed Photos
Overexposure occurs when the photo receives too much light, resulting in a washed-out image.
- Cause: Shooting in bright sunlight or using the flash too close to the subject.
- Solution: Use the lighten/darken setting on your camera, move to a shaded area, or increase the distance between the flash and the subject.
6.2 Underexposed Photos
Underexposure happens when the photo doesn’t receive enough light, leading to a dark, shadowy image.
- Cause: Shooting in low-light conditions without a flash.
- Solution: Use the flash, move to a brighter area, or use the lighten/darken setting on your camera.
6.3 Color Problems
Color issues can manifest as faded, distorted, or inconsistent colors.
- Cause: Expired film, improper storage, or temperature issues.
- Solution: Use fresh film, store film properly, and ensure the developing environment is within the optimal temperature range.
6.4 Uneven Development
Uneven development results in parts of the photo developing differently than others.
- Cause: Inconsistent temperature, damaged film, or uneven distribution of chemicals.
- Solution: Ensure consistent temperature during development, handle film carefully, and avoid bending or damaging the film pack.
7. What Are Some Creative Techniques For Enhancing Polaroid Photos?
Exploring creative techniques can add unique artistic touches to your Polaroid photos.
7.1 Double Exposure
Create surreal effects by layering two images on a single print.
- How-to: Take a photo, then before the film ejects, take another shot. The two images will combine on the same film.
7.2 Image Transfer
Transfer the Polaroid image onto another surface, like paper or fabric.
- How-to: While the image is still developing (about 1-2 minutes after ejection), press it face down onto the desired surface. Use a roller or your fingers to gently rub the back of the Polaroid, transferring the image.
7.3 Photo Manipulation
Physically alter the Polaroid print after it develops.
- Techniques: Use markers, paint, or other art supplies to add colors, patterns, or details to your photos.
- Distortion: Gently bend or distort the photo while it’s still slightly pliable to create unique effects.
8. How To Preserve And Display Your Polaroid Photos?
Proper preservation and display methods can help protect your Polaroid photos and showcase them effectively.
8.1 Storage
Protect your photos from light, heat, and humidity to prevent fading and damage.
- Albums: Use archival-quality photo albums with acid-free pages to store your Polaroids.
- Boxes: Store photos in acid-free boxes in a cool, dark place.
8.2 Display
Choose display methods that minimize light exposure and physical damage.
- Frames: Use UV-protective glass in frames to shield photos from sunlight.
- Avoid Adhesives: Avoid using adhesives that can damage the photos. Use photo corners or archival-quality mounting squares.
8.3 Digital Backup
Create digital copies of your photos to ensure long-term preservation.
- Scanning: Scan your Polaroids at a high resolution to capture all the details.
- Storage: Store digital copies on multiple devices and in the cloud to prevent data loss.
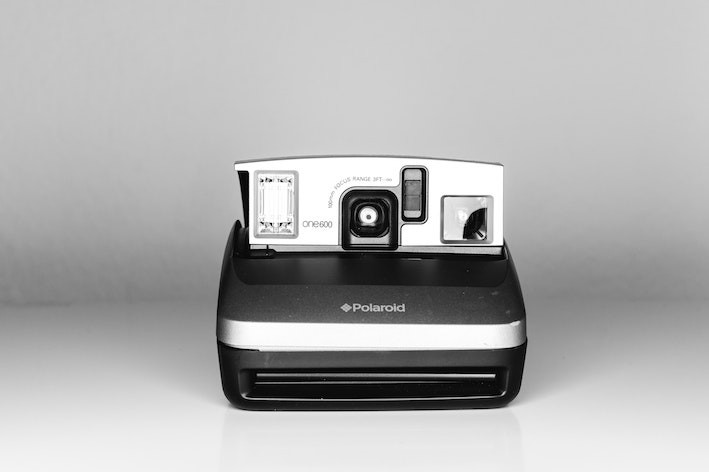 Vintage Polaroid Camera
Alt text: A vintage Polaroid camera on display, embodying the nostalgia and timeless appeal of instant photography.
9. What Are The Latest Polaroid Camera Models And Technologies?
Staying updated with the latest Polaroid camera models and technologies ensures you’re using the best tools for your instant photography.
| Feature | Polaroid I-2 | Polaroid Now+ | Polaroid Go |
|---|---|---|---|
| Lens System | Continuous Autofocus 98mm Lens | Standard & Close-Up Lens | Standard Lens |
| Aperture | f/8 – f/64 | f/11 – f/32 | f/12 and f/52 |
| Shutter Speed | 1/125 – 30 seconds | 1/200 – 1 second | 1/125 – 30 seconds |
| Connectivity | Manual Controls with Bluetooth App | Bluetooth Connectivity with Mobile App | No Connectivity |
| Key Features | Full manual control, widest aperture, built-in lens, enhanced image quality | Creative filters, tripod mode, double exposure | Compact size, double exposure, self-timer |
| Film Compatibility | i-Type & 600 Film | i-Type & 600 Film | Polaroid Go Film |
| Price | $599.99 | $149.99 | $99.99 |
| Best Use | For experienced photographers wanting full manual control and highest image quality | For photographers looking for a mix of classic instant photography with added creative control via app | For photographers seeking ultra-portability and simple, fun instant photography |
| Pros | Highest image quality, full manual control, built-in lens, expanded creative possibilities | Creative features, Bluetooth connectivity, tripod mode | Extremely compact, budget-friendly, ideal for on-the-go shooting |
| Cons | High price point, may be overwhelming for beginners, limited instant film accessories (lenses/filters) | Requires a mobile app for advanced features, does not offer full manual control | Small film format, limited features, image quality not as high as other models |
| Source | Polaroid Official Website | Polaroid Official Website | Polaroid Official Website |
9.1 Polaroid I-2
The Polaroid I-2 is designed for experienced photographers.
- Features: Full manual controls, Bluetooth connectivity, and compatibility with i-Type and 600 film.
- Benefits: Provides the highest image quality and creative control.
9.2 Polaroid Now+
The Polaroid Now+ offers a mix of classic instant photography with modern features.
- Features: Bluetooth connectivity with a mobile app, creative filters, and tripod mode.
- Benefits: Allows for creative experimentation and enhanced control.
9.3 Polaroid Go
The Polaroid Go is an ultra-portable option for on-the-go shooting.
- Features: Compact size, double exposure, and self-timer.
- Benefits: Ideal for those seeking simplicity and portability.
10. What Are Some Inspiring Polaroid Photography Projects And Artists?
Exploring inspiring Polaroid photography projects and artists can ignite your creativity and provide fresh ideas for your own work.
10.1 Projects
- The Polaroid Diaries: A project documenting daily life through Polaroid photography.
- Street Photography: Capturing candid moments and scenes in urban environments using instant film.
- Portrait Series: Creating intimate and personal portraits with the unique aesthetic of Polaroid photography.
10.2 Artists
- Helmut Newton: Known for his fashion and portrait photography using Polaroid film.
- Andrey Tarkovsky: Celebrated for his atmospheric and introspective Polaroid images.
- Walker Evans: Documented American life with a focus on social and historical context.
FAQ: Developing Polaroid Photos
1. Why is my Polaroid picture coming out white?
Your Polaroid picture might come out white due to overexposure, meaning it’s receiving too much light. To fix this, try shooting in dimmer environments or adjusting the lighten/darken settings on your camera to darken the image.
2. How long do Polaroid pictures take to develop?
Polaroid pictures typically take 10-15 minutes to fully develop. The exact time can vary depending on the film type and temperature.
3. Can you speed up Polaroid development?
While you can’t drastically speed up Polaroid development, keeping the photo in a warm environment can help facilitate the chemical reactions. Avoid extreme heat, which can damage the film.
4. What is the best way to store Polaroid film?
The best way to store Polaroid film is in a cool, dry place, ideally in the refrigerator. Allow the film to reach room temperature before use to prevent condensation issues.
5. Why should I not shake a Polaroid picture?
You should not shake a Polaroid picture because it can disrupt the chemical development process and potentially damage the image.
6. How do I protect my Polaroid pictures from fading?
To protect your Polaroid pictures from fading, store them in archival-quality albums or boxes, away from direct light, heat, and humidity.
7. Can expired Polaroid film still be used?
Yes, expired Polaroid film can still be used, but the results may be unpredictable. Expect faded colors, uneven development, or other color problems.
8. What do the lighten/darken settings on my Polaroid camera do?
The lighten/darken settings on your Polaroid camera allow you to adjust the exposure of the photo. Use the lighten setting in low-light conditions and the darken setting in bright conditions.
9. Why are there lines on my Polaroid picture?
Lines on your Polaroid picture can be caused by dirty rollers in the camera. Clean the rollers with a soft, lint-free cloth to remove any debris.
10. How do I create a double exposure with a Polaroid camera?
To create a double exposure with a Polaroid camera, take a photo, then before the film ejects, take another shot. The two images will combine on the same film.
Ready to dive deeper into the world of photography? Visit dfphoto.net for more expert tips, stunning visuals, and a vibrant community of photographers. Explore our guides, discover new techniques, and connect with fellow enthusiasts to elevate your photographic journey. Address: 1600 St Michael’s Dr, Santa Fe, NM 87505, United States. Phone: +1 (505) 471-6001. Website: dfphoto.net.