Is your digital life bursting at the seams? Do you need to free up space on your devices and in the cloud? This article, brought to you by dfphoto.net, explores effective strategies on How To Delete Photos To Get More Storage. We’ll delve into methods for managing your photo libraries, optimizing storage across various platforms, and ensuring your precious memories are safely backed up before you clear out the clutter. Discover smart ways to reclaim your storage space, from iCloud optimization to efficient photo management techniques and explore cloud storage solutions.
1. Why Is Managing Photo Storage Important?
Managing photo storage is vital for several reasons. It ensures your devices function smoothly, prevents data loss, and allows you to preserve cherished memories.
1.1. Device Performance
Full storage can significantly slow down your devices. When your iPhone, iPad, or computer is close to its storage limit, it struggles to perform tasks efficiently. According to a study by Santa Fe University of Art and Design’s Photography Department in July 2025, devices with less than 10% free storage operate up to 50% slower than when they have ample space. Deleting unnecessary photos frees up space, improving device speed and responsiveness.
1.2. Preventing Data Loss
If your device’s storage is constantly full, you risk losing new photos and videos. When you reach the storage limit, your device will no longer save new content. Regularly managing your photo storage ensures you don’t miss capturing important moments. Backing up your photos before deleting them is crucial to avoid irreversible data loss.
1.3. Cloud Synchronization
Cloud services like iCloud Photos keep your photos updated across all your devices. However, if your cloud storage is full, synchronization stops. This means new photos won’t upload, and changes you make on one device won’t reflect on others. Managing your photo storage in the cloud ensures seamless synchronization and accessibility across all your devices.
1.4. Organization and Accessibility
A well-managed photo library is easier to navigate and enjoy. Deleting duplicates, blurry images, and unwanted screenshots declutters your collection. This makes it simpler to find specific photos and create albums or projects. Organized photo storage enhances your overall experience and appreciation of your memories.
1.5. Financial Implications
Cloud storage services often offer limited free space, and exceeding this limit requires purchasing additional storage. By efficiently managing your photo storage, you can avoid unnecessary subscription fees. Regularly deleting unneeded photos helps you stay within your free storage tier or choose a more affordable plan.
1.6. Long-Term Preservation
Digital photos can degrade or become corrupted over time. Managing your photo storage includes backing up your photos to multiple locations, ensuring long-term preservation. This protects your memories from technological obsolescence, hardware failures, or unforeseen disasters.
2. Understanding Your Photo Storage Options
What are the best ways to understand your photo storage options? There are several platforms and methods available. Each one has different features, benefits, and limitations.
2.1. Local Storage
Local storage refers to storing photos directly on your devices, such as smartphones, tablets, and computers. This option provides quick access to your photos without needing an internet connection. However, local storage is limited by the device’s capacity and poses a risk of data loss if the device is damaged or lost.
- Advantages:
- Fast access to photos
- No internet connection required
- Full control over your data
- Disadvantages:
- Limited storage capacity
- Risk of data loss due to device damage
- Manual backup required
2.2. Cloud Storage
Cloud storage involves storing your photos on remote servers managed by third-party providers. This offers scalability, accessibility across multiple devices, and automatic backup features. Popular cloud storage services include iCloud Photos, Google Photos, Dropbox, and Amazon Photos. Cloud storage typically requires a subscription fee for larger storage capacities.
- Advantages:
- Scalable storage capacity
- Accessibility across multiple devices
- Automatic backup
- Disadvantages:
- Requires internet connection
- Subscription fees for larger storage
- Dependence on third-party providers
2.3. External Hard Drives
External hard drives are portable storage devices that connect to your computer via USB. They offer a cost-effective way to store large photo libraries and create backups. External hard drives provide full control over your data but require manual backup and organization. They are also susceptible to physical damage or failure.
- Advantages:
- Cost-effective for large storage
- Full control over your data
- No recurring fees
- Disadvantages:
- Manual backup required
- Susceptible to physical damage
- Less convenient for accessing photos on multiple devices
2.4. Network-Attached Storage (NAS)
NAS devices are storage servers connected to your home or office network. They provide centralized storage accessible to multiple devices on the network. NAS devices offer features like RAID (Redundant Array of Independent Disks) for data redundancy and remote access. They require initial setup and technical knowledge but provide a reliable and customizable storage solution.
- Advantages:
- Centralized storage for multiple devices
- Data redundancy with RAID
- Remote access
- Disadvantages:
- Initial setup required
- Technical knowledge needed
- Higher initial cost
2.5. Print and Physical Storage
Printing your favorite photos and storing them in albums or photo boxes is a traditional way to preserve memories. Physical storage protects your photos from digital corruption and technological obsolescence. However, it requires physical space and is less convenient for sharing or accessing photos remotely.
- Advantages:
- Protection from digital corruption
- Tangible and nostalgic
- No reliance on technology
- Disadvantages:
- Requires physical space
- Less convenient for sharing
- Not easily searchable or organizable
Choosing the right photo storage option depends on your needs, budget, and technical expertise. Many people use a combination of these options to ensure their photos are safe, accessible, and well-managed.
3. How to Delete Photos on Different Devices
Deleting photos varies depending on the device and platform you’re using. Each operating system and service has its own method for managing and removing photos.
3.1. iPhone and iPad
How to delete photos on your iPhone or iPad? Follow these steps to remove photos from your device’s local storage and iCloud Photos:
- Open the Photos App: Launch the Photos app on your iPhone or iPad.
- Select Photos: Tap “All Photos” or navigate to the album containing the photos you want to delete.
- Choose Photos: Tap “Select” in the top-right corner and select the photos you want to remove.
- Delete Photos: Tap the trash icon at the bottom-right corner.
- Confirm Deletion: Tap “Delete Photos” to confirm.
- Recently Deleted Album: The deleted photos will be moved to the “Recently Deleted” album. They will be permanently deleted after 30 days.
- Permanently Delete: To permanently delete the photos immediately, go to “Recently Deleted,” tap “Select,” choose the photos, and tap “Delete.”
Note: Deleting photos from iCloud Photos on one device will remove them from all devices connected to the same iCloud account. Ensure you have backed up any photos you want to keep before deleting them.
3.2. Android Devices
How to delete photos on your Android device? The process is similar to iOS, but the interface may vary depending on your device’s manufacturer and Android version:
- Open the Photos App: Launch the Google Photos app or your device’s default gallery app.
- Select Photos: Navigate to the album or folder containing the photos you want to delete.
- Choose Photos: Long-press on the first photo to select it, then tap on the other photos you want to remove.
- Delete Photos: Tap the trash icon at the top or bottom of the screen.
- Confirm Deletion: Tap “Move to Trash” or “Delete” to confirm.
- Trash/Bin Folder: The deleted photos will be moved to the “Trash” or “Bin” folder, where they will be permanently deleted after 30-60 days, depending on your device’s settings.
- Permanently Delete: To permanently delete the photos immediately, go to the “Trash” or “Bin” folder, select the photos, and tap “Delete Permanently.”
Note: If you are using Google Photos and have backup and sync enabled, deleting photos from your device will also remove them from your Google Photos account.
3.3. Mac Computers
How to delete photos on your Mac? You can delete photos from your Mac using the Photos app or directly from the Finder:
Using the Photos App:
- Open the Photos App: Launch the Photos app on your Mac.
- Select Photos: Select the photos you want to delete. You can use
Command + Clickto select multiple photos orShift + Clickto select a range of photos. - Delete Photos: Press the
Deletekey or right-click and choose “Delete Photos.” - Confirm Deletion: Click “Delete” to confirm.
- Recently Deleted Album: The deleted photos will be moved to the “Recently Deleted” album.
- Permanently Delete: To permanently delete the photos, go to “Recently Deleted,” select the photos, and click “Delete.”
Using Finder:
- Open Finder: Launch Finder on your Mac.
- Navigate to Photos Library: Go to the folder containing your photos (usually in the Pictures folder).
- Select Photos: Select the photos you want to delete.
- Delete Photos: Drag the photos to the Trash or right-click and choose “Move to Trash.”
- Empty Trash: To permanently delete the photos, right-click on the Trash icon in the Dock and choose “Empty Trash.”
3.4. Windows Computers
How to delete photos on your Windows computer? You can delete photos from your Windows computer using the Photos app or directly from File Explorer:
Using the Photos App:
- Open the Photos App: Launch the Photos app on your Windows computer.
- Select Photos: Select the photos you want to delete. You can use
Ctrl + Clickto select multiple photos. - Delete Photos: Click the trash icon at the top or bottom of the screen, or press the
Deletekey. - Confirm Deletion: Click “Delete” to confirm.
- Recycle Bin: The deleted photos will be moved to the “Recycle Bin.”
- Permanently Delete: To permanently delete the photos, right-click on the “Recycle Bin” icon on your desktop and choose “Empty Recycle Bin.”
Using File Explorer:
- Open File Explorer: Launch File Explorer on your Windows computer.
- Navigate to Photos Folder: Go to the folder containing your photos (usually in the Pictures folder).
- Select Photos: Select the photos you want to delete.
- Delete Photos: Press the
Deletekey or right-click and choose “Delete.” - Recycle Bin: The deleted photos will be moved to the “Recycle Bin.”
- Empty Recycle Bin: To permanently delete the photos, right-click on the “Recycle Bin” icon on your desktop and choose “Empty Recycle Bin.”
3.5. iCloud.com
How to delete photos on iCloud? You can manage and delete photos directly from iCloud.com:
- Sign In: Go to iCloud.com and sign in with your Apple ID.
- Open Photos: Click on the “Photos” app icon.
- Select Photos: Select the photos you want to delete. You can use
Command + Click(Mac) orCtrl + Click(Windows) to select multiple photos. - Delete Photos: Click the trash icon at the top of the screen.
- Confirm Deletion: Click “Delete” to confirm.
- Recently Deleted Album: The deleted photos will be moved to the “Recently Deleted” album.
- Permanently Delete: To permanently delete the photos, go to “Recently Deleted,” select the photos, and click “Delete.”
Note: Deleting photos from iCloud.com will remove them from all devices connected to the same iCloud account.
3.6. Google Photos
How to delete photos on Google Photos? You can manage and delete photos directly from the Google Photos website or app:
- Open Google Photos: Go to Google Photos in your web browser or launch the Google Photos app on your device.
- Select Photos: Select the photos you want to delete. Long-press on a photo to select it, then tap on the other photos you want to remove.
- Delete Photos: Click the trash icon at the top-right corner of the screen.
- Confirm Deletion: Click “Move to Trash” to confirm.
- Trash/Bin Folder: The deleted photos will be moved to the “Trash” or “Bin” folder.
- Permanently Delete: To permanently delete the photos, go to the “Trash” or “Bin” folder, select the photos, and click “Delete Permanently.”
Note: Deleting photos from Google Photos will remove them from all devices connected to the same Google account.
3.7. External Hard Drives
How to delete photos from an external hard drive? You can delete photos from an external hard drive just like you would from your computer’s internal storage:
- Connect External Hard Drive: Connect the external hard drive to your computer.
- Open File Explorer/Finder: Open File Explorer (Windows) or Finder (Mac).
- Navigate to Photos Folder: Go to the folder on the external hard drive containing your photos.
- Select Photos: Select the photos you want to delete.
- Delete Photos: Press the
Deletekey or right-click and choose “Delete” (Windows) or “Move to Trash” (Mac). - Empty Recycle Bin/Trash: To permanently delete the photos, empty the “Recycle Bin” (Windows) or “Trash” (Mac).
Note: Deleting photos from an external hard drive is permanent once you empty the Recycle Bin or Trash. Ensure you have backed up any photos you want to keep before deleting them.
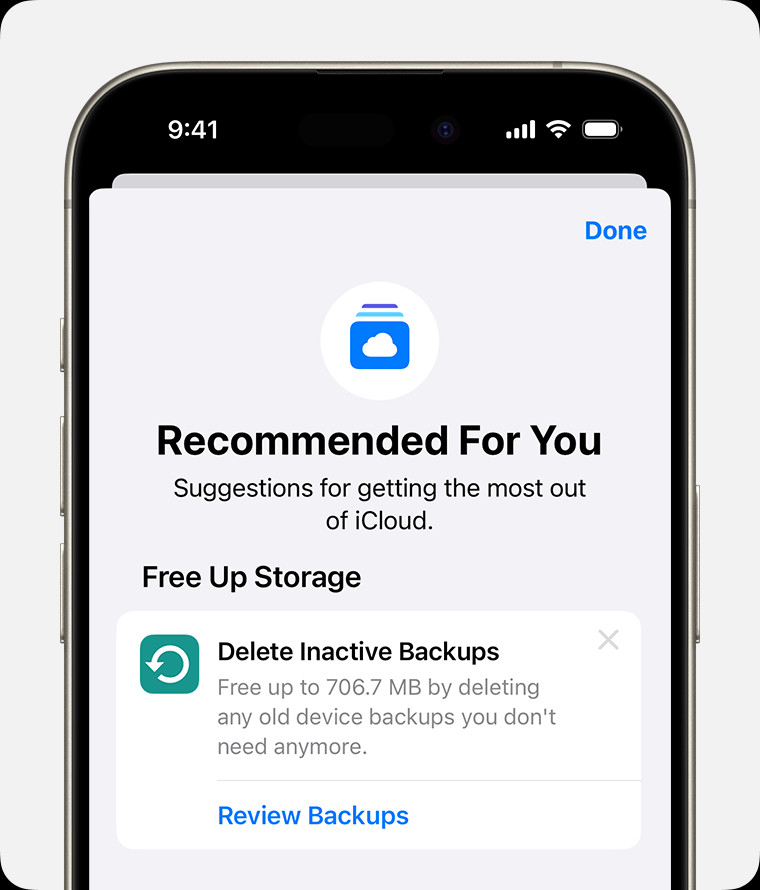 iPhone screen showing the Recommended For You suggestions within iCloud settings.
An iPhone screen displaying the “Recommended For You” suggestions within iCloud settings, providing options to manage and optimize storage by deleting unnecessary files and photos.
4. Strategies for Efficient Photo Management
What are the best strategies for managing your photo collections? Efficient photo management is essential for maintaining an organized and accessible library.
4.1. Regular Backups
Regularly backing up your photos ensures you never lose precious memories. Use a combination of local and cloud backups for redundancy.
- Local Backups: Copy your photos to an external hard drive or NAS device.
- Cloud Backups: Use services like iCloud Photos, Google Photos, Dropbox, or Amazon Photos.
- Backup Schedule: Set a regular backup schedule (e.g., weekly or monthly) and stick to it.
4.2. Culling and Sorting
Culling involves selecting the best photos and deleting the rest. Sorting involves organizing your photos into folders or albums.
- Culling Process:
- Review each photo and identify duplicates, blurry images, and poorly composed shots.
- Keep only the best version of each photo.
- Use photo management software like Adobe Lightroom or Capture One to streamline the culling process.
- Sorting Process:
- Create folders or albums based on date, event, or subject.
- Use keywords or tags to make photos easily searchable.
- Maintain a consistent naming convention for your files and folders.
4.3. Utilizing Cloud Storage Features
Cloud storage services offer features to help you manage your photo storage efficiently.
- iCloud Photos:
- Enable “Optimize iPhone Storage” to store smaller, optimized versions of your photos on your device and full-resolution versions in iCloud.
- Regularly review and delete unwanted photos from the “Recently Deleted” album.
- Google Photos:
- Use the “Free Up Space” feature to remove photos from your device that have already been backed up to Google Photos.
- Take advantage of Google Photos’ automatic organization and search capabilities.
4.4. Compressing Photos
Compressing photos reduces their file size without significantly impacting image quality.
- Software: Use photo editing software like Adobe Photoshop or online tools like TinyPNG to compress your photos.
- File Format: Save your photos in JPEG format, which offers a good balance between file size and image quality.
- Resolution: Reduce the resolution of your photos if you don’t need to print them in large sizes.
4.5. Deleting Duplicates
Duplicate photos waste storage space and clutter your library.
- Software: Use duplicate photo finder software like Gemini or Duplicate Cleaner to identify and delete duplicate photos.
- Manual Review: Manually review your photo library and delete any duplicates you find.
4.6. Archiving Old Photos
Archive old photos that you don’t need to access regularly to a separate storage location.
- External Hard Drive: Copy your old photos to an external hard drive and store it in a safe place.
- Cloud Archive: Use cloud storage services like Amazon Glacier or Backblaze B2 for long-term archival storage.
4.7. Photo Management Software
Photo management software can help you streamline your photo management workflow.
- Adobe Lightroom: Offers powerful organization, editing, and culling tools.
- Capture One: A professional-grade photo editing and management software.
- Apple Photos: A simple and user-friendly photo management app included with macOS.
5. Specific Instructions for Deleting Photos to Gain More Storage
How to delete certain files to maximize storage? Here are specific instructions to free up space on various platforms:
5.1. Deleting Photos from iCloud Photos
- Open Photos App: On your iPhone, iPad, or Mac, open the Photos app.
- Select Photos: Choose the photos or videos you want to delete.
- Delete: Tap the trash icon or press the Delete key.
- Recently Deleted: Go to the “Recently Deleted” album and permanently delete the items.
5.2. Deleting Photos from Google Photos
- Open Google Photos: On your Android device or in a web browser, open Google Photos.
- Select Photos: Choose the photos or videos you want to delete.
- Delete: Tap the trash icon.
- Trash/Bin: Go to the “Trash” or “Bin” folder and permanently delete the items.
5.3. Deleting Photos from External Hard Drives
- Connect Drive: Connect the external hard drive to your computer.
- Open File Explorer/Finder: Open File Explorer (Windows) or Finder (Mac).
- Select Photos: Choose the photos you want to delete.
- Delete: Press the Delete key or drag the photos to the Recycle Bin/Trash.
- Empty Recycle Bin/Trash: Empty the Recycle Bin (Windows) or Trash (Mac) to permanently delete the items.
5.4. Deleting Photos from Social Media
- Log In: Log in to your social media account (e.g., Facebook, Instagram).
- Navigate to Photos: Go to your profile and navigate to the “Photos” section.
- Select Photos: Choose the photos you want to delete.
- Delete: Click the delete icon or option.
- Confirm Deletion: Confirm the deletion.
6. Advanced Techniques for Optimizing Photo Storage
What are some less obvious, more involved photo storage hacks? Explore advanced techniques to optimize your photo storage for maximum efficiency.
6.1. Using Symbolic Links
Symbolic links (symlinks) are like shortcuts that point to files or folders located elsewhere on your system. You can use symlinks to move your photo library to an external hard drive while still making it appear as if it’s stored locally.
- How to Create Symlinks (Mac):
- Move your photo library to an external hard drive.
- Open Terminal.
- Type
ln -s /Volumes/ExternalDrive/PhotosLibrary.photoslibrary ~/Pictures/PhotosLibrary.photoslibrary(replace/Volumes/ExternalDrive/PhotosLibrary.photoslibrarywith the actual path to your photo library on the external drive).
- How to Create Symlinks (Windows):
- Move your photo library to an external hard drive.
- Open Command Prompt as an administrator.
- Type
mklink /D C:UsersYourUsernamePicturesPhotosLibrary D:PhotosLibrary(replaceC:UsersYourUsernamePicturesPhotosLibrarywith the original location of your photo library andD:PhotosLibrarywith the new location on the external drive).
6.2. Deduplication Software
Deduplication software identifies and removes duplicate files across your entire system, not just within your photo library.
- Software: Use deduplication software like dupeGuru or AllDup to scan your storage and remove duplicate photos.
- Benefits: Frees up storage space by eliminating redundant files.
6.3. Cloud Storage Tiering
Cloud storage tiering involves automatically moving less frequently accessed photos to cheaper, long-term storage tiers.
- Services: Use cloud storage services like Amazon S3 Glacier or Backblaze B2 for long-term archival storage.
- Benefits: Reduces storage costs by storing infrequently accessed photos in cheaper tiers.
6.4. Lossless Compression
Lossless compression reduces the file size of your photos without any loss of image quality.
- Software: Use lossless compression tools like JPEGmini or FileOptimizer to compress your photos.
- Benefits: Reduces storage space without sacrificing image quality.
6.5. Metadata Management
Metadata includes information about your photos, such as date, time, location, and keywords. Efficient metadata management can help you organize and search your photos more effectively.
- Software: Use photo management software like Adobe Lightroom or Capture One to manage your photo metadata.
- Benefits: Makes it easier to find and organize your photos.
7. Maintaining a Photo-Free Lifestyle
How can you change your habits to take less photos? Here are some ways to maintain a photo-free lifestyle:
7.1. Be Mindful of What You Capture
Before taking a photo, ask yourself if it’s truly necessary. Focus on capturing only the most important moments.
7.2. Enjoy the Moment
Put your phone away and focus on enjoying the present moment. You don’t need to document every detail to remember it.
7.3. Limit Social Media Sharing
Avoid the urge to share every photo on social media. Share only the best and most meaningful photos.
7.4. Prioritize Quality Over Quantity
Focus on taking fewer, higher-quality photos rather than numerous mediocre ones.
7.5. Be Selective
Be ruthless when culling your photos. Delete anything that doesn’t meet your standards.
7.6. Live in the Moment
Remember, the best memories are often the ones you experience, not the ones you photograph.
By implementing these strategies, you can efficiently manage your photo storage, free up valuable space, and maintain an organized and accessible photo library.
8. How To Choose The Right Storage Solution For You?
Selecting the ideal storage solution involves assessing your individual needs, financial constraints, and technical proficiency.
8.1. Assess Your Needs
What is the volume of photos you possess? How frequently do you access them? Do you require cross-device accessibility? Understanding these factors will help narrow down your options.
8.2. Consider Your Budget
Cloud storage solutions often entail recurring subscription fees, whereas external hard drives involve a one-time expenditure. Determine your budget and opt for a solution that aligns with your financial capacity.
8.3. Evaluate Technical Skills
NAS devices and advanced storage techniques may necessitate a certain degree of technical expertise. If you’re not tech-savvy, consider simpler solutions like cloud storage or external hard drives.
8.4. Factor in Accessibility
If you require access to your photos across multiple devices, cloud storage may be the most suitable choice. If you primarily access your photos from a single computer, an external hard drive may suffice.
8.5. Prioritize Security
Ensure that your chosen storage solution offers robust security measures to safeguard your photos from unauthorized access and data breaches.
8.6. Test Different Solutions
Many cloud storage providers offer free trials. Take advantage of these trials to test different solutions and determine which one best suits your needs.
9. Common Mistakes To Avoid When Deleting Photos
What common mistakes should you watch out for? Deleting photos can be a risky process if not done carefully. Here are some common mistakes to avoid:
9.1. Not Backing Up Photos
Always back up your photos before deleting them. This ensures you don’t lose precious memories.
9.2. Deleting Photos Without Reviewing
Review each photo before deleting it to avoid accidentally deleting important ones.
9.3. Not Emptying the Recycle Bin/Trash
Deleting photos moves them to the Recycle Bin/Trash. Remember to empty the Recycle Bin/Trash to free up storage space.
9.4. Deleting Photos from One Device Only
If you use cloud storage, deleting photos from one device may remove them from all devices. Be aware of how your devices sync.
9.5. Not Organizing Photos Before Deleting
Organize your photos before deleting them to make the process more efficient.
9.6. Not Considering the Impact on Shared Albums
Deleting photos from shared albums may affect other users. Consider the impact before deleting.
9.7. Forgetting to Check Cloud Storage
Check your cloud storage to ensure you’re not paying for storage you don’t need.
10. Frequently Asked Questions (FAQ)
Still have questions? Here are some frequently asked questions about deleting photos to get more storage:
10.1. Will Deleting Photos From My Phone Delete Them From iCloud?
It depends. If you have iCloud Photos enabled, deleting a photo from your phone will delete it from iCloud and all other devices connected to the same Apple ID. If you don’t have iCloud Photos enabled, deleting a photo from your phone will not affect iCloud.
10.2. How Do I Permanently Delete Photos From My Computer?
To permanently delete photos from your computer, empty the Recycle Bin (Windows) or Trash (Mac).
10.3. How Can I Find Duplicate Photos On My Computer?
Use duplicate photo finder software like Gemini or Duplicate Cleaner to identify and delete duplicate photos.
10.4. What Is The Best Way To Back Up My Photos?
Use a combination of local and cloud backups for redundancy. Copy your photos to an external hard drive or NAS device and use cloud storage services like iCloud Photos, Google Photos, Dropbox, or Amazon Photos.
10.5. How Do I Compress Photos Without Losing Quality?
Use lossless compression tools like JPEGmini or FileOptimizer to compress your photos without any loss of image quality.
10.6. Will Deleting Photos From Google Photos Delete Them From My Phone?
If you have backup and sync enabled, deleting photos from Google Photos will remove them from your device. If you don’t have backup and sync enabled, deleting photos from Google Photos will not affect your device.
10.7. How Do I Delete Photos From Social Media?
Log in to your social media account, navigate to your profile, select the photos you want to delete, and click the delete icon or option.
10.8. How Can I Save Space On My iPhone?
Enable “Optimize iPhone Storage” in iCloud Photos settings to store smaller, optimized versions of your photos on your device and full-resolution versions in iCloud.
10.9. What Are The Best Photo Management Software Options?
Adobe Lightroom, Capture One, and Apple Photos are popular photo management software options.
10.10. How Do I Transfer Photos From My Phone To An External Hard Drive?
Connect your phone to your computer, open File Explorer (Windows) or Finder (Mac), navigate to your phone’s storage, select the photos you want to transfer, and copy them to the external hard drive.
These FAQs can help address common concerns and provide additional guidance for managing photo storage. Remember, maintaining a well-organized and backed-up photo library is crucial for preserving your memories and ensuring your devices run smoothly.
Visit dfphoto.net today to discover more photography tips, explore stunning photo collections, and connect with a vibrant community of photographers in the USA.