Deleting photos from your iPad is straightforward, but understanding the different methods and options ensures you manage your photo library effectively. This comprehensive guide, brought to you by dfphoto.net, will walk you through every step, from deleting single photos to permanently removing them. We’ll cover photo management, freeing up storage space, and even recovering accidentally deleted memories with ease. Dive in to discover tips and tricks for optimal photo organization and iOS efficiency.
1. Why Delete Photos From Your iPad?
There are several reasons why you might want to delete photos from your iPad. Managing your digital memories requires both curation and decluttering.
- Free Up Storage Space: iPads have limited storage, and photos can take up a significant amount of space.
- Organize Your Photo Library: Removing unwanted or duplicate photos helps keep your library tidy and manageable.
- Privacy Concerns: You might have photos you no longer want to keep for privacy reasons.
- Improved Performance: A smaller photo library can improve the overall performance of your iPad.
2. Understanding iCloud Photos and Deletion
Before deleting any photos, it’s crucial to understand how iCloud Photos affects the deletion process.
- iCloud Syncing: When iCloud Photos is enabled, any changes you make to your photo library on one device (like deleting a photo on your iPad) will be reflected on all other devices signed in with the same Apple ID.
- Backup: Ensure you have a backup of any photos you want to keep before deleting them. You can back up to iCloud, a computer, or an external storage device.
- Recently Deleted Album: Deleted photos are moved to the Recently Deleted album, where they remain for 30 days before being permanently deleted.
3. How to Delete a Single Photo From Your iPad
Deleting a single photo is the most basic way to manage your iPad’s photo collection. It’s quick, easy, and perfect for when you spot an image you no longer need.
-
Open the Photos App: Locate and tap the Photos app icon on your iPad’s home screen.
-
Select the Photo: Browse through your albums or the main Photos tab to find the photo you want to delete. Tap on the photo to open it in full-screen view.
-
Tap the Trash Icon: Look for the trash can icon, usually located in the top-right or bottom-right corner of the screen. Tap it.
-
Confirm Deletion: A pop-up will appear asking you to confirm the deletion. Tap “Delete Photo.”
 Deleting a single photo on an iPhone using the Delete Photo option
4. How to Delete Multiple Photos From Your iPad
When you need to clear out a large number of photos quickly, deleting them in batches is the way to go. This is especially useful after events, trips, or when cleaning up duplicates.
- Open the Photos App: As before, start by opening the Photos app on your iPad.
- Tap Select: In the top-right corner of the screen, you’ll see a “Select” button. Tap it.
- Select Photos: Now, you can tap on each photo you want to delete. A blue checkmark will appear on each selected photo. You can also slide your finger across multiple photos to select them more quickly.
- Tap the Trash Icon: Once you’ve selected all the photos you want to delete, tap the trash can icon.
- Confirm Deletion: A confirmation message will appear. Tap “Delete [Number] Photos” to confirm.
 Deleting multiple photos on an iPhone from the Photos app
5. Deleting Photos From Shared Albums
Shared Albums in iCloud allow you to share photos and videos with specific people. Deleting photos from a shared album has different implications depending on your role.
- If You Added the Photo: If you added the photo to the shared album, deleting it will remove it for everyone in the album.
- If Someone Else Added the Photo: If someone else added the photo, you can remove it from your view, but it will still be visible to others in the shared album. Only the person who added the photo can permanently delete it.
Steps to Delete From a Shared Album
- Open the Photos App: Open the Photos app on your iPad.
- Go to Shared Albums: Tap the “Albums” tab at the bottom of the screen, then scroll down to the “Shared Albums” section.
- Select the Album: Tap the shared album containing the photo you want to delete.
- Select the Photo: Tap the photo to open it.
- Tap the Trash Icon: Tap the trash can icon.
- Confirm Deletion: Confirm that you want to delete the photo.
6. Utilizing the “Recently Deleted” Album
The Recently Deleted album is your safety net when deleting photos. It holds deleted photos for 30 days, giving you a chance to recover them if needed.
- Accessing the Recently Deleted Album:
- Open the Photos app.
- Tap the “Albums” tab.
- Scroll down to the “Utilities” section and tap “Recently Deleted.”
- You may need to use Face ID or Touch ID to unlock the album, depending on your settings.
- Recovering Photos:
- In the Recently Deleted album, tap “Select” in the top-right corner.
- Tap the photos you want to recover.
- Tap “Recover” at the bottom of the screen.
- Confirm by tapping “Recover Photo.”
- Permanently Deleting Photos:
- In the Recently Deleted album, tap “Select.”
- Tap the photos you want to permanently delete.
- Tap “Delete” at the bottom of the screen.
- Confirm by tapping “Delete [Number] Photos.”
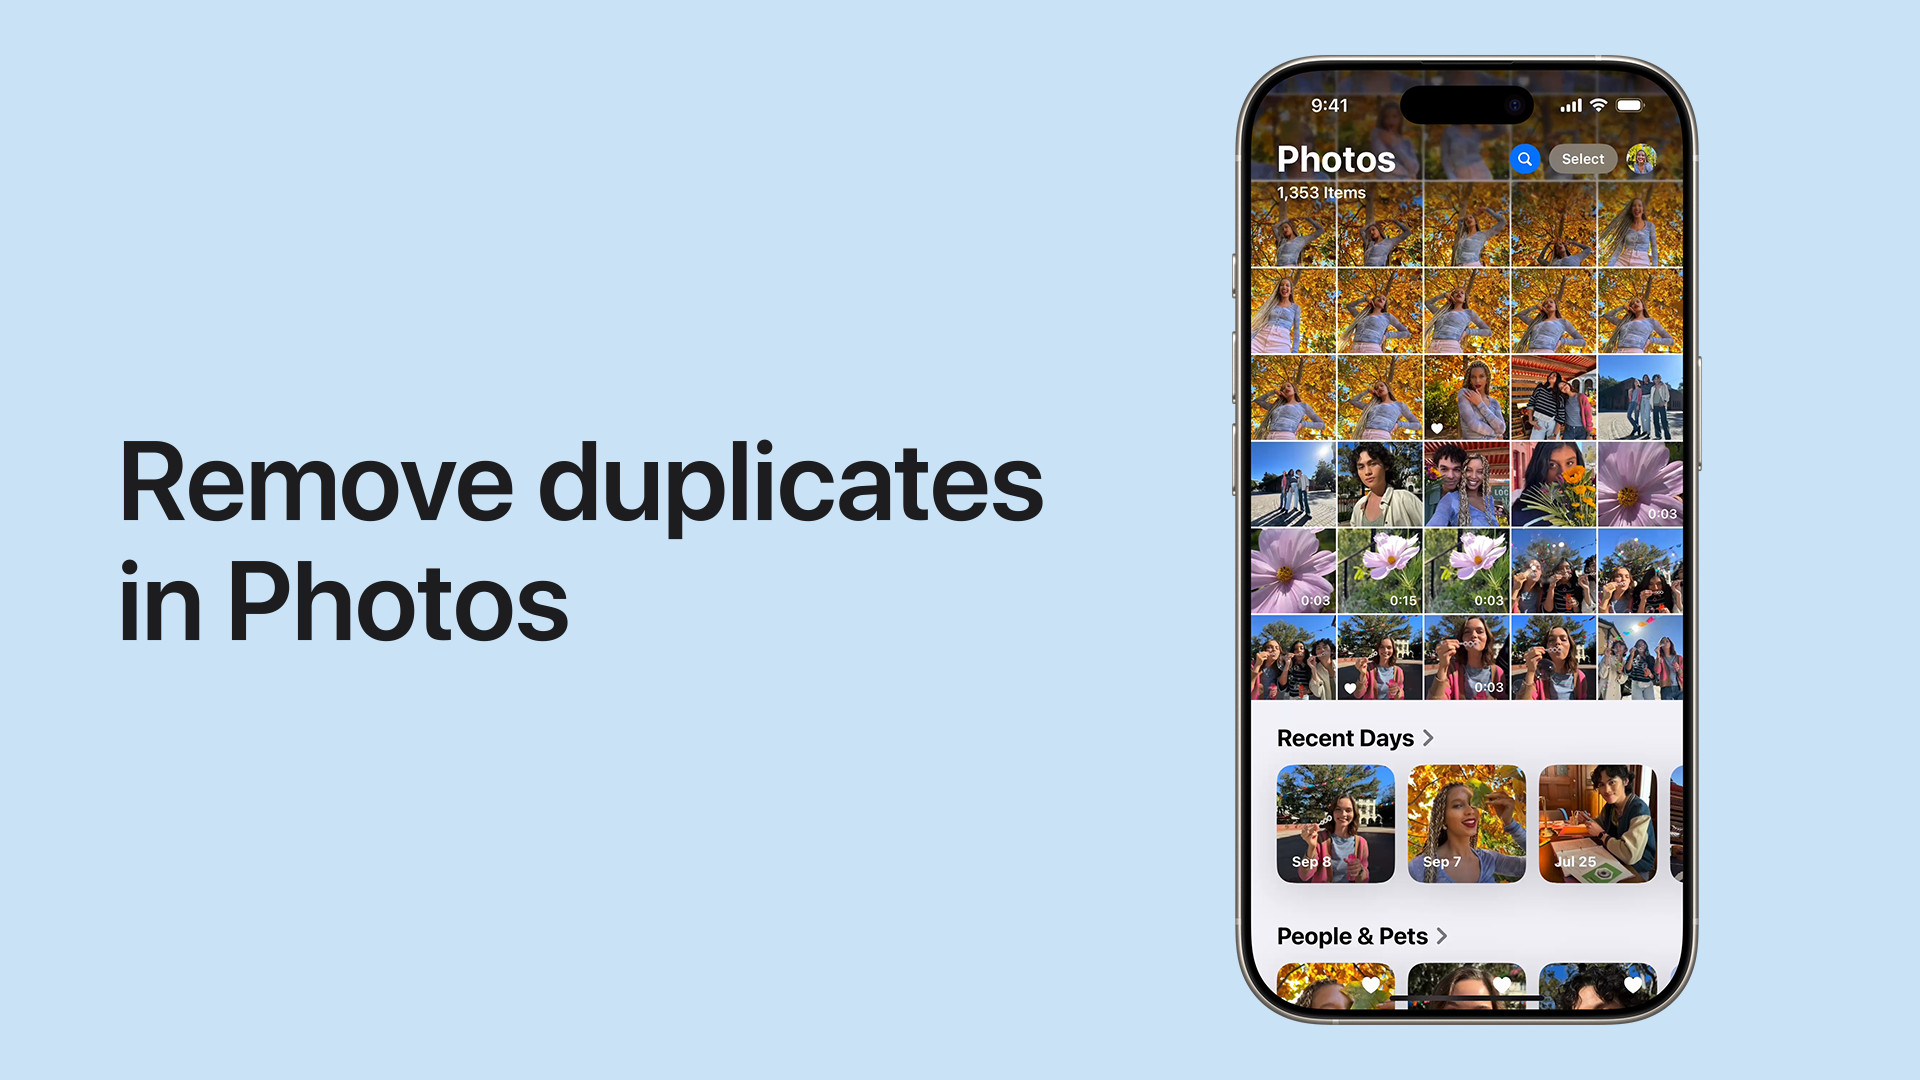
7. Deleting Duplicate Photos on Your iPad
Duplicate photos can quickly eat up storage space and clutter your photo library. Fortunately, iPadOS has a built-in feature to identify and merge duplicates.
- Accessing the Duplicates Album:
- Open the Photos app.
- Tap the “Albums” tab.
- Scroll down to the “Utilities” section. If you have any duplicate photos, you’ll see a “Duplicates” album.
- Merging Duplicates:
- Tap the “Duplicates” album.
- You’ll see sets of duplicate photos. Tap “Merge” to combine a set.
- To merge multiple sets at once, tap “Select,” then tap each set you want to merge, and finally tap “Merge.”
- How It Works: When you merge duplicates, the highest quality image and relevant data are combined into one photo. The other duplicates are moved to the Recently Deleted album.
 The steps of removing duplicate photos from an iPhone
8. Stopping Photo Syncing From a Computer
If you add photos to your iPad by syncing from a computer, you can’t delete them directly from the Photos app on your iPad. The trash icon will appear grayed out. You need to stop syncing photos from your computer to regain control over deleting them directly on your iPad.
-
Connect Your iPad to Your Computer: Use a USB cable to connect your iPad to the computer you use for syncing.
-
Open Finder (macOS Catalina or later): On macOS Catalina or later, Finder is used for syncing. Open a new Finder window.
-
Select Your iPad: In the Finder sidebar, under “Locations,” you’ll see your iPad listed. Click on it.
-
Go to the Photos Tab: At the top of the Finder window, you’ll see several tabs. Click on the “Photos” tab.
-
Uncheck “Sync Photos”: There will be a checkbox labeled “Sync Photos to your device.” Uncheck this box.
-
Remove Photos: A pop-up will appear asking if you want to remove the photos that were previously synced. Choose “Remove photos.”
-
Apply Changes: Click the “Apply” button in the bottom-right corner of the Finder window.
-
Sync (If Necessary): Depending on your settings, you might need to initiate a sync for the changes to take effect. Click the “Sync” button if it’s available.
Once you’ve stopped syncing photos from your computer, you can now delete photos directly from the Photos app on your iPad.
9. Managing Storage: Beyond Deleting Photos
Deleting photos is a great way to free up space, but there are other strategies to consider as well.
- Optimize iPad Storage: In Settings, go to “Photos” and enable “Optimize iPad Storage.” This stores full-resolution photos in iCloud and keeps smaller, device-optimized versions on your iPad.
- Remove Unused Apps: Apps can take up a lot of space. Delete any apps you no longer use.
- Clear App Cache: Some apps store a lot of cached data. Clear the cache regularly in the app’s settings or by offloading the app in Settings > General > iPad Storage.
- Back Up and Erase: Consider backing up your iPad and then erasing it completely to start fresh. This can clear out accumulated junk and improve performance.
10. Advanced Tips for Photo Management
Here are some additional tips to help you manage your photo library like a pro.
- Use Albums: Create albums to organize your photos by event, date, or category.
- Keywords and Captions: Add keywords and captions to your photos to make them easier to search for.
- Third-Party Apps: Explore third-party photo management apps like Google Photos or Adobe Lightroom Mobile for more advanced features.
- Regularly Review and Declutter: Make it a habit to regularly review your photo library and delete unwanted photos.
- Live Photos: Keep in mind that deleting a Live Photo deletes both the still image and the short video clip associated with it.
11. Troubleshooting Common Issues
Sometimes, you might encounter issues when trying to delete photos. Here are some common problems and how to fix them.
- Trash Icon is Grayed Out: This usually means the photo is synced from a computer. Follow the steps in Section 8 to stop syncing.
- Photos Not Deleting: Make sure you have enough storage space on your iPad and in iCloud (if using iCloud Photos).
- Photos Reappearing: This can happen if iCloud Photos is syncing slowly. Make sure you have a stable internet connection and give it some time to sync.
- Recently Deleted Album is Locked: By default, the Recently Deleted album requires Face ID or Touch ID to unlock. You can disable this in Settings > Photos > Use Face ID (or Touch ID).
12. DFphoto.net: Your Photography Resource
At dfphoto.net, we’re passionate about helping you get the most out of your photography. Whether you’re a beginner or a professional, we have resources to inspire and educate you.
- Explore Tutorials: Dive into our extensive library of photography tutorials covering everything from basic techniques to advanced editing tips.
- Discover Inspiration: Browse our curated collections of stunning photographs from talented photographers around the world.
- Stay Updated: Keep up with the latest news, gear reviews, and industry trends in the world of photography.
Address: 1600 St Michael’s Dr, Santa Fe, NM 87505, United States. Phone: +1 (505) 471-6001. Website: dfphoto.net.
13. The Future of Photo Management
Photo management is constantly evolving with advancements in technology. Here are some trends to watch for.
- AI-Powered Organization: Artificial intelligence is being used to automatically tag, sort, and organize photos.
- Cloud Storage Advancements: Cloud storage is becoming more affordable and reliable, making it easier to store and access your photos from anywhere.
- Improved Search Capabilities: Advanced search algorithms are making it easier to find specific photos based on content, location, or even objects within the image.
14. How to Back Up Your Photos Before Deleting
Before you start deleting, it’s crucial to back up any photos you want to keep. Losing precious memories can be heartbreaking, so ensure you have a secure copy.
Using iCloud Backup
iCloud Backup is a convenient way to automatically back up your iPad’s data, including photos and videos.
- Go to Settings: Open the Settings app on your iPad.
- Tap on Your Name: Tap on your name at the top of the Settings menu.
- Select iCloud: Tap on “iCloud.”
- Choose iCloud Backup: Scroll down and tap on “iCloud Backup.”
- Enable iCloud Backup: Make sure the “iCloud Backup” switch is turned on.
- Back Up Now: Tap “Back Up Now” to start an immediate backup. Make sure your iPad is connected to Wi-Fi.
Backing Up to a Computer
You can also back up your iPad to a computer using Finder (macOS Catalina or later) or iTunes (older macOS versions and Windows).
- Connect to Computer: Connect your iPad to your computer using a USB cable.
- Open Finder or iTunes: Open a new Finder window (macOS Catalina or later) or iTunes.
- Select Your iPad: In Finder, find your iPad in the sidebar under “Locations.” In iTunes, your iPad icon will appear near the top-left corner.
- Choose Backup:
- Finder: Click on “General” and then select “Back up all of the data on your iPad to this Mac.”
- iTunes: Click on “Summary” and then find the “Backups” section. Select “This computer.”
- Encrypt Backup (Optional): You can encrypt your backup to protect your data with a password.
- Back Up Now: Click “Back Up Now” to start the backup process.
Using External Storage
For a physical backup, you can use an external hard drive or SSD.
- Connect Storage: Connect the external storage device to your computer.
- Transfer Photos:
- Using Photos App: Open the Photos app on your computer and select the photos you want to back up. Drag and drop them to the external storage device.
- Using Finder/File Explorer: Connect your iPad to your computer. Open Finder (macOS) or File Explorer (Windows). Locate your iPad and navigate to the photos. Copy and paste the photos to the external storage device.
15. How to Find Hidden Photos on Your iPad
Sometimes, photos might seem to disappear, but they could simply be hidden. Here’s how to find them.
- Open the Photos App: Launch the Photos app on your iPad.
- Go to Albums: Tap the “Albums” tab at the bottom of the screen.
- Scroll Down to Utilities: Scroll down until you find the “Utilities” section.
- Tap on Hidden: Tap on the “Hidden” album. You may need to use Face ID or Touch ID to unlock it.
If you find photos in the Hidden album that you want to make visible again:
- Select the Photos: Tap “Select” in the top-right corner, then tap on the photos you want to unhide.
- Tap the More Button: Tap the “More” button (the three dots in a circle) at the bottom-right corner.
- Unhide: Tap “Unhide.” The photos will be moved back to your main photo library.
16. Setting Up an iCloud Shared Photo Library
An iCloud Shared Photo Library allows you to share photos and videos seamlessly with up to five other people. It’s a great way to collaborate on photo collections with family or friends.
Setting Up the Shared Library
- Go to Settings: Open the Settings app on your iPad.
- Tap on Photos: Scroll down and tap on “Photos.”
- Choose Shared Library: Tap on “Shared Library.”
- Tap Start Setup: Tap “Start Setup” and follow the on-screen instructions.
- Invite Participants: You can invite people using iMessage or by generating a link.
- Choose Photos to Share: Decide whether to move existing photos or share photos starting from today. You can also choose to share all photos.
- Preview and Confirm: Review your settings and tap “Continue” to confirm.
Deleting Photos in a Shared Library
Deleting photos from a shared library works a bit differently:
- Photos You Added: If you added the photo, deleting it removes it for everyone.
- Photos Added by Others: If someone else added the photo, you can only remove it from your view, not permanently delete it for everyone. Only the original uploader can permanently delete it.
17. How to Clear the Cache on Your iPad
Clearing the cache on your iPad can help free up storage space and improve performance. Here’s how to do it for different types of apps.
Safari
- Open Settings: Go to the Settings app on your iPad.
- Scroll to Safari: Scroll down and tap on “Safari.”
- Clear History and Website Data: Tap “Clear History and Website Data.” Confirm by tapping “Clear History and Data.”
Third-Party Apps
Some apps have built-in options to clear the cache. Check the settings within each app.
- Open the App: Launch the app you want to clear the cache for.
- Go to Settings: Look for a “Settings” or “Options” menu within the app.
- Clear Cache: If available, tap on the option to clear the cache.
Offloading Apps
Offloading an app removes the app itself but keeps its data, which can help free up space temporarily.
- Open Settings: Go to the Settings app on your iPad.
- Go to General: Tap on “General.”
- Tap iPad Storage: Tap on “iPad Storage.”
- Select the App: Find the app you want to offload and tap on it.
- Offload App: Tap “Offload App.” Confirm by tapping “Offload App” again.
18. Understanding Photo File Formats
Understanding photo file formats can help you manage your storage more efficiently. Here are some common formats and their characteristics.
JPEG (JPG)
- Description: A widely used format for digital photos.
- Pros: Small file size, compatible with most devices and platforms.
- Cons: Lossy compression, which can reduce image quality over time with repeated editing and saving.
PNG
- Description: A lossless format often used for graphics and images with text.
- Pros: Lossless compression, preserves image quality, supports transparency.
- Cons: Larger file size compared to JPEG.
HEIC (High Efficiency Image File Format)
- Description: Apple’s default format for photos on newer iPhones and iPads.
- Pros: More efficient compression than JPEG, preserves image quality, smaller file size.
- Cons: Not universally compatible, may need to be converted for use on some platforms.
RAW
- Description: An uncompressed format that contains all the data captured by the camera sensor.
- Pros: Maximum image quality, ideal for editing and post-processing.
- Cons: Very large file size, requires specialized software to view and edit.
19. Optimizing Your Photo Settings for Storage
Your iPad’s photo settings can impact how much storage your photos consume. Here are some settings to optimize.
High Efficiency vs. Most Compatible
- Go to Settings: Open the Settings app on your iPad.
- Tap on Camera: Scroll down and tap on “Camera.”
- Choose Formats: Tap on “Formats.”
- Select High Efficiency: Choose “High Efficiency” to save photos in HEIC format, which uses less storage. Choose “Most Compatible” to save photos in JPEG format, which is compatible with more devices but uses more storage.
Optimize iPad Storage
- Go to Settings: Open the Settings app on your iPad.
- Tap on Photos: Scroll down and tap on “Photos.”
- Enable Optimize iPad Storage: Turn on “Optimize iPad Storage.” This stores full-resolution photos in iCloud and keeps smaller, device-optimized versions on your iPad.
20. Frequently Asked Questions (FAQ) About Deleting Photos From Your iPad
Here are some frequently asked questions about deleting photos from your iPad, to provide you with more clarity.
- Question: How do I delete photos from my iPad if the trash icon is grayed out?
Answer: The trash icon is grayed out because the photos are synced from your computer. You need to stop syncing photos from your computer to delete them directly on your iPad. - Question: What happens when I delete a photo from a shared album on my iPad?
Answer: If you added the photo, deleting it removes it for everyone. If someone else added the photo, you can only remove it from your view. - Question: How do I recover accidentally deleted photos on my iPad?
Answer: Open the Photos app, go to the Albums tab, scroll down to Recently Deleted, and recover the photos within 30 days. - Question: How do I permanently delete photos from my iPad?
Answer: Go to the Recently Deleted album, select the photos, and tap Delete to permanently remove them. - Question: How can I find duplicate photos on my iPad and delete them?
Answer: Open the Photos app, go to the Albums tab, scroll down to the Duplicates album, and merge or delete the duplicates. - Question: How do I back up my photos before deleting them from my iPad?
Answer: You can back up your photos to iCloud, a computer, or an external storage device before deleting them. - Question: Why are my photos reappearing after I delete them on my iPad?
Answer: This can happen if iCloud Photos is syncing slowly. Make sure you have a stable internet connection and give it some time to sync. - Question: How can I clear the cache on my iPad to free up more space?
Answer: Clear the cache in Safari settings or offload unused apps in iPad Storage settings. - Question: How do I hide photos on my iPad so they don’t appear in my main photo library?
Answer: Select the photos, tap the More button, and choose Hide. They will be moved to the Hidden album. - Question: What are the best settings for optimizing photo storage on my iPad?
Answer: Use High Efficiency format and enable Optimize iPad Storage in the Photos settings.
Call to Action
Ready to take control of your iPad’s photo library? Visit dfphoto.net for more in-depth tutorials, inspiring photography, and a vibrant community of photographers. Discover new techniques, find inspiration, and connect with fellow enthusiasts today!
