Deleting photos from your iPhone can be a quick way to free up space, organize your memories, or remove unwanted images. At dfphoto.net, we understand the importance of managing your digital life, and we’re here to provide you with a comprehensive guide on photo management. Whether you’re looking to declutter your camera roll, safeguard your privacy, or optimize your iPhone’s storage, mastering the art of deleting photos is essential. Let’s explore the process with digital imaging and iPhone photography techniques, coupled with photo library management and secure deletion methods.
1. Why Can’t I Delete Photos From My iPhone?
There are several reasons why you might be unable to delete photos from your iPhone.
- Photos Synced from Computer: If you added photos to your iPhone by connecting it to your computer and syncing through iTunes (or Finder in newer macOS versions), you can’t delete them directly from the Photos app. These photos are managed through your computer.
- iCloud Photos Enabled: When iCloud Photos is enabled, deleting a photo on your iPhone will delete it from all devices connected to the same Apple ID. Sometimes, syncing issues can prevent immediate deletion.
- Permissions in Shared Albums: In shared albums, you can only delete photos that you personally added. If someone else added the photo, you won’t have the option to delete it.
- iCloud Shared Photo Library: In iOS 16.1 and later, the iCloud Shared Photo Library allows multiple users to add, edit, and delete photos. However, only the person who added a photo can permanently delete it from the “Recently Deleted” folder.
- Software Glitches: Occasionally, software glitches can prevent photos from being deleted. Restarting your iPhone can often resolve these issues.
- Insufficient Storage: Although rare, if your iPhone is critically low on storage, it might have trouble processing deletion requests.
- Restrictions Enabled: Restrictions (now called “Content & Privacy Restrictions”) in Settings can prevent you from deleting photos.
- Incorrect Settings: Incorrect iCloud settings may interfere with deleting the iPhone photos.
- Third-party Apps: Some third-party apps that manage your photos might have their own deletion protocols that override the default Photos app behavior.
1.1 How to Fix Photos Synced from Computer
If your photos were synced from your computer, follow these steps to remove them:
- Connect your iPhone to your computer.
- Open iTunes (or Finder on macOS Catalina and later).
- Select your iPhone when it appears.
- Go to the “Photos” tab.
- Uncheck “Sync Photos.”
- Choose to “Remove photos.”
- Sync your iPhone.
1.2 How to Delete Photos with iCloud Photos Enabled
If iCloud Photos is enabled, ensure your iPhone is connected to Wi-Fi and has a stable internet connection. Wait a few minutes for the changes to sync. If the photo still doesn’t delete, try restarting your iPhone.
1.3 How to Manage Permissions in Shared Albums
You can only delete photos you’ve added to a shared album. If you want a photo removed that you didn’t add, ask the person who added it to delete it.
1.4 How to Handle iCloud Shared Photo Library Deletion
In an iCloud Shared Photo Library, remember that only the person who added a photo can permanently delete it from the “Recently Deleted” folder.
1.5 How to Resolve Software Glitches
Restarting your iPhone is often the simplest solution for minor software glitches. Turn your iPhone off and then back on.
1.6 How to Address Insufficient Storage Issues
Free up some space on your iPhone by deleting unnecessary apps, videos, or files. This can help your iPhone process deletion requests more effectively.
1.7 How to Check and Adjust Restrictions
- Go to “Settings” > “Screen Time.”
- Tap “Content & Privacy Restrictions.”
- If “Content & Privacy Restrictions” is enabled, check the “Photos” settings to ensure that “Deleting Photos” is allowed.
1.8 Third-party Apps Conflicts
Check the settings of any third-party photo management apps you have installed. Ensure they are not interfering with the Photos app’s ability to delete photos.
Understanding these potential issues and their solutions can help you effectively manage and delete photos from your iPhone, keeping your photo library organized and your storage optimized.
2. How Do I Permanently Delete Photos From My iPhone?
When you delete photos from your iPhone, they are initially moved to the “Recently Deleted” album, where they remain for 30 days before being permanently deleted. This gives you a chance to recover any photos you may have accidentally deleted. However, if you want to permanently delete photos immediately, here’s how:
- Open the Photos App: Launch the Photos app on your iPhone.
- Go to the “Albums” Tab: Tap on the “Albums” tab at the bottom of the screen.
- Scroll Down to “Recently Deleted”: Find and tap on the “Recently Deleted” album under the “Utilities” section.
- Unlock with Face ID/Touch ID (if enabled): In iOS 16 and later, you may need to use Face ID, Touch ID, or your passcode to access the “Recently Deleted” album.
- Select the Photos to Delete:
- To delete specific photos, tap “Select” in the upper-right corner, then tap on each photo you want to permanently delete.
- To delete all photos, skip selecting individual photos.
- Delete the Photos Permanently:
- If you selected specific photos, tap “Delete” at the bottom of the screen, then confirm “Delete [Number] Photos.”
- If you want to delete all photos, tap “Delete All” at the bottom of the screen and confirm.
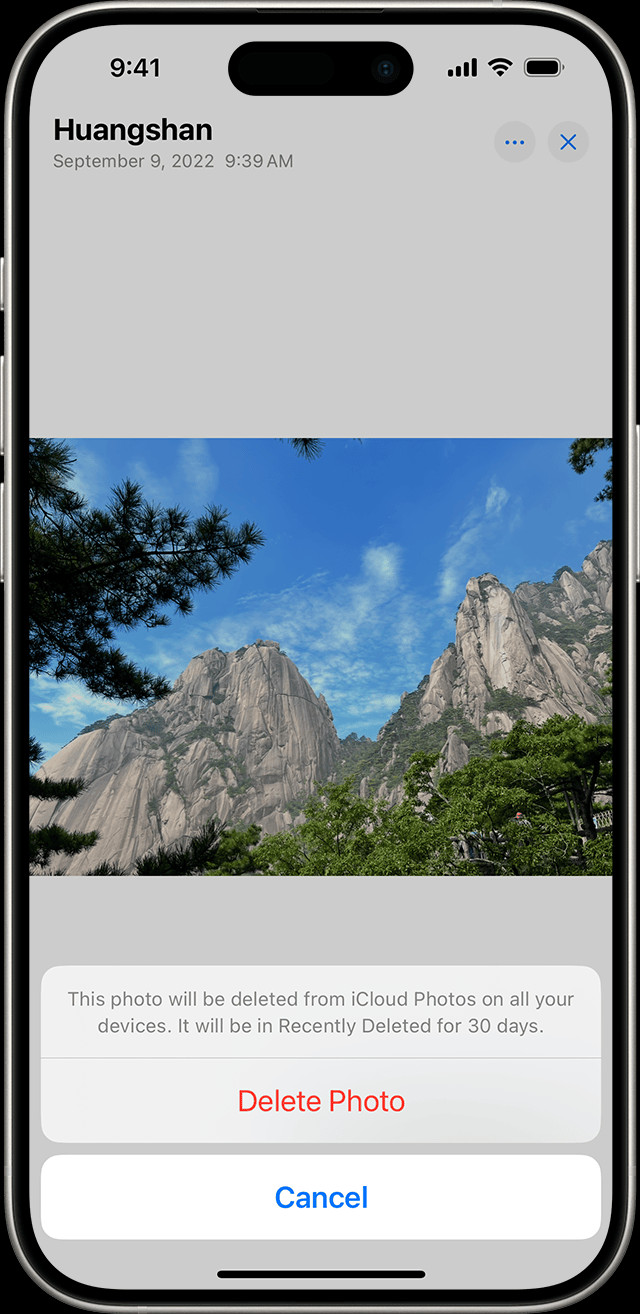 iPhone showing Delete Photo option
2.1 Additional Tips for Permanently Deleting Photos
- Backup Before Deleting: Before permanently deleting photos, ensure you have backed up any important images to iCloud, your computer, or an external storage device.
- Check iCloud Sync: If you use iCloud Photos, verify that the photos have synced to iCloud before deleting them from your iPhone. This ensures they are safely stored in the cloud.
- Be Careful: Once you permanently delete photos from the “Recently Deleted” album, they cannot be recovered. Double-check that you have selected the correct photos before confirming the deletion.
- Consider Encryption: For added security, especially if you are concerned about privacy, consider using an app that securely overwrites the deleted data on your iPhone.
By following these steps, you can permanently delete photos from your iPhone, ensuring they are completely removed and cannot be recovered.
3. How Can I Delete Photos from My iPhone Without Deleting Them from iCloud?
Deleting photos from your iPhone while keeping them in iCloud requires a specific approach to manage your storage effectively. Here’s how you can do it:
-
Disable iCloud Photos on Your iPhone:
- Go to “Settings” on your iPhone.
- Tap on your name at the top, then tap “iCloud.”
- Tap “Photos.”
- Toggle “iCloud Photos” to the “off” position.
- When prompted, choose “Download Photos & Videos” to keep a copy of your iCloud photos on your device, or “Remove from iPhone” to proceed without keeping local copies.
-
Delete Photos from Your iPhone:
- After disabling iCloud Photos, you can now delete photos from your iPhone without them being deleted from iCloud.
- Open the “Photos” app and delete the photos you no longer want on your device.
- The deleted photos will remain in your iCloud account.
-
Manage Storage Effectively:
- If you chose to download photos before disabling iCloud Photos, you might need to manage your iPhone’s storage.
- Go to “Settings” > “General” > “iPhone Storage” to see which apps and files are taking up the most space.
- You can delete unnecessary apps, files, and photos to free up space.
3.1 Important Considerations
- iCloud Storage: Ensure you have enough storage in your iCloud account to store all your photos. If you run out of space, new photos may not be backed up.
- Manual Backup: Periodically back up your iPhone to your computer to create a local backup of your data, including photos. This provides an additional layer of security.
- Re-enabling iCloud Photos: If you re-enable iCloud Photos in the future, the photos in your iCloud account will sync back to your iPhone. You may want to organize your photos in iCloud before re-enabling the feature.
3.2 Alternative Method: Optimize iPhone Storage
Instead of completely disabling iCloud Photos, you can use the “Optimize iPhone Storage” feature:
- Go to “Settings” > “Your Name” > “iCloud” > “Photos.”
- Select “Optimize iPhone Storage.”
- This option automatically manages the storage on your iPhone by keeping smaller, optimized versions of your photos on your device while storing the full-resolution versions in iCloud. This helps save space on your iPhone without deleting your photos from iCloud.
3.3 Risks and Benefits
- Benefits:
- Frees up space on your iPhone.
- Keeps your photos safely backed up in iCloud.
- Allows you to access your photos from other devices connected to your iCloud account.
- Risks:
- If you disable iCloud Photos and don’t back up your photos, you could lose them if your iPhone is lost, stolen, or damaged.
- Managing storage manually can be time-consuming.
By following these steps, you can effectively delete photos from your iPhone while ensuring they remain safely stored in iCloud.
4. How Do I Free Up Storage on My iPhone?
Running out of storage on your iPhone can be frustrating, especially when you want to capture new memories or download essential apps. Here’s how you can free up storage and keep your iPhone running smoothly:
- Check Your Storage Usage:
- Go to “Settings” > “General” > “iPhone Storage.”
- This screen shows a detailed breakdown of how your storage is being used, including apps, photos, media, and other files.
- Offload Unused Apps:
- iOS can automatically offload apps that you haven’t used in a while, freeing up storage space.
- Go to “Settings” > “General” > “iPhone Storage.”
- Enable “Offload Unused Apps.”
- When an app is offloaded, its icon remains on your home screen, and you can tap it to re-download the app and your data.
- Delete Unused Apps:
- If you know you won’t use certain apps again, delete them completely to free up storage.
- Tap on an app in the “iPhone Storage” list and select “Delete App.”
- Optimize Your Photo Storage:
- Use iCloud Photos to store your photos in the cloud and optimize the storage on your iPhone.
- Go to “Settings” > “Your Name” > “iCloud” > “Photos.”
- Select “Optimize iPhone Storage.”
- This keeps smaller, optimized versions of your photos on your device while storing the full-resolution versions in iCloud.
- Delete Unnecessary Photos and Videos:
- Review your “Photos” app and delete any photos or videos you no longer need.
- Remember to empty the “Recently Deleted” album to permanently remove these files.
- Clear Browser Cache and Data:
- Your web browser (Safari, Chrome, etc.) stores cache and data, which can take up storage space.
- For Safari: Go to “Settings” > “Safari” > “Clear History and Website Data.”
- For Chrome: Open the Chrome app, tap the three dots in the bottom-right corner, go to “Settings” > “Privacy” > “Clear Browsing Data.”
- Delete Old Messages:
- Old text messages, especially those with attachments, can consume a lot of storage.
- Go to “Settings” > “Messages” > “Keep Messages.”
- Choose to keep messages for 30 days or 1 year, instead of “Forever.”
- Clear App Caches:
- Some apps store a lot of cache data, which can accumulate over time.
- Check the settings of individual apps to see if they offer an option to clear the cache.
- Remove Downloaded Files:
- Check the “Downloads” folder in the “Files” app and delete any files you no longer need.
- Update to the Latest iOS Version:
- New iOS versions often include storage optimizations and bug fixes that can help free up space.
- Go to “Settings” > “General” > “Software Update” to check for updates.
4.1 Additional Tips for Managing Storage
- Use Cloud Storage Services: Consider using other cloud storage services like Google Drive, Dropbox, or Microsoft OneDrive to store files and documents.
- Transfer Files to a Computer: Regularly transfer photos, videos, and other files from your iPhone to your computer or an external storage device.
- Use Third-Party Storage Cleaner Apps: There are many third-party apps available on the App Store that can help you identify and remove unnecessary files from your iPhone.
By following these steps, you can effectively free up storage on your iPhone, ensuring you have enough space for new photos, videos, and apps.
5. How Can I Back Up My iPhone Photos?
Backing up your iPhone photos is crucial to protect your precious memories from loss due to device damage, theft, or accidental deletion. Here are several methods to back up your iPhone photos:
- iCloud Photos:
- How it Works: iCloud Photos automatically uploads and stores your photos and videos in iCloud, keeping them synced across all your devices signed in with the same Apple ID.
- How to Set Up:
- Go to “Settings” > “Your Name” > “iCloud” > “Photos.”
- Toggle “iCloud Photos” to the “on” position.
- Choose “Optimize iPhone Storage” to save space on your device or “Download and Keep Originals” to store full-resolution versions on your iPhone.
- Pros: Automatic, seamless integration with iOS, accessible from any device.
- Cons: Requires sufficient iCloud storage, which may require a paid subscription.
- iTunes/Finder (Local Backup):
- How it Works: Backs up your entire iPhone to your computer, including photos, videos, and other data.
- How to Set Up:
- Connect your iPhone to your computer using a USB cable.
- Open iTunes (or Finder on macOS Catalina and later).
- Select your iPhone when it appears.
- Click “Back Up Now.”
- Choose to back up to your computer or encrypt the backup for added security.
- Pros: Free, backs up all your data, doesn’t require an internet connection.
- Cons: Requires sufficient storage space on your computer, not accessible from other devices.
- Google Photos:
- How it Works: Google Photos is a cloud-based photo storage service that allows you to back up your photos and videos.
- How to Set Up:
- Download and install the Google Photos app from the App Store.
- Open the app and sign in with your Google account.
- Enable “Backup & sync” to automatically back up your photos and videos.
- Choose to back up in “High quality” (unlimited storage) or “Original quality” (uses Google Drive storage).
- Pros: Free storage (up to 15 GB, shared with other Google services), accessible from any device, easy to use.
- Cons: Requires a Google account, may compress photos if using “High quality” setting.
- Dropbox:
- How it Works: Dropbox is a cloud storage service that allows you to store and share files, including photos and videos.
- How to Set Up:
- Download and install the Dropbox app from the App Store.
- Open the app and sign in with your Dropbox account.
- Enable “Camera Uploads” to automatically back up your photos and videos.
- Pros: Accessible from any device, easy to share files.
- Cons: Limited free storage (2 GB), requires a paid subscription for more storage.
- External Hard Drive:
- How it Works: Transfer photos and videos directly from your iPhone to an external hard drive.
- How to Set Up:
- Connect your iPhone to your computer using a USB cable.
- Open Finder (on macOS) or File Explorer (on Windows).
- Locate your iPhone and browse to the “DCIM” folder, which contains your photos and videos.
- Copy the photos and videos to your external hard drive.
- Pros: Complete control over your data, doesn’t require an internet connection.
- Cons: Requires manual transfer, not accessible from other devices.
- Amazon Photos:
- How it Works: Amazon Photos provides unlimited photo storage for Prime members and limited storage for non-Prime members.
- How to Set Up:
- Download and install the Amazon Photos app from the App Store.
- Open the app and sign in with your Amazon account.
- Enable automatic uploads to back up your photos and videos.
- Pros: Unlimited photo storage for Prime members, accessible from any device.
- Cons: Requires an Amazon Prime membership for unlimited storage.
5.1 Best Practices for Backing Up Your Photos
- Regular Backups: Make it a habit to back up your photos regularly, whether it’s daily, weekly, or monthly.
- Multiple Backups: Use multiple backup methods to ensure redundancy and protect against data loss.
- Verify Backups: Periodically verify that your backups are working correctly by restoring a few photos to your device.
- Secure Your Backups: Encrypt your backups and use strong passwords to protect your data from unauthorized access.
By following these methods, you can ensure that your iPhone photos are safely backed up and protected from loss.
6. How To Find Duplicate Photos On iPhone?
Duplicate photos can take up valuable storage space on your iPhone. iOS 16 and later versions have a built-in feature that makes it easy to find and merge these duplicates. Here’s how to use it:
- Open the Photos App:
- Launch the “Photos” app on your iPhone.
- Go to the “Albums” Tab:
- Tap on the “Albums” tab at the bottom of the screen.
- Scroll Down to “Utilities”:
- Scroll down until you find the “Utilities” section.
- Find the “Duplicates” Album:
- Look for the “Duplicates” album. If you have duplicate photos, this album will appear. If not, it won’t be visible.
- Review Duplicate Photos:
- Tap on the “Duplicates” album to see the sets of duplicate photos.
- Merge Duplicate Photos:
- For each set of duplicates, tap “Merge” to combine them.
- Your iPhone will keep the highest quality version of the photo and move the duplicates to the “Recently Deleted” album.
- Select and Merge Multiple Sets (Optional):
- To merge multiple sets of duplicates at once, tap “Select” in the upper-right corner.
- Tap on each set of duplicates you want to merge, or tap “Select All” to choose all sets.
- Tap “Merge” at the bottom of the screen to merge the selected sets.
6.1 Additional Tips for Managing Duplicate Photos
- Automatic Detection: The duplicate detection process happens automatically and may take some time, especially if you have a large photo library.
- Manual Review: Before merging, take a quick look at the duplicates to ensure they are indeed the same. Sometimes, photos may appear similar but have slight differences (e.g., different edits or resolutions).
- Highest Quality: When merging, your iPhone will keep the highest quality version and move the other duplicates to the “Recently Deleted” album.
- Recently Deleted: Remember to empty the “Recently Deleted” album periodically to permanently remove the duplicate photos.
- Manual Methods: If you don’t have iOS 16 or later, you can manually find duplicates by scrolling through your photo library and comparing images. This can be time-consuming but effective.
- Third-Party Apps: There are several third-party apps available on the App Store that can help you find and remove duplicate photos. Some popular options include Gemini Photos and Remo Duplicate Photos Remover. Be cautious when using third-party apps and ensure they are reputable and trustworthy.
- Review Similar Photos: Sometimes, you might have similar but not exact duplicate photos. Take the time to review these and decide which ones you want to keep.
- Stay Organized: Regularly organize your photos to prevent duplicates from accumulating. Delete photos you no longer need and keep your library tidy.
By using the built-in “Duplicates” feature in iOS 16 or later, or by following manual methods, you can easily find and remove duplicate photos from your iPhone, freeing up valuable storage space and keeping your photo library organized.
7. How to Hide Photos on iPhone?
Hiding photos on your iPhone is a great way to keep personal or sensitive images out of sight without deleting them. Here’s how you can hide photos using the built-in features:
- Open the Photos App:
- Launch the “Photos” app on your iPhone.
- Select the Photo(s) You Want to Hide:
- Tap on the photo you want to hide. To select multiple photos, tap “Select” in the upper-right corner and then tap on each photo you want to hide.
- Tap the Share Button:
- Tap the share button in the bottom-left corner of the screen (it looks like a square with an arrow pointing up).
- Scroll Down and Select “Hide”:
- Scroll down the list of options in the share sheet and tap “Hide.”
- Confirm Hiding the Photo(s):
- A pop-up will appear asking if you want to hide the photo(s). Tap “Hide Photo” (or “Hide [Number] Photos”) to confirm.
- Access the Hidden Album:
- To view your hidden photos, go to the “Albums” tab in the Photos app.
- Scroll down to the “Utilities” section and tap “Hidden.”
- In iOS 16 and later, the “Hidden” album is locked by default and requires Face ID, Touch ID, or your passcode to access.
- Unhide Photos:
- To unhide a photo, go to the “Hidden” album, select the photo, tap the share button, and tap “Unhide.” The photo will be moved back to your main photo library.
7.1 Additional Tips for Managing Hidden Photos
- Locking the Hidden Album: In iOS 16 and later, the “Hidden” album is automatically locked and requires authentication to view. This adds an extra layer of security.
- Disabling the Hidden Album: If you want to make the “Hidden” album even less visible, you can disable it from appearing in the “Albums” tab:
- Go to “Settings” > “Photos.”
- Toggle “Show Hidden Album” to the “off” position.
- When this is disabled, the “Hidden” album will not appear in the “Albums” tab. To view your hidden photos, you’ll need to re-enable this setting.
- Use Third-Party Apps: There are several third-party apps available on the App Store that offer more advanced photo hiding and security features, such as password protection, encryption, and decoy albums. Some popular options include Secret Photo Vault and Keepsafe Photo Vault. Be cautious when using third-party apps and ensure they are reputable and trustworthy.
- Be Mindful of iCloud Sync: If you use iCloud Photos, hiding a photo on one device will hide it on all devices signed in with the same Apple ID.
- Check for Screenshots: Make sure you don’t have screenshots of the hidden photos stored in your main photo library, as these would defeat the purpose of hiding the originals.
- Remember to Unhide Before Deleting: If you decide to delete photos from your iPhone, remember to unhide them first, as hidden photos are not visible in the main photo library and may be overlooked.
- Use a Strong Passcode: To protect your iPhone and the hidden photos, use a strong and unique passcode.
By using the built-in “Hide” feature or third-party apps, you can easily hide photos on your iPhone, keeping them out of sight while still having them available when you need them.
8. Troubleshooting: Photos Not Deleting?
Sometimes, you might encounter issues when trying to delete photos from your iPhone. Here are some troubleshooting steps to resolve common problems:
- Restart Your iPhone:
- The simplest solution is often the most effective. Restarting your iPhone can resolve minor software glitches that may be preventing photos from being deleted.
- Check iCloud Sync:
- If you use iCloud Photos, ensure your iPhone is connected to Wi-Fi and has a stable internet connection. Wait a few minutes for the changes to sync.
- Go to “Settings” > “Your Name” > “iCloud” > “Photos” and check the status of iCloud Photos.
- Disable and Re-enable iCloud Photos:
- Try turning off iCloud Photos, waiting a few minutes, and then turning it back on. This can help refresh the connection and resolve syncing issues.
- Go to “Settings” > “Your Name” > “iCloud” > “Photos” and toggle “iCloud Photos” to the “off” position, then back to “on.”
- Free Up Storage Space:
- If your iPhone is low on storage, it may have trouble processing deletion requests. Free up some space by deleting unnecessary apps, videos, or files.
- Go to “Settings” > “General” > “iPhone Storage” to see how your storage is being used.
- Check for Restrictions:
- Restrictions (now called “Content & Privacy Restrictions”) in Settings can prevent you from deleting photos.
- Go to “Settings” > “Screen Time” > “Content & Privacy Restrictions” and check the “Photos” settings to ensure that “Deleting Photos” is allowed.
- Photos Synced from Computer:
- If your photos were synced from your computer, you can’t delete them directly from the Photos app. You need to remove them through iTunes (or Finder on macOS Catalina and later).
- Connect your iPhone to your computer, open iTunes/Finder, select your iPhone, go to the “Photos” tab, and uncheck “Sync Photos.”
- Check Shared Albums:
- In shared albums, you can only delete photos that you personally added. If someone else added the photo, you won’t have the option to delete it.
- iCloud Shared Photo Library: In iOS 16.1 and later, the iCloud Shared Photo Library allows multiple users to add, edit, and delete photos. However, only the person who added a photo can permanently delete it from the “Recently Deleted” folder.
- Update to the Latest iOS Version:
- Ensure your iPhone is running the latest version of iOS. Software updates often include bug fixes that can resolve issues with deleting photos.
- Go to “Settings” > “General” > “Software Update” to check for updates.
- Reset Photos App:
- Sometimes, resetting the Photos app can resolve issues. To do this, you’ll need to reset your iPhone’s settings (note that this will reset all settings, but not delete your data):
- Go to “Settings” > “General” > “Transfer or Reset iPhone” > “Reset” > “Reset All Settings.”
- Sometimes, resetting the Photos app can resolve issues. To do this, you’ll need to reset your iPhone’s settings (note that this will reset all settings, but not delete your data):
- Check Third-Party Apps:
- Some third-party apps that manage your photos might have their own deletion protocols that override the default Photos app behavior. Check the settings of any third-party photo management apps you have installed.
- Contact Apple Support:
- If none of the above steps work, there may be a more complex issue with your iPhone. Contact Apple Support for further assistance.
8.1 Additional Tips for Troubleshooting
- Check Date and Time Settings: Ensure your iPhone’s date and time settings are correct, as incorrect settings can sometimes cause syncing issues.
- Test with Different Photos: Try deleting different photos to see if the issue is specific to certain images.
- Wait and Try Again: Sometimes, the issue may be temporary, and the photos may delete after waiting a few hours or a day.
- Document the Issue: If you need to contact Apple Support, document the issue with screenshots and detailed descriptions of the steps you’ve taken.
By following these troubleshooting steps, you can resolve most issues related to deleting photos from your iPhone and keep your photo library organized.
9. Maximizing Your iPhone Photography Experience
Now that you’ve mastered the art of managing and deleting photos on your iPhone, let’s explore some tips to enhance your overall iPhone photography experience. At dfphoto.net, we are dedicated to providing you with the resources and inspiration you need to excel in the world of photography.
9.1 Mastering Composition Techniques
- Rule of Thirds: Divide your frame into nine equal parts using two horizontal and two vertical lines. Place key elements of your scene along these lines or at the points where they intersect.
- Leading Lines: Use lines to guide the viewer’s eye through the photo and towards the main subject. Roads, rivers, and fences can all serve as leading lines.
- Symmetry and Patterns: Look for symmetrical scenes or repeating patterns to create visually appealing compositions.
- Framing: Use elements in the foreground to frame your subject and add depth to the photo. Trees, archways, and windows can all be used for framing.
- Negative Space: Use empty space around your subject to create a sense of balance and draw attention to the main focus.
9.2 Utilizing iPhone Camera Features
- Portrait Mode: Use Portrait mode to create photos with a shallow depth of field, blurring the background and making your subject stand out.
- Night Mode: In low-light conditions, Night mode automatically brightens the scene and captures more detail.
- Burst Mode: Hold down the shutter button to capture a burst of photos, which is useful for capturing action shots or selecting the best moment from a series.
- Live Photos: Capture a few seconds of video and audio along with your photo, bringing your memories to life.
- Filters: Experiment with different filters to add creative effects to your photos.
9.3 Editing Your Photos
- Built-In Editing Tools: The Photos app offers a range of editing tools, including adjustments for exposure, contrast, highlights, shadows, and color.
- Third-Party Editing Apps: Explore third-party editing apps like Adobe Lightroom Mobile, VSCO, and Snapseed for more advanced editing features.
- Crop and Straighten: Crop your photos to improve the composition and straighten them to correct any tilting.
- Adjust Exposure and Contrast: Adjust the exposure to brighten or darken the photo and the contrast to enhance the tonal range.
- Experiment with Color: Adjust the saturation, vibrance, and white balance to enhance the colors in your photos.
9.4 Exploring Different Photography Genres
- Landscape Photography: Capture the beauty of nature with wide-angle shots and stunning vistas.
- Portrait Photography: Capture the personality and emotions of your subjects with close-up shots and creative lighting.
- Street Photography: Capture candid moments of everyday life in urban environments.
- Macro Photography: Capture close-up details of small subjects, such as flowers, insects, and textures.
- Black and White Photography: Convert your photos to black and white to emphasize the tones, textures, and shapes.
9.5 Joining Photography Communities
- Online Forums and Groups: Join online photography forums and groups to share your work, get feedback, and learn from other photographers.
- Photography Clubs: Join local photography clubs to meet other photographers in person and participate in workshops, photo walks, and exhibitions.
- Social Media: Follow photographers and photography-related accounts on social media platforms like Instagram, Facebook, and Twitter for inspiration and learning.
9.6 Staying Inspired
- Visit Art Galleries and Museums: Visit art galleries and museums to see the work of master photographers and gain inspiration for your own photography.
- Read Photography Books and Magazines: Read photography books and magazines to learn about different techniques, styles, and photographers.
- Watch Photography Tutorials and Documentaries: Watch photography tutorials and documentaries to learn from experts and see how they approach their work.
- Experiment and Practice: The best way to improve your photography is to experiment with different techniques and practice regularly.
By following these tips, you can take your iPhone photography to the next level and capture stunning images that you’ll be proud to share.
10. FAQs About Deleting Photos from iPhone
Here are some frequently asked questions about deleting photos from your iPhone:
- What happens when I delete a photo from my iPhone?
- When you delete a photo from your iPhone, it is moved to the “Recently Deleted” album, where it remains for 30 days before being permanently deleted.
- How do I permanently delete photos from my iPhone?
- To permanently delete photos, go to the “Recently Deleted” album, select the photos, and tap “Delete.”
- Can I recover photos I’ve deleted from my iPhone?
- Yes, you can recover photos from the “Recently Deleted” album within 30 days of deleting them.
- How do I delete photos from my iPhone without deleting them from iCloud?
- Disable iCloud Photos in Settings > Your Name > iCloud > Photos, then delete the photos from your iPhone.
- How do I free up storage space on my iPhone?
- Delete unused apps, optimize photo storage, clear browser cache, and delete old messages.
- How do I back up my iPhone photos?
- Use iCloud Photos, iTunes/Finder, Google Photos, Dropbox, or an external hard drive to back up your photos.
- How do I find duplicate photos on my iPhone?
- Use the built-in “Duplicates” feature in iOS 16 and later, or manually find duplicates in your photo library.
- How do I hide photos on my iPhone?
- Select the photo, tap the share button, and tap “Hide.” Access the hidden photos in the “Hidden” album in the “Utilities” section.
- Why can’t I delete some photos from my iPhone?
- The photos may be synced from your computer, or you may not have permission to delete them from a shared album.
- What should I do if photos are not deleting from my iPhone?
- Restart your iPhone, check iCloud sync, free up storage space, and check for restrictions.
We hope this comprehensive guide has answered all your questions about deleting photos from your iPhone. At dfphoto.net, we are committed to providing you with the knowledge and tools you need to master