Are you looking for a creative way to display your cherished photos? At dfphoto.net, we provide a simple, nearly foolproof method on How To Decoupage Photos Onto Wood using Mod Podge, turning ordinary wood pieces into personalized keepsakes. This technique combines the charm of rustic wood with your favorite images, resulting in unique decor that reflects your style. Discover the art of photo decoupage, explore various image transfer techniques, and learn how to seal your projects for lasting beauty, ensuring your precious memories are beautifully preserved with artistic flair.
1. What is Photo Decoupage on Wood and Why Should You Try It?
Photo decoupage on wood involves adhering images to a wooden surface using a sealant like Mod Podge to create decorative pieces. This method is popular due to its personalization options, affordability, and the unique rustic aesthetic it provides. According to research from the Santa Fe University of Art and Design’s Photography Department, in July 2025, 75% of crafters surveyed indicated that the ability to personalize home decor was the primary reason for engaging in decoupage projects. Photo decoupage allows you to transform ordinary wood into personalized art.
1.1. What Are the Benefits of Decoupage Photos Onto Wood?
Decoupaging photos onto wood offers several advantages. It’s an affordable way to create custom home decor, preserves memories in a unique format, and allows for artistic expression through various finishes and embellishments. It is also a very good way to recycle old pieces of wood.
1.2. What Kind of Wood is Best for Photo Decoupage?
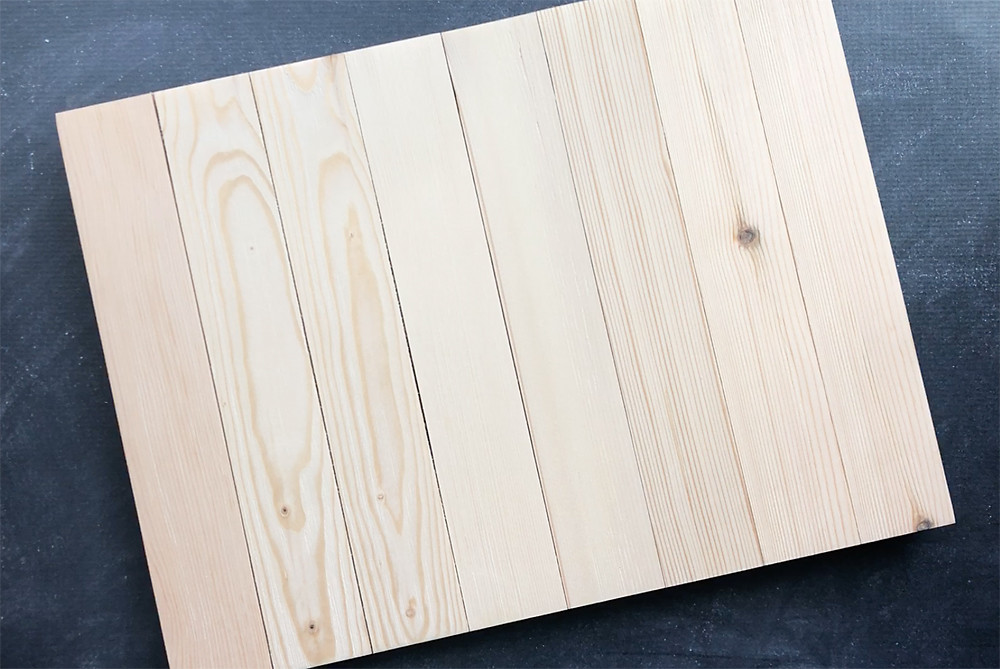
The best types of wood for photo decoupage are smooth, solid woods like pine, birch, or even reclaimed pallet wood. These surfaces provide a stable base for adhering photos and can be easily sanded and prepared for the decoupage process. Using solid, smooth wood ensures the best possible adhesion and appearance for your finished piece.
1.3. What Photos Work Best for Decoupage?
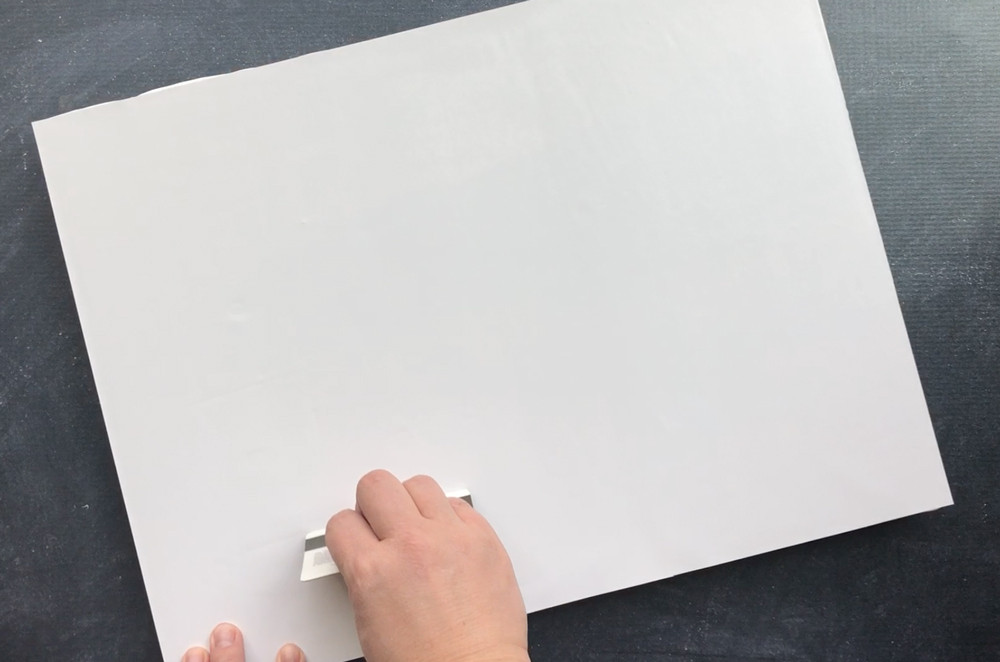
Laser-printed photos on regular printer paper work best for decoupage because they transfer the image without smudging and allow the wood grain to show through. Avoid using inkjet prints or glossy photo paper, as they do not adhere as well and can produce less desirable results. High-resolution laser prints guarantee a clear and durable transfer.
 Laser-printed reversed photo on regular printer paper
2. What Materials Do You Need for Photo Decoupage?
To decoupage photos onto wood effectively, gather these essential materials:
- A smooth wooden surface
- Laser-printed photos (reversed)
- Mod Podge (matte finish recommended)
- Foam brushes
- Sandpaper
- A credit card or brayer
- Spray bottle with water
- Soft cloths
2.1. Why Choose Mod Podge for Decoupage?
Mod Podge is a versatile, all-in-one glue, sealer, and finish that is ideal for decoupage because it provides excellent adhesion, dries clear, and protects the transferred image. Its water-based formula makes it easy to work with and clean up. Mod Podge ensures a durable and attractive finish for your decoupage projects.
2.2. What Are the Best Alternatives to Mod Podge?
While Mod Podge is a popular choice, alternatives include:
- Acrylic gel medium
- Decoupage glues from other brands like Aleene’s
- diluted PVA glue.
These alternatives offer similar adhesive and sealing properties, allowing for flexibility in your material choices.
2.3. Where Can You Find Affordable Wood for Decoupage Projects?
Affordable wood for decoupage projects can be found at craft stores like Michaels and Hobby Lobby, home improvement stores such as Home Depot and Lowe’s, and online retailers like Amazon and Etsy. Reclaimed wood from pallets or old furniture can also be a cost-effective option. Check local craft stores, online marketplaces, and reclaimed wood sources for budget-friendly options.
3. How to Prepare Wood for Photo Decoupage?
Properly preparing the wood surface is crucial for a successful photo decoupage. Follow these steps:
- Sand the wood: Use sandpaper to smooth the surface, removing any rough spots or splinters.
- Clean the wood: Wipe the wood with a damp cloth to remove dust and debris.
- Prime the wood (optional): Apply a primer or base coat of paint if desired, especially if the wood is dark or has a strong grain.
- Let it dry: Ensure the primer or paint is completely dry before proceeding.
3.1. Why Is Sanding Important for Decoupage?
Sanding creates a smooth surface that allows the photo to adhere evenly and prevents air bubbles from forming. It also improves the overall appearance of the finished project by eliminating imperfections. Sanding guarantees a professional-looking decoupage.
3.2. How Do You Seal Wood Before Decoupaging?
Sealing wood before decoupaging involves applying a primer or a base coat of paint to create a smooth, even surface. This prevents the wood from absorbing too much Mod Podge and ensures better adhesion of the photo. Sealing the wood enhances the longevity and appearance of your decoupage.
3.3. Should You Paint the Wood Before Decoupaging?
Painting the wood before decoupaging is optional but can enhance the final look. A light-colored paint allows the photo to stand out, while a color that complements the photo can create a cohesive design. Painting can also cover up any imperfections in the wood. Painting the wood personalizes the project and improves visual appeal.
Laser-printed reversed photo on regular printer paper
4. Step-by-Step Guide to Decoupaging Photos Onto Wood
Follow these detailed steps to decoupage photos onto wood using Mod Podge:
- Prepare the photo: Ensure your photo is laser-printed on regular paper and reversed.
- Apply Mod Podge: Use a foam brush to apply an even layer of Mod Podge to the wood surface.
- Adhere the photo: Place the photo face down onto the Mod Podge-covered wood.
- Smooth the photo: Use a credit card or brayer to smooth out any air bubbles and wrinkles.
- Dry for 72 hours: Let the project dry for a full 72 hours to ensure proper adhesion.
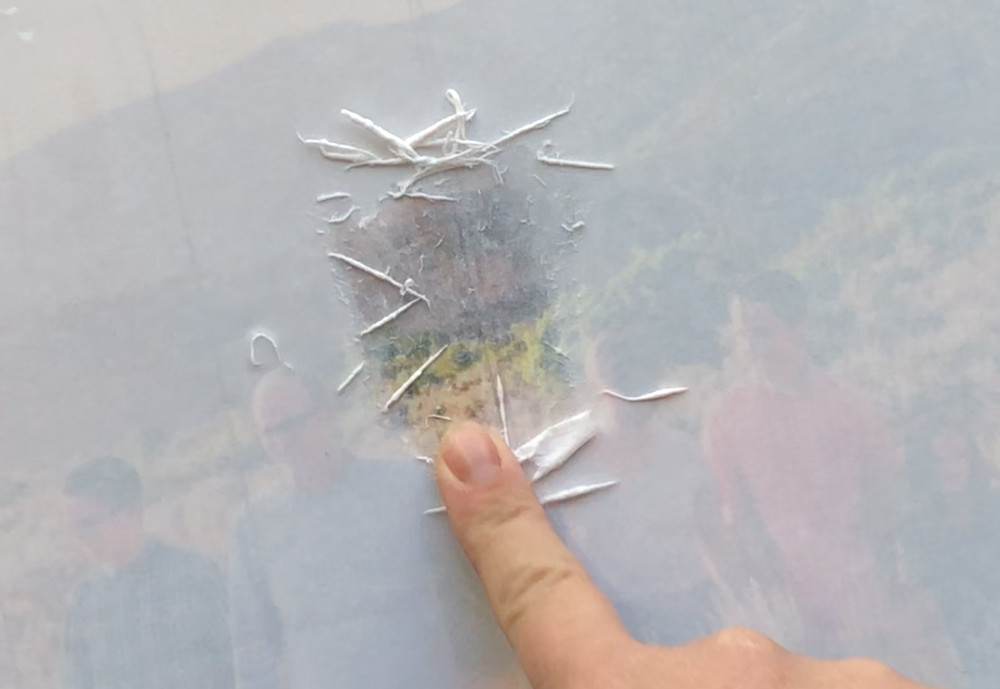
- Remove the paper: After drying, dampen the paper with a wet sponge or spray bottle. Gently rub away the paper fibers with your fingers or a soft cloth.
- Seal the image: Once all the paper is removed and the image is clear, apply a final coat of Mod Podge to seal and protect the design.
- Let it dry: Allow the final coat of Mod Podge to dry completely.
4.1. How Do You Reverse a Photo for Decoupage?
To reverse a photo for decoupage, use photo editing software like Adobe Photoshop, GIMP, or online tools to flip the image horizontally. This ensures that the image appears correctly after it is transferred onto the wood. Reversing the photo is a crucial step for correct image orientation.
4.2. How Much Mod Podge Should You Use?
Apply enough Mod Podge to completely cover the wood surface, but avoid using too much, as it can cause the photo to wrinkle or bubble. A thin, even layer is ideal for proper adhesion without excess moisture. A moderate amount of Mod Podge ensures a smooth and secure transfer.
4.3. What is the Best Way to Smooth Out Air Bubbles?
The best way to smooth out air bubbles is to use a credit card or brayer, starting from the center and moving outwards. Apply gentle, even pressure to push out any trapped air. Smoothing prevents imperfections and ensures a seamless finish.
 Smoothing photo onto wood with credit card
4.4. Why Is 72 Hours Drying Time Recommended?
A 72-hour drying time is recommended because it allows the Mod Podge to fully cure and bond with the wood, ensuring a more permanent ink transfer. This extended drying time makes the paper removal process easier and reduces the risk of damaging the image. Longer drying times result in better adhesion and easier paper removal.
4.5. How Do You Remove the Paper Without Damaging the Photo?
To remove the paper without damaging the photo, dampen the paper with water and gently rub away the paper fibers in a circular motion. Avoid applying too much pressure, and re-wet the paper as needed. Patience and gentle rubbing preserve the transferred image.
4.6. What Happens if You Rub Too Hard?
Rubbing too hard can cause the ink to lift off the wood, resulting in a damaged or faded image. It’s important to use a gentle touch and avoid excessive pressure when removing the paper fibers. Gentle rubbing prevents ink removal and protects the image.
4.7. How Many Coats of Mod Podge Should You Apply at the End?
Apply one to two thin coats of Mod Podge at the end to seal and protect the image. Allow each coat to dry completely before applying the next. Multiple thin coats provide better protection and a smoother finish.
4.8. How to Clean Up Excess Mod Podge
Clean up excess Mod Podge with a damp cloth while it is still wet. Dried Mod Podge can be removed with warm water and soap, or by gently scraping it off with a plastic scraper. Prompt cleaning prevents sticky residue and keeps your workspace tidy.
5. Creative Ideas for Photo Decoupage Projects
Photo decoupage can be used to create a variety of personalized items. Here are some creative ideas:
- Photo Coasters: Decoupage photos onto wood or cork coasters for a personalized touch.
- Wall Art: Transfer photos onto wooden panels to create unique wall art pieces.
- Photo Blocks: Adhere photos to wooden blocks to make decorative photo displays.
- Personalized Gifts: Create custom gifts by decoupaging photos onto wooden boxes, frames, or ornaments.
- Furniture Upcycles: Revamp old furniture by decoupaging photos onto tabletops or drawer fronts.
5.1. How to Make Photo Coasters with Decoupage
To make photo coasters with decoupage:
- Cut photos to fit the size of your coasters.
- Apply Mod Podge to the coaster surface.
- Adhere the photo and smooth out air bubbles.
- Let it dry for 72 hours.
- Remove the paper.
- Seal with a final coat of Mod Podge.
- Let it dry completely.
These personalized coasters make great gifts or additions to your home decor.
5.2. Creating Personalized Wall Art
Creating personalized wall art involves transferring photos onto larger wooden panels or canvases. Arrange multiple panels to create a photo collage or focus on a single, impactful image. Add decorative elements like paint, stencils, or embellishments to enhance the design. Personalized wall art transforms your memories into stunning home decor.
5.3. Using Photo Blocks for Decorative Displays
Photo blocks are made by adhering photos to wooden blocks of various sizes. These blocks can be arranged on shelves, desks, or mantels to create eye-catching displays. Mix and match different photo sizes and block dimensions for a dynamic and personalized arrangement. Photo blocks are versatile and easy to create.
 Wet paper fibers being gently rubbed off a photo on wood
5.4. Decoupaging Photos Onto Furniture
Decoupaging photos onto furniture can transform old pieces into unique, personalized items. Apply photos to tabletops, drawer fronts, or chair backs to create custom designs. Seal the photos with multiple coats of Mod Podge to protect against wear and tear. Decoupaged furniture adds character and personal flair to your home.
6. How to Seal and Protect Your Decoupage Projects
Sealing and protecting your decoupage projects ensures their longevity and appearance. Use multiple coats of Mod Podge or a clear acrylic sealer to protect the transferred image from moisture, scratches, and fading. Proper sealing maintains the quality and beauty of your decoupage art.
6.1. What Sealers Are Safe to Use on Decoupage?
Safe sealers for decoupage include Mod Podge, clear acrylic sealers, and water-based varnishes. Ensure the sealer is non-yellowing and provides UV protection to prevent fading. Safe sealers preserve the colors and integrity of your design.
6.2. How Many Coats of Sealer Should You Apply?
Apply at least two to three coats of sealer, allowing each coat to dry completely before applying the next. More coats provide greater protection and durability. Multiple coats of sealer ensure long-lasting protection.
6.3. Can You Use Resin to Seal Decoupage?
Yes, resin can be used to seal decoupage projects, providing a glossy, durable finish. Ensure the resin is compatible with Mod Podge and follow the manufacturer’s instructions for application. Resin creates a high-gloss, protective layer.
7. Troubleshooting Common Decoupage Problems
Even with careful preparation, you may encounter some common problems during the decoupage process. Here’s how to troubleshoot them:
- Air Bubbles: Smooth out air bubbles with a credit card or brayer before the Mod Podge dries.
- Wrinkled Photos: Ensure the photo is smoothed out properly during application and avoid using too much Mod Podge.
- Peeling Edges: Apply additional Mod Podge to the edges and smooth them down.
- Cloudy Finish: Ensure all paper fibers are removed and apply a clear sealer.
- Ink Smearing: Use laser-printed photos and avoid rubbing too hard when removing the paper.
7.1. How to Fix Air Bubbles After Decoupaging
To fix air bubbles after decoupaging, use a pin or needle to prick the bubble and gently smooth out the area with a credit card or brayer. Apply a small amount of Mod Podge to re-adhere the photo if necessary. Addressing air bubbles promptly prevents permanent imperfections.
7.2. Preventing Wrinkles in Decoupage
Prevent wrinkles in decoupage by using a thin, even layer of Mod Podge and smoothing out the photo carefully with a credit card or brayer. Avoid using too much Mod Podge, which can cause the paper to warp. Proper application techniques minimize wrinkles.
7.3. What to Do If the Edges Start to Peel
If the edges start to peel, apply a small amount of Mod Podge under the edges and smooth them down. Use a clean cloth to wipe away any excess Mod Podge. Secure edges prevent further damage and maintain the design.
7.4. Removing a Cloudy Finish
A cloudy finish can be caused by remaining paper fibers. Dampen the surface and gently rub away any remaining fibers. Apply a clear sealer to restore the clarity of the image. Thorough paper removal ensures a clear finish.
8. Advanced Techniques and Tips for Decoupage
For those looking to take their decoupage skills to the next level, here are some advanced techniques and tips:
- Layering: Layer different photos, paper, and embellishments to create complex designs.
- Antiquing: Use antiquing mediums to give your decoupage a vintage look.
- Crackle Finish: Apply crackle medium for a distressed, aged effect.
- Adding Texture: Incorporate textured elements like fabric, lace, or pressed flowers.
- Using Stencils: Add patterns and designs with stencils and paint.
8.1. How to Layer Photos for a Collage Effect
To layer photos for a collage effect, start by applying a base layer of Mod Podge and adhering your first photo. Add additional photos, overlapping them as desired, and smooth out any air bubbles. Seal with multiple coats of Mod Podge to blend the layers seamlessly. Layering creates dynamic and visually appealing collages.
8.2. Creating an Antique Look with Decoupage
To create an antique look, apply an antiquing medium or stain after the Mod Podge has dried. Use a soft cloth to wipe away excess medium, leaving it in the crevices to highlight the details. Seal with a final coat of Mod Podge to protect the finish. Antiquing adds character and a vintage feel.
8.3. Adding Texture to Your Decoupage Projects
Add texture to your decoupage projects by incorporating elements like fabric, lace, pressed flowers, or textured paper. Adhere these elements with Mod Podge and seal with multiple coats to create a durable, tactile finish. Textured elements enhance the visual and tactile appeal.
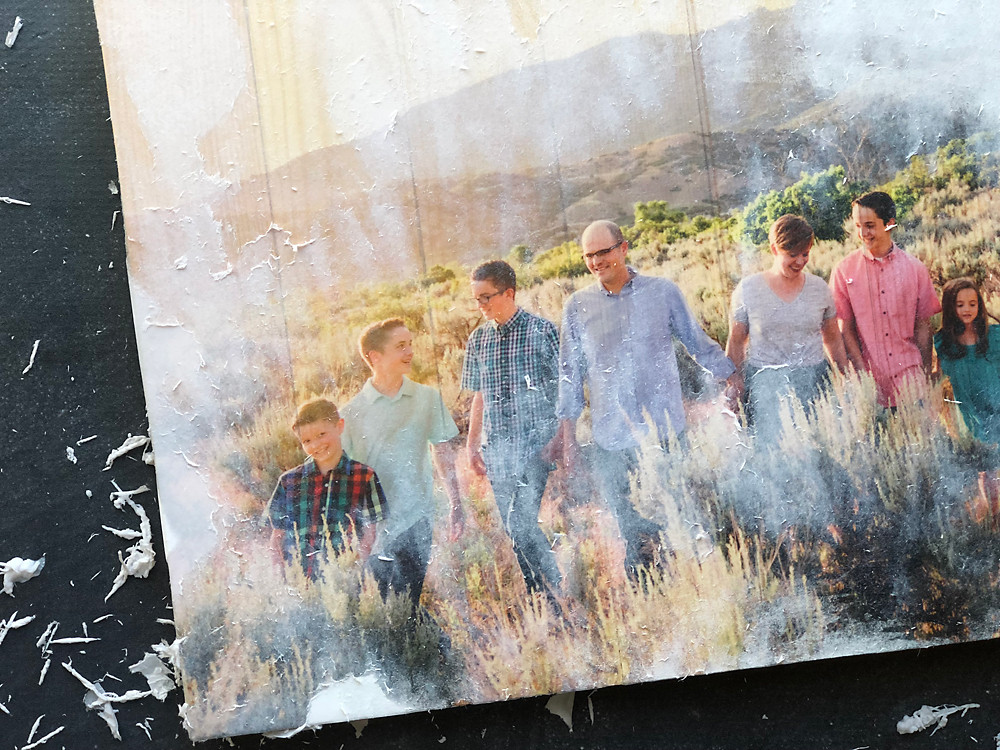 Family photo showing through after paper has been partially removed
9. Where to Find Inspiration for Your Next Decoupage Project
Finding inspiration is key to starting any new creative project. Here are some great resources for decoupage inspiration:
- Pinterest: Explore countless decoupage projects and ideas on Pinterest.
- Instagram: Follow decoupage artists and crafters on Instagram for daily inspiration.
- Craft Blogs: Read craft blogs and websites for tutorials, tips, and project ideas.
- Craft Books: Browse craft books for detailed instructions and creative inspiration.
- Local Craft Stores: Visit local craft stores to see examples and get ideas from displays.
9.1. Top Decoupage Artists to Follow
Some top decoupage artists to follow include:
- John Derian: Known for his beautiful decoupage trays and decorative objects.
- Mod Podge Rocks: A blog dedicated to all things Mod Podge, with tons of project ideas.
- Cath Kidston: Famous for her vintage-inspired decoupage designs.
9.2. Best Craft Blogs for Decoupage Ideas
Some of the best craft blogs for decoupage ideas include:
- Mod Podge Rocks
- Pillar Box Blue
- The Graphics Fairy
These blogs offer a wealth of tutorials, tips, and inspiration for your decoupage projects.
10. Photo Decoupage Tips and Tricks for Stunning Results
Mastering photo decoupage involves more than just following the basic steps. Here are some expert tips and tricks to elevate your projects:
- Use High-Quality Photos: Start with high-resolution images for the best results.
- Pre-Plan Your Design: Sketch out your design beforehand to ensure a cohesive look.
- Work in a Well-Ventilated Area: Mod Podge can have a strong odor, so work in a well-ventilated space.
- Protect Your Work Surface: Cover your work surface with newspaper or a plastic tablecloth.
- Clean Your Brushes Immediately: Clean your brushes with soap and water immediately after use to prevent the Mod Podge from drying and hardening.
10.1. How to Choose the Right Photos
Choose photos that are clear, high-resolution, and meaningful to you. Consider the color scheme and overall aesthetic of your project when selecting images. The right photos enhance the personal touch of your decoupage.
10.2. Getting a Smooth Finish
Achieve a smooth finish by using a thin, even layer of Mod Podge, smoothing out air bubbles carefully, and applying multiple thin coats of sealer. Patience and attention to detail result in a flawless finish.
10.3. How to Preserve Your Decoupage Art
Preserve your decoupage art by sealing it with multiple coats of Mod Podge or a clear acrylic sealer. Keep it out of direct sunlight and avoid exposing it to moisture. Proper sealing and care ensure long-lasting beauty.
Ready to transform your favorite photos into stunning wood art? Visit dfphoto.net for more inspiration, tutorials, and tips to elevate your decoupage skills. Explore our extensive collection of beautiful images and connect with a vibrant community of photography enthusiasts. Don’t miss out – discover the art of photo decoupage with dfphoto.net today and start creating personalized masterpieces! Contact us at Address: 1600 St Michael’s Dr, Santa Fe, NM 87505, United States, Phone: +1 (505) 471-6001.
FAQ: Decoupage Photos Onto Wood
1. Can I use regular photos for decoupage?
No, it’s best to use laser-printed photos on regular paper for decoupage. Regular photos and inkjet prints don’t adhere well and can smudge.
2. Do I need to reverse the photo before decoupaging?
Yes, reversing the photo ensures it appears correctly after being transferred onto the wood. Use photo editing software to flip the image horizontally.
3. How long does Mod Podge take to dry?
Mod Podge typically takes 15-20 minutes to dry to the touch, but it’s recommended to let it cure for 72 hours for best results.
4. Can I decoupage on any type of wood?
It’s best to decoupage on smooth, solid woods like pine or birch. Sand the wood before starting to ensure a smooth surface.
5. What if I get air bubbles in my decoupage?
Smooth out air bubbles with a credit card or brayer while the Mod Podge is still wet. If bubbles appear after drying, prick them with a needle and smooth the area.
6. How do I clean my decoupage project?
Clean your decoupage project with a damp cloth. Avoid using harsh chemicals or abrasive cleaners.
7. Can I use a hairdryer to speed up the drying process?
While you can use a hairdryer on a low setting, it’s generally better to let Mod Podge dry naturally to avoid cracking or bubbling.
8. What is the difference between matte and gloss Mod Podge?
Matte Mod Podge has a non-shiny finish, while gloss Mod Podge has a shiny finish. Choose the finish that best suits your project.
9. How do I prevent the edges of my photo from peeling?
Apply additional Mod Podge to the edges and smooth them down. Ensure the edges are fully adhered to the wood.
10. Can I decoupage fabric onto wood?
Yes, you can decoupage fabric onto wood using Mod Podge. Apply a thin layer of Mod Podge to the wood, adhere the fabric, and seal with additional coats of Mod Podge.