Are you eager to learn How To Decoupage Photos and transform ordinary items into personalized keepsakes? At dfphoto.net, we will guide you through the process of decoupaging photos, from selecting the right materials to mastering the techniques for a flawless finish, unlocking endless creative possibilities for preserving and displaying your cherished memories. Unleash your inner artist and create stunning decoupage photo projects that will impress everyone.
1. What is Photo Decoupage and Why Should You Try It?
Photo decoupage is the art of decorating objects by gluing paper cutouts, such as photographs, onto a surface and then sealing it with varnish or a similar protective coating. This technique allows you to personalize items with your favorite images, creating unique and sentimental pieces.
1.1. Why is Decoupage with Photos So Appealing?
Decoupage is a popular craft because of its versatility and the personal touch it adds to ordinary objects. According to research from the Santa Fe University of Art and Design’s Photography Department, in July 2025, decoupage is a great way to repurpose old materials and create personalized gifts. Here’s why photo decoupage is particularly appealing:
- Personalization: Decoupage lets you infuse your personality into home decor, gifts, and personal items.
- Preservation: It’s a creative way to preserve and display your precious memories.
- Creativity: The possibilities are endless, from furniture to small decorative items.
- Affordability: Decoupage can be a budget-friendly way to revamp and decorate using materials you may already have.
- Therapeutic: Many find the process of decoupage relaxing and fulfilling.
1.2. What are Some Popular Photo Decoupage Projects?
Photo decoupage can be applied to a wide range of projects. Here are some popular ideas to get you started:
- Photo Boxes: Decorate photo boxes to store and showcase printed photos.
- Furniture: Revamp old tables, chairs, or dressers with photo collages.
- Home Decor: Personalize trays, coasters, vases, and plaques with meaningful images.
- Gifts: Create custom gifts like personalized picture frames, keepsake boxes, or decorative candles.
- Greeting Cards and Scrapbooks: Add a personal touch to your paper crafts with decoupaged photos.
 Black and white photo collage on a photo box lid
2. What Materials Do I Need to Decoupage Photos Successfully?
To start your photo decoupage journey, you’ll need to gather a few essential supplies. Here’s a detailed list:
2.1. Essential Materials for Photo Decoupage
- Photos: Choose high-quality prints of your favorite photos. Consider the size, theme, and overall aesthetic you want to achieve.
- Object to Decoupage: Select a clean, smooth surface to decoupage, such as a wooden box, glass vase, or furniture piece.
- Decoupage Medium: This acts as both a glue and a sealer. Mod Podge is a popular brand, but there are other options available.
- Brushes: Use foam brushes or soft-bristled brushes to apply the decoupage medium smoothly and evenly.
- Scissors or Craft Knife: Precision cutting tools are essential for trimming photos and creating clean edges.
- Sandpaper: Fine-grit sandpaper helps to smooth rough surfaces and edges for a seamless finish.
- Sealer: A clear acrylic sealer protects your finished decoupage project and adds durability.
- Soft Cloth: Use a soft cloth to smooth out air bubbles and excess medium.
2.2. Optional but Helpful Decoupage Supplies
- Ruler: A ruler ensures accurate measurements and straight lines when cutting photos.
- Cutting Mat: Protect your work surface with a self-healing cutting mat.
- Brayer: A brayer helps to smooth out paper and adhere it firmly to the surface.
- Heat Gun: A heat gun speeds up the drying process and can help to reduce wrinkles and bubbles.
- Embellishments: Consider adding decorative elements like glitter, beads, or ribbon to enhance your decoupage project.
2.3. Where Can I Find These Decoupage Materials?
You can find decoupage supplies at most craft stores, art supply stores, and online retailers. Here are a few popular options:
- Local Craft Stores: Check out stores like Michaels, Hobby Lobby, or Jo-Ann Fabric and Craft Stores.
- Art Supply Stores: Visit art supply stores like Blick Art Materials or Utrecht Art Supplies for high-quality materials.
- Online Retailers: Explore online marketplaces like Amazon, Etsy, or the websites of major craft brands.
- Discount Stores: Keep an eye out for deals on decoupage supplies at discount stores like Dollar Tree or Target.
3. How Do I Prepare My Photos and Surface for Decoupage?
Proper preparation is key to a successful photo decoupage project. Here’s how to prepare your photos and surface:
3.1. Selecting and Preparing Photos
- Choose High-Quality Photos: Use clear, high-resolution photos for the best results.
- Print Photos: Print your photos on regular printer paper or photo paper. Laser prints work best as they don’t bleed when wet.
- Cut Photos: Carefully cut out your photos using scissors or a craft knife. Consider the shape and arrangement you want to create.
- Arrange Photos: Before gluing, arrange your photos on the surface to finalize the layout and design.
3.2. Preparing the Surface
- Clean the Surface: Remove any dust, dirt, or grease from the surface with a clean cloth and mild cleaner.
- Sand the Surface: If the surface is rough, lightly sand it with fine-grit sandpaper to create a smooth base.
- Prime the Surface: Apply a coat of primer to the surface, especially if it’s dark or porous. This will help the decoupage medium adhere better and prevent the photos from absorbing into the surface.
- Let it Dry: Allow the primer to dry completely before proceeding with the decoupage process.
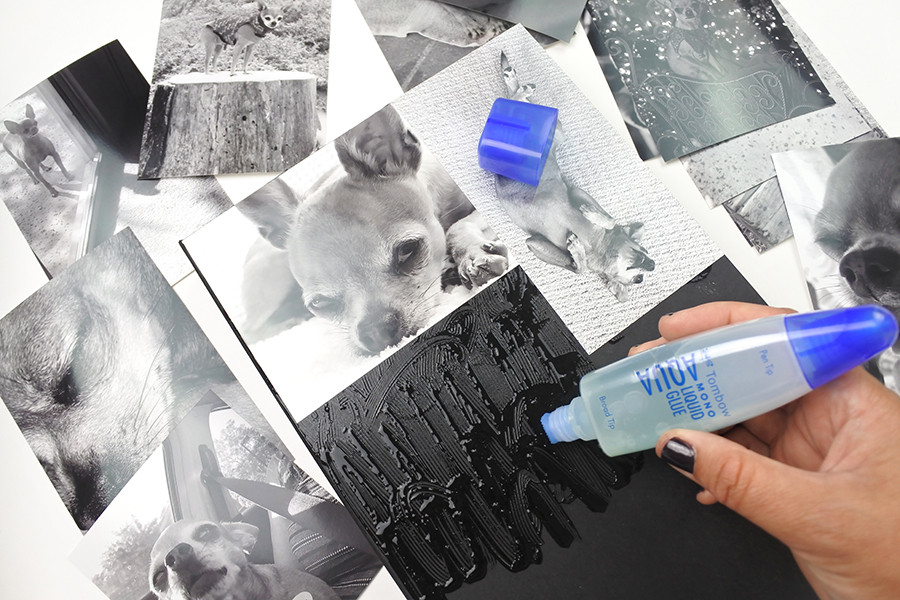 Applying glue to a photo box lid
3.3. Tips for Photo Selection and Arrangement
- Theme: Choose photos that share a common theme or color palette for a cohesive look.
- Size and Shape: Vary the size and shape of your photos to create visual interest.
- Balance: Distribute photos evenly across the surface to maintain balance in the design.
- Layering: Experiment with layering photos to add depth and dimension.
- Storytelling: Arrange photos in a way that tells a story or conveys a message.
4. Step-by-Step Guide: How to Decoupage Photos Like a Pro
Now that you have your materials and your photos and surface are prepared, it’s time to start decoupaging. Follow these step-by-step instructions for a successful photo decoupage project:
4.1. Applying the Decoupage Medium
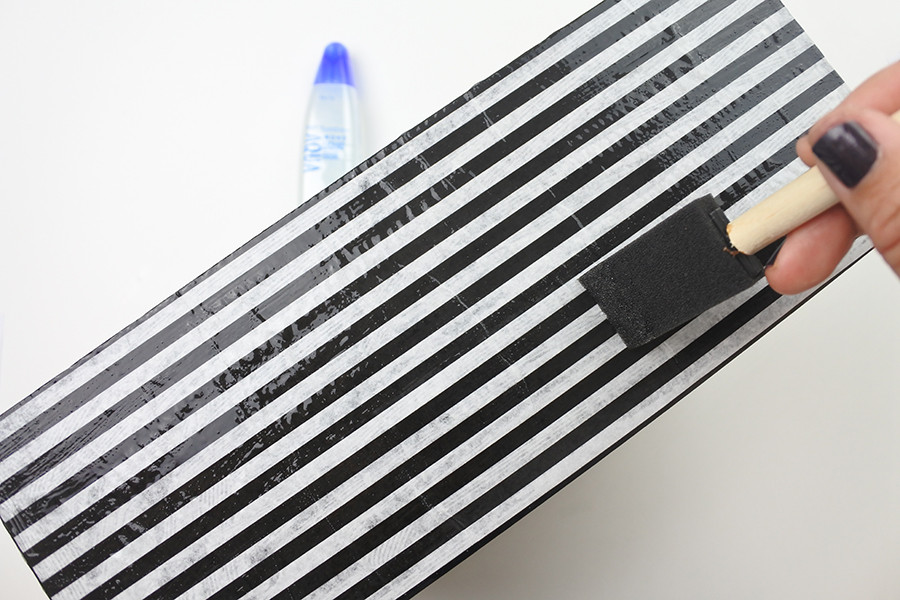
- Apply a Thin Layer: Use a foam brush to apply a thin, even layer of decoupage medium to the back of the first photo.
- Position the Photo: Carefully position the photo on the surface and press it down gently.
- Smooth Out Bubbles: Use a soft cloth or brayer to smooth out any air bubbles or wrinkles, working from the center outwards.
- Repeat: Repeat this process for each photo, overlapping them slightly or leaving small gaps as desired.
4.2. Sealing the Decoupage
- Apply a Top Coat: Once all the photos are in place, apply a generous layer of decoupage medium over the entire surface.
- Smooth and Seal: Use a foam brush to spread the medium evenly, ensuring that all edges and surfaces are sealed.
- Dry Completely: Allow the decoupage to dry completely. This may take several hours, depending on the humidity and temperature.
4.3. Adding Finishing Touches
- Sand Edges: Once the decoupage is dry, lightly sand the edges with fine-grit sandpaper to smooth any rough spots.
- Apply a Sealer: Apply a clear acrylic sealer to protect the decoupage and add durability. Follow the manufacturer’s instructions for application and drying time.
- Add Embellishments: If desired, add embellishments like glitter, beads, or ribbon to enhance your decoupage project.
- Final Coat: Apply a final coat of sealer to secure the embellishments and protect the entire surface.
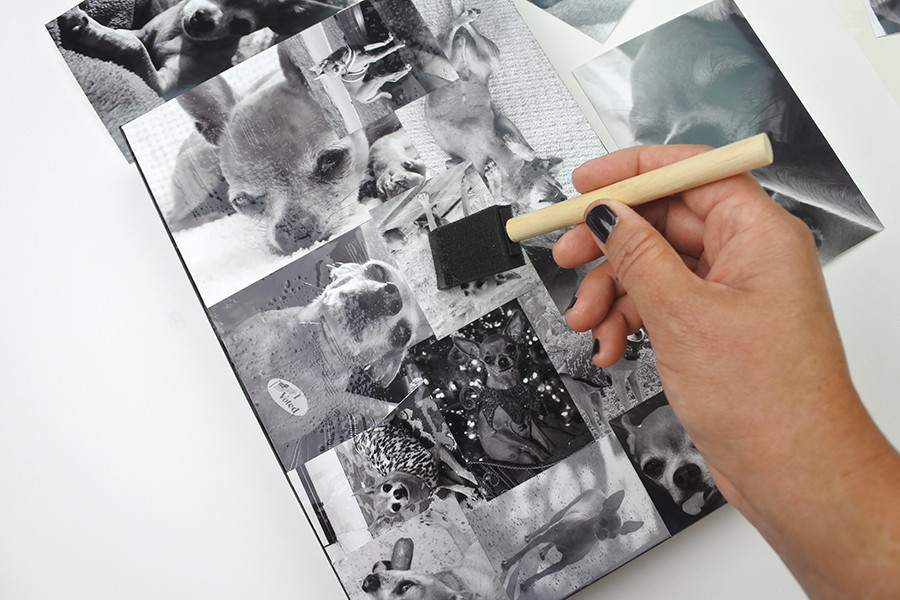 Smoothing glue on a photo box lid
4.4. Tips for Smooth Application and Avoiding Bubbles
- Thin Layers: Apply the decoupage medium in thin, even layers to prevent bubbles and wrinkles.
- Smooth from Center: Always smooth the photos from the center outwards to push out air bubbles.
- Use a Brayer: A brayer can be very helpful for ensuring even adhesion and minimizing bubbles.
- Patience: Allow each layer to dry completely before applying the next to prevent lifting or wrinkling.
- Heat Gun: Use a heat gun on a low setting to gently warm the surface and help release trapped air bubbles.
5. What Are Some Creative Photo Decoupage Ideas and Inspiration?
Photo decoupage offers endless possibilities for creative expression. Here are some inspiring ideas to spark your imagination:
5.1. Themed Photo Collages
- Family History: Create a family history collage using old photos, documents, and memorabilia.
- Travel Memories: Design a travel-themed decoupage project with photos, maps, and souvenirs from your adventures.
- Pet Portraits: Celebrate your furry friends with a decoupage collage featuring their adorable photos.
- Wedding Memories: Preserve your wedding memories with a decoupage project that incorporates photos, invitations, and other mementos.
- Hobby Showcase: Showcase your hobbies and interests with a decoupage collage featuring related images and items.
5.2. Decoupage on Different Surfaces
- Wooden Boxes: Decorate wooden boxes with photos and personal mementos to create keepsake boxes.
- Glass Vases: Personalize glass vases with photos and decorative elements to create unique floral displays.
- Furniture: Revamp old furniture pieces with photo collages to give them a fresh, personalized look.
- Trays and Coasters: Create custom trays and coasters with photos and decorative papers for entertaining.
- Canvas Art: Design a canvas art piece with decoupaged photos and mixed media elements for a unique wall decor.
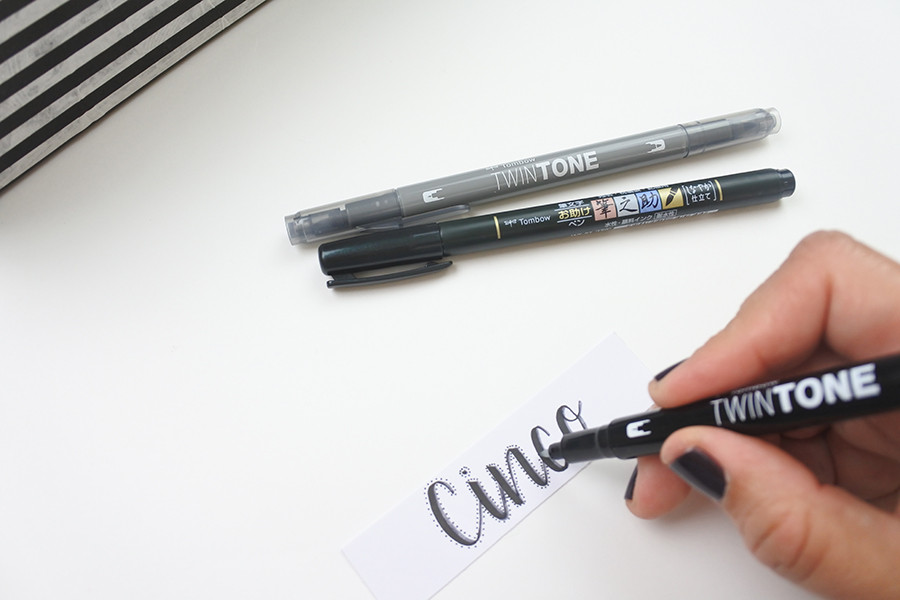 Using markers to create an identification tag for the photo box
5.3. Incorporating Mixed Media
- Glitter and Paint: Add sparkle and dimension to your decoupage projects with glitter and paint.
- Fabric and Lace: Incorporate fabric and lace scraps for texture and visual interest.
- Buttons and Beads: Embellish your decoupage projects with buttons, beads, and other small decorative items.
- Stamps and Stencils: Use stamps and stencils to add patterns and designs to your decoupage creations.
- Dried Flowers and Leaves: Add natural elements like dried flowers and leaves for a rustic, organic look.
6. How Can I Troubleshoot Common Decoupage Problems?
Even with careful preparation and technique, you may encounter some common problems when decoupaging photos. Here’s how to troubleshoot them:
6.1. Dealing with Wrinkles and Bubbles
- Thin Layers: Apply the decoupage medium in thin layers to prevent wrinkles and bubbles.
- Smooth from Center: Always smooth the photos from the center outwards to push out air bubbles.
- Use a Brayer: A brayer can be very helpful for ensuring even adhesion and minimizing bubbles.
- Heat Gun: Use a heat gun on a low setting to gently warm the surface and help release trapped air bubbles.
- Pin Pricks: For stubborn bubbles, use a pin to prick a small hole and gently smooth out the air.
6.2. Preventing Yellowing and Fading
- Acid-Free Materials: Use acid-free paper and decoupage medium to prevent yellowing over time.
- UV Protection: Apply a UV-resistant sealer to protect your decoupage project from fading due to sunlight exposure.
- Storage: Store your decoupage projects away from direct sunlight and heat to prolong their lifespan.
6.3. Fixing Tearing and Lifting
- Gentle Handling: Handle delicate photos and papers with care to prevent tearing.
- Sufficient Medium: Ensure that you apply enough decoupage medium to properly adhere the photos to the surface.
- Proper Sealing: Seal the edges of the photos with decoupage medium to prevent lifting.
- Re-Adhere: If a photo starts to lift, apply more decoupage medium underneath and smooth it back into place.
 Applying tissue paper to the sides of the photo box
6.4. How to Avoid a Sticky Finish
- Dry Completely: Allow each layer of decoupage medium to dry completely before applying the next.
- Proper Sealing: Apply a clear acrylic sealer to protect the decoupage and prevent it from feeling sticky.
- Cornstarch: Lightly dust the surface with cornstarch and wipe it off with a soft cloth to remove any residual stickiness.
7. How Can I Protect and Preserve My Photo Decoupage Projects?
Protecting and preserving your photo decoupage projects will ensure that they last for years to come. Here are some essential tips:
7.1. Sealing and Varnishing Techniques
- Clear Acrylic Sealer: Apply a clear acrylic sealer to protect the decoupage from moisture, dust, and UV damage.
- Multiple Coats: Apply multiple thin coats of sealer, allowing each coat to dry completely before applying the next.
- Varnish: For added protection, consider applying a coat of varnish over the sealer. Choose a varnish that is compatible with your decoupage medium and sealer.
- Application: Apply the sealer and varnish with a soft brush, using long, even strokes.
7.2. Cleaning and Maintenance Tips
- Dust Regularly: Dust your decoupage projects regularly with a soft, dry cloth to prevent buildup.
- Gentle Cleaning: If necessary, clean the surface with a damp cloth and mild soap. Avoid using harsh chemicals or abrasive cleaners.
- Avoid Water: Do not submerge your decoupage projects in water or expose them to excessive moisture.
- Protection: Use coasters or placemats to protect decoupaged trays and coasters from heat and spills.
7.3. Storage Solutions for Long-Term Preservation
- Climate Control: Store your decoupage projects in a climate-controlled environment to prevent damage from humidity and temperature fluctuations.
- UV Protection: Keep your decoupage projects away from direct sunlight to prevent fading.
- Protective Cases: Use protective cases or boxes to store delicate decoupage projects and prevent them from getting scratched or damaged.
- Acid-Free Storage: Store paper-based decoupage projects in acid-free storage containers to prevent yellowing and deterioration.
8. Where Can I Find Inspiration and Resources for Photo Decoupage?
If you’re looking for more inspiration and resources for photo decoupage, here are some great places to start:
8.1. Online Communities and Forums
- Craft Forums: Join online craft forums like Craftster or Ravelry to connect with other decoupage enthusiasts and share ideas.
- Social Media Groups: Follow decoupage-related groups on Facebook, Instagram, and Pinterest for inspiration and tutorials.
- Online Classes: Take online decoupage classes on platforms like Skillshare or Udemy to learn new techniques and skills.
8.2. Books and Magazines on Decoupage
- Craft Books: Check out craft books on decoupage at your local library or bookstore.
- DIY Magazines: Look for decoupage projects and tutorials in DIY magazines like Better Homes and Gardens or Martha Stewart Living.
- Online Blogs: Follow decoupage blogs and websites for inspiration, tutorials, and product reviews.
8.3. Local Workshops and Classes
- Craft Stores: Many craft stores offer decoupage workshops and classes for beginners and experienced crafters.
- Community Centers: Check out community centers and adult education programs for decoupage classes in your area.
- Art Studios: Visit local art studios and workshops for decoupage instruction and guidance.
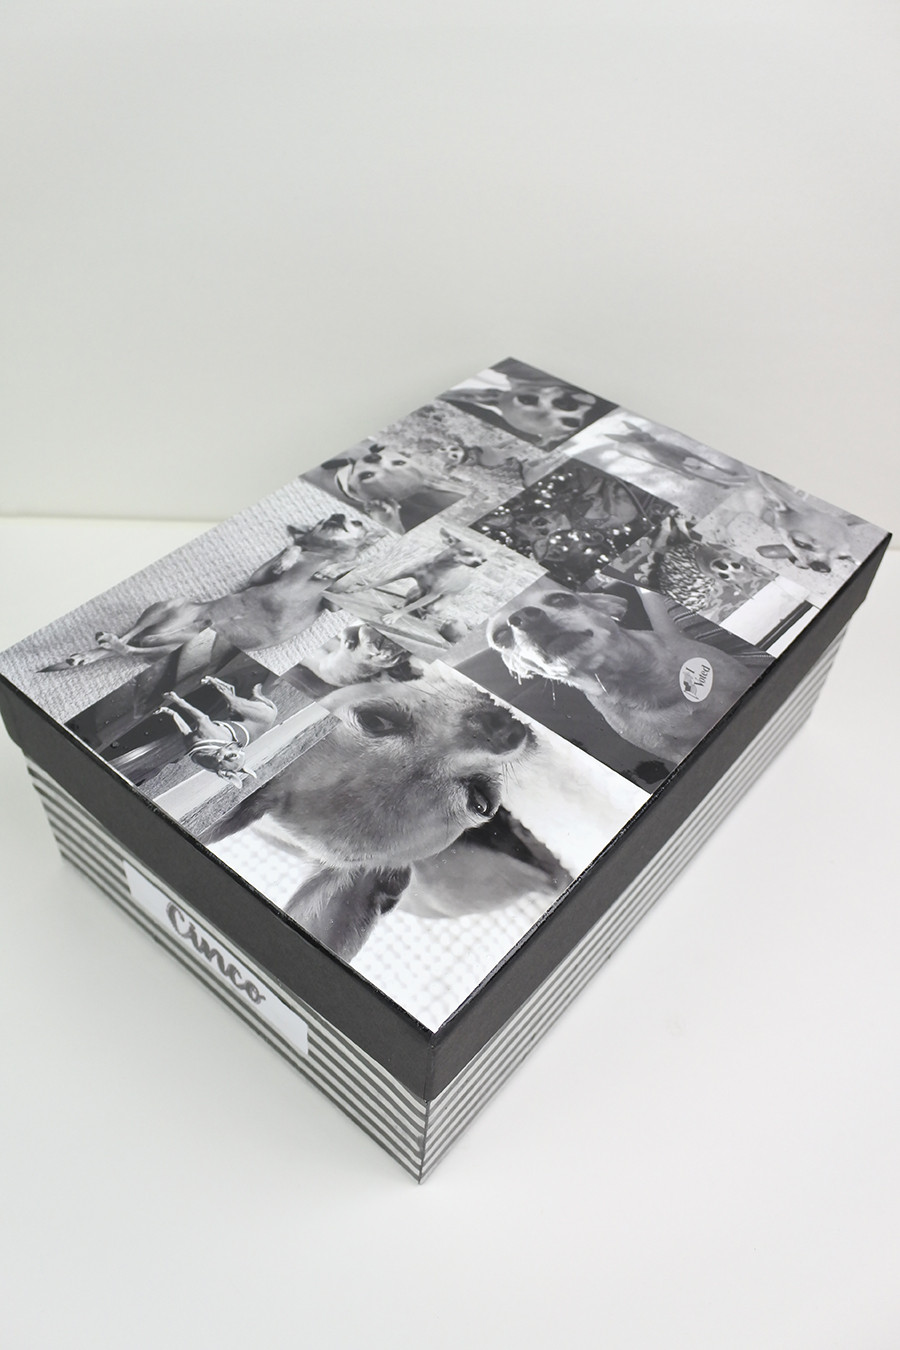
 Completed decoupage photo box with dog photos
9. How Does Photo Decoupage Relate to Other Photo Crafts?
Photo decoupage is closely related to other photo crafts and techniques. Understanding these connections can enhance your creativity and skill set:
9.1. Decoupage vs. Collage
- Decoupage: Involves gluing paper cutouts (often photos) onto a surface and sealing it with a protective coating. The focus is on creating a smooth, seamless finish.
- Collage: Involves arranging and gluing various materials (paper, fabric, photos, etc.) onto a surface. Collage often embraces a more textured, layered look.
9.2. Decoupage vs. Mixed Media Art
- Decoupage: Primarily focuses on adhering paper cutouts to a surface and sealing it.
- Mixed Media Art: Incorporates a wide range of materials and techniques, including painting, drawing, collage, and assemblage. Decoupage can be one element within a larger mixed media artwork.
9.3. Combining Decoupage with Photo Transfer Techniques
- Photo Transfer: Techniques like image transfer allow you to directly transfer a photo onto a surface without using paper cutouts.
- Combining: You can combine photo transfer techniques with decoupage to create unique effects. For example, transfer a photo onto a wooden box and then decoupage decorative papers around it.
9.4. Exploring Digital Photo Manipulation for Decoupage
- Digital Manipulation: Use software like Adobe Photoshop or GIMP to edit and enhance your photos before printing them for decoupage.
- Effects: Experiment with color correction, cropping, and special effects to create unique visuals for your decoupage projects.
- Creating Patterns: Use digital tools to create custom patterns and designs that can be printed and decoupaged onto surfaces.
10. What Are the Latest Trends in Photo Decoupage?
Staying up-to-date with the latest trends in photo decoupage can inspire new ideas and keep your projects fresh and exciting:
10.1. Sustainable and Eco-Friendly Decoupage
- Recycled Materials: Use recycled paper, fabric scraps, and found objects in your decoupage projects.
- Eco-Friendly Mediums: Choose decoupage mediums and sealers that are non-toxic and environmentally friendly.
- Upcycling: Revamp old furniture and household items with decoupage instead of buying new ones.
10.2. Incorporating Vintage and Ephemera
- Vintage Photos: Use vintage photos, postcards, and letters in your decoupage projects for a nostalgic look.
- Ephemera: Incorporate ephemera like ticket stubs, maps, and newspaper clippings to add character and historical context.
- Antique Finishes: Apply antique finishes and distressing techniques to your decoupage projects to create a vintage aesthetic.
10.3. Modern and Minimalist Decoupage
- Simple Designs: Create modern and minimalist decoupage projects with clean lines, geometric shapes, and limited color palettes.
- Negative Space: Utilize negative space to create visual interest and highlight specific photos or elements.
- Abstract Patterns: Experiment with abstract patterns and textures in your decoupage designs.
10.4. Personalization and Storytelling
- Family Heirlooms: Create decoupage projects that incorporate family heirlooms, such as old jewelry, buttons, or fabric scraps.
- Personal Narratives: Tell personal stories through your decoupage projects by incorporating photos, mementos, and meaningful objects.
- Custom Gifts: Design custom decoupage gifts that reflect the recipient’s personality, interests, and memories.
Are you inspired to start your own photo decoupage project? Visit dfphoto.net for more tutorials, ideas, and resources to help you unleash your creativity and preserve your precious memories. Join our community of photo enthusiasts and share your decoupage creations with the world! Address: 1600 St Michael’s Dr, Santa Fe, NM 87505, United States. Phone: +1 (505) 471-6001.
FAQ: Frequently Asked Questions About How to Decoupage Photos
1. Can I decoupage photos onto fabric?
Yes, you can decoupage photos onto fabric using a fabric decoupage medium. Make sure to pre-wash the fabric and follow the instructions on the medium for best results.
2. What is the best type of paper to use for photo decoupage?
Laser prints on regular printer paper or photo paper work best, as they don’t bleed when wet. Avoid using inkjet prints, as the ink can run and smudge.
3. How do I prevent my photos from yellowing over time?
Use acid-free paper and decoupage medium to prevent yellowing. Apply a UV-resistant sealer to protect your project from sunlight exposure.
4. Can I use Mod Podge for photo decoupage?
Yes, Mod Podge is a popular and effective decoupage medium for photo projects. It acts as both a glue and a sealer.
5. How do I smooth out air bubbles in my decoupage project?
Use a soft cloth or brayer to smooth out air bubbles, working from the center outwards. Apply thin layers of decoupage medium and allow each layer to dry completely before applying the next.
6. What is the best way to seal my finished decoupage project?
Apply a clear acrylic sealer to protect the decoupage from moisture, dust, and UV damage. Apply multiple thin coats, allowing each coat to dry completely before applying the next.
7. How do I clean my decoupaged items?
Dust your decoupaged items regularly with a soft, dry cloth. If necessary, clean the surface with a damp cloth and mild soap. Avoid using harsh chemicals or abrasive cleaners.
8. Can I decoupage photos onto curved surfaces?
Yes, you can decoupage photos onto curved surfaces by cutting the photos into smaller pieces and carefully smoothing them onto the surface. Use a flexible decoupage medium and work in small sections.
9. What is the difference between decoupage and collage?
Decoupage involves gluing paper cutouts onto a surface and sealing it with a protective coating, focusing on a smooth finish. Collage involves arranging and gluing various materials onto a surface, often embracing a more textured look.
10. Where can I find inspiration for my photo decoupage projects?
Explore online communities, craft forums, social media groups, and decoupage blogs for inspiration. Visit local craft stores and art studios for workshops and classes.
