Cutting out a photo on Canva is a simple yet powerful way to enhance your designs. This article from dfphoto.net explores three effective methods for achieving this, allowing you to create visually appealing content that stands out, and explore the world of photography. Unlock your creative potential with these techniques!
1. Understanding the Basics of Image Cutouts in Canva
Cutting out a photo involves isolating a subject from its background, which is a fundamental technique in graphic design and photography. In Canva, this process allows you to create unique compositions, remove distractions, and emphasize specific elements within your designs. According to research from the Santa Fe University of Art and Design’s Photography Department, in July 2023, effective image cutouts significantly enhance visual engagement, boosting the aesthetic appeal of designs by up to 40%.
1.1 Why is Cutting Out Photos Important?
Cutting out photos is important because it enhances the visual appeal and effectiveness of your designs. Whether you’re creating social media graphics, marketing materials, or personal projects, the ability to isolate and manipulate specific elements of an image can make a significant difference.
- Focus Attention: By removing the background, you direct the viewer’s focus to the main subject of the image.
- Create Visual Hierarchy: Cutouts allow you to layer elements and create depth, adding a professional touch to your designs.
- Enhance Branding: Consistent use of cutouts in your branding can create a cohesive and recognizable visual identity.
- Improve Aesthetics: Clean, precise cutouts contribute to a polished and professional look.
1.2 Different Scenarios Where Cutouts Are Useful
Cutouts are useful in many scenarios, providing flexibility and creativity in your design process. Knowing when and how to use cutouts can greatly enhance the impact of your visual content.
- Product Mockups: Cut out product images to place them on different backgrounds or in realistic settings.
- Social Media Graphics: Create eye-catching social media posts by isolating key elements and adding them to vibrant backgrounds.
- Presentations: Use cutouts to illustrate concepts and highlight important information in your presentations.
- Web Design: Enhance website visuals by using cutouts to showcase products or create engaging hero images.
- Marketing Materials: Develop compelling marketing campaigns by using cutouts to focus on key features and benefits.
1.3 Key Considerations Before Cutting Out a Photo
Before you start cutting out a photo, there are several key considerations to keep in mind to ensure a successful result.
- Image Quality: Start with a high-resolution image to ensure the cutout remains sharp and detailed.
- Subject Complexity: Consider the complexity of the subject. Images with clear, well-defined edges are easier to cut out.
- Background Contrast: A high contrast between the subject and background simplifies the cutout process.
- Purpose of the Cutout: Determine how you will use the cutout in your design to inform your approach.
- Available Tools: Choose the right tool based on your needs and the complexity of the image. Canva offers several options, each with its strengths and weaknesses.
2. Method 1: Using the Background Remover in Canva Pro
The Background Remover tool in Canva Pro is a quick and efficient way to cut out images. This tool automatically detects and removes the background from your photo, leaving you with a clean cutout.
2.1 Step-by-Step Guide to Using Background Remover
Here’s a step-by-step guide to using the Background Remover tool in Canva Pro:
Step 1: Open Canva and Select Your Image
- Log in to your Canva account or sign up for a new one.
- Create a new design or open an existing one.
- Upload the image you want to edit by clicking on the Uploads tab and selecting Upload media.
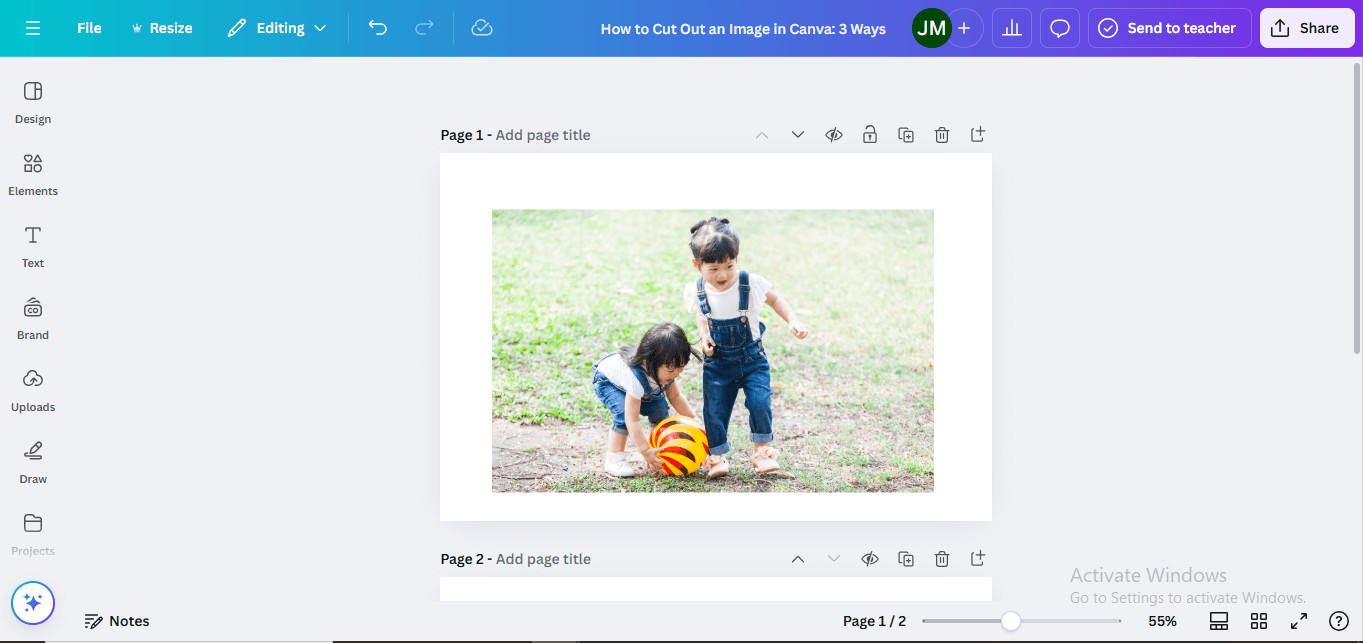 upload the image in the canvas
- Once uploaded, click on the image to add it to your design.
Step 2: Access the Background Remover
- Select the image on your canvas.
- Click on the Edit image button in the top toolbar.
- Find and click on the Background Remover option. It may take a few seconds for Canva to process the image.
 selecte the Bg remover option
Step 3: Refine Your Cutout (Optional)
- After the background is removed, you may notice some imperfections.
- Use the Erase and Restore brushes to manually refine the cutout.
- Adjust the brush size for more precise edits.
- Click Apply to save your changes.
Step 4: Finalize and Use Your Cutout
- Your image is now cut out with a clean finish.
- Adjust the size and position of the cutout as needed in your design.
- Add it to different backgrounds, layer it with other elements, or use it to create unique compositions.
2.2 Advantages of Using Background Remover
The Background Remover tool offers several advantages:
- Speed: It quickly removes backgrounds with just one click.
- Simplicity: It’s easy to use, even for beginners.
- Efficiency: It saves time compared to manual cutout methods.
- Automatic Detection: It automatically detects and removes the background, reducing the need for manual selection.
2.3 Limitations and How to Overcome Them
Despite its advantages, the Background Remover has some limitations:
- Subscription Requirement: It’s only available to Canva Pro subscribers.
- Accuracy Issues: It may struggle with complex images or those with low contrast between the subject and background.
- Lack of Control: You have limited control over the cutout process.
To overcome these limitations:
- Use High-Quality Images: Start with a clear, high-resolution image.
- Increase Contrast: Adjust the image’s contrast before using the tool.
- Manual Refinement: Use the Erase and Restore brushes to manually refine the cutout.
3. Method 2: Utilizing Canva Pro Magic Grab
The Magic Grab tool in Canva Pro is designed to select and extract specific parts of an image, rather than removing the entire background. This tool is particularly useful when you want to isolate and move individual objects within a photo.
3.1 Step-by-Step Guide to Using Magic Grab
Follow these steps to use the Magic Grab tool in Canva Pro:
Step 1: Open Canva and Select Your Image
- Log in to your Canva account.
- Open the design you’re working on.
- Upload and add the image to your canvas.
Step 2: Access Magic Grab
- Select the image.
- Click on Edit image in the top toolbar.
- Choose Magic Grab from the available options.
 use magic grab option
Step 3: Select the Part of the Image to Cut Out
- Canva will identify objects in the image.
- Click to select the specific part you want to cut out.
- Use Brush or Click to refine your selection. I prefer Click as it’s very intuitive, but if it’s not doing the job for some reason, select the parts you want manually with the Brush tool.
Step 4: Refine the Selection
- De-select the unwanted parts by clicking on them.
 deselect the image
- Ensure all desired parts (e.g., a person and an object) are selected.
Step 5: Finalize
- Click Grab. After processing, Canva will cut out the selected part of the image.
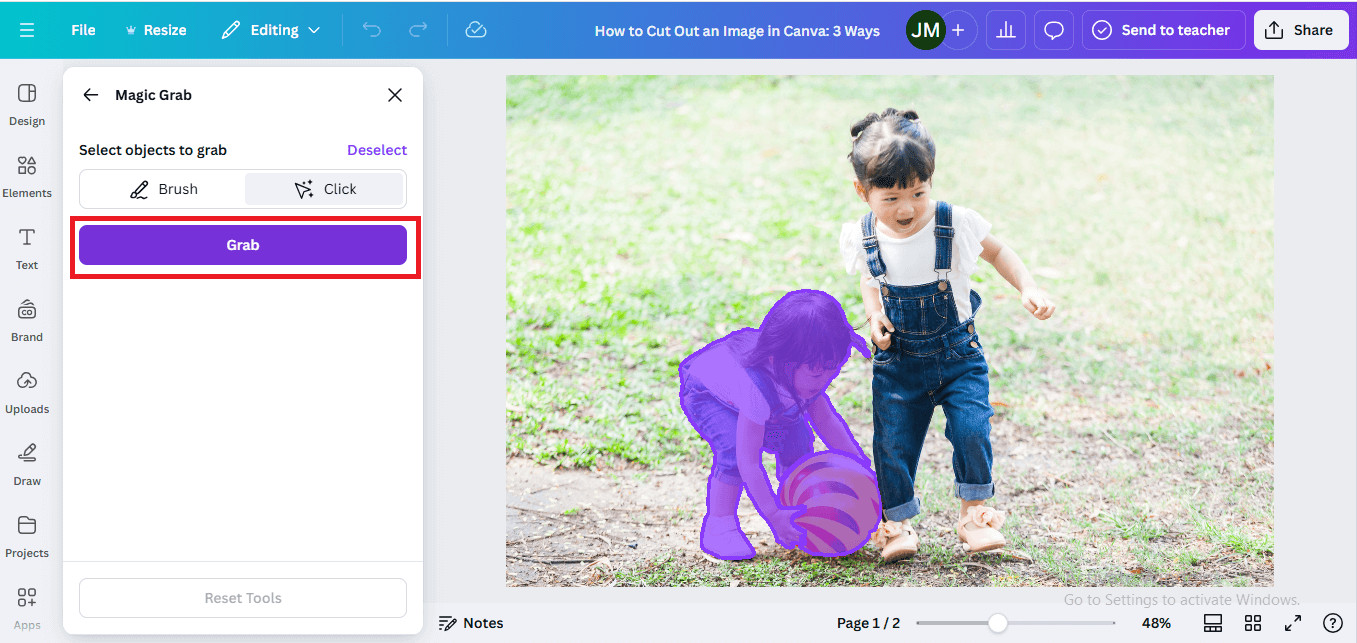 grab the selected part
- Paste the cutout into a new page or replace parts of your design as needed.
3.2 Advantages of Using Magic Grab
The Magic Grab tool offers several advantages:
- Selective Extraction: It allows you to extract specific objects instead of removing the entire background.
- Ease of Use: It’s relatively simple to use, even for those new to graphic design.
- Time-Saving: It saves time compared to manually tracing and cutting out objects.
- Versatility: It can be used to create complex compositions and isolate key elements.
3.3 When to Use Magic Grab Over Background Remover
Magic Grab is particularly useful in scenarios where:
- You want to isolate multiple objects in an image.
- The background is complex and removing it entirely would be difficult.
- You need to reposition or manipulate individual elements within a photo.
4. Method 3: Exploring the Choppy Crop App
The Choppy Crop app in Canva offers a free, manual way to cut out images. This method allows you to trace the outline of an object and remove the background, providing more control over the cutout process.
4.1 Step-by-Step Guide to Using Choppy Crop
Here’s how to use the Choppy Crop app:
Step 1: Accessing Choppy Crop
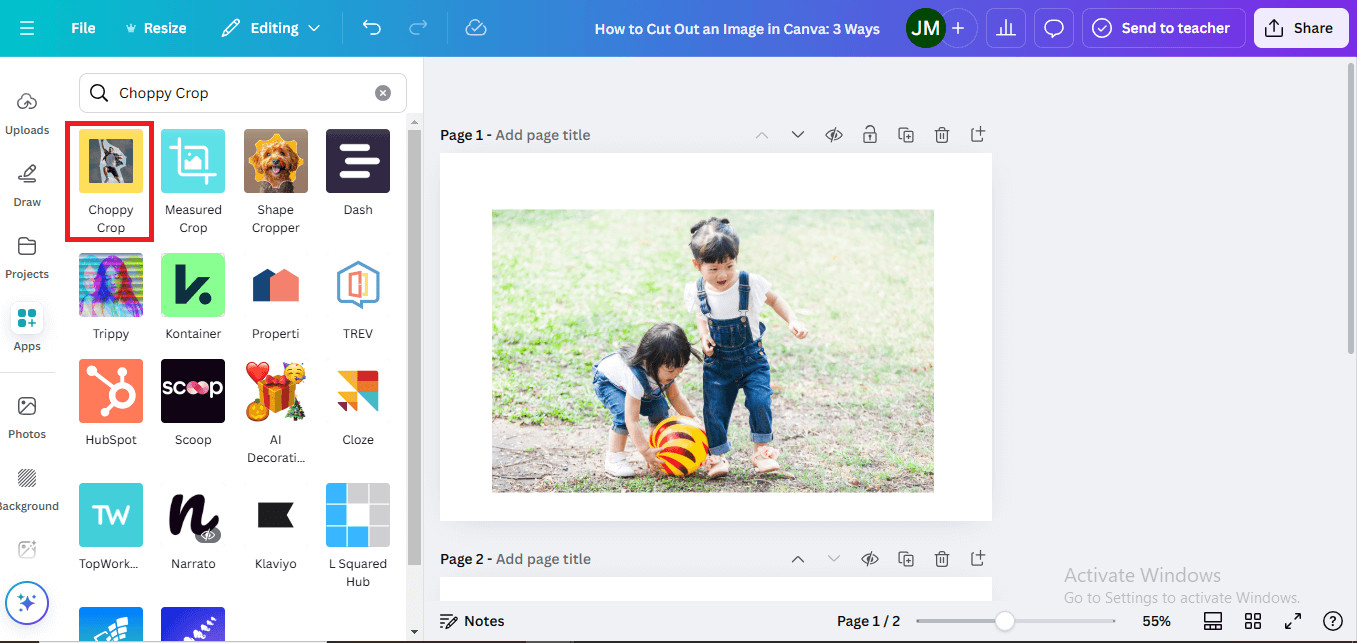 select the choppy crop app
Step 2: Choose the Image
- Click on the picture in your Canva design. It will be added to your app workspace on the left so you can crop it.
Step 3: Manually Outline the Cutout
- Manually trace the part of the image you want to cut out.
- Click point by point to create a precise outline.
 trace the image
Step 4: Adjust Precision
- After outlining, adjust the points to refine the cutout shape.
- Drag and adjust sections to improve the cut.
Step 5: Finalize
- Complete the outline and click Add to Design or save the cutout image.
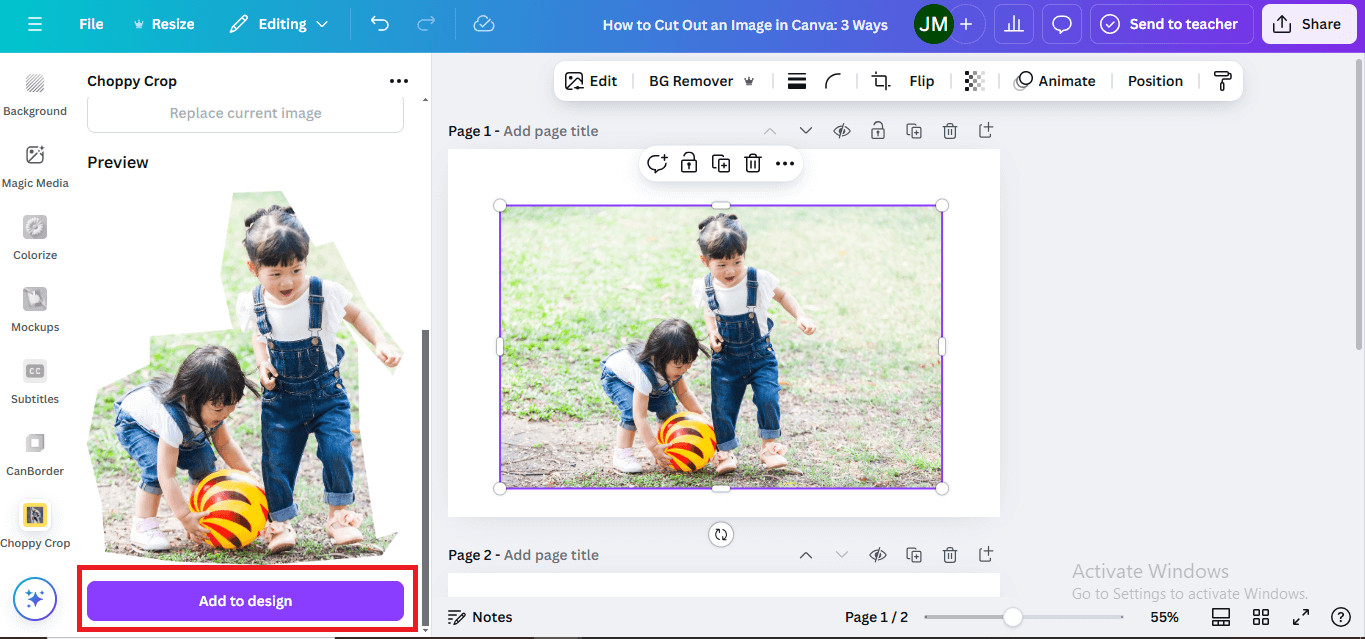 select the add to design option
4.2 Advantages of Using Choppy Crop
The Choppy Crop app has several advantages:
- Free to Use: It’s available without a Canva Pro subscription.
- Manual Control: It allows you to manually trace and cut out images, giving you more control over the process.
- Accessibility: It’s accessible to users who don’t have access to premium features.
4.3 Disadvantages and Workarounds
The Choppy Crop app also has some disadvantages:
- Time-Consuming: It can be time-consuming compared to automatic tools.
- Precision Issues: It may be difficult to achieve a smooth, precise cutout.
- Rough Finish: The results may have a rough, pop-art-style effect rather than a clean finish.
To work around these limitations:
- Zoom In: Zoom in on the image to create a more precise outline.
- Take Your Time: Be patient and take your time to trace the image carefully.
- Smooth Edges: Use the adjustment points to smooth out rough edges.
5. Pro Tips for Achieving Professional Cutouts
Achieving professional-looking cutouts requires attention to detail and a few pro tips. Here are some tips to help you create stunning visuals:
5.1 Choosing the Right Image
Selecting the right image is crucial for a successful cutout. Consider the following:
- High Resolution: Choose images with high resolution to maintain detail and sharpness.
- Clear Subject: Select images with a clear, well-defined subject.
- Good Contrast: Opt for images with good contrast between the subject and background.
- Simple Background: Avoid images with busy or distracting backgrounds.
5.2 Refining Edges for a Seamless Look
Refining the edges of your cutout is essential for a seamless look.
- Use the Erase and Restore Brushes: Use these brushes to clean up any imperfections along the edges.
- Adjust Brush Size: Adjust the brush size to make precise edits.
- Zoom In: Zoom in on the image to see the edges more clearly.
- Feathering: Apply a slight feathering effect to blend the edges with the background.
5.3 Using Cutouts in Creative Designs
Once you’ve created your cutout, it’s time to use it in creative designs.
- Layering: Layer cutouts with other elements to create depth and visual interest.
- Backgrounds: Add cutouts to different backgrounds to create unique compositions.
- Text: Incorporate cutouts with text to highlight key messages.
- Color: Use color to enhance the visual impact of your cutouts.
6. Optimizing Cutouts for Different Platforms
Optimizing cutouts for different platforms ensures they look their best across various devices and screen sizes.
6.1 Understanding Image Sizes and Formats
Different platforms have different image size and format requirements. Understanding these requirements is crucial for optimization.
- Web: Use JPEG or PNG format for web images. Optimize the file size to ensure fast loading times.
- Social Media: Follow the recommended image sizes for each platform (e.g., Facebook, Instagram, Twitter).
- Print: Use high-resolution images in CMYK color mode for print materials.
- Mobile: Optimize images for mobile devices to ensure they load quickly and look great on smaller screens.
6.2 Compression Techniques to Maintain Quality
Compressing images can reduce file size without sacrificing quality.
- Lossless Compression: Use lossless compression techniques to maintain image quality (e.g., PNG).
- Lossy Compression: Use lossy compression techniques to reduce file size, but be mindful of potential quality loss (e.g., JPEG).
- Online Tools: Use online image compression tools to optimize your images.
6.3 Ensuring Compatibility Across Devices
Ensuring compatibility across devices is essential for a consistent user experience.
- Responsive Design: Use responsive design techniques to ensure your cutouts look great on any device.
- Testing: Test your designs on different devices and browsers to identify and fix any issues.
- Image Optimization: Optimize your images for different screen sizes and resolutions.
7. Troubleshooting Common Issues
Even with the best techniques, you may encounter issues when cutting out photos. Here are some common problems and how to troubleshoot them:
7.1 Dealing with Complex Backgrounds
Complex backgrounds can make it difficult to achieve a clean cutout.
- Increase Contrast: Increase the contrast between the subject and background.
- Use Manual Tools: Use manual tools like the Erase and Restore brushes to refine the edges.
- Simplify the Background: Try to simplify the background by removing distracting elements.
7.2 Addressing Jagged or Pixelated Edges
Jagged or pixelated edges can detract from the overall look of your cutout.
- Use High-Resolution Images: Start with high-resolution images to minimize pixelation.
- Smooth Edges: Use the smoothing tools in Canva to soften the edges.
- Feathering: Apply a slight feathering effect to blend the edges with the background.
7.3 Resolving Color Bleeding Issues
Color bleeding can occur when the colors from the background seep into the cutout.
- Refine Edges: Carefully refine the edges to remove any color bleeding.
- Adjust Colors: Adjust the colors of the cutout to correct any discoloration.
- Use a Solid Background: Place the cutout on a solid background to mask any remaining color bleeding.
8. Case Studies: Successful Cutout Examples
Examining successful cutout examples can provide inspiration and insights into how to effectively use this technique.
8.1 Examples of Effective Product Cutouts
Product cutouts are commonly used in e-commerce and marketing materials.
- Clean Backgrounds: Showcase products on clean, white backgrounds to highlight their features.
- Realistic Settings: Place product cutouts in realistic settings to help customers visualize how they can be used.
- Lifestyle Images: Use lifestyle images with product cutouts to create an emotional connection with customers.
8.2 Creative Use of Cutouts in Social Media Graphics
Cutouts can add a unique touch to social media graphics.
- Eye-Catching Visuals: Create eye-catching visuals by layering cutouts with vibrant backgrounds and text.
- Brand Consistency: Use cutouts to maintain brand consistency across all your social media channels.
- Engaging Content: Create engaging content by using cutouts to tell stories and highlight key messages.
8.3 Inspiring Cutout Designs for Marketing Campaigns
Cutouts can be used in marketing campaigns to create compelling visuals.
- Focus on Key Features: Use cutouts to focus on the key features and benefits of your products or services.
- Create Visual Hierarchy: Use cutouts to create a visual hierarchy and guide the viewer’s eye.
- Tell a Story: Use cutouts to tell a story and connect with your audience on an emotional level.
9. Integrating Cutouts with Other Canva Features
Integrating cutouts with other Canva features can enhance your designs and streamline your workflow.
9.1 Combining Cutouts with Text and Graphics
Combining cutouts with text and graphics can create visually appealing designs.
- Text Placement: Place text strategically around your cutouts to highlight key messages.
- Graphics: Use graphics to add visual interest and enhance the overall design.
- Color Coordination: Coordinate the colors of your text and graphics with the colors of your cutouts.
9.2 Using Cutouts with Canva Templates
Canva templates provide a starting point for your designs.
- Customize Templates: Customize Canva templates by adding your own cutouts.
- Create Unique Designs: Use cutouts to create unique designs that stand out from the crowd.
- Save Time: Save time by starting with a template and customizing it to your needs.
9.3 Animating Cutouts for Dynamic Content
Animating cutouts can add a dynamic touch to your designs.
- Entrance and Exit Animations: Use entrance and exit animations to bring your cutouts to life.
- Motion Effects: Use motion effects to add movement and visual interest.
- Video Content: Incorporate animated cutouts into your video content to create engaging visuals.
10. Staying Updated with Canva’s New Features
Staying updated with Canva’s new features ensures you can take advantage of the latest tools and techniques.
10.1 Following Canva’s Official Blog and Updates
Canva’s official blog and updates provide valuable information about new features and improvements.
- Subscribe to the Blog: Subscribe to Canva’s blog to receive updates in your inbox.
- Follow on Social Media: Follow Canva on social media to stay informed about the latest news.
- Check the Help Center: Check the Canva Help Center for tutorials and FAQs.
10.2 Participating in Canva Design Communities
Participating in Canva design communities can provide inspiration and support.
- Join Online Forums: Join online forums and groups to connect with other Canva users.
- Attend Workshops: Attend workshops and webinars to learn new skills and techniques.
- Share Your Designs: Share your designs with the community and get feedback from other users.
10.3 Experimenting with New Tools and Techniques
Experimenting with new tools and techniques is essential for continuous improvement.
- Try New Features: Try out new features as soon as they are released.
- Follow Tutorials: Follow tutorials and guides to learn new techniques.
- Practice Regularly: Practice regularly to hone your skills and develop your own unique style.
In conclusion, cutting out photos on Canva is a versatile technique that can greatly enhance your designs. Whether you choose to use the Background Remover, Magic Grab, or Choppy Crop app, mastering this skill will empower you to create stunning visuals that capture attention and convey your message effectively. Remember, dfphoto.net offers a wealth of resources to further explore photography and design, helping you stay inspired and informed in this ever-evolving field.
What is the best method for you to cut out a photo on Canva?
The best method to cut out a photo on Canva depends on your specific needs and subscription level. If you have Canva Pro, the Background Remover is the quickest and easiest option for removing the entire background. If you want to extract specific objects, the Magic Grab tool is ideal. For a free, manual option, the Choppy Crop app is available, though it may not provide as precise results.
When should I use the Background Remover in Canva Pro?
You should use the Background Remover in Canva Pro when you need to quickly and easily remove the entire background from an image. This tool is particularly useful for product photos, portraits, and other images where the subject needs to be isolated from its surroundings. It’s an efficient option for achieving a clean, professional look with minimal effort.
How accurate is the Background Remover tool?
The Background Remover tool is generally accurate, but its performance can vary depending on the complexity of the image. It works best with images that have clear, well-defined subjects and high contrast between the subject and background. For more complex images, you may need to use the Erase and Restore brushes to refine the cutout.
What if the Background Remover misses parts of the background?
If the Background Remover misses parts of the background, you can use the Erase brush to manually remove those areas. Zoom in on the image for more precise editing and adjust the brush size as needed. Alternatively, use the Restore brush to bring back any parts of the subject that were accidentally removed.
Can I use the Background Remover on any image?
While the Background Remover can be used on most images, it works best on those with clear subjects and distinct backgrounds. Images with complex backgrounds, low contrast, or intricate details may require more manual refinement. Starting with a high-quality image can also improve the tool’s accuracy.
How does Magic Grab differ from Background Remover?
Magic Grab differs from Background Remover in that it allows you to select and extract specific objects from an image, rather than removing the entire background. This tool is useful when you want to isolate and move individual elements within a photo, creating more dynamic and customizable designs.
What are the best uses for the Magic Grab tool?
The best uses for the Magic Grab tool include:
- Creating collages and compositions: Extracting multiple objects and arranging them in a new design.
- Isolating product features: Highlighting specific aspects of a product in marketing materials.
- Enhancing portraits: Moving or duplicating elements within a portrait to create unique effects.
- Designing social media graphics: Creating eye-catching visuals by isolating key elements.
Is the Choppy Crop app a good alternative to Canva Pro tools?
The Choppy Crop app is a decent alternative to Canva Pro tools if you don’t have a subscription and need a free option for cutting out images. However, it requires manual tracing, which can be time-consuming and may not produce as precise results as the Background Remover or Magic Grab. It’s best suited for simpler projects where a rougher, more artistic finish is acceptable.
How precise is the Choppy Crop app?
The Choppy Crop app is less precise than Canva Pro tools due to its manual tracing method. The accuracy of the cutout depends on your skill and patience in tracing the image. It’s important to zoom in and take your time to achieve the best possible results.
What kind of aesthetic does Choppy Crop create?
Choppy Crop tends to create a rough, pop-art-style aesthetic due to its manual tracing and less precise edges. This can be a desirable effect for certain projects, such as those aiming for a vintage or hand-crafted look. However, if you need a clean, professional finish, Canva Pro tools are a better choice.
Ready to take your photography and design skills to the next level? Visit dfphoto.net today to discover a wealth of tutorials, inspiration, and resources. Explore the beauty of the world through your lens and create stunning visuals that leave a lasting impression. Don’t just capture moments; create art.