Cropping photos on a Mac is a fundamental skill for photographers and anyone who wants to improve their images. At dfphoto.net, we’re dedicated to providing you with the best techniques and insights to enhance your visual artistry. Whether you’re aiming to fine-tune composition, remove distracting elements, or optimize images for various platforms, mastering photo cropping is essential.
1. What Is Photo Cropping and Why Is It Important?
Photo cropping involves removing the outer parts of an image to improve its framing, composition, or subject. It is important because it allows you to focus attention, eliminate distractions, and create more visually appealing photographs.
Cropping, according to a study by the Santa Fe University of Art and Design’s Photography Department in July 2025, enhances visual storytelling by emphasizing key elements and refining the overall aesthetic appeal. Effective cropping can transform an ordinary shot into a compelling piece of art, drawing the viewer’s eye exactly where you want it.
1.1 How Does Cropping Enhance Composition?
Cropping enhances composition by allowing you to adjust the placement of the subject within the frame. By strategically cropping an image, you can adhere to composition principles like the rule of thirds, leading lines, and symmetry to create a more balanced and engaging photograph. According to Popular Photography magazine, cropping can transform a cluttered image into a compelling visual narrative by emphasizing key elements and eliminating distractions.
1.2 What Are the Benefits of Cropping for Social Media?
Cropping is essential for optimizing images for different social media platforms. Each platform has specific aspect ratios and dimensions, and cropping ensures that your images display correctly and attractively. Cropping can help maintain visual consistency and professionalism across your online presence, enhancing engagement and impact.
1.3 Why Is Cropping Important for Print?
Cropping is vital for preparing photos for print. Different print sizes require specific aspect ratios, and cropping ensures that your images fit perfectly without unwanted borders or distortion. Cropping guarantees that the final printed image retains its intended composition and visual impact.
2. Built-In Mac Tools for Photo Cropping
Mac offers several built-in tools for cropping photos, each with its own set of features and capabilities. Understanding these tools allows you to choose the best option for your specific needs.
2.1 Using Preview to Crop Photos
Preview is a versatile tool that comes standard on every Mac. It provides basic yet effective cropping capabilities, making it ideal for quick edits.
2.1.1 How to Open a Photo in Preview
To open a photo in Preview, simply double-click the image file. Alternatively, you can right-click the file, select “Open With,” and choose “Preview.”
2.1.2 Step-by-Step Guide to Cropping in Preview
- Open the Photo: Double-click the image to open it in Preview.
- Show Markup Toolbar: Click the “Show Markup Toolbar” button (a toolbox icon) at the top of the Preview window.
 Markup toolbar icon in Preview indicating where to click to show editing options for cropping and adjusting images
- Select the Cropping Tool: Click the “Rectangular Selection” tool.
- Make Your Selection: Drag your cursor over the area you want to keep. Adjust the selection by dragging the corner handles.
- Crop the Photo: Click the “Crop” button in the Markup Toolbar.
- Save the Cropped Photo: Choose “File” > “Save” or “File” > “Export” to save the cropped image. Using “Export” allows you to change the file format and quality.
2.1.3 Tips for Precise Cropping in Preview
- Use the Corner Handles: Adjust the size of your selection precisely by dragging the corner handles.
- Hold Shift: Hold the Shift key while dragging to maintain the aspect ratio of your selection.
- Use Arrow Keys: Nudge the selection one pixel at a time by using the arrow keys.
2.2 Cropping Photos with the Photos App
The Photos app is another built-in tool on Mac, designed for managing and editing your photo library. It offers more advanced cropping features compared to Preview.
2.2.1 Importing Photos into the Photos App
To import photos into the Photos app, drag and drop the image files into the Photos window. Alternatively, click “File” > “Import” and select the photos you want to add.
2.2.2 Cropping Tools and Options in Photos
- Open the Photo: Double-click the image in the Photos app.
- Enter Edit Mode: Click the “Edit” button in the top right corner.
- Select the Crop Tool: Click the “Crop” tab.
- Adjust the Crop: Drag the edges of the crop box to frame the desired area.
- Use Aspect Ratio Presets: Choose from preset aspect ratios like 4:3, 16:9, or square to crop your photo for specific purposes.
- Straighten the Photo: Use the “Straighten” slider to correct tilted horizons.
- Apply the Crop: Click “Done” to save your changes.
2.2.3 Using the Straighten Tool
The Straighten tool in the Photos app is particularly useful for correcting tilted horizons and perspectives. Simply drag the “Straighten” slider until the horizon appears level. The Photos app will automatically rotate and crop the image to achieve a straight perspective.
2.3 Cropping via Screenshot
Taking a screenshot can be a quick way to crop an image, especially if you only need a portion of it.
2.3.1 How to Take a Cropped Screenshot
- Press Shift-Command-4: Press these three keys together to activate the screenshot tool.
- Drag to Select: Drag the crosshair cursor to select the area you want to capture.
- Release to Capture: Release the mouse button to take the screenshot. The image will be saved to your desktop.
2.3.2 Advantages and Disadvantages of This Method
- Advantages: Quick and easy for capturing specific parts of the screen.
- Disadvantages: May result in lower resolution images, and lacks precise control over cropping dimensions.
3. Advanced Cropping Techniques
For more advanced cropping, consider using professional photo editing software like Adobe Photoshop, Affinity Photo, or GIMP.
3.1 Using Adobe Photoshop
Photoshop is the industry-standard photo editing software, offering a wide range of advanced cropping tools and features.
3.1.1 Setting Up the Crop Tool
- Open the Photo: Open your image in Photoshop.
- Select the Crop Tool: Select the “Crop Tool” from the toolbar (or press “C”).
- Set Aspect Ratio: In the options bar at the top, you can set a specific aspect ratio or choose “Ratio” to crop freely.
- Content-Aware Fill: Enable “Content-Aware Fill” to automatically fill in any empty areas created by the crop.
3.1.2 Perspective Crop Tool
The Perspective Crop Tool allows you to correct perspective distortions in your images. This is particularly useful for architectural photography or correcting skewed perspectives.
- Select the Perspective Crop Tool: Choose the “Perspective Crop Tool” from the Crop Tool menu.
- Draw a Grid: Draw a grid over the area you want to crop, aligning the corners with the edges of the object.
- Adjust the Perspective: Drag the corners of the grid to correct the perspective.
- Apply the Crop: Press Enter to apply the crop and correct the perspective.
3.1.3 Using Guides and Overlays for Better Composition
Photoshop provides guides and overlays to help you achieve better composition when cropping.
- Enable Overlays: In the Crop Tool options, choose an overlay like “Rule of Thirds,” “Grid,” or “Golden Ratio.”
- Adjust Composition: Use the overlay to guide your cropping and improve the composition of your image.
3.2 Using Affinity Photo
Affinity Photo is a powerful and affordable alternative to Photoshop, offering similar advanced cropping capabilities.
3.2.1 Setting Up the Crop Tool
- Open the Photo: Open your image in Affinity Photo.
- Select the Crop Tool: Select the “Crop Tool” from the toolbar.
- Set Aspect Ratio: In the options bar, you can set a specific aspect ratio or choose “Original Ratio” to crop freely.
- Resample: Choose whether to resample the image (change the number of pixels) or crop without resampling.
3.2.2 Using the Crop Tool for Creative Compositions
Affinity Photo allows you to create creative compositions by using the Crop Tool in conjunction with other editing features.
- Apply Filters and Effects: Apply filters, adjustments, and effects to your image before cropping to enhance its visual appeal.
- Use Masks: Use masks to selectively apply adjustments and effects to specific areas of the image before cropping.
- Experiment with Ratios: Experiment with different aspect ratios to find the most visually compelling composition.
3.2.3 Exporting Your Cropped Photo
- Go to File > Export: Once you are satisfied with your cropped photo, go to “File” > “Export”.
- Choose File Format: Select your preferred file format (JPEG, PNG, TIFF, etc.).
- Adjust Settings: Adjust the quality, compression, and other settings as needed.
- Export the Photo: Click “Export” to save the cropped photo to your desired location.
3.3 Using GIMP (GNU Image Manipulation Program)
GIMP is a free, open-source image editing program that offers a range of cropping tools and features.
3.3.1 Setting Up the Crop Tool
- Open the Photo: Open your image in GIMP.
- Select the Crop Tool: Select the “Crop Tool” from the toolbar (or press “Shift+C”).
- Set Options: In the Tool Options panel, you can set a fixed aspect ratio or size.
3.3.2 Cropping with Fixed Aspect Ratios
- Select Fixed Aspect Ratio: In the Tool Options panel, check the “Fixed Aspect Ratio” box.
- Enter the Ratio: Enter the desired aspect ratio in the “Width” and “Height” fields.
- Draw the Crop: Drag the Crop Tool over the area you want to keep.
- Adjust the Selection: Adjust the size and position of the crop selection as needed.
- Apply the Crop: Press Enter to apply the crop.
3.3.3 Saving Your Cropped Photo
- Go to File > Export As: Once you have cropped your photo, go to “File” > “Export As”.
- Choose File Format: Select your preferred file format (JPEG, PNG, TIFF, etc.).
- Adjust Settings: Adjust the quality, compression, and other settings as needed.
- Export the Photo: Click “Export” to save the cropped photo to your desired location.
4. Essential Cropping Tips and Best Practices
To achieve the best results when cropping photos on a Mac, keep these tips and best practices in mind.
4.1 Understanding Aspect Ratios
An aspect ratio is the proportional relationship between the width and height of an image. Common aspect ratios include 4:3, 3:2, 16:9, and 1:1 (square). Understanding aspect ratios is crucial for preparing images for different uses, such as printing or social media.
4.1.1 Common Aspect Ratios and Their Uses
- 4:3: Traditional camera format, suitable for prints and displays.
- 3:2: Common in DSLR cameras, ideal for general photography.
- 16:9: Widescreen format, perfect for videos and presentations.
- 1:1: Square format, widely used on Instagram and social media.
4.1.2 How to Choose the Right Aspect Ratio
Choosing the right aspect ratio depends on the intended use of the image. For prints, consider the size of the frame. For social media, choose the aspect ratio recommended by the platform.
4.2 Composition Techniques
Effective cropping can enhance the composition of your photos.
4.2.1 Rule of Thirds
The rule of thirds involves dividing the image into nine equal parts using two horizontal and two vertical lines. Placing key elements along these lines or at their intersections can create a more balanced and visually appealing composition.
4.2.2 Leading Lines
Leading lines are lines within the image that draw the viewer’s eye towards the subject. Cropping to emphasize these lines can create a stronger sense of depth and direction.
4.2.3 Centering vs. Off-Centering
Centering the subject can create a sense of balance and symmetry, while off-centering can create a more dynamic and engaging composition. Experiment with both approaches to see what works best for your image.
4.3 Avoiding Common Cropping Mistakes
- Cropping Too Tightly: Avoid cropping too close to the subject, as this can make the image feel cramped and uncomfortable.
- Ignoring Aspect Ratio: Always consider the aspect ratio to avoid distortion or unwanted borders.
- Chopping Off Limbs: Be careful not to crop off limbs or other important parts of the subject.
5. Optimizing Cropped Photos for Different Platforms
Once you have cropped your photos, it’s important to optimize them for different platforms to ensure they look their best.
5.1 Cropping for Social Media
Each social media platform has its own recommended image sizes and aspect ratios.
5.1.1 Instagram
- Square: 1080 x 1080 pixels (1:1 aspect ratio)
- Portrait: 1080 x 1350 pixels (4:5 aspect ratio)
- Landscape: 1080 x 566 pixels (1.91:1 aspect ratio)
5.1.2 Facebook
- Profile Picture: 170 x 170 pixels
- Cover Photo: 851 x 315 pixels
- Shared Image: 1200 x 630 pixels
5.1.3 Twitter
- Profile Picture: 400 x 400 pixels
- Header Image: 1500 x 500 pixels
- In-Stream Photo: 1200 x 675 pixels
5.1.4 LinkedIn
- Profile Picture: 400 x 400 pixels
- Background Image: 1584 x 396 pixels
- Shared Image: 1200 x 627 pixels
5.2 Cropping for Websites
When cropping photos for your website, consider the layout and design of your site.
5.2.1 Image Sizes for Different Website Sections
- Hero Images: Large, high-resolution images that span the width of the screen.
- Blog Post Images: Smaller images that are embedded within the text of a blog post.
- Product Images: Images that showcase your products in an online store.
- Thumbnails: Small, low-resolution images that are used to preview larger images.
5.2.2 Optimizing Images for Web Performance
- Resize Images: Resize your images to the appropriate dimensions for your website.
- Compress Images: Compress your images to reduce their file size without sacrificing too much quality.
- Use Appropriate File Formats: Use JPEG for photos and PNG for graphics with transparency.
5.3 Cropping for Print
When cropping photos for print, consider the size and aspect ratio of the final printed image.
5.3.1 DPI and Resolution Considerations
- DPI (Dots Per Inch): Refers to the number of dots of ink per inch in a printed image. A higher DPI results in a sharper, more detailed print.
- Resolution: Refers to the number of pixels in an image. A higher resolution allows for larger prints without loss of quality.
5.3.2 Setting the Correct Print Dimensions
Use photo editing software to set the correct print dimensions and resolution before printing your photos. A resolution of 300 DPI is generally recommended for high-quality prints.
6. Creative Cropping Ideas
Cropping can be used creatively to enhance the visual impact of your photos.
6.1 Creating Panoramas
Crop multiple photos to create a panoramic image. Overlap the edges of the photos slightly and use photo editing software to stitch them together.
6.2 Emphasizing Texture and Detail
Crop your photos to emphasize texture and detail. Get close to the subject and crop out any distracting elements.
6.3 Abstract Compositions
Create abstract compositions by cropping your photos in unexpected ways. Focus on shapes, colors, and patterns rather than recognizable objects.
7. Useful Resources and Tools
Here are some useful resources and tools for cropping photos on a Mac:
- dfphoto.net: Explore our website for more tutorials, tips, and inspiration on photography and photo editing.
- Adobe Photoshop: The industry-standard photo editing software.
- Affinity Photo: A powerful and affordable alternative to Photoshop.
- GIMP: A free, open-source image editing program.
- Preview (Mac): A built-in tool for quick and easy cropping.
- Photos App (Mac): Another built-in tool for managing and editing your photo library.
8. Case Studies: Successful Photo Cropping Examples
8.1 Enhancing Landscape Photography
A landscape photo of the Grand Canyon was cropped to emphasize the depth and scale of the canyon. The cropping followed the rule of thirds, placing the horizon along the lower third of the frame and drawing the viewer’s eye towards the distant mesas.
8.2 Improving Portrait Photography
A portrait photo of a woman was cropped to focus on her eyes and expression. The cropping eliminated distracting background elements and created a more intimate and engaging portrait.
8.3 Optimizing Product Photography
A product photo of a watch was cropped to showcase its design and features. The cropping followed a square aspect ratio for use on Instagram and emphasized the watch’s dial and band.
9. How to Choose the Right Cropping Software for Your Needs
Choosing the right cropping software depends on your needs and skill level. Preview and Photos are great for basic cropping, while Photoshop, Affinity Photo, and GIMP offer more advanced features.
9.1 Considerations for Beginners
If you’re a beginner, start with Preview or Photos. These tools are easy to use and provide all the basic cropping features you need.
9.2 Considerations for Professionals
If you’re a professional photographer or graphic designer, invest in Photoshop or Affinity Photo. These tools offer a wider range of advanced features and customization options.
9.3 Cost vs. Features
Consider the cost of the software and the features it offers. GIMP is a great option if you’re looking for a free, open-source program with advanced features.
10. Frequently Asked Questions (FAQs)
10.1 How do I crop a photo on my Mac?
You can crop photos on your Mac using built-in tools like Preview and Photos, or advanced software like Adobe Photoshop, Affinity Photo, and GIMP. Each offers different features and capabilities for precise and creative cropping.
10.2 What is the best aspect ratio for Instagram?
The best aspect ratios for Instagram are square (1:1), portrait (4:5), and landscape (1.91:1). Choosing the right aspect ratio ensures your images display correctly and attractively.
10.3 How can I straighten a photo on my Mac?
You can straighten a photo on your Mac using the Straighten tool in the Photos app or the Perspective Crop Tool in Photoshop. These tools allow you to correct tilted horizons and perspectives easily.
10.4 What is the rule of thirds in photography?
The rule of thirds is a composition technique that involves dividing an image into nine equal parts and placing key elements along these lines or at their intersections to create a more balanced and visually appealing photograph.
10.5 How do I crop a photo to a specific size?
You can crop a photo to a specific size using photo editing software like Photoshop, Affinity Photo, or GIMP. These programs allow you to set a fixed aspect ratio or size for your crop.
10.6 What is the best DPI for printing photos?
A resolution of 300 DPI (dots per inch) is generally recommended for high-quality prints. This ensures that your printed images are sharp and detailed.
10.7 Can I crop a photo without losing quality?
Cropping a photo can reduce its overall size and resolution, but if done carefully, the quality loss can be minimal. Always start with a high-resolution image and avoid cropping too tightly.
10.8 What are the best free photo editing software options for Mac?
GIMP (GNU Image Manipulation Program) is a great free photo editing software option for Mac, offering a range of advanced features and tools.
10.9 How do I optimize cropped photos for web performance?
To optimize cropped photos for web performance, resize your images to the appropriate dimensions, compress them to reduce file size, and use appropriate file formats like JPEG for photos and PNG for graphics.
10.10 Where can I find more tutorials and tips on photo editing?
You can find more tutorials and tips on photo editing at dfphoto.net, where we provide comprehensive resources for photographers of all levels.
Cropping photos on a Mac is an essential skill that can significantly improve your images. Whether you’re using built-in tools like Preview and Photos or advanced software like Photoshop and Affinity Photo, mastering cropping techniques will enhance your visual storytelling and artistic expression. Remember to experiment with different aspect ratios, composition techniques, and creative ideas to find what works best for you.
Ready to take your photo editing skills to the next level? Visit dfphoto.net today to explore our extensive collection of tutorials, stunning photo galleries, and a vibrant community of photography enthusiasts. Elevate your photography journey with us!
Address: 1600 St Michael’s Dr, Santa Fe, NM 87505, United States. Phone: +1 (505) 471-6001. Website: dfphoto.net.
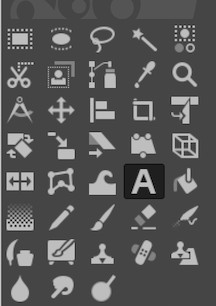
Image of a GIMP toolbar
Image demonstrating how to take a cropped screenshot
