Crocheting photos is a unique craft that combines the art of crochet with cherished visual memories, and you can learn how at dfphoto.net. This guide will walk you through the basics of crochet, show you how to transfer photos into patterns, and inspire you with creative ideas for your projects. It is a perfect way to blend photography and yarn crafts.
1. What Do You Need To Start Crocheting Photos?
You’ll need yarn, crochet hooks, scissors, a yarn needle, and a photo to crochet photos. Selecting the right tools is key to a smooth and enjoyable crafting experience.
1.1 What Materials Are Essential for Crochet Photos?
Essential materials include:
- Yarn: Choose yarn based on color, texture, and weight suitable for your project.
- Crochet Hooks: Select hooks of appropriate sizes for your yarn.
- Scissors: Use sharp scissors for cutting yarn.
- Yarn Needle: Employ a yarn needle for weaving in ends.
- Photo: Have the photograph you want to turn into a pattern.
1.2 What Kind of Yarn Should I Use for My First Crochet Project?
For beginners, thicker yarn is advisable because it’s easier to handle and see the stitches. According to Popular Photography in June 2024, size 4 yarn is a great starting point.
1.3 How Do I Read a Yarn Label?
Yarn labels provide vital information like yarn size, recommended hook size, and care instructions. This is typically shown with a number indicating yarn weight.
1.4 What Crochet Hook Size Should I Start With?
A 5.5mm or I-9 hook size is suitable for size 4 yarn, which is a good starting point. Always refer to the yarn label for specific recommendations.
2. How to Hold a Crochet Hook?
Holding your crochet hook correctly is important for comfort and stitch consistency. There are two common methods for crochet photos, the knife hold and the pencil hold.
2.1 What Are the Common Ways to Hold a Crochet Hook?
The two primary methods are:
- Knife Hold: Holding the hook like a knife, which many find comfortable.
- Pencil Hold: Holding the hook like a pencil, offering more control for some crafters.
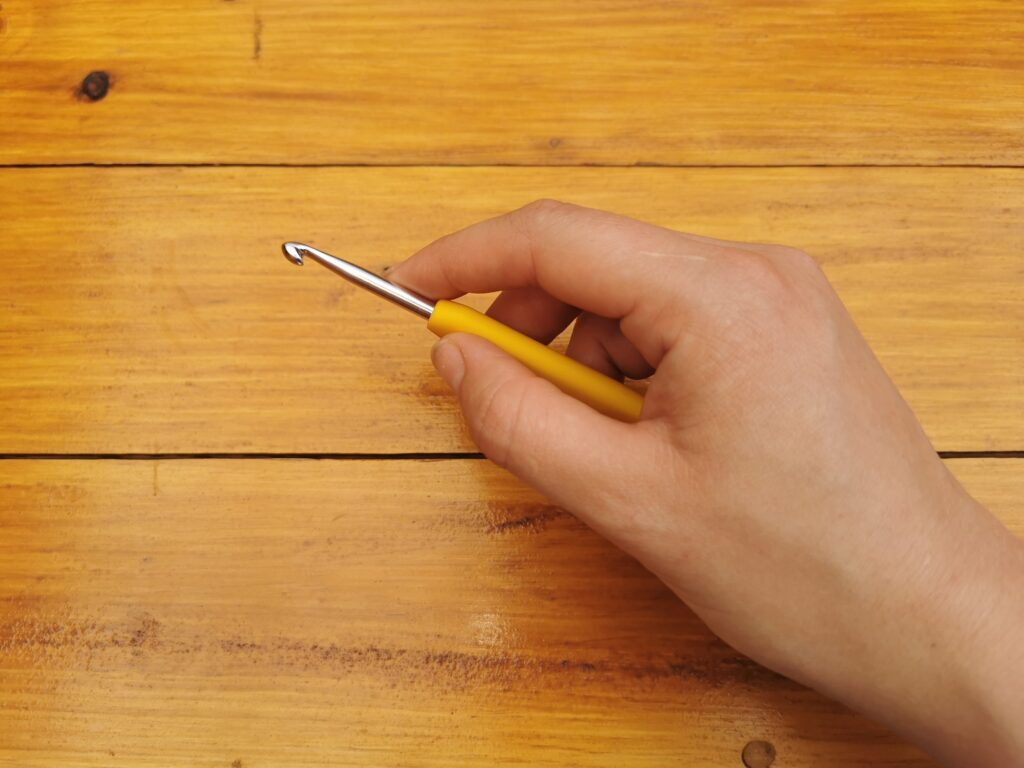 Knife Hold for crocheting offers a comfortable grip for many crafters
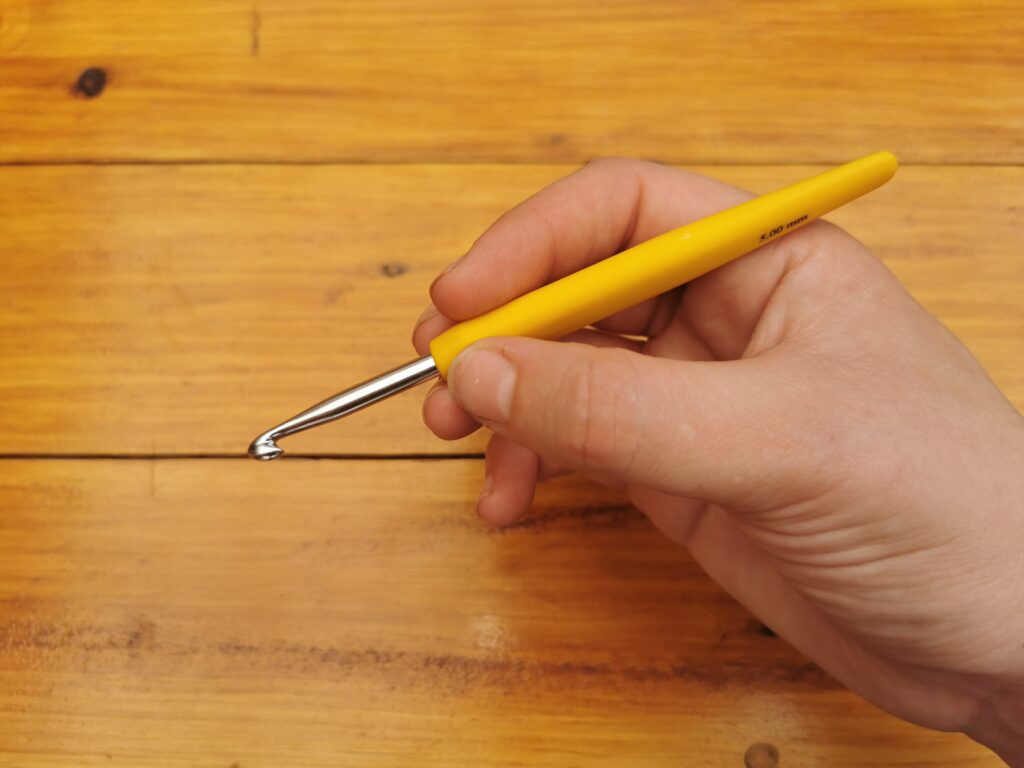 Pencil Hold allows precise control when crocheting delicate photo patterns
2.2 Is There a Right or Wrong Way to Hold a Crochet Hook?
No, there is no right or wrong way; it’s about finding what feels most comfortable and allows you to maintain even tension.
3. Making a Slip Knot: The First Step
The slip knot is the foundation for most crochet projects. It’s the initial loop you create on your hook to start your chain.
3.1 What Is a Slip Knot in Crochet?
A slip knot is a basic loop used to begin crocheting, essential for securing the yarn to the hook.
3.2 How Do I Make a Slip Knot?
Here’s how to make a slip knot:
- Measure about 3 inches of yarn.
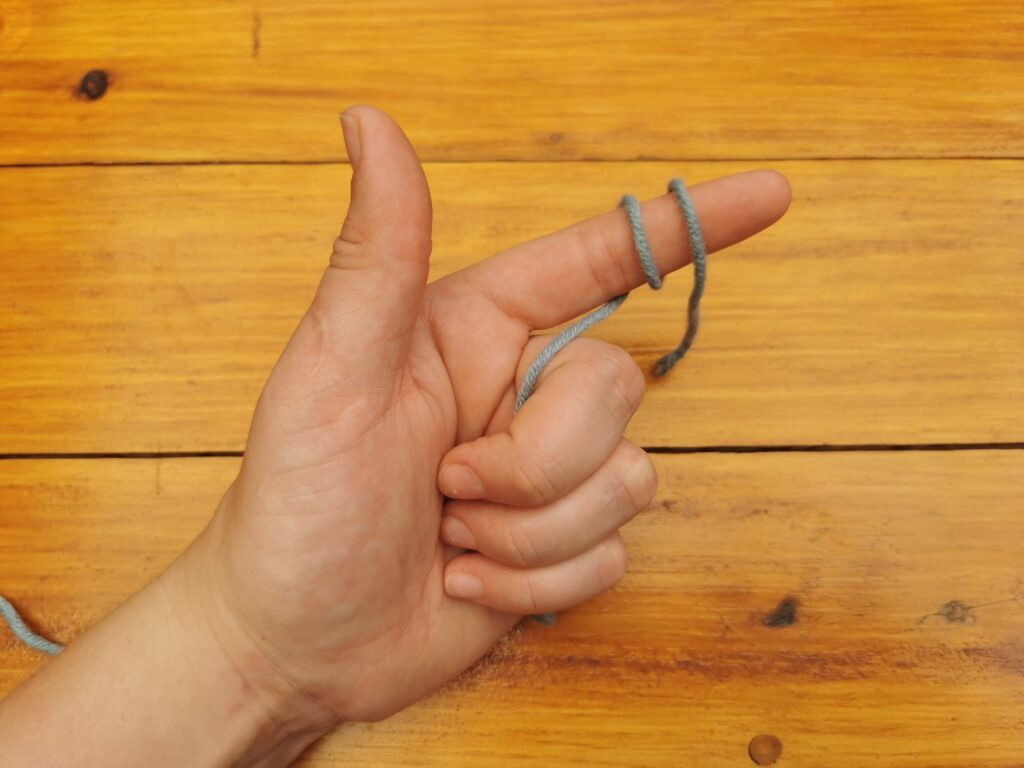
- Grab the yarn with three fingers and point your index finger outward, like making a finger gun.
- Wrap the yarn over your index finger once with the short end at the front.
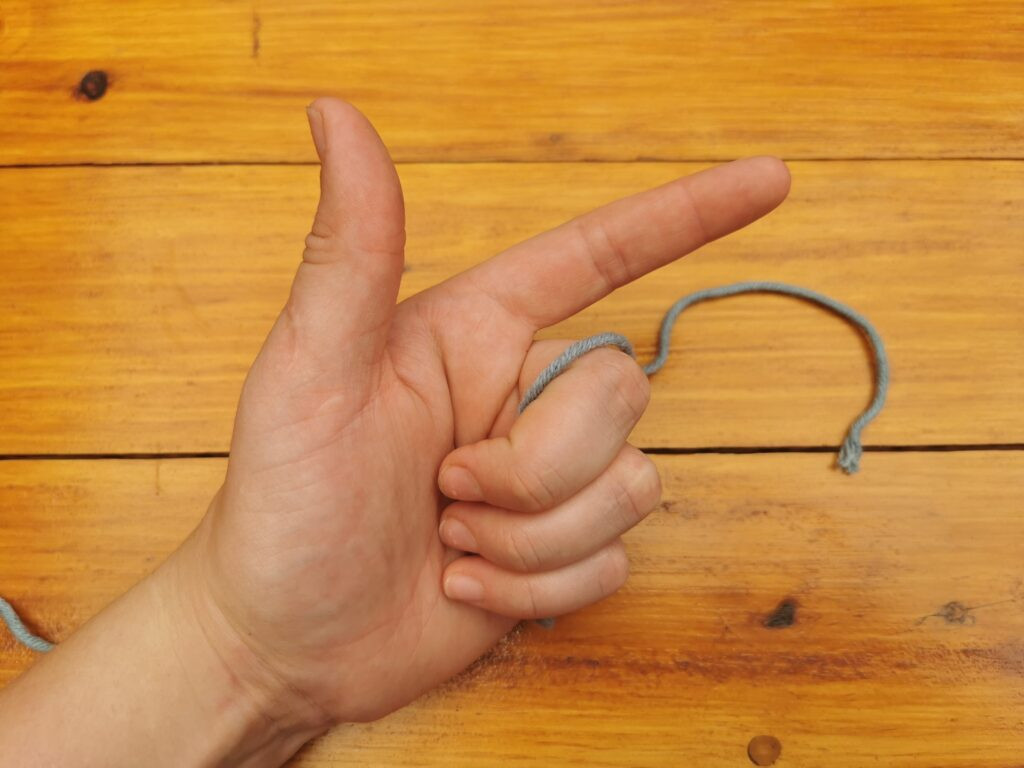 Grabbing the yarn with three fingers prepares to form the initial loop for crocheting photos
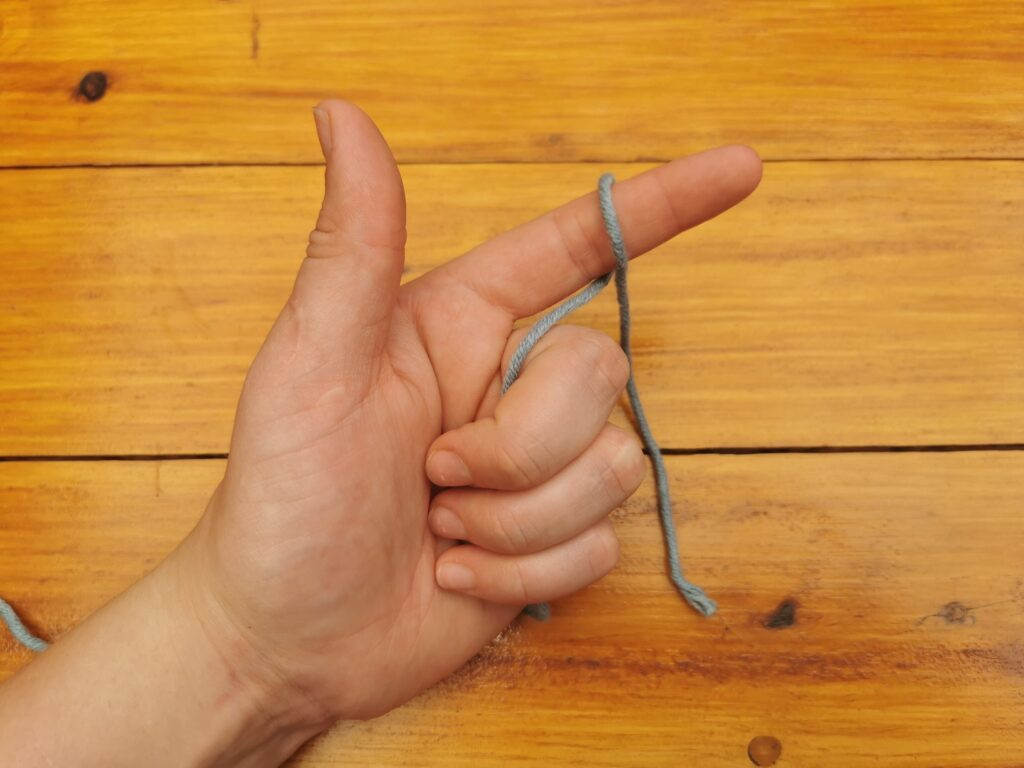 Wrapping the yarn creates the necessary loop for starting the crochet slip knot
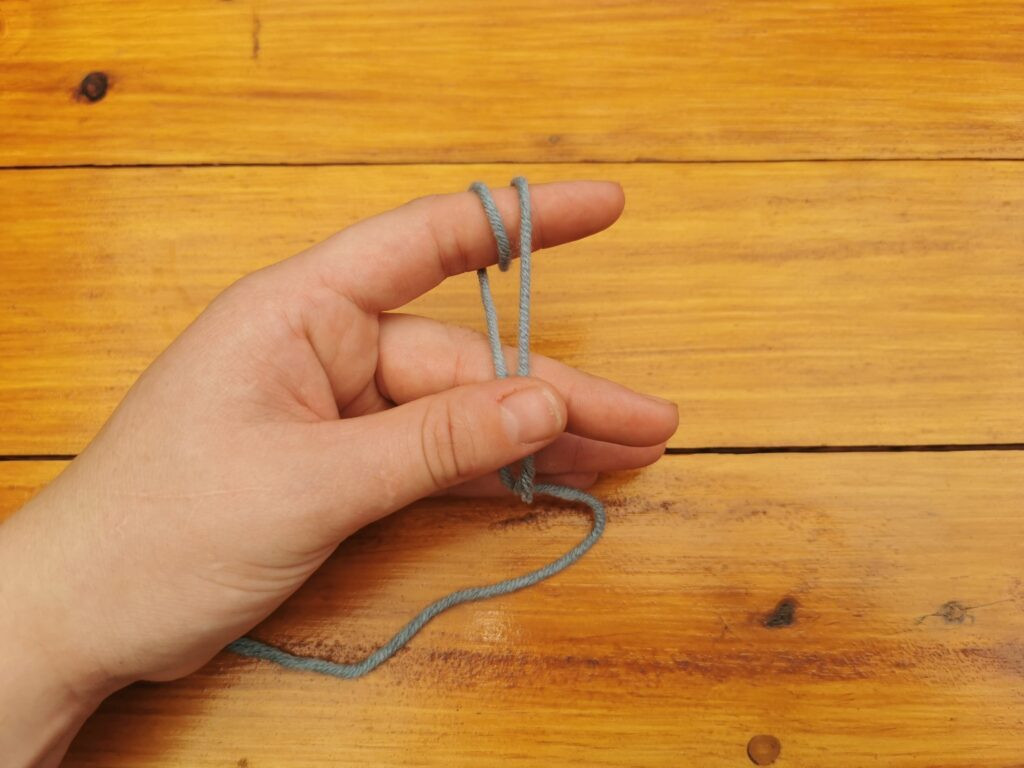
- Wrap the yarn around your finger again, so you have two loops.
- Grab both ends (short tail and long tail, the working yarn) with your thumb and middle finger.
 Forming two loops around the finger is crucial for creating a secure slip knot
 Holding both yarn ends stabilizes the loops, essential for tightening the slip knot correctly
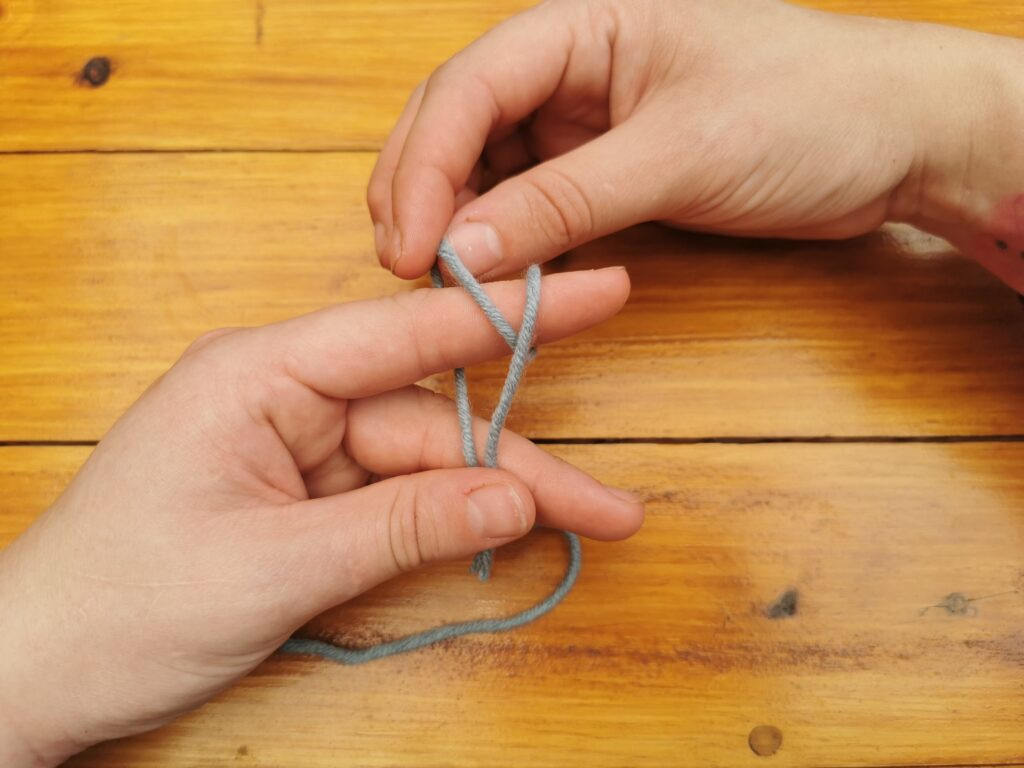
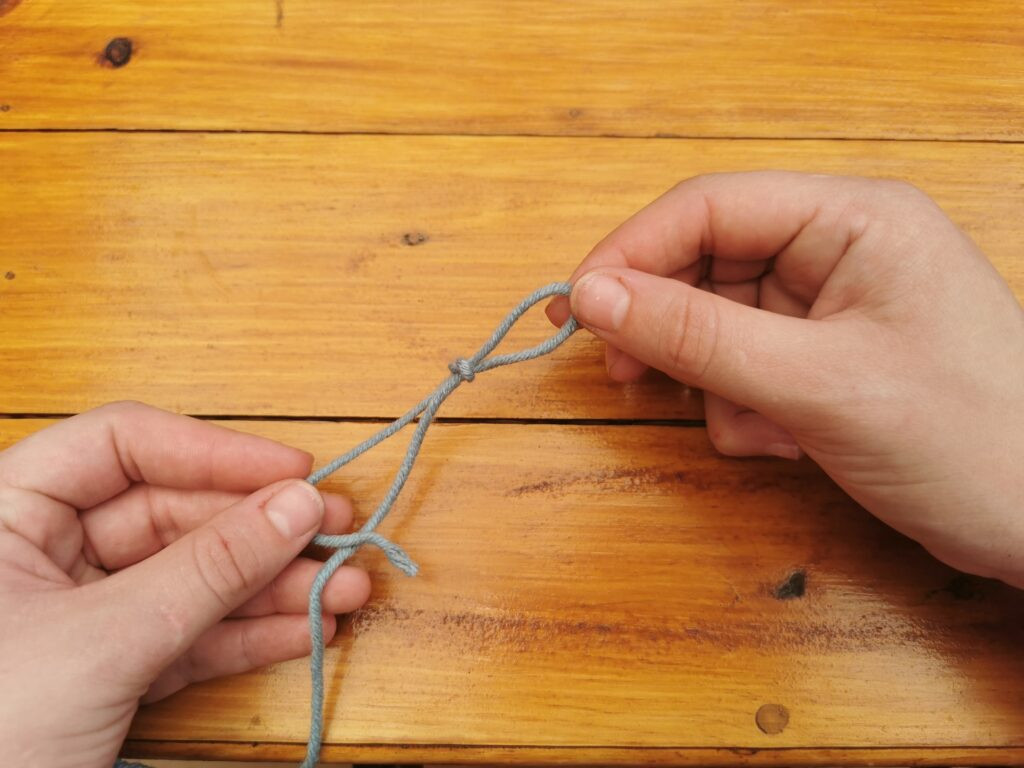
- Take the back loop and pull it over the front loop, but don’t pull it off completely.
 Pulling the back loop over the front loop begins to form the knot that secures the yarn
 Ensuring the loop remains on the finger prevents the knot from tightening prematurely
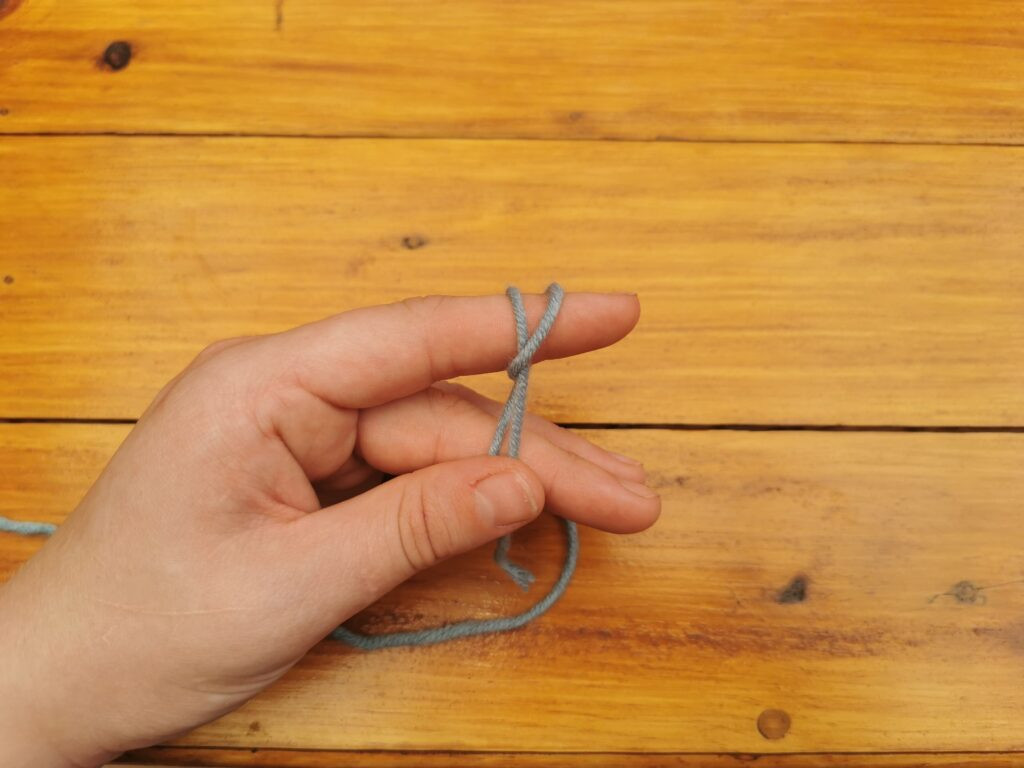
- Now, pull the back loop off your finger and tighten the knot. Ensure it’s not too tight, allowing it to slide.
 Removing the back loop from the finger sets the stage for adjusting the slip knot's tension
 Tightening the slip knot creates a secure but adjustable loop, ready for the crochet hook
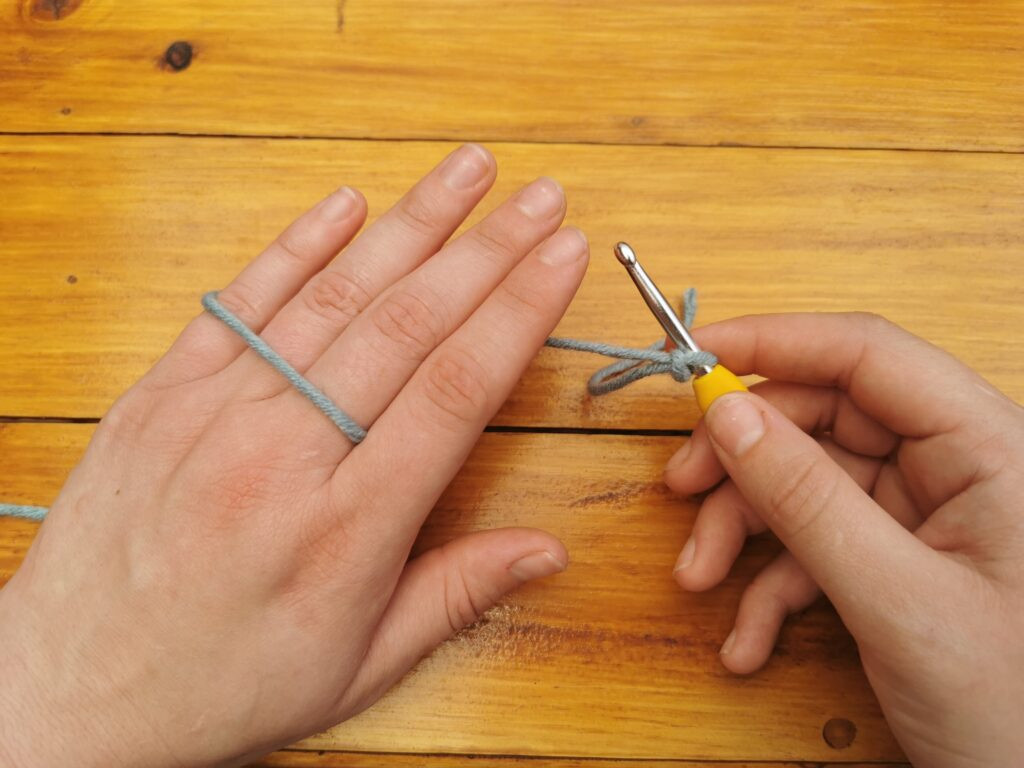
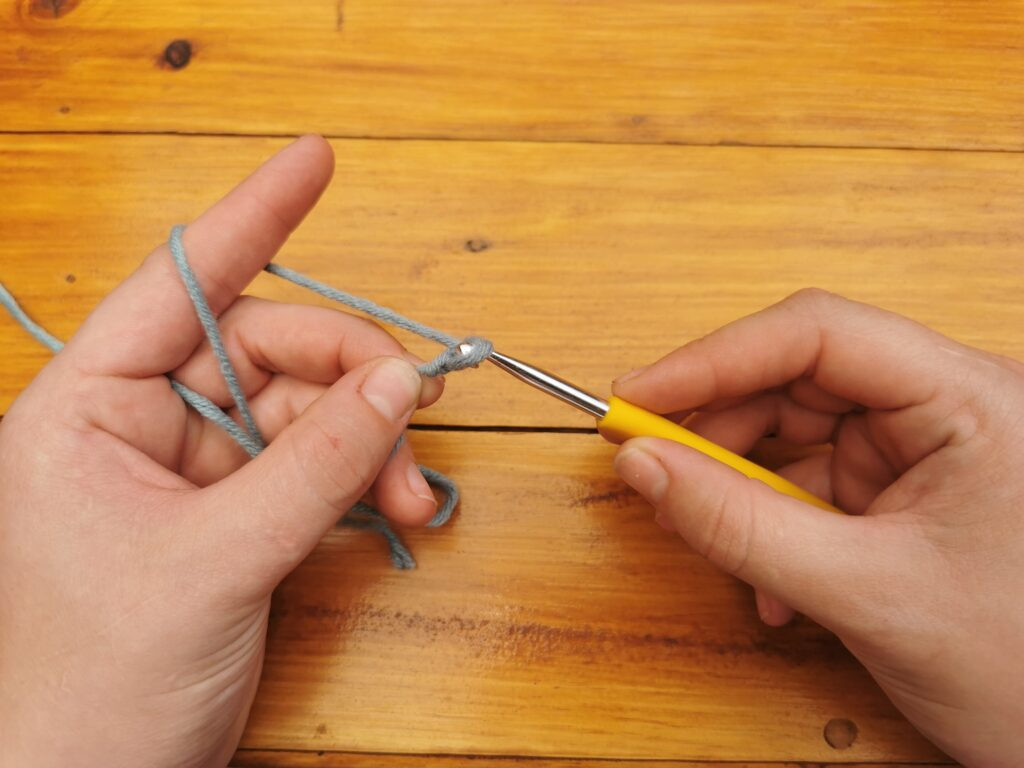
3.3 How Do I Place the Slip Knot on the Crochet Hook?
Insert your hook into the slip knot and pull on the working yarn, ensuring the tail end faces towards the hook.
 Tightening the knot around the hook readies the yarn for creating the first chain stitch
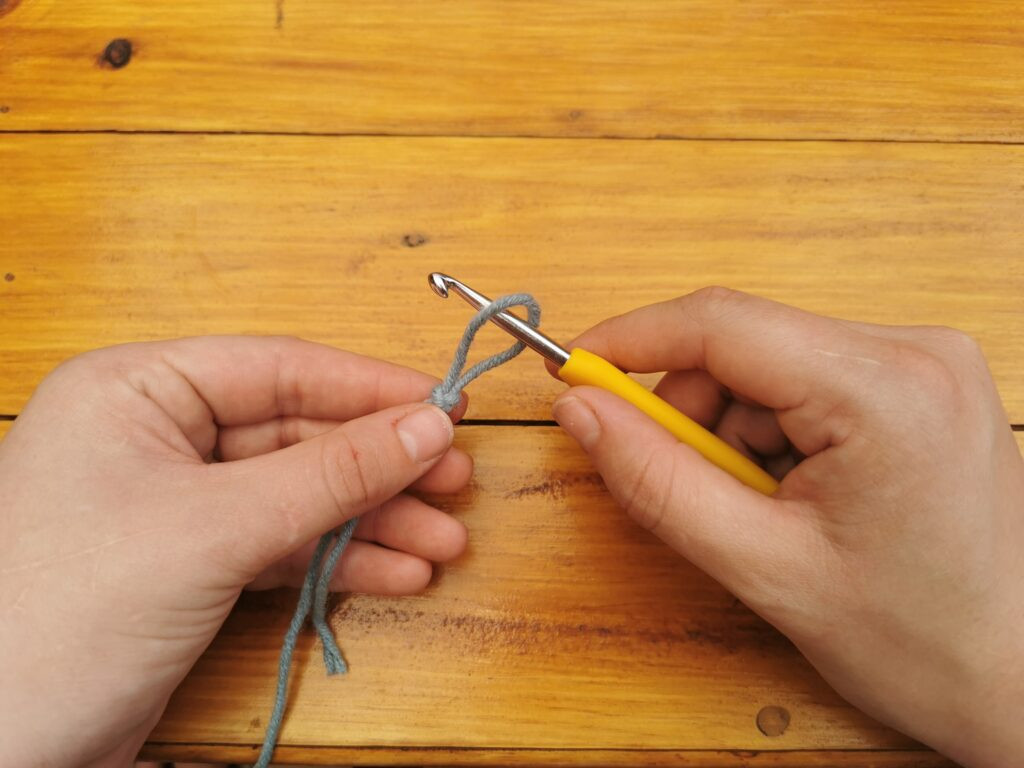 Inserting the hook into the loop ensures the slip knot is correctly positioned to begin crocheting
 Securing the slip knot on the hook allows for easy adjustment and smooth start to any crochet project
4. How to Hold Your Yarn for Crochet Photos
Holding the yarn correctly affects your tension, which influences the final product. Relaxed, consistent tension is ideal.
4.1 How Does Yarn Holding Affect Crochet Tension?
How you hold the yarn determines the tightness or looseness of your stitches. Consistent tension leads to even crochet work.
4.2 What Is the Best Way to Hold Yarn for Consistent Tension?
Here’s how I hold my yarn:
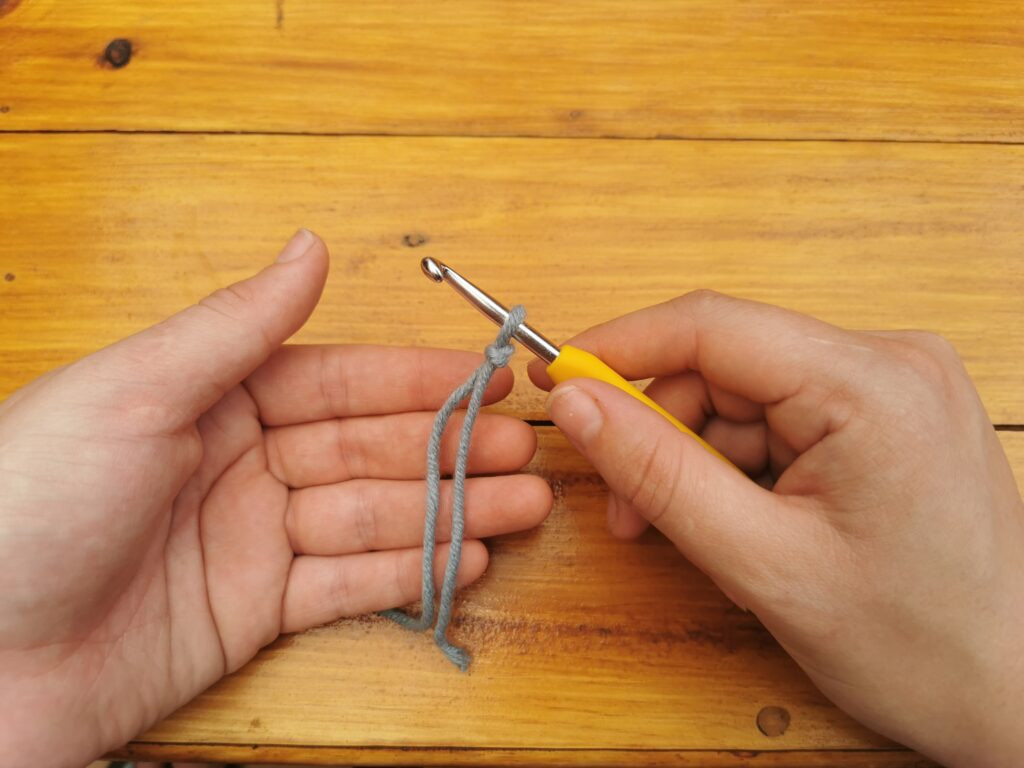
- With the slip knot on the hook, hold the hook in your working hand.
- Place the yarn between your middle and index finger.
- Wrap the yarn around your pinky, coming back up to the front of your index finger, then wrap it to the back.
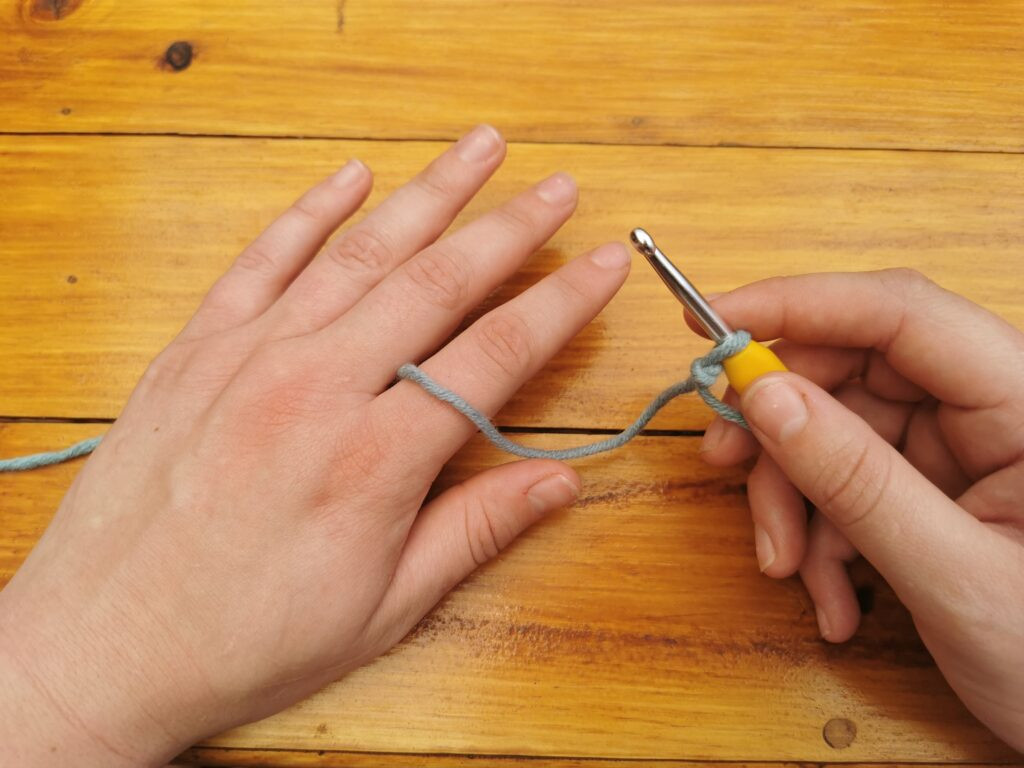 Positioning the yarn between the fingers stabilizes it, aiding in consistent tension control
 Wrapping the yarn around the pinky and index finger helps maintain even tension during crocheting
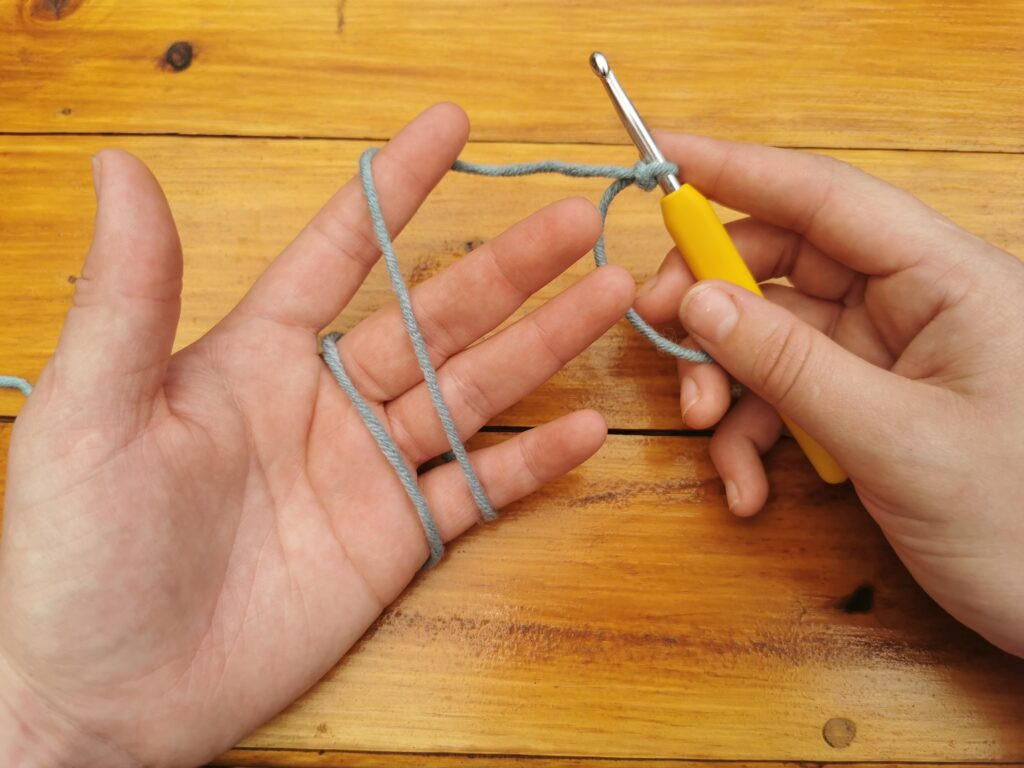 Guiding the yarn from back to front around the index finger supports a smooth yarn flow
4.3 Can I Adjust How I Hold the Yarn for Comfort?
Yes, adjust your grip for comfort and ease of yarn flow. It’s about finding a method that feels natural and allows consistent tension.
5. Creating a Chain Stitch: The Foundation
The chain stitch is essential because it forms the base for most crochet projects, including those involving photos.
5.1 What Is a Chain Stitch in Crochet?
A chain stitch is the fundamental stitch used to start most crochet projects, forming the foundation row.
5.2 How Do I Crochet a Chain Stitch?
Here’s how:
- Hold the slip knot in place with your thumb and middle finger against the hook.
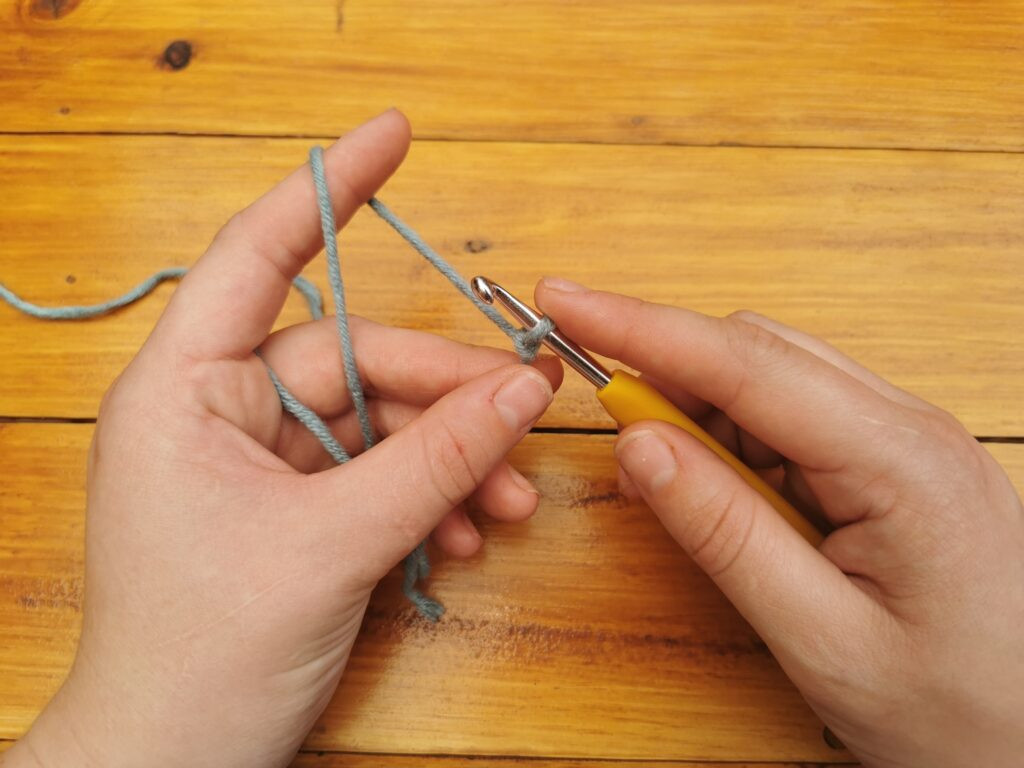 Holding the slip knot secures the base for the initial chain stitch
- Bring your yarn over your hook from back to front and grab it.
- Pull the hooked yarn through the slip knot.
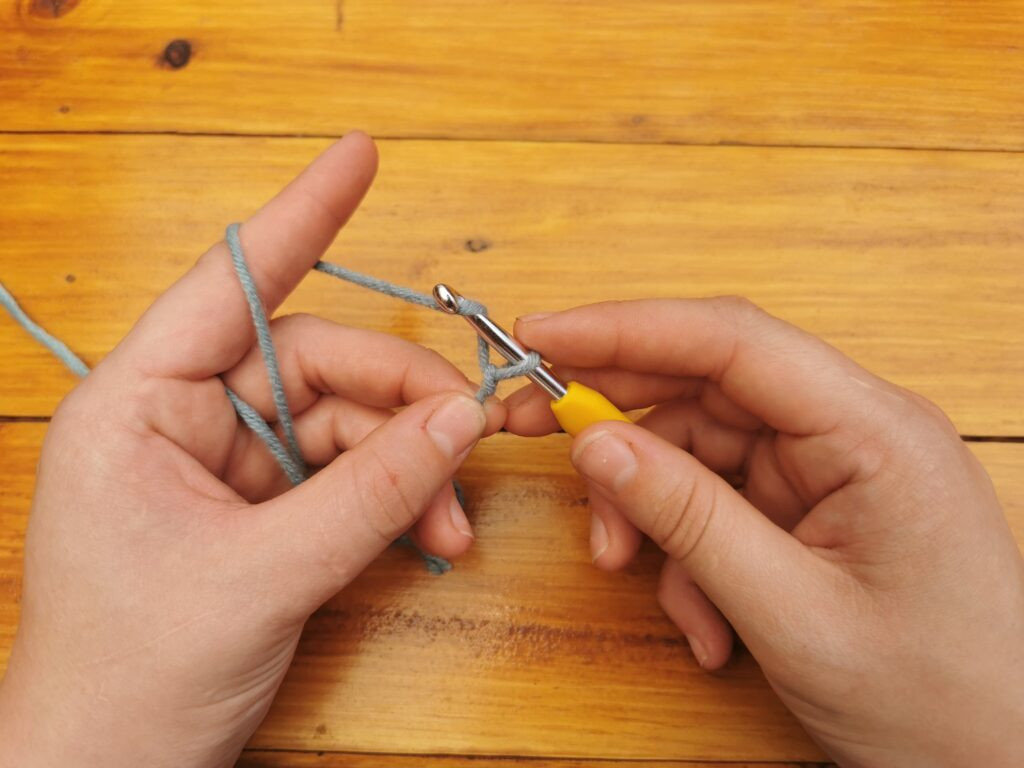 Bringing the yarn over the hook prepares to pull through, forming the chain stitch
 Pulling the yarn through the loop creates the first chain of the crochet foundation
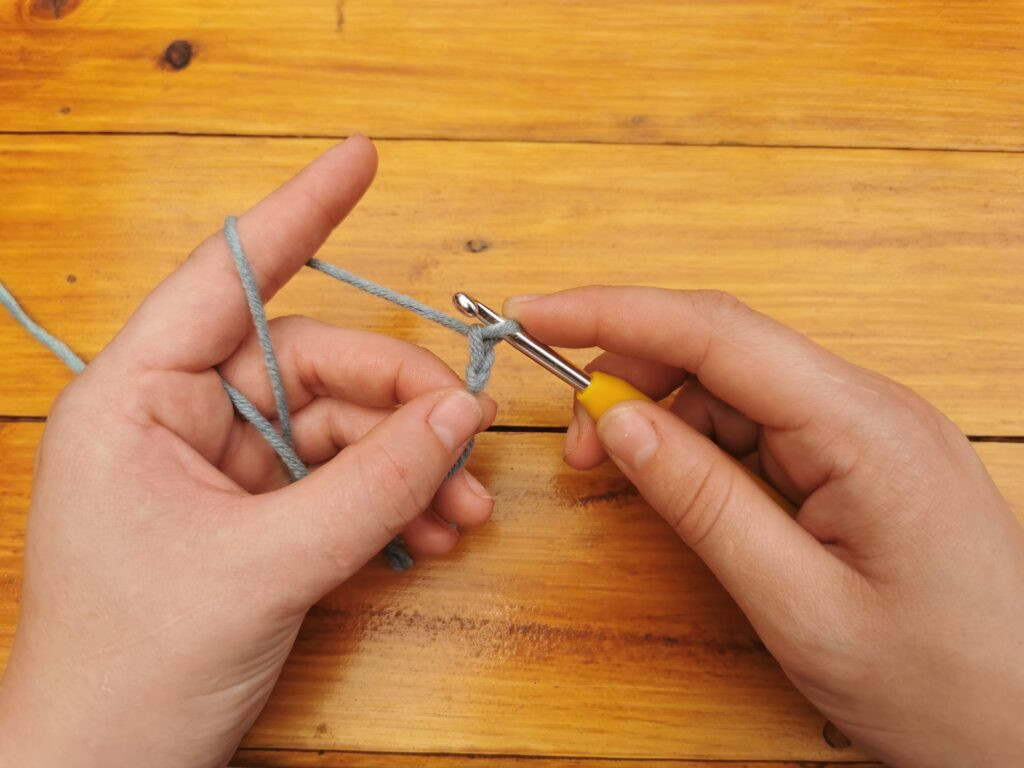 The first chain on the hook is a milestone, establishing the base for further crochet work
Repeat this step until you have the required number of chains.
5.3 How Many Chains Should I Start With?
Start with 21 chains for practice. The loop on your hook doesn’t count as a chain.
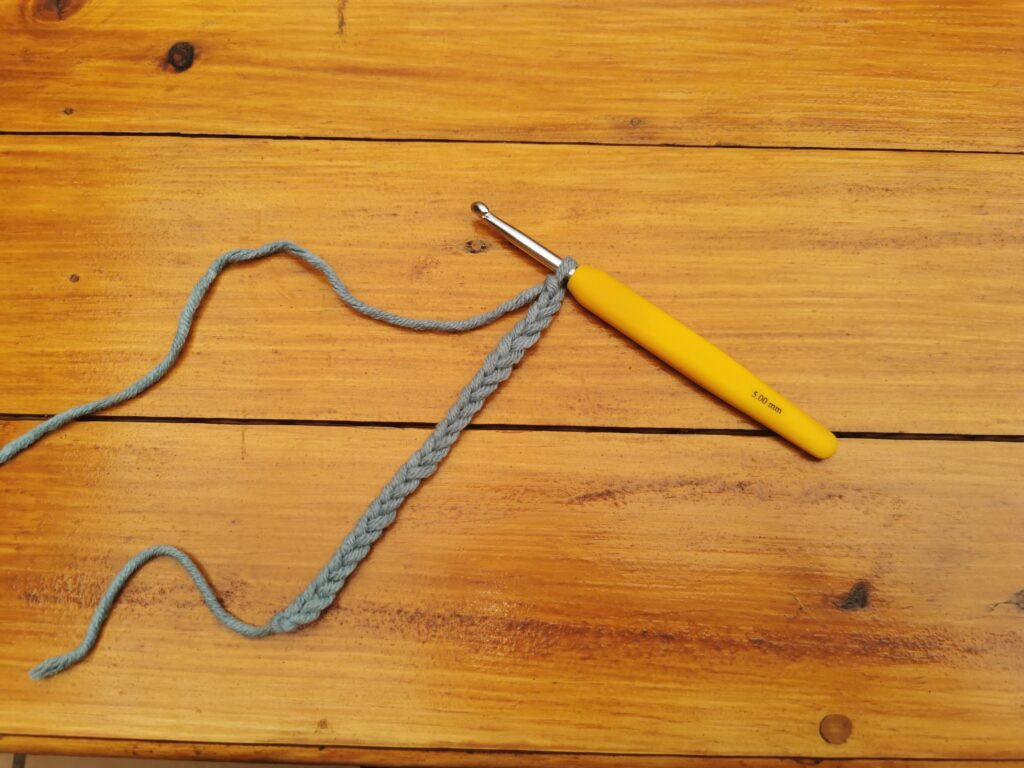 Creating a foundation chain sets the width for your crochet project
5.4 What If My Chain Is Too Tight?
If your chain is too tight, switch to a larger hook size or consciously crochet more loosely. Aim for a chain loose enough to easily work into.
5.5 How Do I Count My Chain Stitches?
Count each loop on your chain, excluding the one on your hook, to ensure you have the correct number of stitches for your pattern.
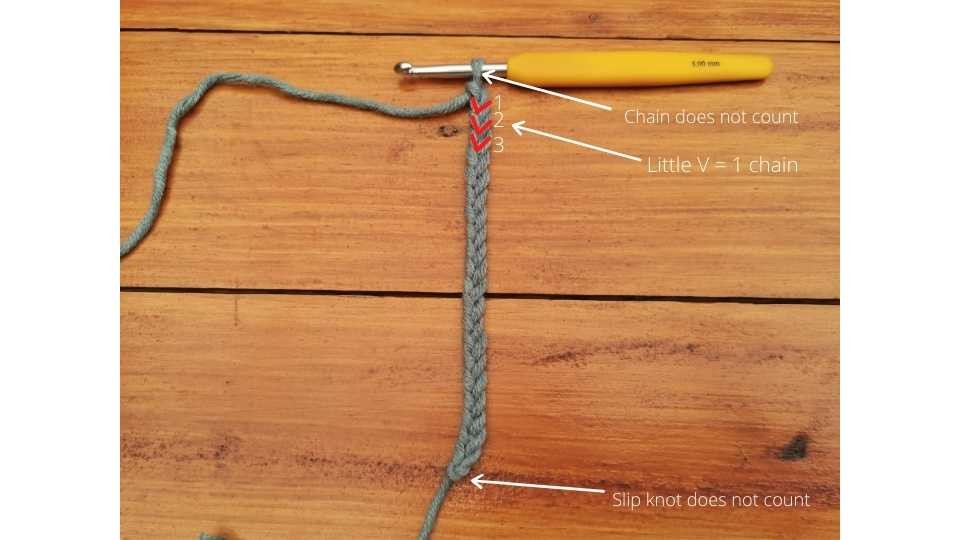 Counting chain stitches ensures accuracy, vital for maintaining consistent dimensions in crochet projects
6. Single Crochet Stitch: A Basic Technique for Crochet Photos
The single crochet stitch is fundamental for creating solid fabric, ideal for photo-based projects needing a dense weave.
6.1 What Is a Single Crochet Stitch?
The single crochet stitch is a basic stitch that creates a tight, dense fabric, often used for amigurumi and detailed work.
6.2 How Do I Crochet a Single Crochet Stitch?
Here’s a step-by-step guide:
- Skip the first chain and insert your hook into the center of the next chain.
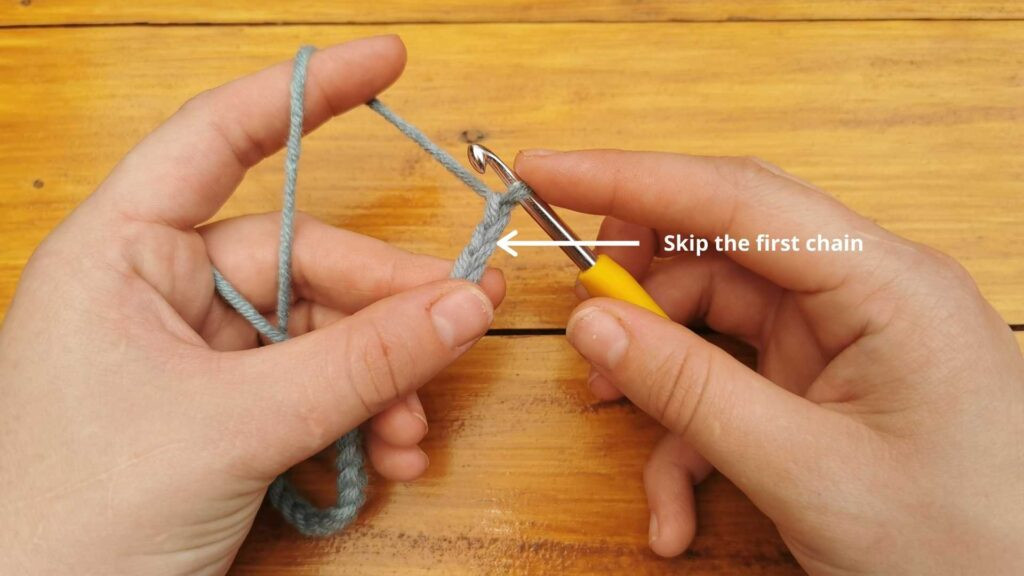 Skipping the first chain prepares the foundation for creating a row of single crochet stitches
 Inserting the hook into the second chain from the hook initiates the single crochet stitch
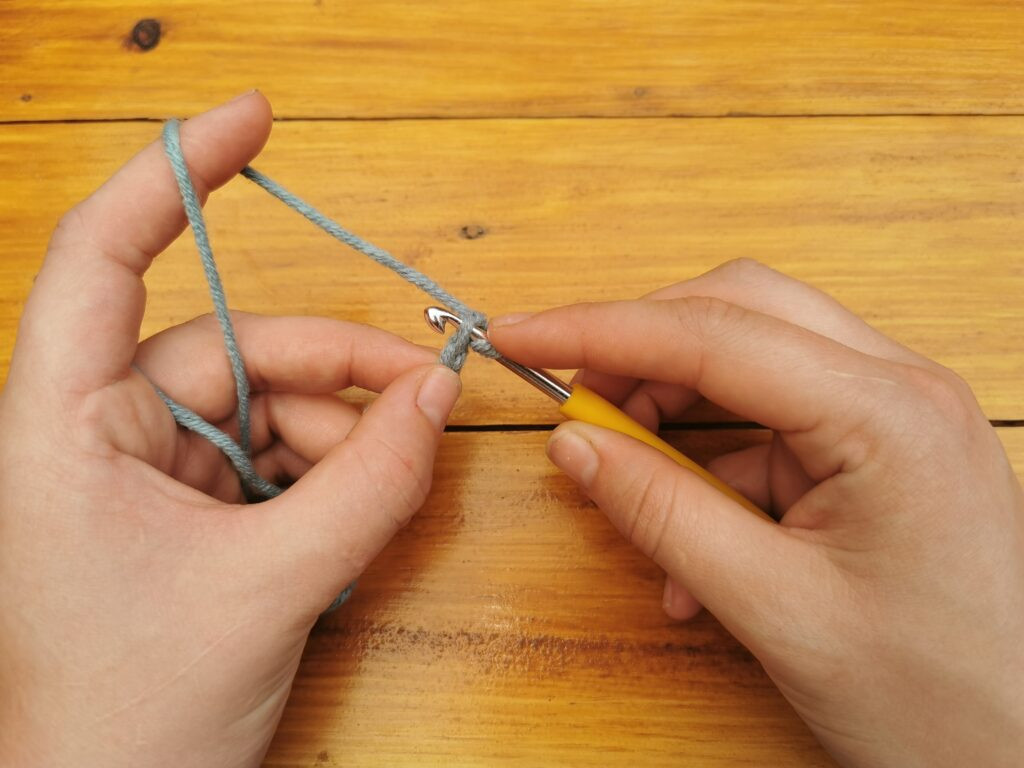
- Bring your yarn over your hook from back to front and grab it (yarn over).
- Pull through the chain and up your hook. Two loops should be on your hook.
 Yarning over the hook is essential for pulling the yarn through and starting the stitch
 Pulling through the chain creates two loops on the hook, ready for completing the single crochet
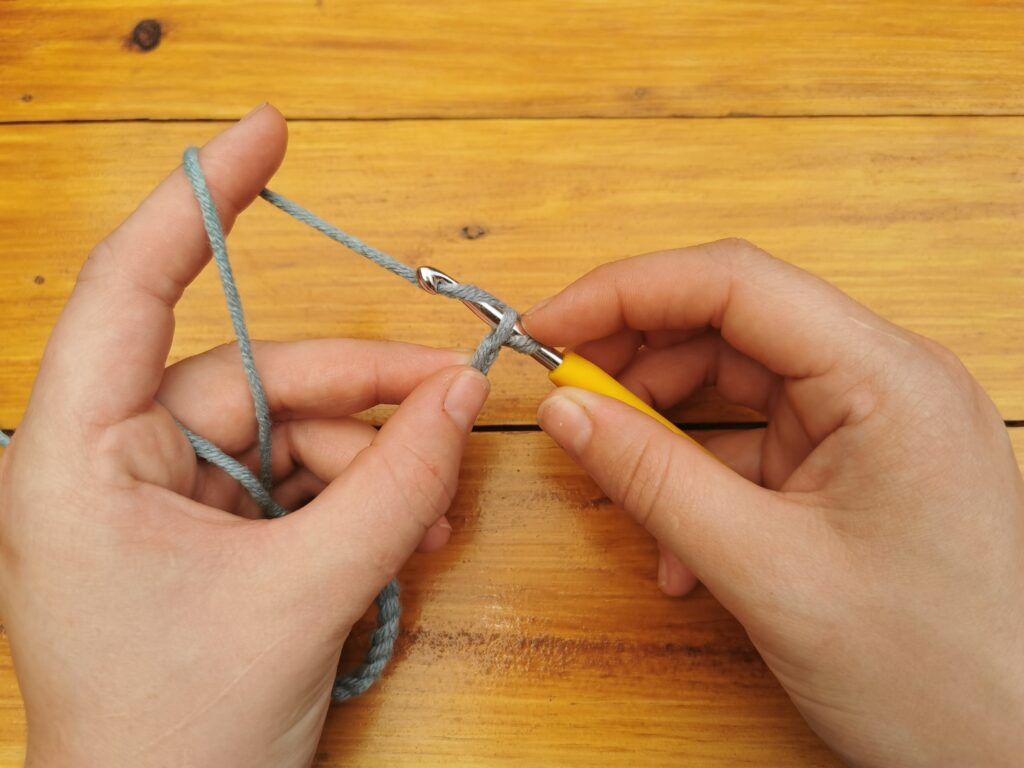
- Bring your yarn over your hook again.
- Pull through both loops on your hook. One loop remains on your hook. You’ve made your first single crochet.
 Yarning over once more prepares to draw the yarn through both loops, finishing the stitch
 Pulling through both loops finalizes the single crochet, leaving one loop on the hook
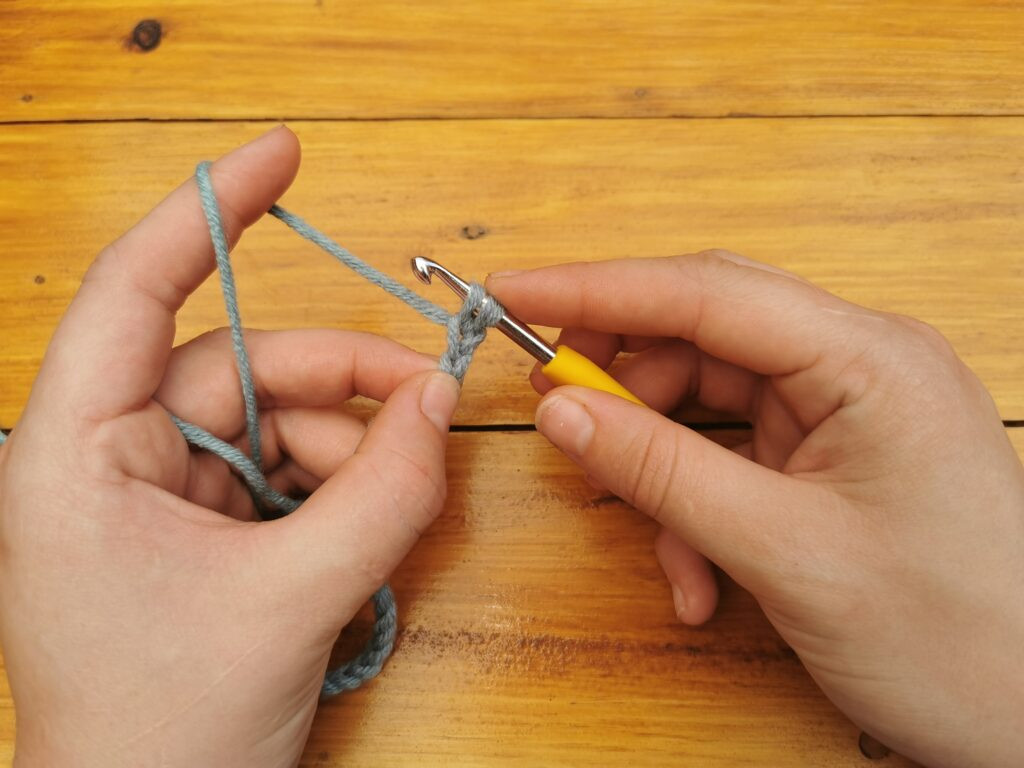
Continue making single crochets down the chain.
6.3 How Many Single Crochets Should I Make?
Make 19 single crochets down the chain. You should have 20 single crochets total.
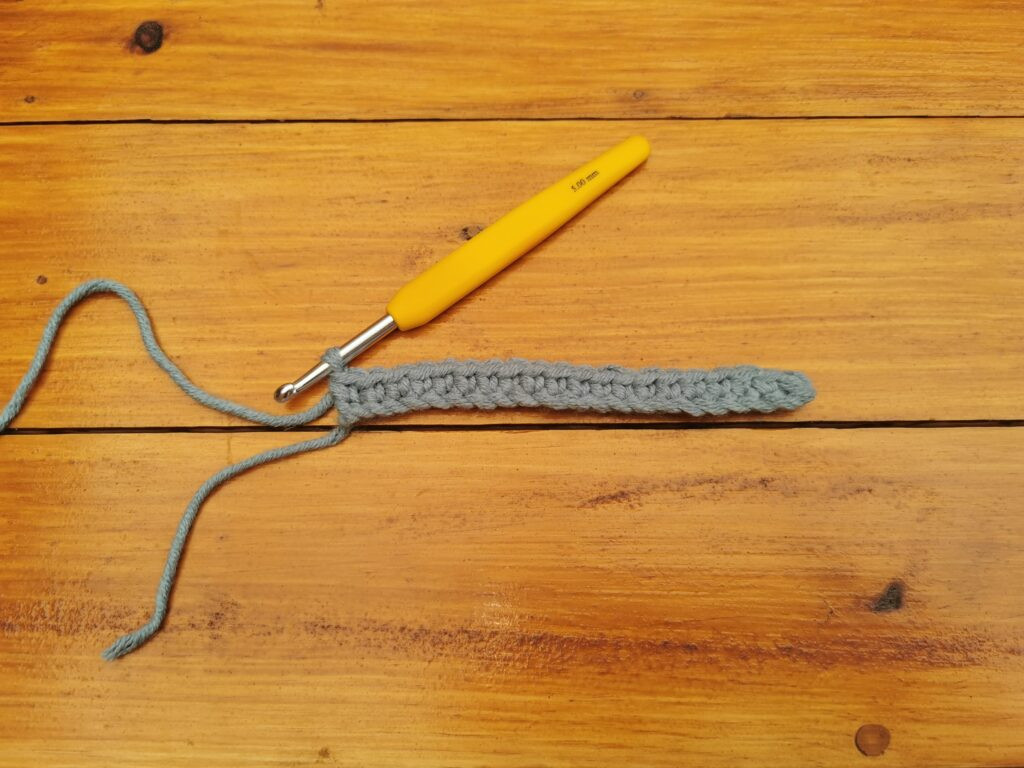 Continuing to single crochet down the chain creates a uniform row of dense stitches
7. Starting the Next Row in Crochet Photos
Properly starting each new row is crucial for maintaining the structure and appearance of your crochet project.
7.1 How Do I Start a New Row of Single Crochet?
To start a new row:
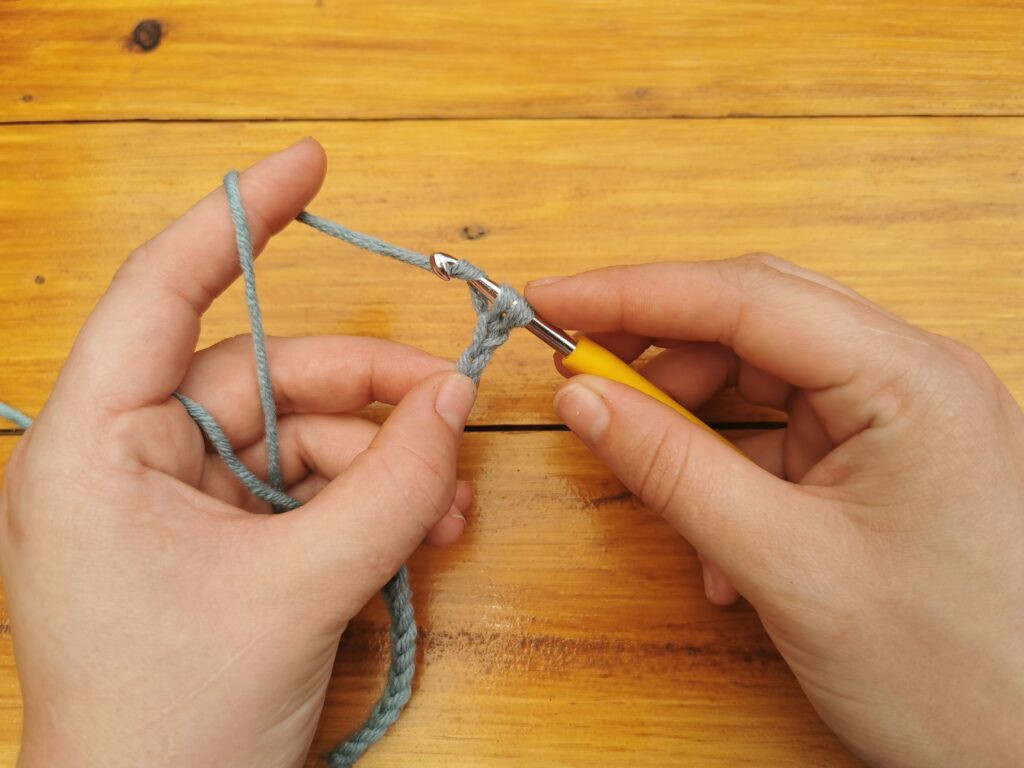
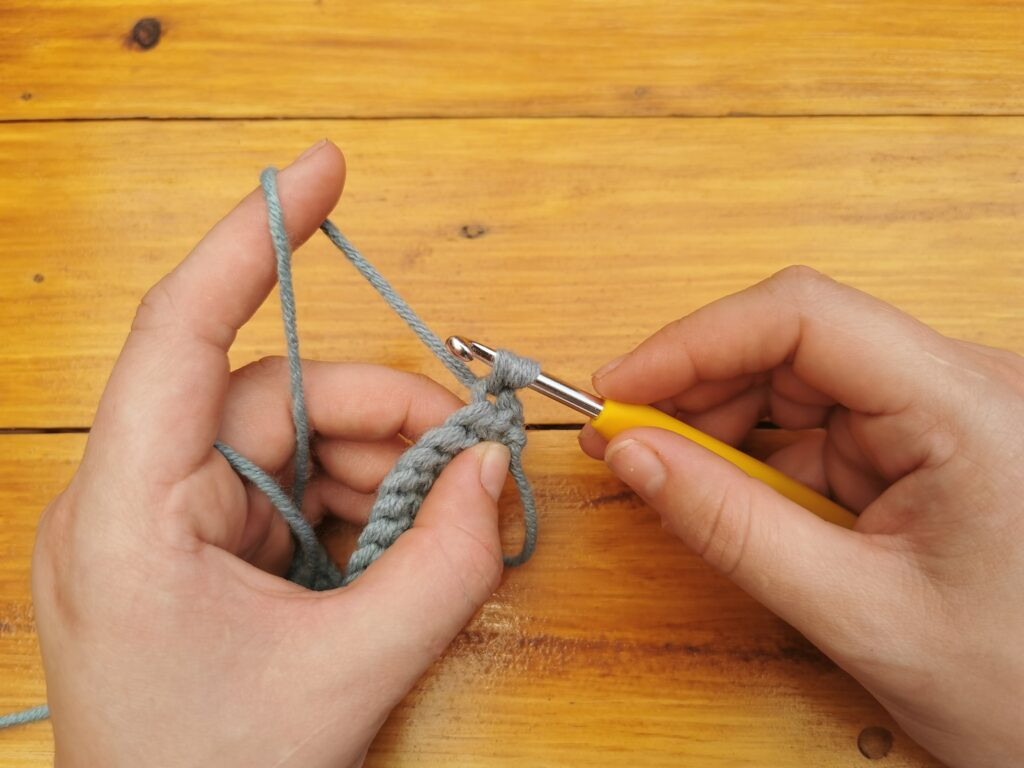
- Chain 1 (yarn over, pull through the loop on your hook). This is your turning chain.
 Chaining one to start the second row maintains the correct height and edge alignment
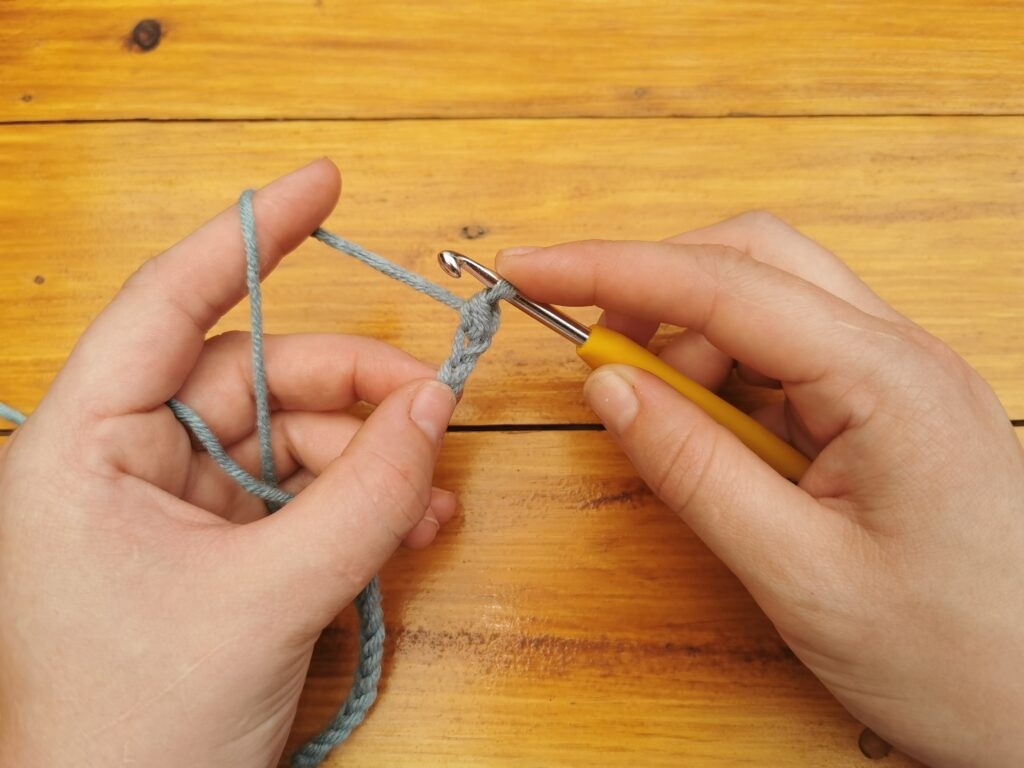
- Turn your work the same way each time.
 Turning the work ensures consistent stitch direction and a neat fabric appearance
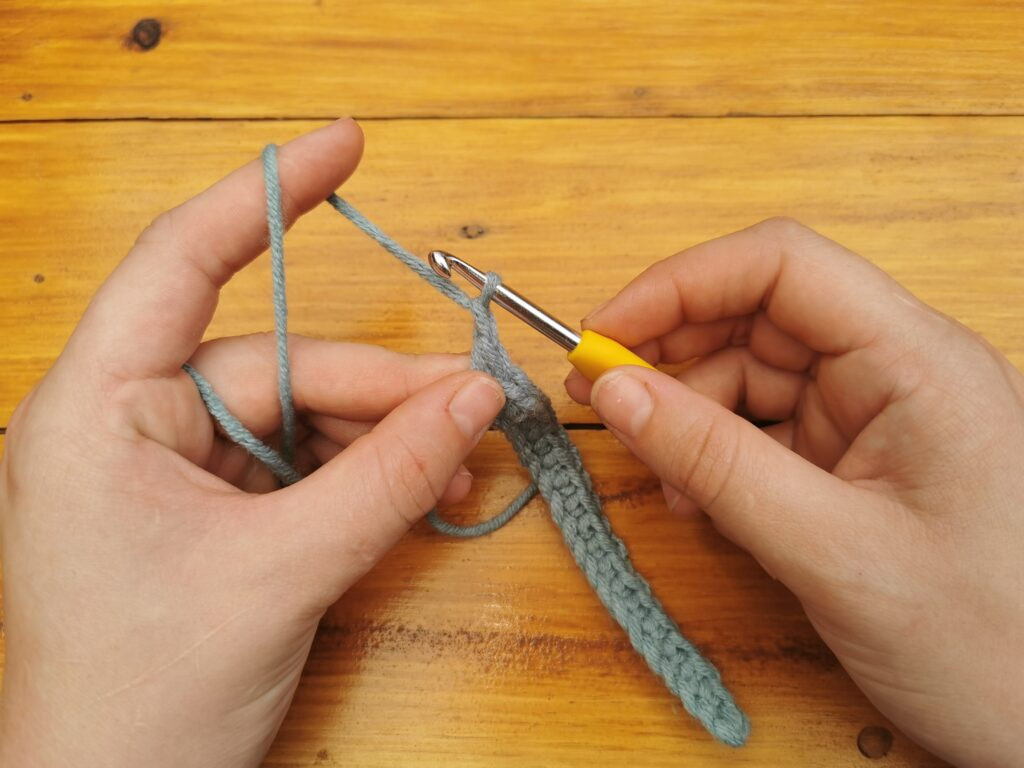
- Insert your hook into the last single crochet you made in the previous row.
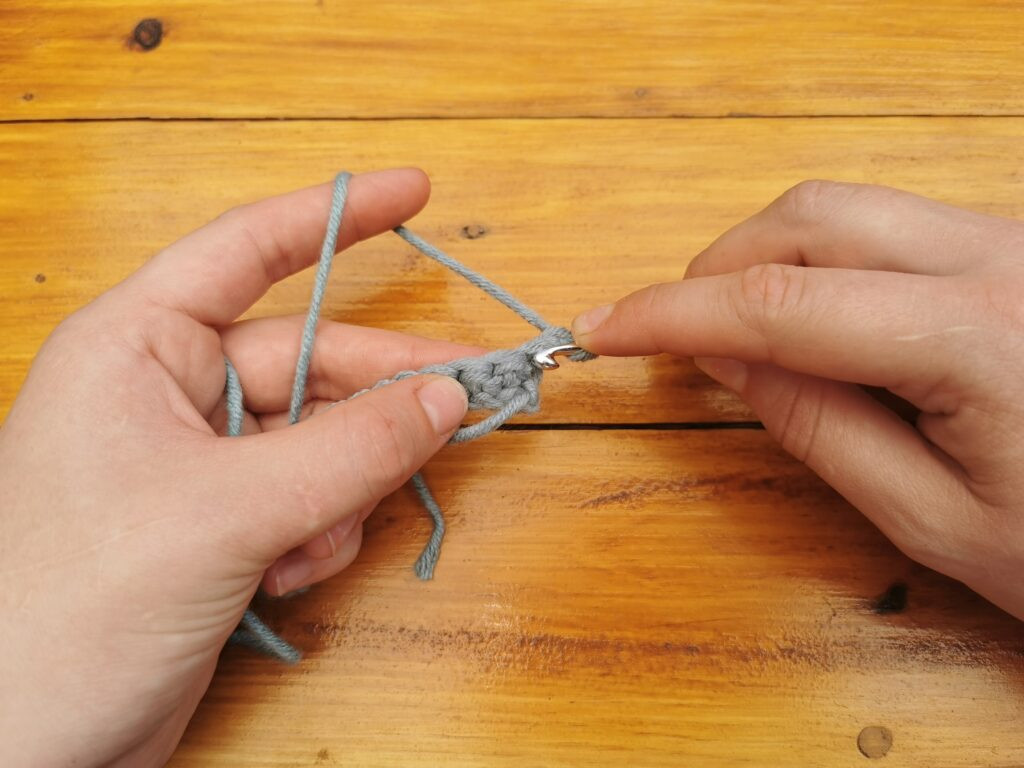 Inserting the hook into the first stitch of the row aligns the new row with the previous one
 The V-shape indicates the correct stitch for inserting the hook, ensuring proper stitch formation
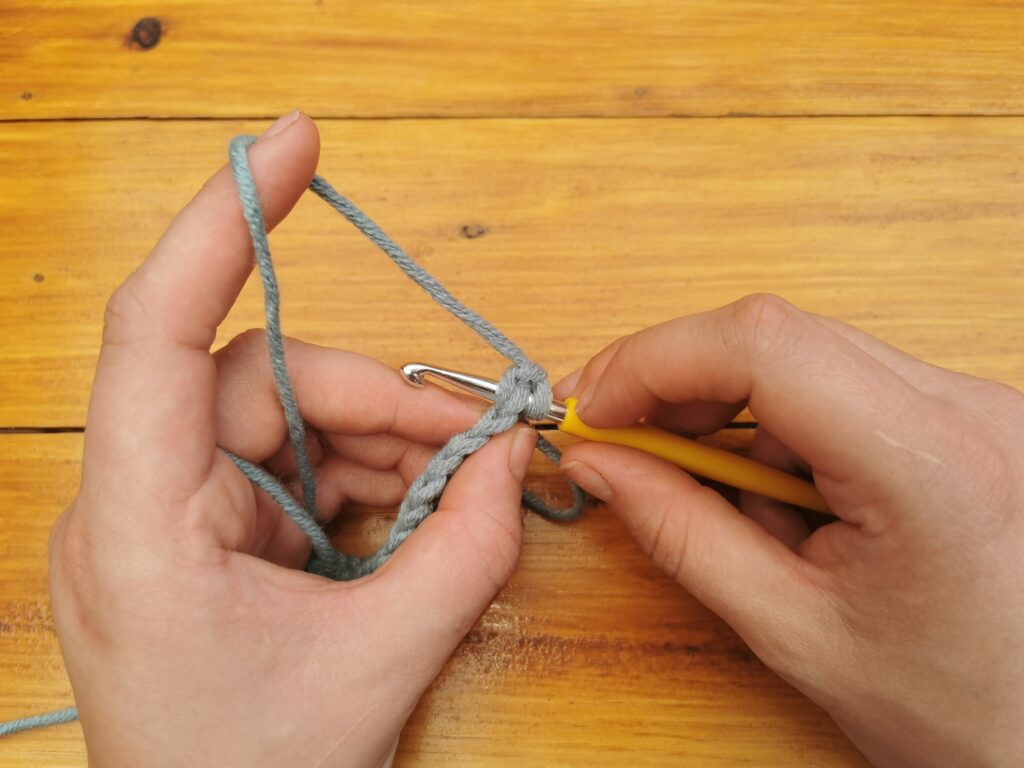
- Ensure you put your hook through both the front and back loop of the stitch, creating a V.
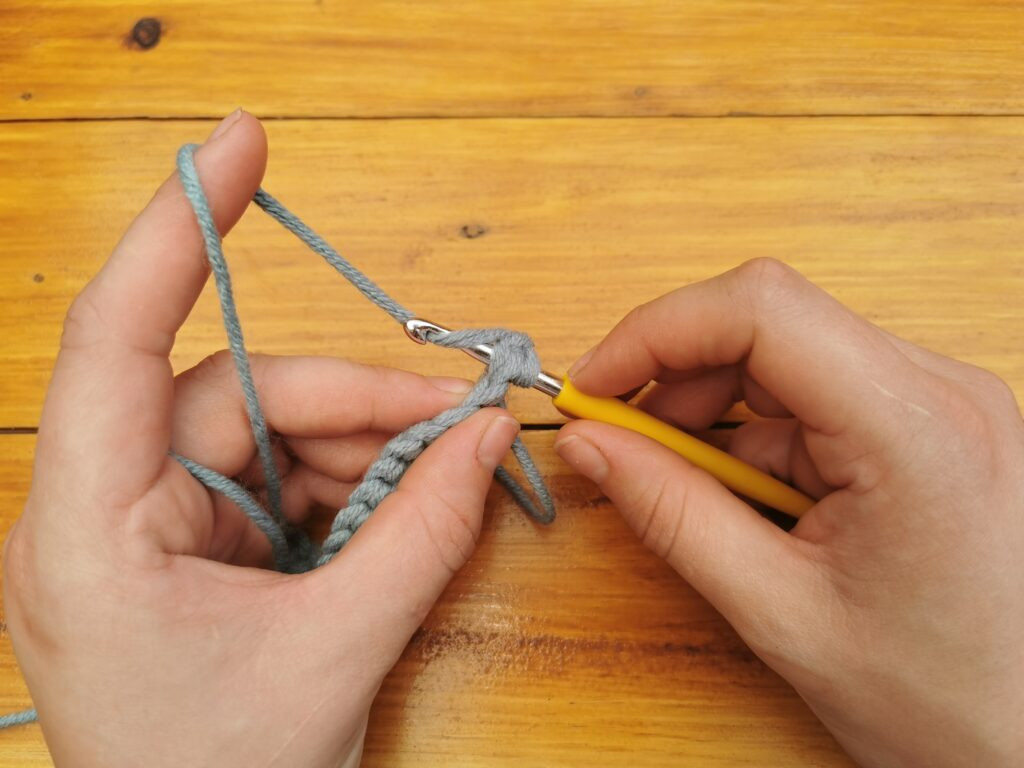
- Yarn over and pull through the stitch; you have two loops on your hook.
- Yarn over and pull through, completing your single crochet on the second row.
 Yarning over the hook prepares to pull through, initiating the single crochet stitch
 Having two loops on the hook sets the stage for the final step of the single crochet
7.2 Why Is the Turning Chain Important?
The turning chain helps keep the sides of your work straight and even, maintaining a professional appearance.
8. Finishing Off and Weaving In Ends
Properly finishing off and weaving in ends secures your work and gives it a polished look.
8.1 How Do I Finish Off a Crochet Project?
Here’s the process:
- At the end of your project, yarn over like when making a chain 1.
- Pull the loop about an inch outward.
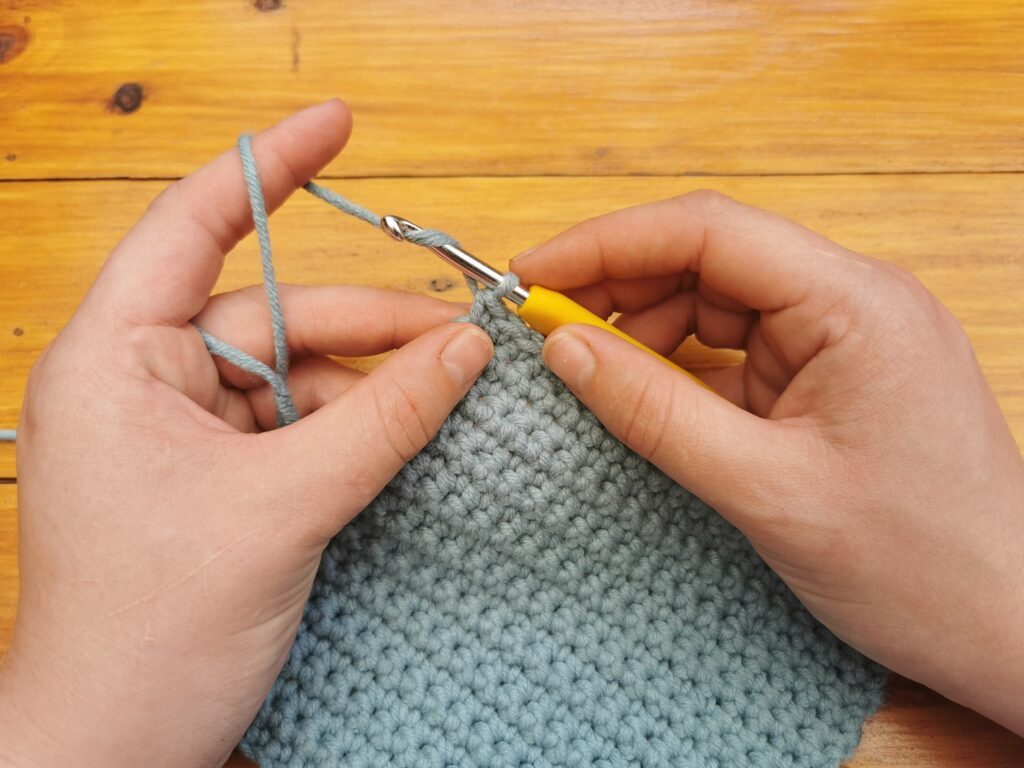 At the end of your project, yarn over like for when you make a chain 1.
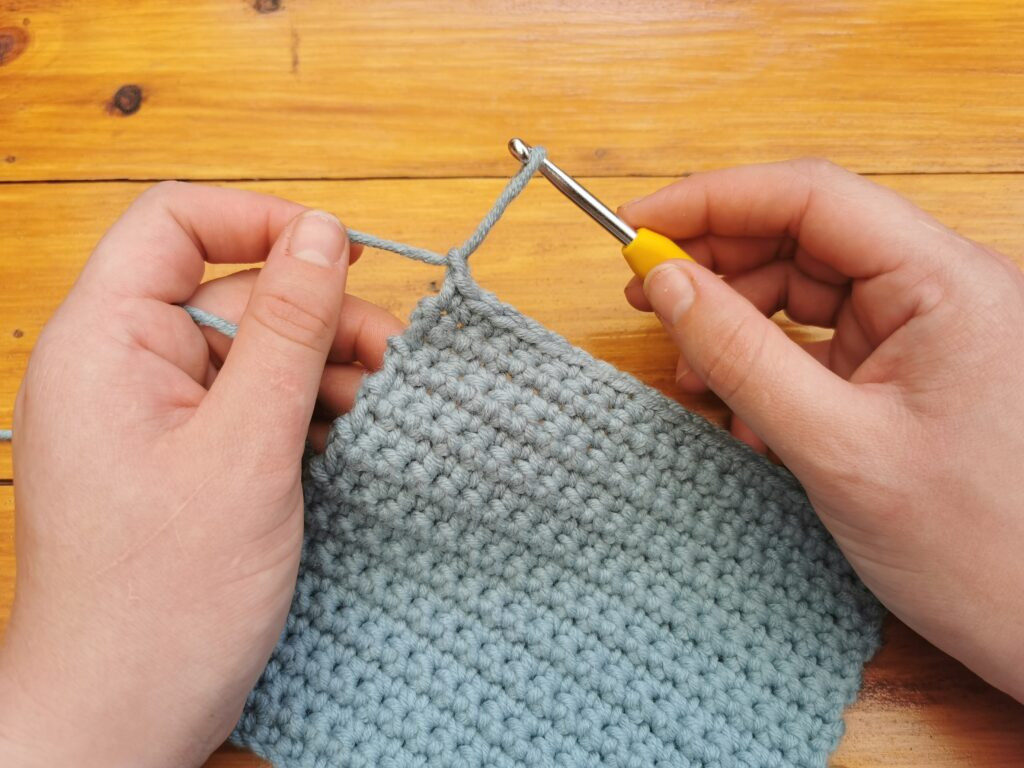 Pull the loop about an inch outward.
- Keeping your yarn on the hook, lay down your project and measure about 2 inches on the working yarn. Cut the yarn at the 2-inch mark.
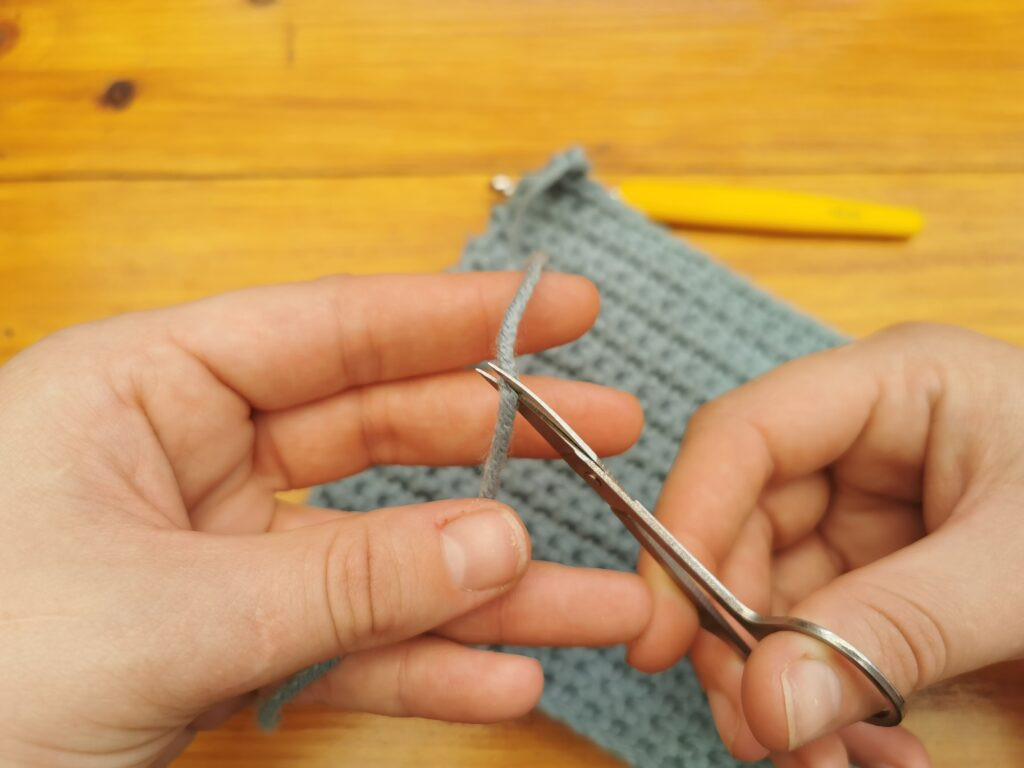 Cut the yarn
- Now take your hook and pull the yarn completely through the loop.
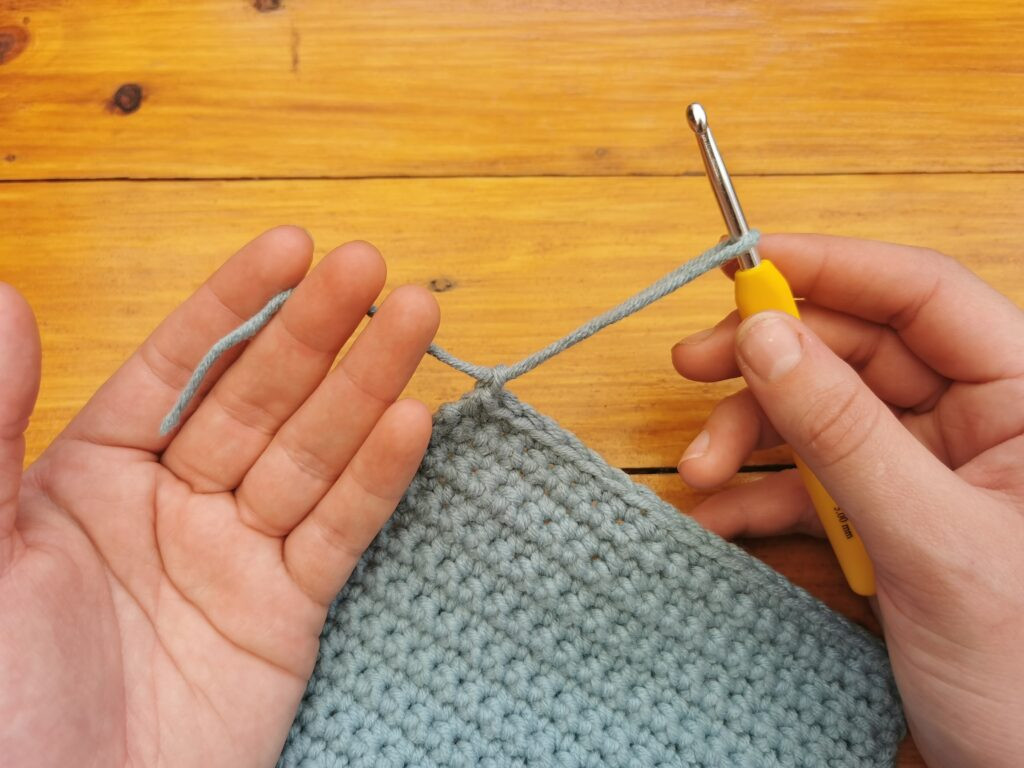 Pull the yarn completely through the loop
8.2 What Does FO Mean in Crochet Patterns?
FO stands for Finish Off, meaning to cut your yarn and tighten the loop to secure your work.
8.3 Why Is Weaving In Ends Important?
Weaving in ends secures loose yarn tails, preventing your work from unraveling and ensuring a neat finish.
8.4 How Do I Weave In Ends?
Here’s how to do it:
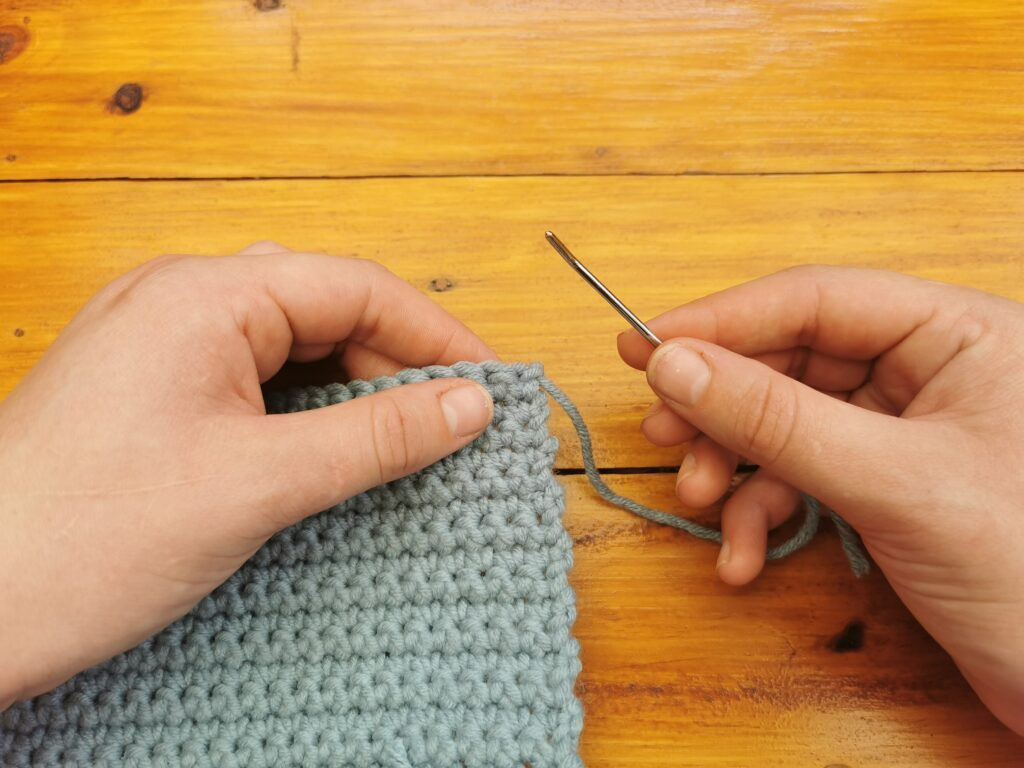
- Push the piece of yarn through the eye of the yarn needle.
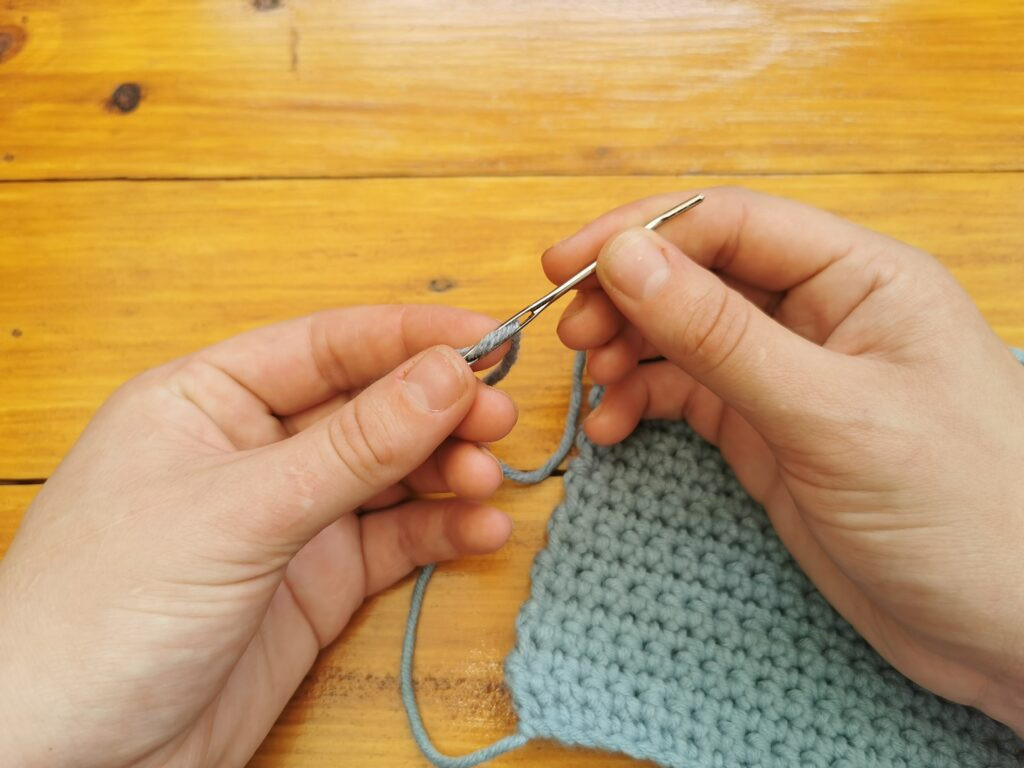 Insert yarn into darning needle
- Pull the yarn through enough so that it is long enough for you to grab a hold of.
 Pull the yarn through the eye of the needle
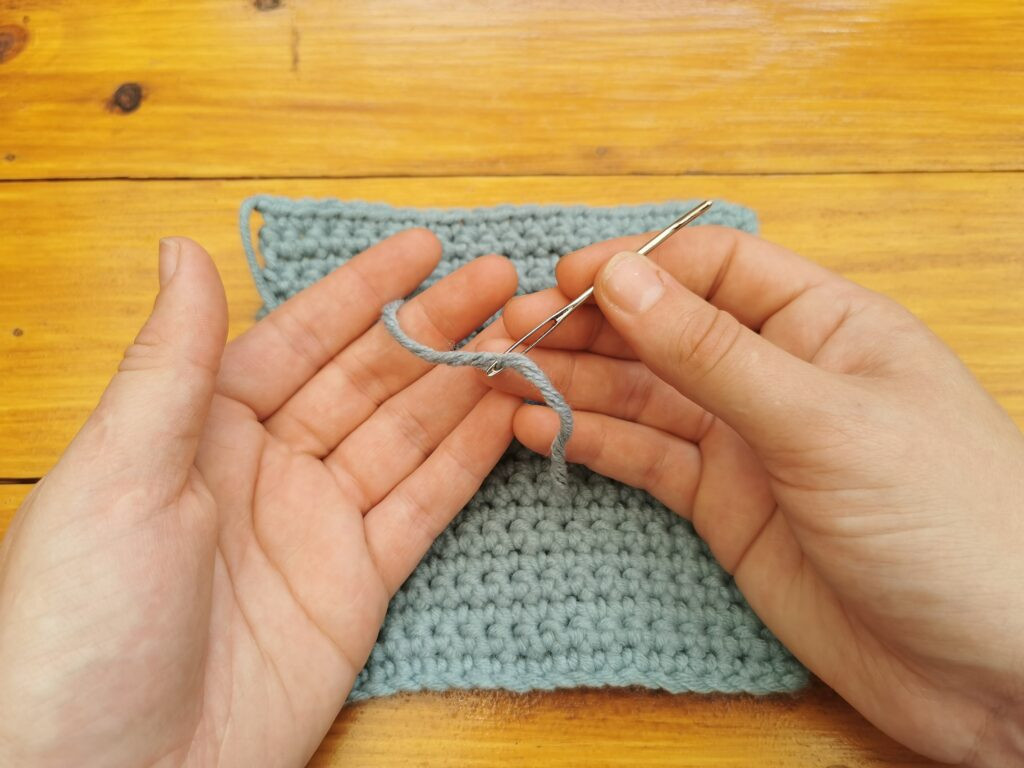
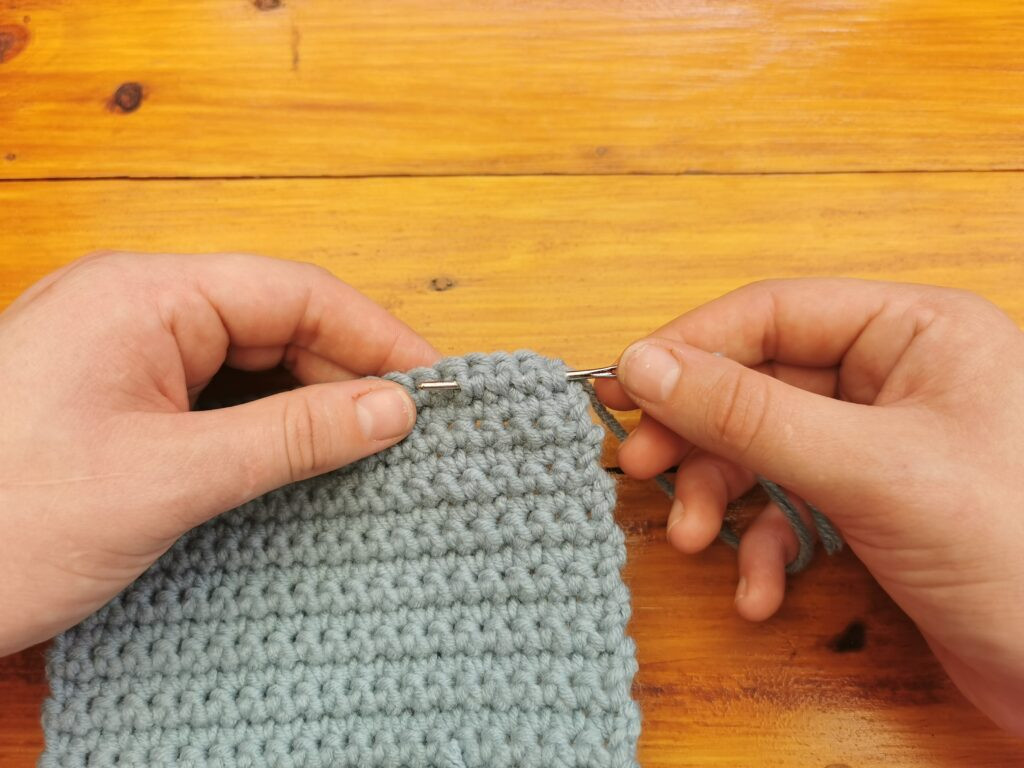
- I usually go through the back of the first stitch to get to the bottom row.
 Insert darning needle into bottom row
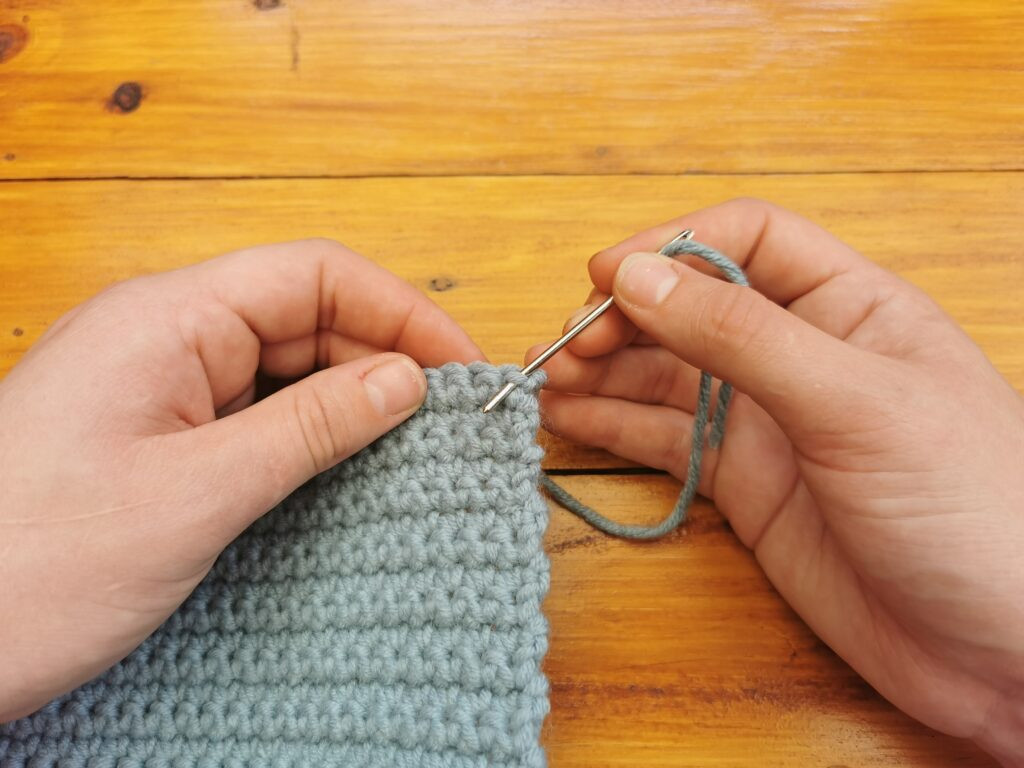
- Insert the needle through the top of the stitch downward, making sure to not go through the other side.
 Pull through to weave in the ends
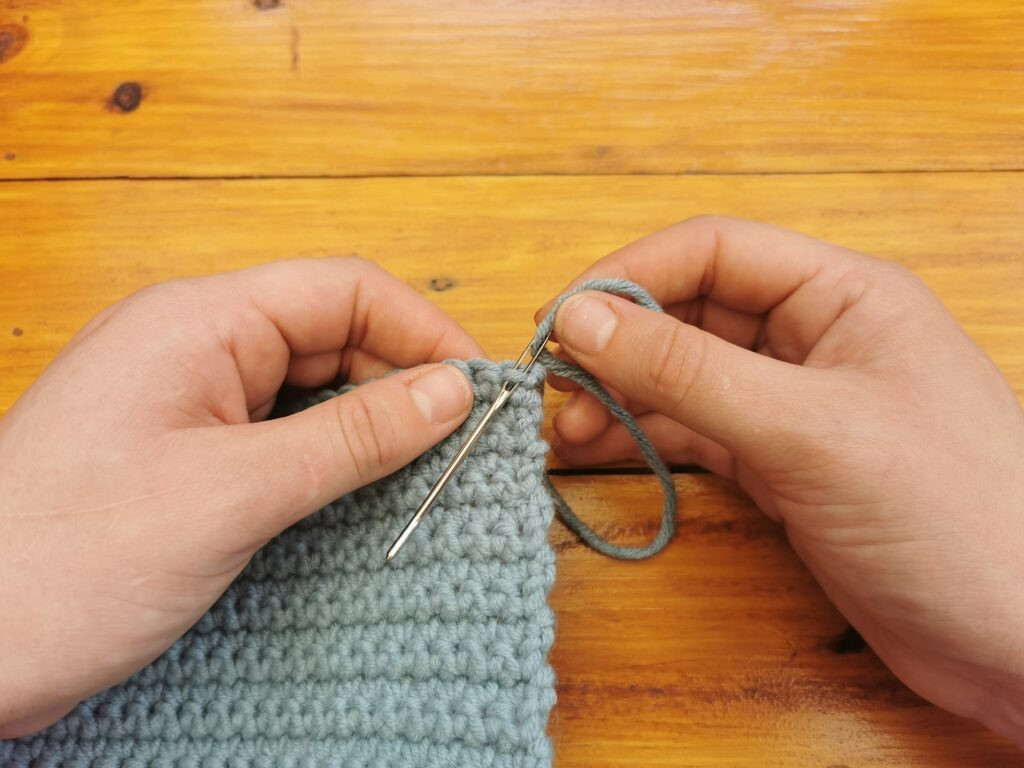
- Pull the needle through but not too tightly as you don’t want your work to curl.
 Pull the yarn tightly
- Weave in the needle into the bottom row where your yarn came out.
 Insert the needle again
- Pull the needle through, again not to tightly.
 Pull through the yarn
- Take our the needle from the yarn and cut the yarn close to your work. If a little piece shows, you can stretch the row a little until it disapears.
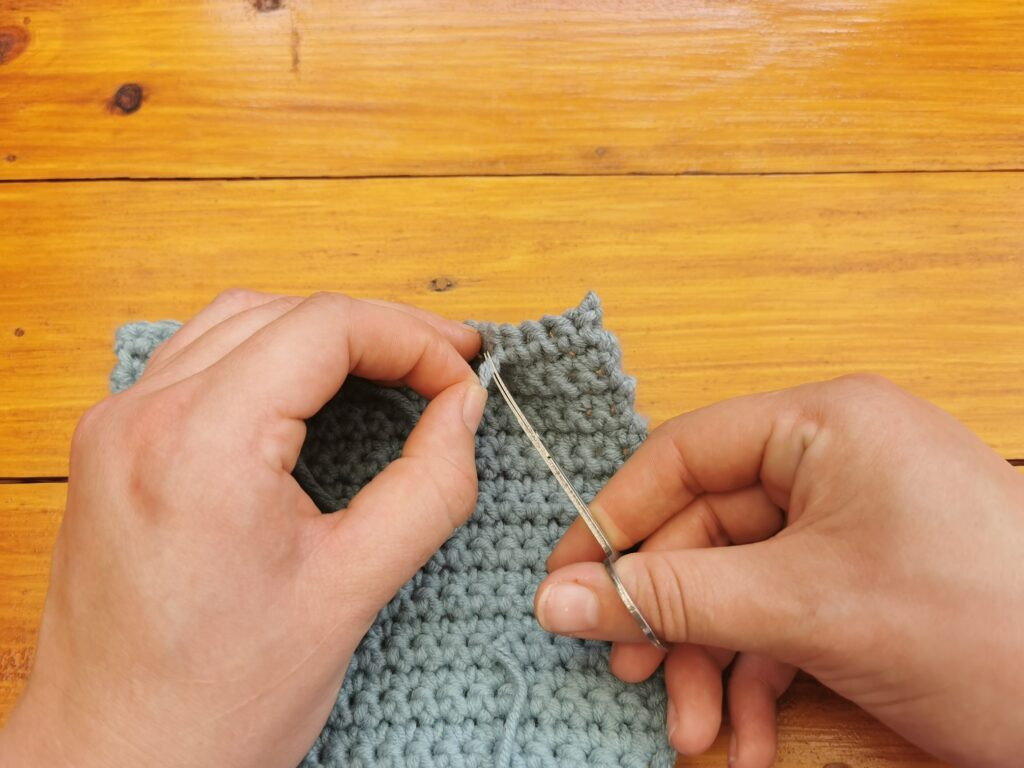 Cut the yarn close to the work
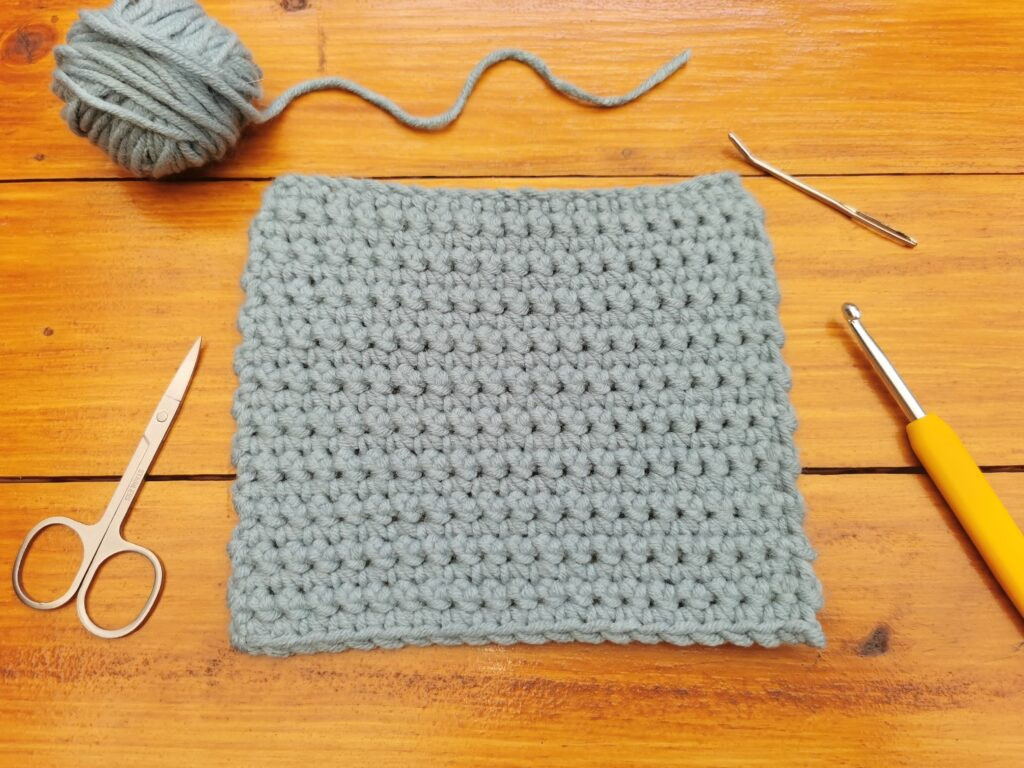 Finished product.
9. Transforming Photos into Crochet Patterns
Turning a photograph into a crochet pattern involves several steps, from selecting the right photo to mapping out the color changes.
9.1 How Do You Convert a Photo to a Crochet Pattern?
Here are the general steps:
- Choose a Photo: Pick a clear, high-resolution photo with good contrast.
- Use Software or Online Tools: Upload your photo to a crochet pattern generator like Stitch Fiddle or Pic2Pat.
- Adjust Settings: Customize the pattern by adjusting size, colors, and stitch density.
- Create a Graph: The software converts the image into a grid-based chart, where each square represents a stitch.
- Follow the Chart: Crochet following the chart, changing colors as indicated to replicate the image.
9.2 What Makes a Good Photo for Crochet?
Ideal photos have:
- High Resolution: Captures more detail.
- Good Contrast: Makes it easier to differentiate colors.
- Simple Composition: Reduces complexity in the pattern.
9.3 What Programs or Software Can I Use to Make a Crochet Pattern from a Photo?
Popular choices include:
- Stitch Fiddle: Online tool for creating crochet and knitting charts.
- Pic2Pat: Converts images into various craft patterns.
- Photoshop: Use to edit the photo before converting it into a pattern.
9.4 How Can I Simplify a Photo for Crochet?
Simplify by:
- Reducing Colors: Use software to limit the color palette.
- Increasing Pixel Size: Makes the image blockier and easier to follow.
- Editing Details: Remove unnecessary elements in photo editing software.
10. Crochet Techniques for Photo Projects
Different crochet techniques can be used to achieve various effects when crocheting photos.
10.1 What Are the Best Crochet Stitches for Photo Replication?
Suitable stitches include:
- Single Crochet: Provides dense coverage, good for detailed images.
- Tunisian Crochet: Creates a woven-like texture that can mimic the look of a photo.
- Corner to Corner (C2C): Works up quickly and can create interesting pixelated effects.
10.2 What Is Intarsia Crochet?
Intarsia is a technique where you use different colors of yarn to create blocks of color in your design. It’s ideal for solid shapes and blocks of color, avoiding carrying colors across the back.
10.3 What Is Filet Crochet?
Filet crochet uses a grid of open and closed meshes to create a picture. It works well for images with clear outlines and simpler details.
10.4 How Can I Add Texture to My Crochet Photo?
Add texture by:
- Using Different Stitches: Mix single crochet with bobble or popcorn stitches.
- Adding Overlays: Crochet separate elements and attach them.
- Employing Textured Yarn: Adds depth and interest.
11. Tips for Colorwork in Crochet Photos
Effective color management is vital when crocheting photos to ensure accurate and clean image representation.
11.1 How Do I Change Colors in Crochet?
Change colors by:
- Working the last stitch of the old color to the last yarn over.
- Yarn over with the new color and pull through all loops on the hook.
- Continue crocheting with the new color, carrying or weaving in the old color.
11.2 How Do I Manage Yarn When Changing Colors?
- Carry Colors: For short distances, carry the unused color up the side of the work.
- Weave In: For longer distances, weave in the ends as you go to avoid bulk.
- Use Bobbins: For intarsia, use small bobbins of each color to prevent tangling.
11.3 What Are Some Common Mistakes in Crochet Colorwork and How to Avoid Them?
Common mistakes and solutions:
- Uneven Tension: Keep tension consistent when changing colors.
- Color Bleeding: Secure ends well to prevent colors from showing through.
- Too Many Carried Colors: Use intarsia to avoid carrying too many colors across the back.
12. Creative Crochet Photo Project Ideas
Explore various project ideas to spark your creativity and showcase your crocheted photos.
12.1 Can I Crochet a Photo Blanket?
Yes, you can crochet a photo blanket using the techniques mentioned above. It’s a great way to create a personalized keepsake.
12.2 What Other Projects Can I Crochet Using Photos?
Other project ideas include:
- Pillows: Display a single image or a collage of photos.
- Wall Hangings: Create decorative art pieces.
- Tote Bags: Personalize your accessories with photo images.
- Baby Blankets: Incorporate baby photos or nursery themes.
12.3 Can I Crochet a Photo as a Gift?
Absolutely, crocheted photos make thoughtful and personalized gifts for birthdays, anniversaries, or holidays.
13. Caring for Your Crochet Photos
Proper care will keep your crochet photos looking their best for years to come.
13.1 How Do I Wash a Crochet Blanket with a Photo?
- Hand Wash: Gently wash in cold water with a mild detergent.
- Machine Wash: If using a machine, place the item in a mesh laundry bag and use a gentle cycle.
- Dry Flat: Lay the item flat to dry to prevent stretching.
13.2 How Can I Prevent Colors from Fading?
- Use Colorfast Yarn: Choose yarns that are less likely to bleed or fade.
- Avoid Direct Sunlight: Store or display your project away from direct sunlight.
- Wash Carefully: Use gentle detergents and cold water.
13.3 How Do I Store Crochet Photos?
Store your crochet photos:
- In a Cool, Dry Place: Avoid moisture and extreme temperatures.
- Fold Neatly: Store flat to prevent creases.
- Use Acid-Free Paper: If storing for a long time, wrap in acid-free paper to protect the fibers.
14. Where to Find Inspiration and Patterns
Discover resources and communities that can inspire and guide your crochet photo projects.
14.1 Are There Online Communities for Crochet Photos?
Yes, online communities include:
- Ravelry: A comprehensive site for knitters and crocheters.
- Etsy: Great for finding unique patterns and connecting with designers.
- Facebook Groups: Join groups dedicated to crochet and photo-based projects.
14.2 Where Can I Find Free Crochet Photo Patterns?
- Ravelry: Often has free patterns available.
- Blogs: Many crochet bloggers offer free patterns.
- YouTube: Tutorials can provide step-by-step guidance.
14.3 What Magazines Feature Crochet Patterns?
Magazines like “Interweave Crochet,” “Happily Hooked,” and “Inside Crochet” often feature unique patterns and techniques.
15. Advanced Techniques for Crochet Photos
Once you’ve mastered the basics, explore these advanced techniques to elevate your crochet photos.
15.1 How Do I Crochet a Portrait?
- Use a Detailed Chart: Start with a high-quality, detailed chart.
- Work Slowly: Pay close attention to color changes and stitch placement.
- Use Fine Yarn: Finer yarn allows for more detail.
15.2 What Is Pixel Crochet?
Pixel crochet involves creating images using small blocks of color, similar to pixels on a screen. It is often done using the C2C technique.
15.3 How Can I Add Shading and Depth to My Crochet Photo?
Add shading and depth by:
- Using Different Shades of Yarn: Create gradients by using multiple shades of the same color.
- Employing Shading Techniques: Use stitches like the slip stitch to create subtle shading effects.
- Blocking: Properly block your finished piece to enhance stitch definition.
16. Maintaining E-E-A-T Standards in Crochet Photography
E-E-A-T stands for Experience, Expertise, Authoritativeness, and Trustworthiness. It’s a set of guidelines Google uses to evaluate content quality, especially for “Your Money or Your Life” (YMYL) topics.
16.1 Experience
Share your personal journey and hands-on experience in crochet photography. Highlight any challenges you overcame and lessons you learned. This could include details about specific projects you’ve worked on, how you chose certain materials, or any innovative techniques you’ve developed.
16.2 Expertise
Showcase your knowledge by providing detailed explanations of crochet techniques, tools, and materials. Reference reputable sources and cite studies from institutions like the Santa Fe University of Art and Design’s Photography Department, if applicable.
16.3 Authoritativeness
Establish yourself as a reliable source by demonstrating your credibility and recognition within the crochet photography community. This can be achieved by guest blogging on well-known crochet sites, participating in industry events, or receiving positive reviews for your work.
16.4 Trustworthiness
Ensure your content is accurate, up-to-date, and honest. Disclose any potential biases and be transparent about your sources. Include a clear privacy policy and contact information on your website.
17. Optimizing Your Crochet Photography for Google Discovery
To ensure your crochet photography appears on Google Discovery, you need to optimize your content for visual appeal, relevance, and user engagement.
17.1 Visual Appeal
Use high-quality, eye-catching images of your crochet projects. These images should be well-lit, in focus, and visually appealing. Consider using images that showcase the texture, detail, and artistic aspects of your crochet work.
17.2 Relevance
Create content that aligns with the interests and needs of your target audience. Research trending topics in the crochet and photography communities and tailor your content accordingly. Use relevant keywords and phrases to help Google understand the subject matter of your content.
17.3 User Engagement
Encourage user engagement by asking questions, inviting comments, and sharing your content on social media. Respond to comments and feedback to foster a sense of community. Optimize your website for mobile devices to ensure a seamless user experience.
18. Staying Updated with the Latest Trends
Keeping up with the latest trends in crochet and photography ensures your skills and projects remain current and appealing.
18.1 Monitoring Online Communities
Engage with online communities, such as Ravelry and Facebook groups, to stay informed about the latest trends and techniques. These platforms often feature discussions, tutorials, and project showcases.
18.2 Following Influencers
Follow influential figures in the crochet and photography communities on social media platforms. These influencers often share their latest projects, insights, and recommendations.
18.3 Attending Workshops and Classes
Participate in workshops and classes led by experienced crochet and photography instructors. These learning opportunities can provide valuable insights and hands-on experience.
19. Common Questions About Crochet Photography
19.1 What Is the Best Yarn for Crochet Photography?
The best yarn for crochet photography depends on the specific project and desired outcome. Cotton yarn is a popular choice for its durability, versatility, and affordability. Wool yarn offers warmth, texture, and a natural look. Acrylic yarn
