Silhouette art offers a unique and timeless way to capture memories and add a touch of personalized elegance to your home decor. Whether you’re aiming to create a sentimental portrait of a loved one or a chic piece of wall art, transforming a simple photograph into a captivating silhouette is surprisingly easy. In this guide, we’ll walk you through a straightforward method using free online tools to create stunning silhouette art from your photos, even if you have no prior photo editing experience.
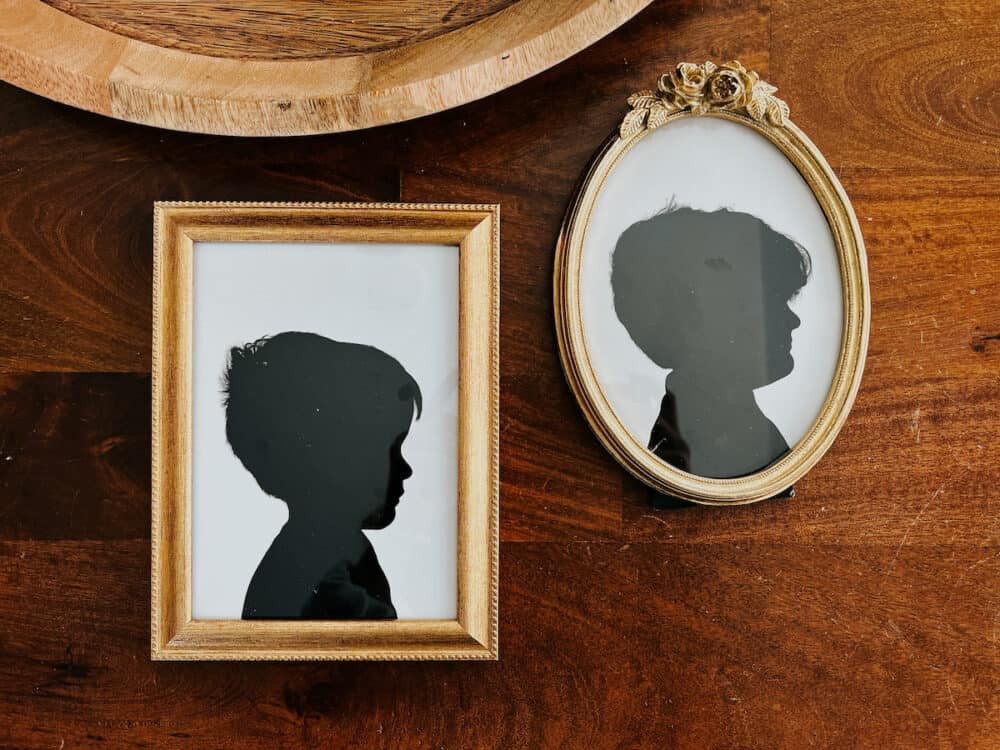 two silhouette art prints framed and laying on a table
Understanding Silhouette Art
Before we dive into the creation process, let’s briefly define what silhouette art entails. At its core, a silhouette is a representation of an object or person depicted as a solid shape of a single color, usually black, against a light background, typically white. Historically, silhouettes were a popular and affordable alternative to painted portraits, often capturing the profile of individuals, especially children. The beauty of silhouette art lies in its simplicity and its ability to emphasize the subject’s form and outline, highlighting distinctive features like the curve of a nose or the delicate shape of eyelashes. It’s fascinating to observe how much personality and recognition can be conveyed through just an outline.
Tools You’ll Need to Make a Photo Silhouette
The best part about this DIY project is that you likely already have everything you need! Here’s a quick rundown:
- A Digital Photo: The starting point for your silhouette art is a photograph. Profile shots work best, especially for portraits of people or animals.
- A Computer or Smartphone with Internet Access: We’ll be using an online tool to create our silhouettes, so you’ll need a device connected to the internet.
- Canva (Free Version): Canva is a user-friendly graphic design platform that offers a free version packed with features perfect for this project. While Canva offers paid plans, the free version is more than sufficient for creating beautiful silhouette art. You can access Canva through their website or app.
- Optional: Printer and Photo Paper or Cardstock: If you want to print your silhouette art at home, you’ll need a printer and your choice of paper. Cardstock is a great option for a more professional and durable finish.
- Optional: Picture Frame: To display your finished silhouette art, a picture frame will add a polished touch.
Step-by-Step Guide: How to Create a Silhouette from a Photo Using Canva
Let’s get started on transforming your photo into a striking silhouette using Canva’s intuitive tools. Follow these simple steps:
Step 1: Selecting the Perfect Photo for Your Silhouette
The key to a great silhouette is choosing the right photograph. Here are some tips to help you select or take the ideal picture:
- Profile View is Ideal: For portraits, profile shots (side views) are classic for silhouettes as they clearly define the subject’s unique outline.
- Clean Background: While we’ll be removing the background digitally, starting with a photo that has a relatively uncluttered background can make the process even smoother. A plain wall or open sky works well.
- Good Lighting: Ensure your subject is well-lit so their features are clearly defined in the photo. Natural light is often the most flattering.
- Consider Hair Style: For people with long hair, consider styling it in a ponytail or updo. Loose hair can sometimes appear as a large, undefined mass in a silhouette.
- Pet Photography Tip: If you’re silhouetting a pet, especially a dog, try using treats to get them to look in profile. Having someone hold a treat just off-camera can work wonders to capture their attention and the perfect pose.
- Chin Position: For human portraits, ensure the subject’s chin is held naturally, not too high or too low. Slightly adjusting the chin position can refine the silhouette’s overall appearance. Take a few photos with minor adjustments to choose from later.
- Smartphone Photos are Perfect: You don’t need professional equipment! Modern smartphone cameras are more than capable of capturing photos suitable for silhouette art.
Step 2: Upload Your Photo to Canva
Once you’ve chosen your photo, it’s time to upload it to Canva and prepare your digital workspace:
- Create a Canva Account (if you don’t have one): Go to Canva.com and sign up for a free account.
- Start a New Design: On the Canva homepage, click the “Create a design” button.
- Choose Custom Size: Select “Custom size” to define the dimensions of your silhouette art. If you plan to print in a standard frame size like 5×7 inches or 8×10 inches, enter those dimensions in inches. You can always resize later if needed.
- Upload Your Photo: In the Canva editor, find the “Uploads” tab in the left-hand panel. Click “Upload files” and select your chosen photo from your computer or device.
- Add Your Image to the Design: Once uploaded, drag your image from the “Uploads” panel onto your blank canvas. Resize and position it to fill the canvas area as desired.
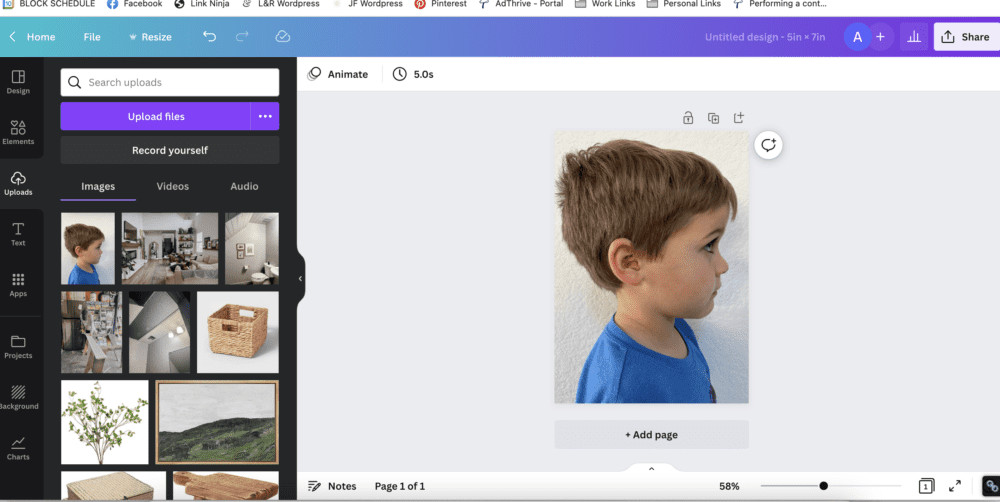 Screen shot showing the upload button in Canva
Step 3: Remove the Background in Canva
Canva’s “Background Remover” tool makes eliminating the background from your photo incredibly simple:
- Select Your Image: Click on your uploaded image within your design in Canva.
- Click “Edit image”: In the top toolbar that appears when you select the image, click the “Edit image” button.
- Use “Background Remover”: In the “Edit image” panel on the left, you should see a tool called “Background Remover.” Click on it.
- Automatic Background Removal: Canva’s AI will automatically detect and remove the background from your photo. This process usually takes just a few seconds.
- Refine (if necessary): After the automatic removal, Canva may offer “Erase” and “Restore” buttons. If there are any small areas missed or incorrectly removed, you can use these tools to manually refine the background removal. However, with good photos, the automatic tool is usually very accurate on the first try.
Step 4: Convert Your Photo to a Silhouette Using the “Duotone” Effect
Now, we’ll use Canva’s “Duotone” effect to transform your image into a classic silhouette:
- Stay in “Edit image”: Ensure your image is still selected and you are in the “Edit image” panel.
- Find “Duotone”: Scroll down in the “Edit image” panel until you find the “You may also like…” section. Look for the “Duotone” effect.
- Apply Duotone: Click on “Duotone.” You’ll see a range of color presets. Select any of the presets to initially apply the Duotone effect. “Cherry” is often the first option and works fine as a starting point. Don’t worry about the initial colors, we’ll customize them.
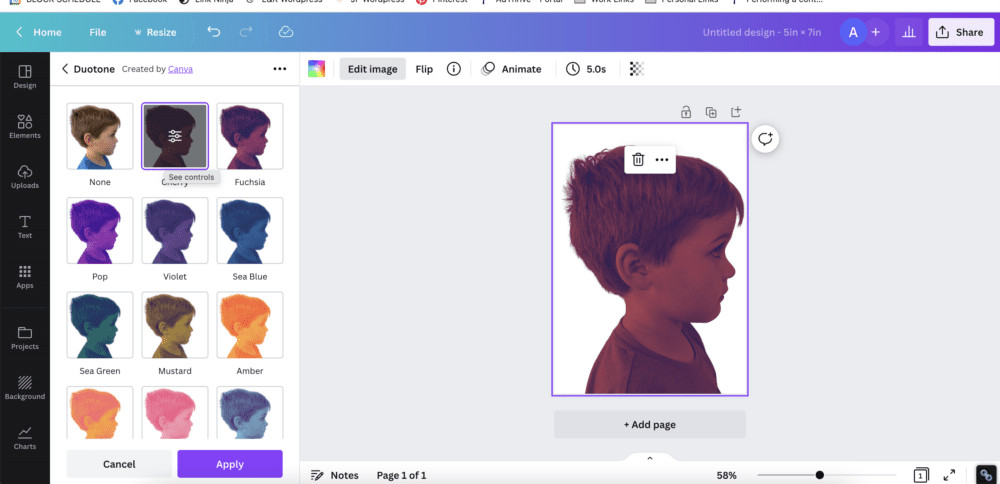 Screenshot showing the Duotone option in Canva's edit image panel
- Customize Colors: Once you’ve applied a Duotone preset, click on the adjustment sliders icon that appears on the Duotone option. This will open the Duotone color customization panel.
- Set Highlights and Shadows to Black: In the Duotone customization panel, you’ll see options to change “Highlights” and “Shadows” colors. Click on the color swatch for both “Highlights” and “Shadows” and select black (#000000) from the color picker. Alternatively, if you plan to print on black paper, you could choose white for both “Highlights” and “Shadows” to create a white silhouette.
- Silhouette Transformation Complete! Instantly, your photo will transform into a solid black silhouette against the white background, or white against black if you chose white colors.
Step 5: Download and Print Your Silhouette Art
Your digital silhouette art is now ready to be downloaded and printed:
- Download Your Design: Click the “Share” button in the top right corner of the Canva editor.
- Choose “Download”: Select “Download” from the dropdown menu.
- File Type: For printing, it’s recommended to choose “PNG” as the file type for high-quality images.
- Download: Click the “Download” button. Canva will download your silhouette art file to your computer or device.
- Print at Home or Professionally: You can now print your silhouette at home using your printer and cardstock or photo paper. For higher quality prints, consider using a local photo printing service or online print services. Walmart is mentioned as a reliable and affordable option for photo printing. Matte finish photo paper often looks excellent for silhouette art.
- Optional: Adjust Size and Background Color: Before printing, you can slightly resize the silhouette within Canva to create more white space around the edges if desired. You can also subtly change the background color from stark white to a softer off-white within Canva for a warmer look, if you prefer. This is done by clicking on the background of your design and selecting a different color from the color palette.
Creative Ways to Display Your Silhouette Art
Once you have your printed silhouette, the possibilities for displaying it are endless. Here are a few ideas:
- Classic Frames: Frame your silhouette art in traditional picture frames to create elegant wall decor. Black frames enhance the contrast and classic look of silhouettes.
- Gallery Walls: Incorporate your silhouette art into a larger gallery wall arrangement with other art pieces, photographs, and decorative items for a curated and personalized display.
- Floating Frames: Use glass floating frames for a modern and airy display that highlights the silhouette against the wall color.
- DIY Crafts: Use your silhouette prints for various DIY projects, such as creating personalized greeting cards, gift tags, or iron-on transfers for fabric items like tote bags or t-shirts.
- Kids’ Rooms: Silhouette art is perfect for children’s rooms, adding a whimsical and personal touch. Create silhouettes of your kids, pets, or favorite characters.
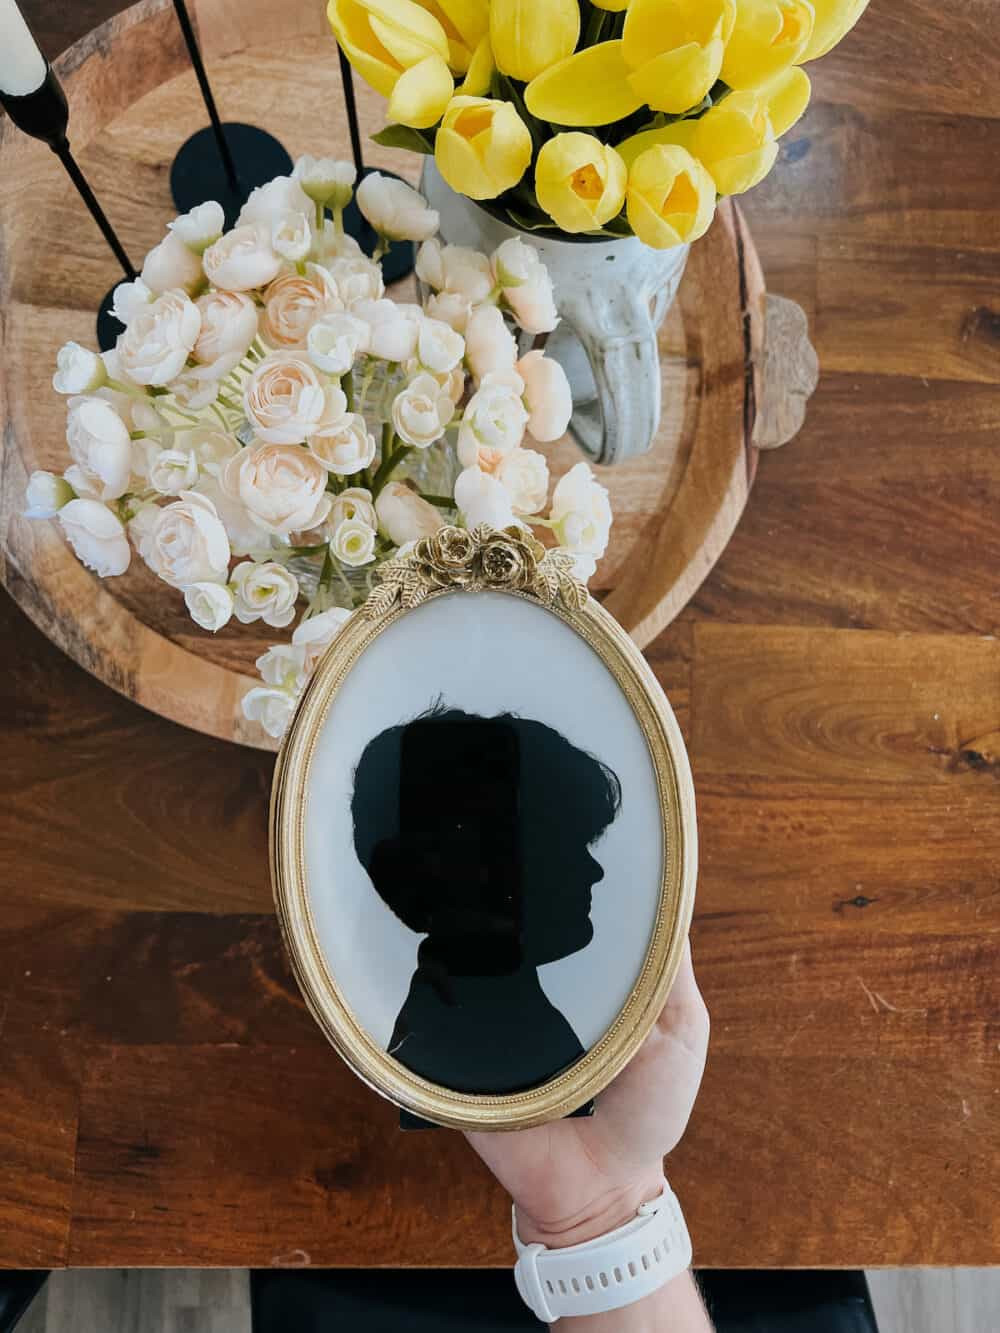 woman holding framed silhouette art
Silhouette Art: A Fun Project with Kids
Creating silhouettes can also be a delightful and engaging arts and crafts activity to enjoy with children. Here’s a simplified, kid-friendly approach:
- Print a Profile Photo: Print a simple profile photograph of your child (or let them choose a photo of a favorite animal or object).
- Cut Out the Profile: Have your child carefully cut out the profile outline from the printed photo using safety scissors.
- Trace onto Black Paper: Place the cut-out profile onto a piece of black construction paper and trace around it with a pencil.
- Cut Out the Silhouette: Let your child cut out the traced outline from the black paper.
- Glue onto White Paper: Glue the black silhouette onto a sheet of white paper or cardstock.
- Proudly Display Their Masterpiece: Encourage your child to display their handmade silhouette art!
Conclusion
Creating silhouette art from photos is a wonderfully accessible and rewarding DIY project. With free tools like Canva and a few simple steps, you can transform your cherished photographs into timeless pieces of art. Whether you’re adding to your home decor, creating personalized gifts, or enjoying a creative activity with kids, silhouette art offers a unique and elegant way to capture memories and express your personal style. So, gather your photos and get ready to create your own stunning silhouette masterpieces!