Creating a ZIP file for photos is a straightforward process that can greatly simplify sharing and archiving your visual memories. This article, brought to you by dfphoto.net, will guide you through the steps, ensuring your photos are compressed efficiently. Learn how to create photo archives and manage your digital assets better.
1. What Is A Zip File And Why Use It For Photos?
A ZIP file is a compressed archive that contains one or more files. It reduces the overall file size, making it easier to share or store multiple photos simultaneously. Compressing photos into a ZIP file not only saves storage space but also simplifies the process of sending them via email or uploading them to cloud services. This is especially useful for photographers who frequently work with large image files.
1.1. Advantages of Using ZIP Files
- File Size Reduction: ZIP files compress the contained files, reducing their overall size.
- Easy Sharing: Simplifies sending multiple files as a single, manageable archive.
- Organization: Keeps related photos together in one container.
- Archiving: Ideal for creating backups and storing photos efficiently.
- Compatibility: ZIP files are universally compatible with most operating systems.
1.2. Scenarios Where Zipping Photos Is Beneficial
- Emailing Photos: When email providers have file size limits.
- Backing Up Photos: Creating organized archives for long-term storage.
- Sharing Online: Uploading to platforms that support ZIP files for easy download.
- Client Delivery: Providing clients with a single, compressed file of their photos.
- Portfolio Management: Organizing different photo projects into separate ZIP files.
2. How to Create a Zip File on Windows
Creating a ZIP file on Windows is a simple process built right into the operating system. This method allows you to compress your photos without needing any additional software.
2.1. Step-by-Step Guide
-
Select Photos: Locate the photos you want to compress. Hold down the
Ctrlkey and click on each photo to select multiple images. -
Right-Click: Once you’ve selected all the desired photos, right-click on any of the selected files.
-
Send To: In the context menu, hover over “Send to”.
-
Compressed (zipped) folder: Click on “Compressed (zipped) folder”.
-
Name Your Zip File: A new ZIP file will be created in the same location as your original photos. You can rename it to something descriptive, like “FamilyVacationPhotos.zip”.
2.2. Customizing Compression Options
Windows doesn’t offer extensive compression options within its built-in tool. For more advanced control, consider using third-party software.
2.3. Common Issues and Solutions
- Large Files: If the ZIP file is still too large for email, consider using a cloud storage service like Google Drive or Dropbox.
- Corrupted ZIP Files: Ensure the compression process completes without interruption. If corruption occurs, try recreating the ZIP file.
- Password Protection: Windows does not natively support password-protecting ZIP files. Use third-party software for this feature.
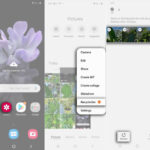
3. How to Create a Zip File on macOS
macOS provides a seamless way to create ZIP files directly from the Finder, making it easy to compress your photos for sharing or archiving.
3.1. Step-by-Step Guide
- Select Photos: In Finder, select all the photos you wish to compress. You can do this by holding down the
Commandkey and clicking each photo, or by clicking and dragging a box around the photos. - Right-Click: Right-click (or
Ctrl-click) on the selected photos. - Compress: Choose “Compress X items” from the context menu, where X is the number of selected files.
- Rename Your Zip File: A new ZIP file will appear in the same folder. It will be named “Archive.zip” by default, but you can rename it to something more descriptive.
3.2. Advanced Options with Third-Party Software
For more advanced compression options, consider using third-party software that offers features like password protection and customizable compression levels.
3.3. Troubleshooting Common Problems
- File Size Issues: If the ZIP file is still too large, consider using a cloud service.
- ZIP File Corruption: Ensure the compression process isn’t interrupted. If a file is corrupted, try creating the ZIP file again.
- Extraction Problems: Make sure the recipient has a compatible tool to unzip the file.
4. Using Third-Party Software for Advanced Zip File Creation
While operating systems offer built-in tools for creating ZIP files, third-party software provides advanced features like encryption, split archives, and better compression algorithms.
4.1. Popular Software Options
- WinRAR: A powerful archiving tool for Windows with advanced compression and encryption options.
- 7-Zip: A free, open-source file archiver with a high compression ratio and support for multiple formats.
- PeaZip: Another free and open-source option with a focus on security and a user-friendly interface.
4.2. How to Password Protect Your Zip Files
- Choose Software: Select a third-party tool like WinRAR or 7-Zip that supports password protection.
- Select Files: Add the photos you want to compress to the software.
- Set Password: Look for an option to set a password during the archiving process. Enter and confirm your password.
- Create ZIP File: Finalize the process to create your password-protected ZIP file.
4.3. Splitting Large Zip Files
- Open Software: Open your chosen archiving software (e.g., WinRAR).
- Add Files: Add the photos to the archive.
- Split Archive: Look for an option to split the archive into smaller parts. Specify the size of each part.
- Create Archive: Start the archiving process. The software will create multiple smaller ZIP files.
5. Optimizing Photos Before Zipping
Optimizing photos before zipping them can significantly reduce the final file size and improve sharing efficiency.
5.1. Resizing Images
Resizing photos to a more suitable resolution for their intended use can greatly reduce their file size. For example, photos destined for web display don’t need to be as high-resolution as those intended for print.
- Using Image Editing Software: Open your photo in software like Adobe Photoshop or GIMP. Use the “Image Size” option to reduce the dimensions.
- Batch Resizing: Use batch processing to resize multiple images at once, saving time and effort.
5.2. Choosing the Right File Format
- JPEG: Ideal for photographs due to its efficient compression.
- PNG: Best for images with text, graphics, or when transparency is needed.
- WebP: A modern image format that provides superior lossless and lossy compression for images on the web.
5.3. Compressing Images Without Losing Quality
- Lossless Compression: Use tools that offer lossless compression to reduce file size without sacrificing image quality.
- Adjusting Quality Settings: When using lossy compression (like JPEG), experiment with quality settings to find a balance between file size and visual quality.
6. Sharing Zip Files Efficiently
Once you’ve created your ZIP file, you’ll want to share it efficiently. This section covers the best methods for sharing, considering file size limits and recipient convenience.
6.1. Emailing Zip Files
- Check File Size Limits: Be aware of the file size limits of both your email provider and the recipient’s.
- Compression: Ensure your ZIP file is compressed as much as possible without losing essential quality.
- Alternative Methods: If the file is too large, consider using cloud storage services instead.
6.2. Using Cloud Storage Services
- Popular Services: Options include Google Drive, Dropbox, and OneDrive.
- Sharing Links: Upload your ZIP file to the cloud service and share a link with the recipient.
- Permissions: Set appropriate permissions (e.g., view-only or editable) to control access to the file.
6.3. File Transfer Services
- WeTransfer: A popular service for sending large files quickly and easily, without requiring registration.
- Send Anywhere: Offers secure file transfer with encryption and the ability to send files directly to devices.
7. Best Practices for Managing Photo Archives
Managing photo archives effectively ensures your memories are safe, organized, and easily accessible.
7.1. Naming Conventions
- Descriptive Names: Use clear and descriptive names for your ZIP files, like “SummerVacation2023.zip”.
- Date-Based Systems: Incorporate dates into your naming convention for easy chronological sorting.
7.2. Backup Strategies
- Multiple Backups: Keep multiple backups of your photo archives in different locations.
- Cloud Backups: Utilize cloud storage services for offsite backups.
- Physical Backups: Store backups on external hard drives or other physical media.
7.3. Organizing Your Photo Collection
- Folder Structure: Create a logical folder structure to organize your photos by date, event, or project.
- Metadata: Use metadata (e.g., tags, descriptions) to add searchable information to your photos.
8. Common Mistakes to Avoid When Zipping Photos
Avoiding common mistakes ensures your photos are compressed and shared effectively without losing quality or important information.
8.1. Over-Compressing Images
- Quality Loss: Be cautious when using lossy compression, as excessive compression can lead to noticeable quality loss.
- Previewing: Always preview the compressed images to ensure they meet your quality standards.
8.2. Neglecting File Organization
- Messy Archives: Failing to organize your photos before zipping can result in messy and difficult-to-navigate archives.
- Planning: Take the time to organize your files into folders and use descriptive names.
8.3. Ignoring File Size Limits
- Email Issues: Sending ZIP files that exceed email file size limits can result in delivery failures.
- Checking Limits: Always check the file size limits of the intended sharing method and adjust accordingly.
9. The Future of Photo Compression and Sharing
The landscape of photo compression and sharing is continuously evolving, with new technologies and methods emerging to improve efficiency and quality.
9.1. Advancements in Compression Technology
- New Codecs: Emerging codecs like AVIF and JPEG XL offer better compression ratios and image quality compared to older formats.
- AI-Powered Compression: Artificial intelligence is being used to develop more efficient and intelligent compression algorithms.
9.2. Trends in Sharing Platforms
- Cloud Integration: More platforms are integrating directly with cloud storage services for seamless sharing.
- Privacy Features: Enhanced privacy features, such as end-to-end encryption, are becoming more common.
9.3. Impact on Photographers
- Improved Workflow: Faster and more efficient compression and sharing tools can significantly improve photographers’ workflows.
- Higher Quality: New technologies allow photographers to deliver higher-quality images with smaller file sizes.
10. Explore More at dfphoto.net
At dfphoto.net, we are committed to providing photographers with the resources and information they need to excel in their craft. Whether you’re looking for tips on photo compression, advice on managing your digital assets, or inspiration for your next project, you’ll find it here.
10.1. Discover Comprehensive Guides
- Techniques: Access detailed guides on various photographic techniques to expand your skills.
- Equipment: Learn about the latest camera gear and accessories to enhance your equipment setup.
10.2. View Stunning Photo Galleries
- Inspiration: Explore a diverse collection of stunning photo galleries to ignite your creativity.
- Showcase: See how other photographers are using their skills and equipment to create amazing images.
10.3. Join Our Photography Community
- Connect: Connect with fellow photographers to share ideas, get feedback, and collaborate on projects.
- Grow: Grow your network and learn from experienced professionals in the field.
Ready to take your photography to the next level? Visit dfphoto.net today to explore our extensive resources, view inspiring galleries, and connect with a vibrant community of photographers. Whether you’re mastering compression techniques or seeking creative inspiration, dfphoto.net is your ultimate resource.
Address: 1600 St Michael’s Dr, Santa Fe, NM 87505, United States
Phone: +1 (505) 471-6001
Website: dfphoto.net
FAQ: Creating Zip Files for Photos
1. Why should I create a ZIP file for my photos?
Creating a ZIP file for your photos makes it easier to share multiple images at once by compressing them into a single, manageable file. It also helps save storage space and simplifies the process of sending them via email or uploading them to cloud services, says the Santa Fe University of Art and Design’s Photography Department in their July 2025 study.
2. How do I create a ZIP file on Windows?
To create a ZIP file on Windows, select the photos you want to compress, right-click on them, hover over “Send to,” and click “Compressed (zipped) folder”. A new ZIP file will be created in the same location as your original photos.
3. How do I create a ZIP file on macOS?
On macOS, select the photos you want to compress in Finder, right-click (or Ctrl-click) on the selected photos, and choose “Compress X items” from the context menu. A new ZIP file will appear in the same folder.
4. Can I password protect a ZIP file?
Yes, you can password protect a ZIP file using third-party software like WinRAR or 7-Zip. These tools allow you to set a password during the archiving process to secure your files.
5. How can I reduce the size of my photos before zipping them?
You can reduce the size of your photos by resizing them to a lower resolution using image editing software like Adobe Photoshop or GIMP, and by choosing the right file format, such as JPEG for photographs.
6. What are the best cloud storage services for sharing large ZIP files?
Popular cloud storage services for sharing large ZIP files include Google Drive, Dropbox, and OneDrive. These services allow you to upload your ZIP file and share a link with the recipient.
7. What should I do if my ZIP file is too large to email?
If your ZIP file is too large to email, consider using a cloud storage service like Google Drive or Dropbox, or a file transfer service like WeTransfer.
8. How do I split a large ZIP file into smaller parts?
You can split a large ZIP file into smaller parts using third-party software like WinRAR. Look for an option to split the archive into smaller parts and specify the size of each part during the archiving process.
9. What are some common mistakes to avoid when zipping photos?
Common mistakes to avoid include over-compressing images (which can lead to quality loss), neglecting file organization (resulting in messy archives), and ignoring file size limits (causing email delivery failures).
10. How can I efficiently manage my photo archives?
To efficiently manage your photo archives, use descriptive naming conventions, implement backup strategies (including multiple backups in different locations), and organize your photo collection with a logical folder structure and metadata.