Silhouettes possess a timeless charm. These captivating outlines, traditionally rendered in stark black against a bright background, offer a unique way to capture a likeness, emphasize form, or add a touch of artistic mystery to your home decor. Whether you’re looking to personalize your living space, create heartfelt gifts, or simply explore a fun and easy DIY project, transforming your photos into stunning silhouettes is surprisingly simple.
In this comprehensive guide, we will walk you through the process of creating your own silhouette art from photos using free and accessible tools. Forget complicated software and steep learning curves – we’ll focus on a user-friendly method that anyone can master in minutes. Get ready to turn your cherished photos into elegant works of art and discover just How To Create A Silhouette From A Photo with ease and creativity.
What Exactly is Silhouette Art?
Before we dive into the “how-to,” let’s explore the essence of silhouette art. At its core, a silhouette is a solid, dark shape in a single color, usually black, set against a lighter background, most often white. The power of a silhouette lies in its ability to suggest form and detail through outline alone. Think of iconic imagery like the stark profile of a bird against a sunset or the recognizable shape of a person’s head in shadow.
Historically, silhouettes were a popular and affordable alternative to painted miniature portraits, particularly in the 18th and 19th centuries. Skilled artists would cut profiles from black paper, creating detailed likenesses that captured the subject’s essence in a distinctive and elegant style. Today, the appeal of silhouettes remains strong, appreciated for their minimalist aesthetic, nostalgic charm, and ability to evoke emotion through simple shapes. They are a fantastic way to subtly personalize your space and celebrate loved ones, pets, or even beloved objects.
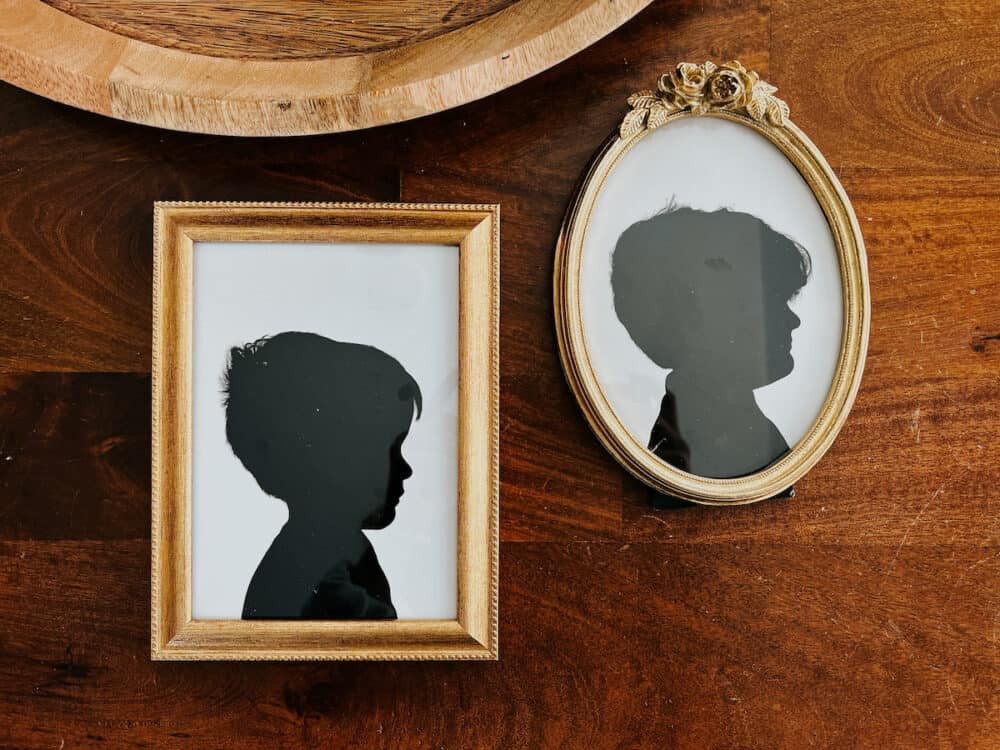 two silhouette art prints framed and laying on a table
Tools You’ll Need for Your DIY Silhouette Project
The beauty of this project is its simplicity. You likely already have everything you need at hand! Here’s a quick rundown of the essentials:
- A Digital Photograph: The starting point, of course! Profile shots work best for classic silhouette portraits, but you can experiment with any subject.
- A Computer or Smartphone with Internet Access: We’ll be using a free online tool.
- Canva (Free Version): Our secret weapon! Canva is a user-friendly graphic design platform accessible through any web browser. Its free version offers all the tools we need to create beautiful silhouettes.
- Printer (Optional): If you want to print your silhouette art at home. Alternatively, you can use a photo printing service.
- Cardstock or Photo Paper (Optional): For printing your silhouette on a higher quality material.
- Frames (Optional): To display your finished silhouette art.
Step-by-Step Guide: Creating Your Silhouette in Canva
Now for the fun part – transforming your photo into a striking silhouette! Follow these simple steps, and you’ll be amazed at how quickly you can achieve professional-looking results using Canva’s intuitive tools.
1. Choosing and Taking the Right Photo
The photograph you choose is crucial for a successful silhouette. While you can create silhouettes from various subjects, profile portraits are particularly popular and effective. Here are some tips for selecting or taking the ideal photo:
- Profile View: For portraits, a clear profile shot is essential. This captures the distinct features of the face and head, which are key to silhouette recognition.
- Clean Background: Opt for photos with a relatively plain or uncluttered background. This makes the background removal process much smoother. A white or light-colored background is ideal, but not mandatory.
- Good Lighting: Ensure your subject is well-lit, but avoid harsh shadows directly on their face in the profile area. Even lighting will help define the shape clearly.
- Pose Naturally: For people or animals, a natural pose is always best. For portraits, ensure the chin is held at a comfortable, slightly elevated angle. Avoid overly tilted heads unless it’s a deliberate artistic choice.
- Hair Considerations: If your subject has long hair, consider styling it in a ponytail or updo for a cleaner silhouette outline. Loose, flowing hair can sometimes become a less defined “blob” in silhouette form.
- Smartphone Photos are Perfect: You absolutely do not need professional equipment. Modern smartphone cameras are more than capable of capturing excellent photos for silhouette creation.
 Screen shot of Canva interface showing the "Create a design" button
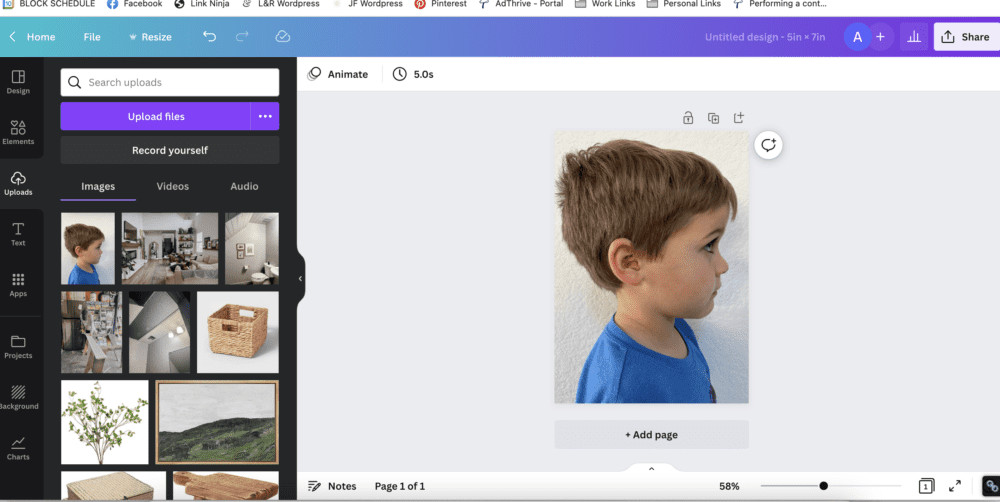
2. Uploading Your Photo to Canva
Let’s get started in Canva!
- Go to Canva: Open your web browser and navigate to www.canva.com. If you don’t have an account, sign up for a free one.
- Create a Design: Once you are logged in, click the “Create a design” button, usually located in the top right corner.
- Choose Custom Size: Select “Custom size” from the dropdown menu. This allows you to specify the dimensions for your silhouette art. A standard size like 5″ x 7″ or 8″ x 10″ works well, but you can choose any size you prefer. Enter your desired width and height in inches and click “Create new design”.
- Upload Your Image: In the Canva editor, you’ll see a blank canvas. On the left-hand side panel, click on the “Uploads” tab. Then, click the “Upload files” button. Locate the photo you want to turn into a silhouette on your computer or device and select it to upload it to Canva.
- Add Image to Canvas: Once uploaded, your image will appear in the “Uploads” panel. Simply drag and drop the image onto your blank canvas. Resize the image by dragging the corner handles so that it fills the entire canvas area as desired.
3. Removing the Background Effortlessly
Canva’s background remover tool makes this step incredibly simple.
- Select Your Image: Click on your uploaded image on the canvas to select it.
- Edit Image: With the image selected, you will see an “Edit image” button appear in the top toolbar. Click on this button.
- Background Remover: In the “Edit image” panel on the left, you should see a tool labeled “Background Remover.” Click on this.
- Magic Happens: Canva will automatically analyze your image and remove the background. This process usually takes just a few seconds.
- Refine (If Needed): In most cases, Canva’s background remover is remarkably accurate. However, if it misses any areas or removes parts you want to keep, you can use the “Erase” and “Restore” brushes that appear after using the Background Remover. Use these tools to manually refine the background removal until you are satisfied.
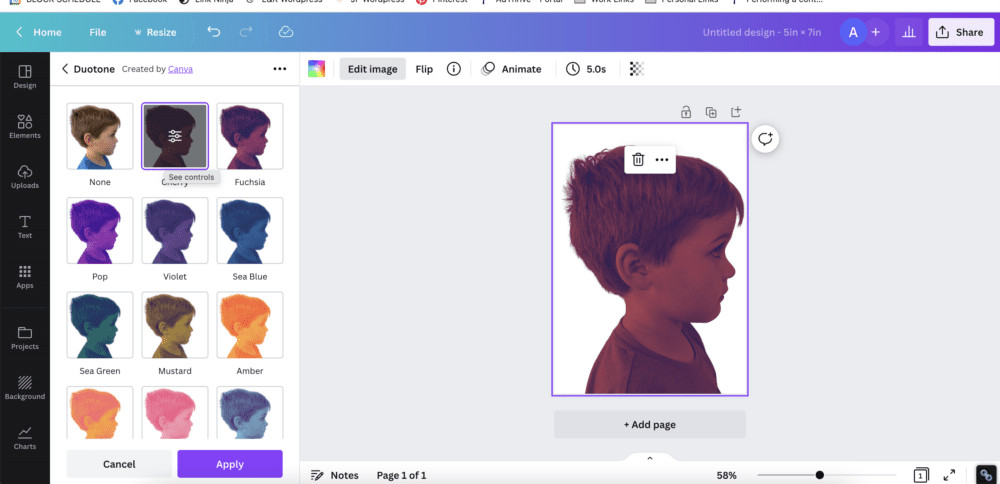
4. Applying the “Duotone” Effect for a Classic Silhouette Look
Now, we’ll use Canva’s “Duotone” effect to transform your subject into a solid black silhouette.
- Stay in “Edit image”: Ensure you are still in the “Edit image” panel on the left (where you found the Background Remover).
- Scroll to “Duotone”: Scroll down in the “Edit image” panel until you find the section labeled “You may also like…” or simply search for “Duotone” in the search bar at the top of the “Edit image” panel. Select “Duotone.”
- Choose a Duotone Option: Click on any of the Duotone style options. The first option, often named “Cherry,” is a good starting point as the specific color doesn’t matter at this stage.
- Customize Colors: After applying a Duotone effect, you will see adjustment sliders appear above the chosen style. Click on these sliders icon to open the Duotone color customization panel.
- Set Highlights and Shadows to Black: In the Duotone customization panel, you will see options to change the “Highlights” and “Shadows” colors. Click on the color swatch for both “Highlights” and “Shadows” and select black (#000000) from the color palette. Alternatively, if you plan to print on black paper, you could choose white for both colors to create a white silhouette.
 Screenshot showing Canva's Duotone effect options
5. Downloading and Printing Your Silhouette Art
Congratulations! You’ve created a digital silhouette image. Now, let’s get it ready for printing and display.
- Download Your Design: In the top right corner of the Canva editor, click the “Share” button. Then, click “Download.”
- Choose File Type: For best printing results, select “PNG” as the file type. PNG ensures a high-quality image with a transparent background (although the background will be solid white in our silhouette).
- Highest Quality Settings (Optional): If you want the absolute best print quality, you can toggle on options like “Transparent background” (though not strictly needed for silhouettes on white) and consider increasing the size if you plan to print very large.
- Download: Click the “Download” button to save your silhouette image to your computer or device.
- Printing Options:
- Print at Home: You can print your silhouette directly from your home printer onto cardstock or photo paper for a more professional feel than regular printer paper.
- Use a Photo Printing Service: For larger prints or higher volume, consider using a local photo printing service or online services. Many offer matte photo paper options, which work beautifully for silhouettes. Retailers like Walmart often provide excellent and affordable photo printing services.
Creative Ways to Use Your Silhouette Art
Once you have your printed silhouettes, the creative possibilities are endless! Here are a few ideas to get you started:
- Framed Wall Art: Frame your silhouettes individually for a classic and elegant look. Create a gallery wall by grouping several silhouette portraits together.
- Personalized Gifts: Silhouettes make thoughtful and personalized gifts for family and friends. Consider creating silhouettes of children, pets, or even homes as unique presents.
- Greeting Cards and Invitations: Incorporate silhouettes into handmade greeting cards, birthday invitations, or thank-you notes for a distinctive touch.
- Kids’ Crafts: Make silhouette creation a fun activity with children. Print their profile photos, let them cut out the silhouettes, and glue them onto colorful backgrounds for a delightful art project.
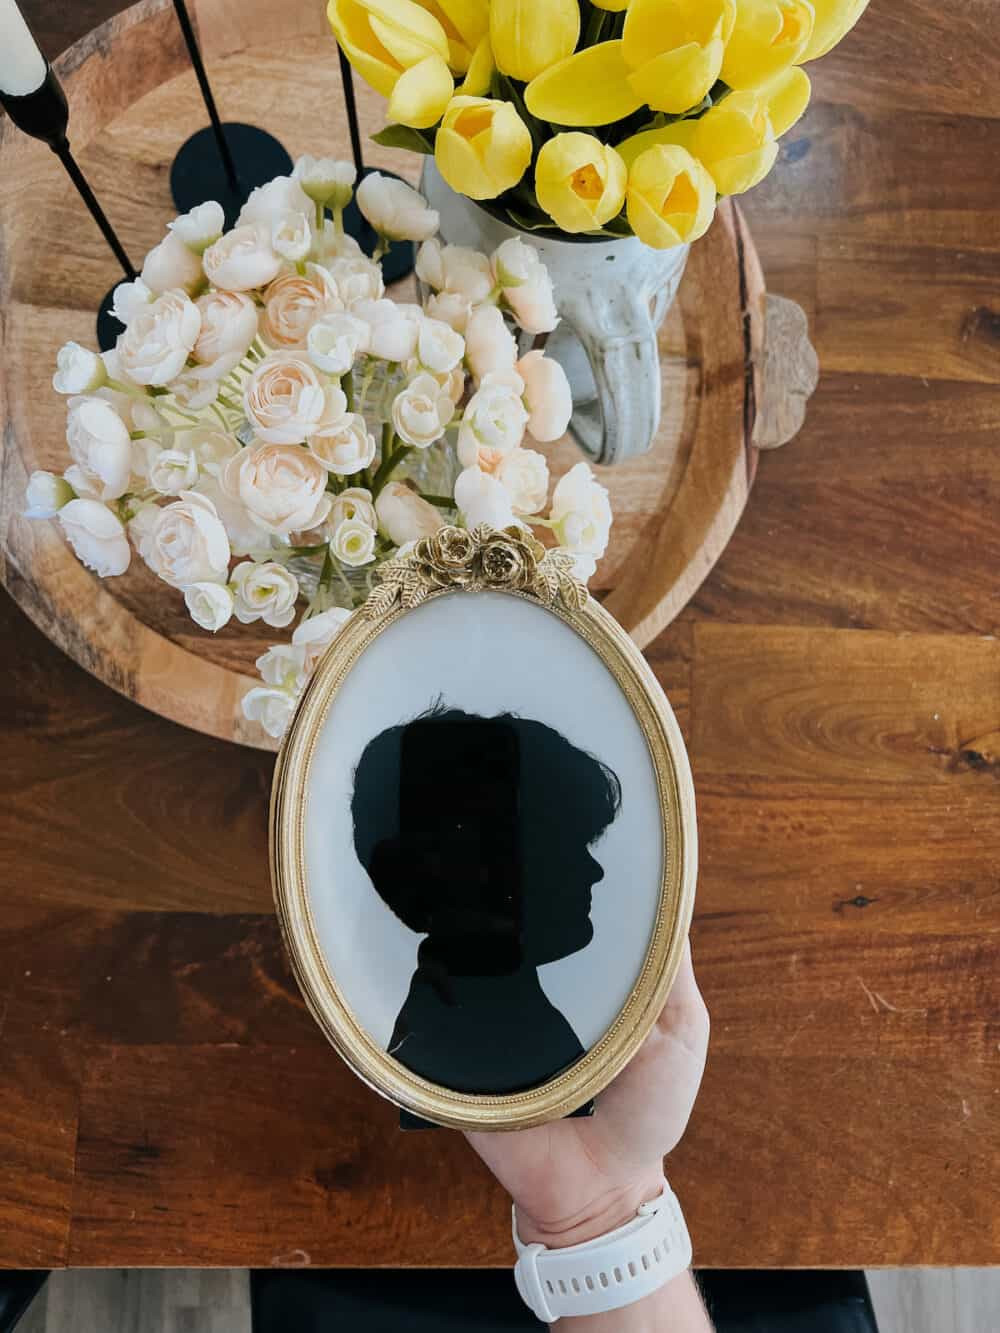
- Home Décor Accents: Use silhouettes to decorate shelves, mantles, or tabletops. You can even create larger-scale silhouettes to make a bolder statement.
 woman
woman
Conclusion: Effortless Silhouette Art at Your Fingertips
Creating beautiful silhouette art from your photos is easier than you might think! With free tools like Canva and a few simple steps, you can transform ordinary pictures into striking and personalized pieces of art. Whether you’re decorating your home, seeking a unique gift idea, or simply exploring your creative side, mastering how to create a silhouette from a photo opens up a world of artistic possibilities. So, grab your favorite photos and give it a try – you’ll be thrilled with the elegant and timeless results!