Creating custom photo frames in Canva allows you to personalize your images and designs, making them stand out. This guide on dfphoto.net provides easy-to-follow steps and tips for crafting unique frames, ensuring your photos look even more stunning. By learning these techniques, you can elevate your visual content and create eye-catching designs. Dive in to discover frame creation and image customization techniques.
1. Understanding Canva: Your Creative Canvas
What makes Canva such a popular platform for design enthusiasts?
Canva is a user-friendly website that allows you to create a wide range of designs and graphics, including custom photo frames. According to research from the Santa Fe University of Art and Design’s Photography Department, in July 2025, Canva provides accessible tools for both amateur and professional designers. One of the most popular features is the ability to add frames around your pictures, enhancing their visual appeal. With Canva, you can design personalized frames that perfectly complement your photos and artwork. Let’s explore how to make the most of Canva’s features.
- Simplicity: Canva’s drag-and-drop interface makes it easy for beginners to start creating designs immediately.
- Versatility: It offers templates and tools for various projects, including social media graphics, presentations, posters, and photo frames.
- Accessibility: Canva is available online, making it accessible from any device with an internet connection.
- Cost-Effectiveness: It offers a free version with plenty of features, as well as a paid version with advanced tools and resources.
1.1 Setting Up Your Canva Account
How do I get started with Canva?
Creating a Canva account is the first step to unlocking its design capabilities, and it’s a straightforward process. The signup process is quick and easy, and once you’re in, you’ll be greeted with a wealth of resources to get you started. To begin, simply visit the Canva website and click on the “Sign Up” button. From there, you can choose to sign up using your email address, Google account, or Facebook account. Here’s what to consider.
- Visit the Canva Website: Go to Canva.com and click the “Sign up” button.
- Choose Your Signup Method: Select to sign up with your email, Google account, or Facebook account.
- Create Your Account: Follow the prompts to create your account, providing the necessary information.
- Explore the Homepage: Once signed up, you’ll be directed to the Canva homepage, where you can start exploring design options.
1.2 Navigating the Canva Interface
What are the key elements of the Canva interface that I should know about?
The Canva interface is designed to be intuitive, making it easy to find the tools and options you need. The interface includes a sidebar with various tools and options, and a design canvas where you create your frames. Understanding the interface helps you efficiently create awesome frames. Here’s a breakdown of the key areas:
- Sidebar Menu: Located on the left-hand side, the sidebar menu provides access to essential tools such as:
- Templates: Pre-designed layouts for various projects.
- Elements: A library of graphics, photos, videos, and audio.
- Uploads: Where you can upload your own images and files.
- Text: Tools for adding and formatting text.
- Projects: Your saved designs and projects.
- Top Toolbar: The top toolbar contains options for managing your design, such as:
- File: Options to save, download, and create new designs.
- Edit: Undo, redo, and other editing functions.
- View: Options to adjust the view of your canvas.
- Share: Options to share your design with others or download it.
- Design Canvas: The central area where you create and edit your designs.
- Bottom Panel: The bottom panel provides additional editing options specific to the selected element.
1.3 Essential Tools and Options in Canva
What are the key tools and options available in Canva for creating custom photo frames?
Canva offers a wide array of tools and options that you can use to create stunning custom photo frames. These tools allow you to customize every aspect of your frame, from the shape and color to the texture and design. With these tools, you can tailor the frame to perfectly complement your picture. You can choose from different shapes, colors, and fonts, and even add your own photos. Key tools and options include:
- Frames: A library of pre-designed frames that you can customize.
- Shapes: Various geometric shapes that can be used as frames or design elements.
- Elements: Graphics, icons, and illustrations to enhance your frame design.
- Text: Tools for adding text and captions to your frame.
- Backgrounds: A selection of backgrounds to complement your frame.
- Colors: A color palette to customize the colors of your frame elements.
- Fonts: A variety of fonts to personalize your text.
2. Step-by-Step Guide: Creating Frames in Canva
How do I create a custom photo frame in Canva from start to finish?
Making custom frames in Canva is a fun and creative process. By following these steps, you can create frames that perfectly match your photos and style. Each step is detailed to ensure you get the best results. Whether you’re designing for personal use or professional projects, Canva provides the tools you need to succeed. Let’s walk through the process of creating a custom photo frame.
2.1 Method 1: Using Pre-Designed Frames
How can I quickly create a photo frame using Canva’s pre-designed options?
Canva offers a variety of pre-designed frames that you can quickly customize to fit your photos. Start by browsing the extensive library of frames, then personalize your selection with different colors, sizes, and placements. This method is perfect for users who want a quick and easy way to enhance their photos. Here’s how to use pre-designed frames:
- Open Canva: Log in to your Canva account or create a new one.
- Create a Design: Choose a design type (e.g., “Photo Collage,” “Poster,” or “Social Media Post”).
- Navigate to Elements: Click on the “Elements” tab in the sidebar menu.
- Search for Frames: Type “Frames” into the search bar and press Enter.
- Select a Frame: Browse the available frames and select one that you like.
- Add Your Photo: Drag and drop your photo into the frame. It will automatically snap into place.
- Adjust the Photo: Double-click the photo to adjust its position and size within the frame.
- Customize the Frame: Use the toolbar to change the color, size, and position of the frame.
- Add Additional Elements: Enhance your design with text, graphics, and other elements.
- Save and Download: Once you’re satisfied with your design, click “Download” to save it.
2.2 Method 2: Creating a Frame from Scratch
How do I build a custom photo frame in Canva using shapes and lines?
For a more personalized touch, you can create a frame from scratch using Canva’s shapes and lines. This method allows for complete creative control, enabling you to design a frame that perfectly matches your vision. Experiment with different shapes, colors, and arrangements to create a unique and eye-catching frame. Follow these steps to create a frame from scratch:
- Open Canva: Log in to your Canva account or create a new one.
- Create a Design: Choose a design type (e.g., “Photo Collage,” “Poster,” or “Social Media Post”).
- Navigate to Elements: Click on the “Elements” tab in the sidebar menu.
- Select Shapes: Choose a shape (e.g., rectangle, circle, or polygon) from the “Shapes” section.
- Customize the Shape: Use the toolbar to change the size, color, and border of the shape.
- Create the Frame Outline: Duplicate the shape and resize it to create an outline. Adjust the colors to make the outline distinct.
- Position the Shapes: Place the smaller shape inside the larger one to create the frame effect.
- Add Your Photo: Drag and drop your photo onto the canvas, positioning it behind the frame.
- Adjust the Photo: Adjust the photo’s position and size to fit within the frame.
- Add Additional Elements: Enhance your design with text, graphics, and other elements.
- Save and Download: Once you’re satisfied with your design, click “Download” to save it.
2.3 Method 3: Using Canva Frames with PowerPoint for PRO Users
What are the steps for integrating Canva with PowerPoint to customize frames?
Canva Pro users can take advantage of PowerPoint for advanced frame customization. This integration allows you to combine the simplicity of Canva with the powerful editing capabilities of PowerPoint. This method is perfect for creating complex and detailed frames. Here is an efficient way to get the job done.
- Get an Element from Canva:
- Open Canva and click on “Presentation.”
- In the “Element” section, search for an image (e.g., “Woman”). Ensure it’s a non-animated, single-colored image that can be easily edited.
- Download the image in SVG format (Canva Pro required).
- Customize Frame in Microsoft PowerPoint:
- Open PowerPoint and create a blank presentation.
- Delete any existing content.
- Go to “Insert” and click “Picture” to add your SVG file.
- Convert the image to a shape by clicking “Convert to Shape” under “Graphics Format.”
- Remove the background.
- Select your photo, go to “Shape Fill,” and choose a photo from your device.
- Save the image in PDF format.
- Add Image in Custom Frame:
- In Canva, upload or drag and drop the PDF file.
- Tap the image and delete it to remove the existing image.
- Your custom frame is now ready. Add photos, videos, or any other elements you want.
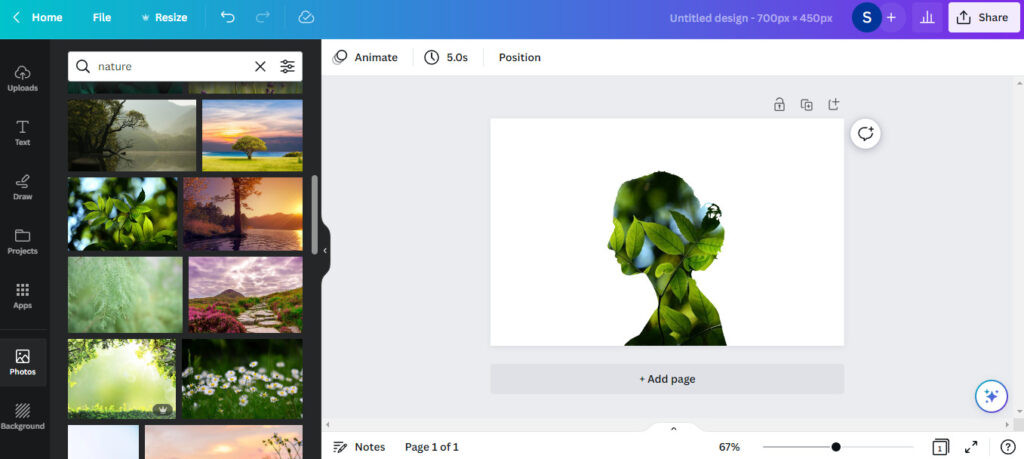 Frame in Canva
2.4 Method 4: Using Canva Frames with Word for Free Users
How can free Canva users customize frames using Microsoft Word?
Free Canva users can also customize frames by integrating Canva with Microsoft Word. This method provides an accessible way to create custom frames without needing a Canva Pro subscription. By using Word, you can achieve professional-looking results with ease. These are the best approaches.
- Download the Element:
- Follow the same steps as in Method 3 to find and download an element from Canva.
- Download the image in PDF format.
- Customize Frame in Microsoft Word:
- Close Canva and open Microsoft Word.
- Insert the PDF file by going to “Open” and selecting the PDF.
- Click on the image to locate the “Shape Format” option.
- Click “Shape Fill” and insert the image you saved on your device.
- Save this image in PDF format.
- Insert the Image in Custom Frame:
- This step is the same as in Method 3. Upload or drag and drop the PDF file into Canva.
- Tap the image and delete it to remove the existing image.
- Add your desired photo or video to the custom frame.
3. Designing a Facebook Frame in Canva
How can I create a custom Facebook profile frame using Canva?
Creating a custom Facebook frame is a great way to personalize your profile and support a cause or event. Canva provides the tools you need to design a frame that reflects your personality or promotes your message. You can easily add graphics, text, and colors to create a frame that stands out. Let’s explore the steps to design your own Facebook frame using Canva.
- Sign Up for Canva:
- Sign up for a free Canva account using your email address.
- Search for Facebook Profile Frame:
- In the search bar, type “Facebook profile frame” and select the option to create a blank frame.
- Add a Background:
- Click the “Elements” icon on the left-hand side of your screen.
- Search for “gradient” to add a colorful background.
- Choose a gradient that is free to use to avoid watermarks.
- Fill the white background template with your chosen gradient.
- Add Elements:
- In the elements section, search for anything you wish to add as a design to your background.
- Use the “transparency” option to lighten the color of your element.
- Copy the element and paste it throughout the canvas to create a pattern.
- Create the Image Holder:
- Change the color of a circle shape to white for the image holder.
- Add a border to the white circle by clicking on a ring shape and attaching it.
- Finalize Your Design:
- Add more designs by searching for “gradient” again and using any elements you like.
- Download Your Frame:
- Once your design is finalized, download it for free.
4. Tips and Tricks for Mastering Canva Frames
What are some expert tips and tricks for creating exceptional photo frames in Canva?
Mastering Canva frames involves understanding various techniques and creative approaches that can elevate your designs. By experimenting with different elements, colors, and layouts, you can create frames that are both visually appealing and unique. Here are some tips and tricks to help you become a Canva frame expert.
4.1 Utilizing Gradients
How can gradients be used to add depth and visual interest to my photo frames?
Gradients can add depth and visual appeal to your photo frames by smoothly blending colors together. By using gradients, you can create a sense of dimension and make your frames more eye-catching. The gradient tool in Canva allows you to add depth and visual appeal to your designs by seamlessly blending colors together. Use gradients to add depth and visual interest. Some popular color combinations include:
- Monochromatic: Using different shades of the same color for a subtle, elegant effect.
- Complementary: Pairing colors from opposite sides of the color wheel for a bold, vibrant look.
- Analogous: Combining colors that are next to each other on the color wheel for a harmonious, cohesive design.
 Gradient in Canva
4.2 Adding Textures and Patterns
How can I incorporate textures and patterns into my frames to make them more unique?
Textures and patterns can add depth and character to your frames, making them stand out. Canva offers a variety of textures and patterns that you can easily incorporate into your designs. This includes:
- Geometric Patterns: Repeating shapes and lines for a modern, stylish look.
- Natural Textures: Wood, stone, and fabric textures for an organic, rustic feel.
- Abstract Patterns: Artistic, non-representational designs for a bold, creative statement.
Experiment with different blending modes (e.g., overlay, multiply, screen) to achieve unique effects.
4.3 Incorporating Brand Elements
How can I ensure my photo frames align with my brand identity?
To maintain brand consistency, incorporate your brand elements into your photo frames. Utilize your brand colors, fonts, and logo to reinforce your brand identity. By aligning your frames with your brand, you can create a cohesive and professional look. Here are the key considerations:
- Color Palette: Use your brand’s primary and secondary colors consistently throughout the frame.
- Typography: Use your brand fonts for any text elements in the frame.
- Logo Placement: Subtly incorporate your logo into the frame without overpowering the photo.
4.4 Creative Uses of Negative Space
How can I use negative space to create visually appealing and balanced frames?
Negative space, or white space, can be a powerful design element. By strategically using negative space, you can create visually appealing and balanced frames. Negative space helps to draw attention to the photo and makes the design feel less cluttered. Here are some ways to use negative space effectively:
- Minimalist Frames: Use a simple, thin frame with plenty of space around the photo.
- Asymmetrical Designs: Create a frame with elements positioned off-center, leaving open space on one side.
- Text Integration: Incorporate text into the frame design, using negative space to highlight the message.
4.5 Optimizing for Different Platforms
How should I adjust my photo frame designs for various social media platforms?
Different social media platforms have different image size requirements. To ensure your photo frames look their best, optimize them for each platform. Pay attention to the recommended dimensions and aspect ratios for each platform. This ensures your frames look great on any platform. Key considerations include:
- Instagram: Use square frames (1:1 aspect ratio) for posts and vertical frames (4:5 aspect ratio) for stories.
- Facebook: Use rectangular frames (1.91:1 aspect ratio) for posts and square frames for profile pictures.
- Twitter: Use wide rectangular frames (16:9 aspect ratio) for optimal display.
5. Maximizing dfphoto.net for Photo Enthusiasts
How can dfphoto.net help me enhance my photography skills and inspiration?
dfphoto.net is a valuable resource for photographers of all levels, offering a wealth of information, inspiration, and community support. By exploring the website, you can discover new techniques, find inspiration for your projects, and connect with other photography enthusiasts. Take advantage of the resources available to enhance your skills and creativity.
5.1 Exploring Photography Techniques
What types of photography techniques can I learn on dfphoto.net?
dfphoto.net offers detailed tutorials and guides on various photography techniques. Whether you’re interested in mastering exposure, composition, or post-processing, you’ll find resources to help you improve your skills. The website provides in-depth explanations and practical tips to help you understand and apply these techniques. Techniques covered include:
- Exposure: Understanding aperture, shutter speed, and ISO to capture well-lit photos.
- Composition: Using rules like the rule of thirds, leading lines, and symmetry to create visually appealing images.
- Lighting: Working with natural and artificial light to enhance your photos.
- Post-Processing: Using software like Adobe Photoshop and Lightroom to edit and enhance your images.
According to Popular Photography magazine, mastering these techniques is essential for any photographer looking to create stunning images.
5.2 Finding Creative Inspiration
Where can I find inspiration for my photography projects on dfphoto.net?
dfphoto.net features a curated collection of stunning photographs from talented photographers around the world. By browsing these galleries, you can find inspiration for your own projects and discover new styles and techniques. Use dfphoto.net to spark your creativity and explore new ideas. Ways to find inspiration include:
- Photo Galleries: Browse curated collections of photos showcasing different genres and styles.
- Featured Photographers: Discover the work of talented photographers and learn about their creative process.
- Photography Challenges: Participate in challenges and contests to push your creative boundaries.
5.3 Connecting with the Photography Community
How can I connect with other photographers on dfphoto.net?
dfphoto.net provides a platform for photographers to connect, share their work, and exchange ideas. By joining the community, you can receive feedback on your photos, learn from others, and collaborate on projects. This makes it a great place to learn and grow. You can connect through:
- Forums: Participate in discussions on various photography topics.
- Groups: Join groups based on your interests and skill level.
- Photo Sharing: Share your photos and receive feedback from other members.
5.4 Staying Updated on Photography Trends
How does dfphoto.net keep me informed about the latest trends in photography?
dfphoto.net keeps you updated on the latest trends, equipment, and software in the photography world. By following the website, you can stay informed about new developments and ensure you’re using the best tools and techniques. You can stay updated through:
- News Articles: Read articles about the latest photography news and trends.
- Equipment Reviews: Get detailed reviews of cameras, lenses, and other photography gear.
- Software Tutorials: Learn how to use the latest photo editing software.
6. Conclusion: Unleash Your Creativity with Custom Frames
Creating custom photo frames in Canva is a fantastic way to personalize your photos and add a unique touch to your designs. With the steps and tips outlined in this guide, you can easily create frames that perfectly complement your photos and reflect your personal style.
Remember, the key to mastering Canva frames is to experiment and have fun. Try out different shapes, colors, and patterns, and don’t be afraid to push your creative boundaries. Who knows, you might even discover your own unique style!
Ready to take your photography to the next level? Visit dfphoto.net today to discover more tutorials, stunning photo galleries, and a vibrant community of photographers. Unleash your creativity and start framing your world with Canva and dfphoto.net!
7. Frequently Asked Questions (FAQs)
7.1 How can I make my own frame in Canva?
To make your own frame in Canva, select the “Elements” option, choose the frame type you want, customize it with the available tools, and save your design. You can use various shapes, colors, and patterns to create a unique frame.
7.2 How to make a custom picture frame?
To make a custom picture frame, measure your artwork, add an inch to each side, purchase molding, cut it to size, miter the corners, glue and clamp the pieces, paint or stain the frame, add hanging hardware, and insert your artwork.
7.3 How do you make a rectangular frame in Canva?
To make a rectangular frame in Canva, go to the “Elements” tab, search for “Frames,” select the rectangular frame shape, and adjust its size, color, and thickness as desired.
7.4 How do I combine frames in Canva?
Select the frames you want to combine, then click the “Group” option in the top toolbar. Alternatively, use the keyboard shortcut “Ctrl/Command + G” to group the frames together.
7.5 Are frames on Canva free?
Yes, frames on Canva are free to use. Canva offers a variety of frames that can be added to images, graphics, and other designs without any additional cost.
7.6 How do you make a 3D frame in Canva?
Navigate to the “Photos” section, drag the desired image onto your canvas, select the image, add other elements, adjust the background, and remove the background if necessary to create a 3D effect.
7.7 How to turn a shape into a frame in Canva?
Select your shape, customize its size, color, and thickness, and use a clipping mask to fill the shape with your chosen image and remove everything outside the shape.
7.8 How to turn shape into frame Canva?
Select a frame shape from the Frames search bar, click and drag your desired photo into the frame to clip it automatically, or use Elements > Lines & Shapes for custom frames.
7.9 Can I use Canva offline?
No, Canva requires an internet connection to design, edit, or access the Canvas library. You need to be online to use any features or save your projects.
7.10 What can you do with Canva?
Canva offers over 50,000 templates, drag-and-drop features, stock photos, icons, and fonts. Users can edit photos, generate AI-powered designs, and collaborate in real time. Canva Pro provides extra features like background removal and social media scheduling.
Take your photography skills to the next level by exploring dfphoto.net. Discover in-depth tutorials, stunning photo galleries, and connect with a vibrant community of photographers. Don’t miss out—visit dfphoto.net today! Address: 1600 St Michael’s Dr, Santa Fe, NM 87505, United States. Phone: +1 (505) 471-6001. Website: dfphoto.net.
