In today’s digital age, sharing photos is a daily occurrence. Whether you’re sending snapshots to family, submitting documents for work, or archiving precious memories, the format you choose matters. While JPG is excellent for web images, PDF offers a more universal and printer-friendly solution, especially when you need to maintain image quality and layout. For Mac users, converting a photo to PDF is incredibly straightforward, thanks to the built-in Preview application. You don’t need to hunt for third-party software or rely on online converters that might compromise your privacy.
This guide will walk you through the simple steps to convert your photos to PDF directly on your Mac using Preview, ensuring your images are perfectly formatted for sharing, printing, and archiving.
Why Convert Photos to PDF?
Before diving into the “how-to,” it’s helpful to understand why you might want to convert a photo to PDF in the first place. While JPGs are widely used for digital photography due to their efficient compression, PDFs offer several advantages, particularly when it comes to sharing and document handling:
- Universal Compatibility: PDF is a universally recognized format. Anyone, regardless of their operating system or software, can open a PDF file, ensuring your photos are accessible to everyone you send them to.
- Preserved Formatting: PDFs maintain the original formatting of your document, including images, fonts, and layout. This is crucial when you want to ensure your photo is displayed exactly as you intended, without distortions or unwanted changes.
- Printer-Friendly: PDFs are designed to be printer-friendly. They ensure consistent printing results across different printers and devices, making them ideal for creating hard copies of your photos.
- Security and Archiving: PDFs can be password-protected for security and are excellent for long-term archiving as they preserve the integrity of your image over time.
- Combining Multiple Images: While this guide focuses on single image conversion, Preview also allows you to combine multiple JPGs into a single PDF document, which is incredibly useful for creating photo albums or collections.
Now that you understand the benefits, let’s explore how to effortlessly convert your photos to PDF on your Mac.
How to Convert JPG to PDF on Mac Using Preview
Preview is the default image viewer on macOS and is a powerful tool that goes beyond simply displaying images. It’s equipped with features to edit, annotate, and, importantly, convert images to various formats, including PDF. Here’s how to use it to convert your JPG photos to PDF:
Step 1: Open Your JPG Photo with Preview
The first step is to open the JPG image you wish to convert. Locate the photo file on your Mac. The easiest way to open it in Preview is usually by double-clicking the image file. By default, macOS is set to open image files, including JPGs, with Preview.
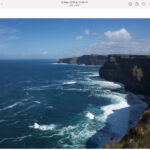
 Double click JPG file to open in Preview
If Preview is not your default image viewer (perhaps you’ve changed it previously), you can still open the image with Preview. Right-click on the JPG file, hover over “Open With” in the context menu, and then select “Preview” from the list of applications.
Step 2: Access the Export to PDF Function
Once your JPG image is open in Preview, navigate to the menu bar at the top of your screen. Click on “File” in the menu. A dropdown menu will appear. From this dropdown menu, select “Export as PDF…”. This option is specifically designed to convert your current image into a PDF document.
Step 3: Save Your Photo as a PDF
After selecting “Export as PDF…”, a save dialog box will appear. Here, you can customize the name and location of your new PDF file.
 Double click JPG file to open in Preview
- Rename (Optional): In the “Save As” field, you can change the file name if you wish. If you leave it as is, it will retain the original JPG file name but with the .pdf extension.
- Choose a Destination: Use the dropdown menu or the file browser in the dialog box to choose where you want to save the PDF file on your Mac. Selecting a location you can easily remember, like your Desktop or Documents folder, is recommended.
- Click “Save”: Once you’ve chosen a name and location, simply click the “Save” button in the bottom right corner of the dialog box. Preview will then convert your JPG photo to a PDF and save it in your specified location.
That’s it! You have successfully converted your photo to PDF on your Mac using Preview. You can now find the newly created PDF file in the location you chose and use it for sharing, printing, or archiving as needed.
Preview: More Than Just a Viewer
As you can see, Preview on macOS makes the process of converting photos to PDF incredibly simple and efficient. It’s a testament to the user-friendly design of macOS that essential tasks like this are built right into the operating system, eliminating the need for extra software or complicated procedures. Next time you need to convert a photo to PDF on your Mac, remember the power of Preview – it’s likely already open and ready to help!
