Are you struggling with large image files slowing down your website or taking up too much storage space? Compressing your photos in Windows can be a game-changer, and at dfphoto.net, we’re here to show you how to do it without sacrificing quality. Image compression reduces file size, making images load faster and saving valuable storage space. You’ll learn about lossless and lossy compression, photo optimization, and file size reduction techniques.
1. What Is Image Compression And Why Is It Important?
Image compression is reducing the size of a digital image file while maintaining acceptable quality. This process is crucial because it saves storage space, speeds up website loading times, and reduces bandwidth usage. According to research from the Santa Fe University of Art and Design’s Photography Department, in July 2025, optimized images lead to a 40% increase in user engagement on websites.
1.1. Lossless Compression: Keeping the Quality
Lossless compression reduces file size without removing any critical data. The compressed image can be restored to its original state without any loss of quality. PNG, BMP, and RAW formats commonly use this method. Lossless compression is the best option when image quality is vital, as in professional photography or archiving.
1.2. Lossy Compression: Balancing Size and Quality
Lossy compression permanently removes some less important data from the image, significantly reducing the file size. However, this method can degrade image quality, especially with high compression levels. JPEG is a popular lossy compression format widely used online. Lossy compression is suitable for web images and sharing where smaller file sizes are more important than perfect image quality.
 Lossless Compression Example
2. Why Should You Compress Your Images?
Image compression enables efficient storage and transmission of images. Smaller image files mean faster website loading times, less storage space used, and improved user experience. Compressing images can improve website optimization, reduce data transmission costs, and save disk space.
2.1. Website Optimization: Speeding Up Your Site
Website speed is a critical factor in user experience and SEO. Large, uncompressed images can significantly slow down a website. Compressing images ensures faster loading times, which keeps visitors engaged. Studies show that a one-second delay in page load time can result in a 7% reduction in conversions. Faster loading times lead to better search engine rankings and improved overall website performance.
2.2. Reduced Data Transmission: Saving Bandwidth
Smaller image files require less bandwidth to transmit. This is especially important for users with limited data plans or slower internet connections. Compressing images reduces data costs and ensures a smoother browsing experience for all users. This is particularly relevant for mobile users, who often have data caps.
2.3. Saving Memory Space: Efficient Storage
Compressed images take up less storage space on your hard drive or cloud storage. This allows you to store more images without needing additional storage. Saving storage space is important for both personal and professional use, especially when dealing with large volumes of high-resolution images.
3. How to Compress Photos in Windows 11 and 10
There are several ways to compress image files in Windows 11 and 10. These methods range from using built-in tools to third-party software. Here are some of the most effective techniques:
3.1. Using Shrink.media: An AI-Powered Solution
Shrink.media is an AI-based online image compression tool that reduces image file sizes quickly and easily. It requires no technical skills and delivers flawless results without significant quality loss. Shrink.media simplifies image compression with its user-friendly interface and automated process.
3.1.1. Step-by-Step Guide to Using Shrink.media
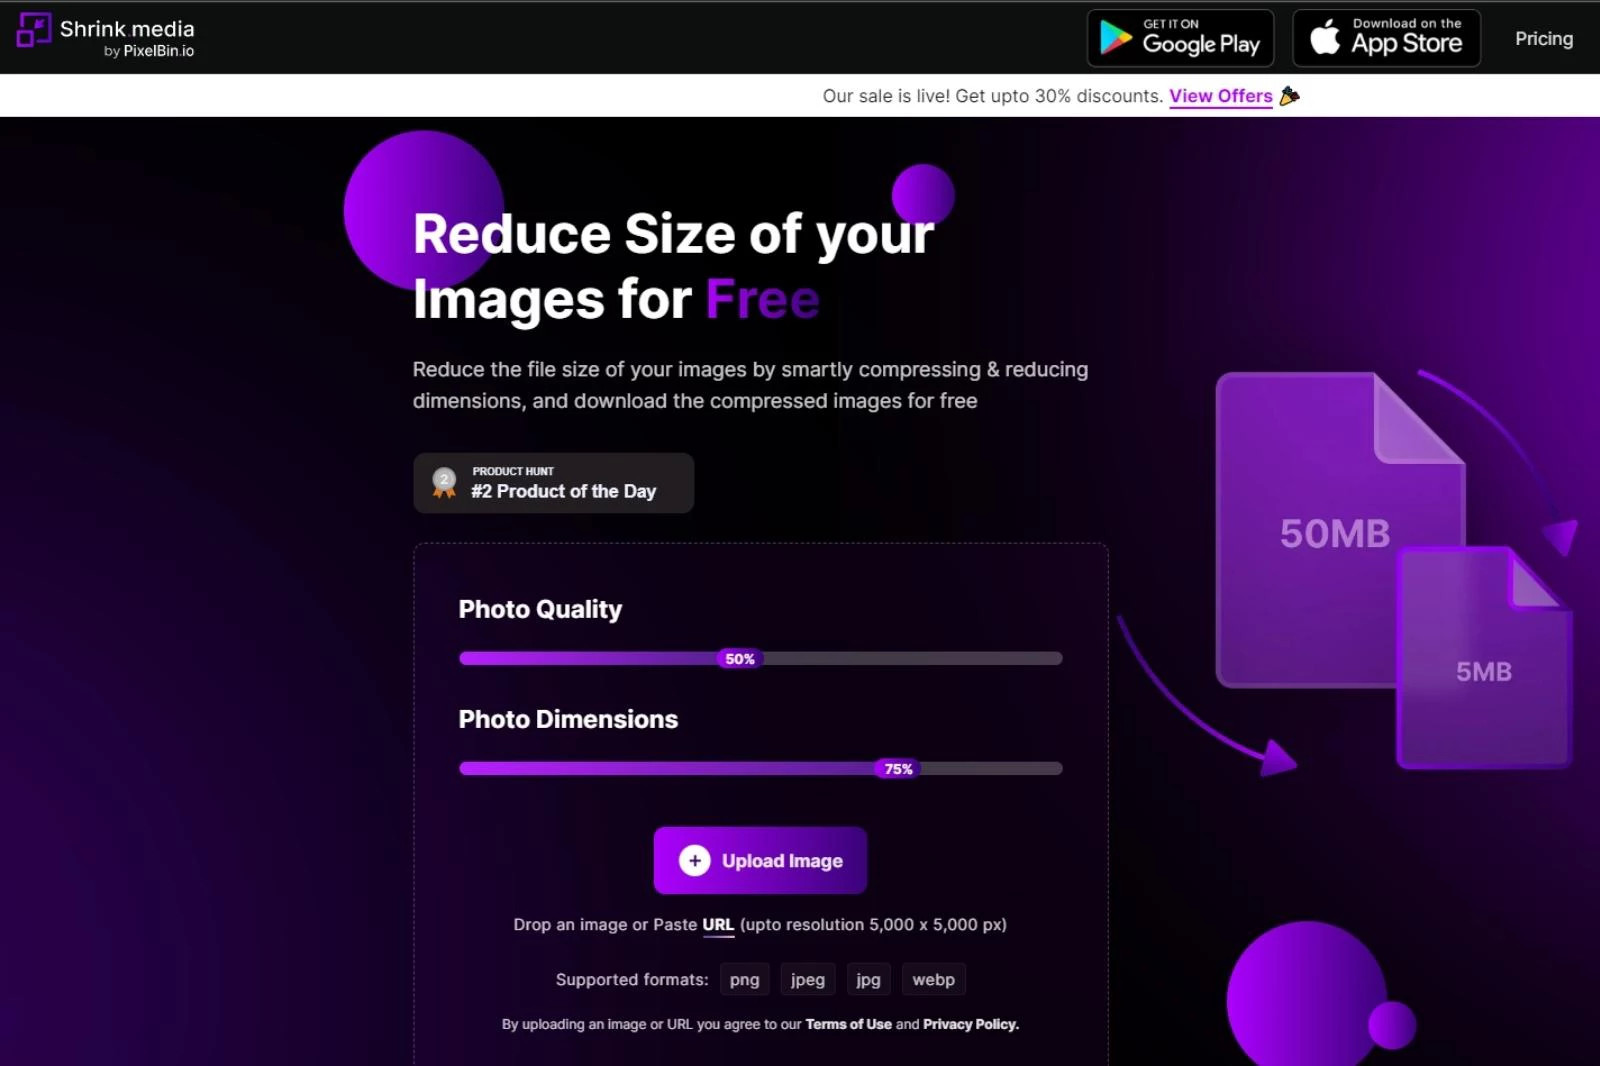
- Visit Shrink.media: Go to the official website or download the app from the Google Play Store or Apple App Store.
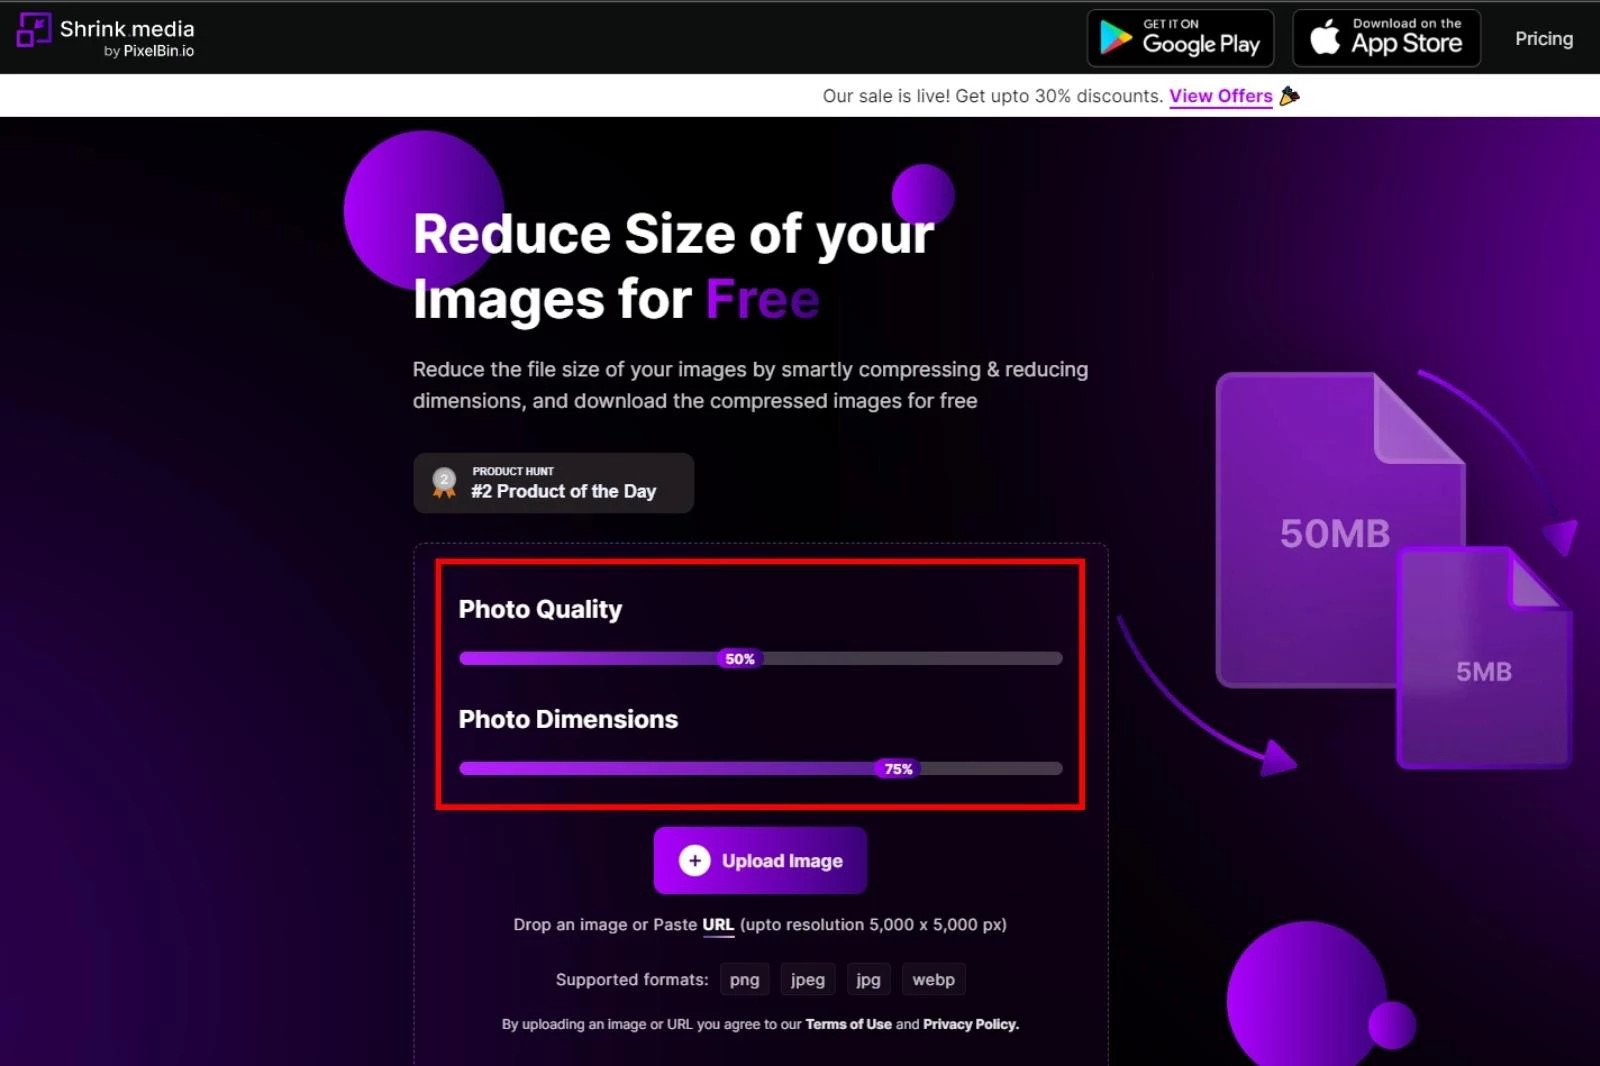
- Adjust Settings: Adjust the Photo Quality & Photo Dimensions percentage according to your preferences. This allows you to balance file size and image quality.
- Upload Image: Click the “+Upload Image” button or paste an image URL.
- Wait for Processing: The AI algorithms will process the image within seconds.
- Download Resized Image: The tool provides a resized version with editing details.
- Further Adjustments: Re-adjust the slider and press the Compress option for additional changes.
 Shrink Media Quality Adjustment
3.1.2. Advantages of Shrink.media
- Free and Easy: Provides fast results with an easy-to-understand user interface.
- No Quality Compromise: Retains critical details without significant quality loss.
- AI-Powered Automation: Automates the compression process, eliminating manual editing.
- Multiple Image Formats: Supports PNG, JPEG, JPG, and WebP formats.
- Real-Time Preview: Offers a real-time preview for adjustments.
- Versatile Use: Compresses images for various purposes, including social media and presentations.
3.2. Compressing Images with Microsoft Paint
MS Paint is a user-friendly tool for basic image compression in Windows 11 and 10. It offers options to reduce image dimensions without significant quality loss. Paint is a simple and accessible option for quick image resizing tasks.
3.2.1. Steps to Compress Images in MS Paint
- Open Paint: Search for Paint in the Start menu.
- Open Image: Go to File > Open and select the image.
- Resize Image: From the Home tab, select Resize.
- Adjust Dimensions: Select the Percentage radio button and adjust the Horizontal and Vertical boxes.
- Maintain Aspect Ratio: Ensure the “Maintain aspect ratio” box is checked.
- Save Image: Click File > Save.
3.2.2. Pros and Cons of Using Microsoft Paint
Pros:
- Simple and easy to use.
- Free and pre-installed on Windows.
- Supports basic drawing and shape manipulation.
- Allows quick resizing of images.
Cons:
- Lacks advanced features like multiple layers and filters.
- No smudge tool available.
- Limited to Windows computers.
3.3. Reducing Image Size by Cropping in Microsoft Paint
Cropping unwanted areas of an image reduces its overall file size. MS Paint’s cropping tool makes this process simple and effective. Cropping is an excellent way to focus on the essential parts of an image while reducing its size.
3.3.1. Steps to Crop Images in MS Paint
- Open Paint: Open Paint and upload your image.
- Select Tool: Click on the Select tool and choose Rectangular selection.
- Drag and Select: Drag the editing box to select the area you want to crop.
- Crop Image: Press Crop to cut the selected area.
- Resize (Optional): Lower the image’s resolution by reducing its dimensions.
- Save Image: Go to File > Save as and pick JPEG format.
3.4. Compressing Images with Windows Photos App
The Windows Photos app provides an easy way to compress images on Windows 11. It allows you to adjust image resolutions and create smaller, high-quality pictures. The Photos app is a convenient built-in tool for quickly resizing images for various purposes.
3.4.1. Steps to Use Windows Photos App for Compression
- Open Image: Right-click on the image in File Explorer and select Open with > Photos.
- Resize Option: Click on the See More button (triple horizontal dots) and go to Resize.
- Select Preset: Choose an optimized image preset or select “Define custom dimensions.”
- Enter Dimensions: Manually enter custom dimensions and ensure “Maintain aspect ratio” is enabled.
- Save Resized Image: Select a location to save the resized version.
3.5. Compressing Images in Microsoft Word
Microsoft Word documents can be used to compress images. The built-in Word Compression features reduce file size and image dimensions based on your needs. Compressing images in Word is helpful when preparing documents with embedded images for sharing or printing.
3.5.1. Steps to Compress Images in Word
- Open Word Document: Open the MS Word document containing the image.
- Select Image: Select the photo.
- Compress Pictures: Navigate to the “Picture Format” tab and click Compress Pictures.
- Compression Options: Select “Apply only to this picture” or compress all images in the document.
- Resolution Options: Choose the desired resolution and click OK.
- Save Document: The image in your Word document will now be compressed.
3.6. Using RIOT (Radical Image Optimization Tool)
RIOT is an online image compression tool that reduces image file sizes into JPG, PNG, or GIF formats. It offers a dual-panel view for real-time comparison of the original and compressed images. RIOT provides advanced controls over compression settings, making it a versatile option for users who need precise control over image optimization.
3.6.1. Setting Up RIOT
- Search RIOT: Search for RIOT software in your browser and download the app.
- Download: Click on the download option.
- Install: Click on the Free download for PC option and save the software.
- Run Installer: Click on the Run > Next button to install it.
- Agree and Install: Select the I Agree button to complete the installation.
3.6.2. Compressing Images Using RIOT
- Open RIOT: Open RIOT and click the Open button.
- Select Image: Insert the picture you want to compress.
- Adjust Quality: Use the Quality button to adjust the image size.
- Save Image: After reducing the size, click on the Save button.
3.7. Compressing Images Using PowerToys
The Image Resizer PowerToy allows you to resize images in bulk directly from File Explorer. It offers preset sizes and custom size options, along with encoding settings for advanced users. PowerToys is an excellent tool for users who frequently need to resize multiple images at once.
3.7.1. Steps to Use PowerToys Image Resizer
- Download PowerToys: Download and install the PowerToys extension file from the GitHub page.
- Open PowerToys: Open PowerToys from the Start menu.
- Enable Image Resizer: Go to the PowerToys settings and click on Image Resizer. Turn the “Enable Image Resizer” button ON.
- Select Images: Select images from file explorer and right-click on them.
- Resize Pictures: Choose Resize pictures.
- Select Size: Select a size in the PowerToys image resizer window from current presets or enter a Custom size.
- Save Changes: Save the resized image to apply all changes.
4. Image Compression Techniques
Understanding different image compression techniques can help you choose the best method for your needs. These techniques balance file size and image quality. Knowing these methods will enable you to make informed decisions when optimizing your images.
4.1. Chroma Subsampling
Chroma subsampling reduces the amount of color information in an image. Since the human eye is more sensitive to brightness than color, this technique can significantly reduce file size without noticeable quality loss. Chroma subsampling is commonly used in JPEG compression.
4.2. Discrete Cosine Transform (DCT)
DCT is a mathematical transformation that converts an image into different frequency components. Higher-frequency components, which contain less important details, can be discarded to reduce file size. DCT is a key component of JPEG compression.
4.3. Huffman Coding
Huffman coding is a lossless data compression algorithm that assigns shorter codes to more frequent data. This technique efficiently reduces file size without losing any information. Huffman coding is used in many compression formats, including JPEG and PNG.
4.4. Run-Length Encoding (RLE)
RLE is a simple compression technique that replaces long sequences of identical data with a single value and a count. This method is effective for images with large areas of uniform color. RLE is used in BMP and TIFF formats.
5. Optimizing Images for the Web
Optimizing images for the web involves more than just compression. It includes choosing the right file format, resizing images to the appropriate dimensions, and using descriptive file names and alt tags. Optimizing images ensures they load quickly, look great, and contribute to better SEO.
5.1. Choosing the Right File Format
- JPEG: Best for photographs and complex images with many colors.
- PNG: Ideal for images with transparency, logos, and graphics with sharp lines.
- GIF: Suitable for animated images and simple graphics with limited colors.
- WebP: A modern image format that provides superior compression and quality compared to JPEG and PNG.
5.2. Resizing Images Appropriately
Resizing images to the exact dimensions needed on your website prevents unnecessary data from being loaded. Use image editing software to resize images before uploading them. Resizing ensures that images fit perfectly within your website layout and don’t waste bandwidth.
5.3. Using Descriptive File Names and Alt Tags
Descriptive file names and alt tags improve SEO and accessibility. Use keywords in file names and alt tags to help search engines understand the image content. Alt tags also provide alternative text for visually impaired users.
6. Common Image Compression Mistakes to Avoid
Avoiding common image compression mistakes ensures you maintain image quality while reducing file size. These mistakes can lead to poor image quality, slow loading times, and reduced user engagement. Knowing what to avoid will help you achieve the best possible results.
6.1. Over-Compressing Images
Over-compressing images can result in noticeable artifacts and reduced image quality. Always aim for a balance between file size and quality. Use preview options to check the image quality before saving.
6.2. Using the Wrong File Format
Using the wrong file format can lead to inefficient compression and poor image quality. Choose the file format that best suits the image content and your needs. Refer to the file format guidelines in Section 5.1.
6.3. Ignoring Image Dimensions
Ignoring image dimensions can result in large files being loaded even when they are displayed at a smaller size. Always resize images to the appropriate dimensions before uploading them. Resizing ensures that no unnecessary data is loaded, improving website performance.
6.4. Neglecting Alt Tags
Neglecting alt tags can harm SEO and accessibility. Always add descriptive alt tags to your images. Alt tags help search engines understand the image content and provide alternative text for visually impaired users.
7. The Role of Image Compression in SEO
Image compression plays a significant role in SEO by improving website speed and user experience. Faster loading times and optimized images contribute to better search engine rankings. Optimizing images for SEO ensures that your website is more visible and accessible to a wider audience.
7.1. Improving Website Speed
Website speed is a ranking factor in Google’s search algorithm. Compressing images reduces page load times, which can improve your search engine rankings. Faster websites provide a better user experience, leading to higher engagement and lower bounce rates.
7.2. Enhancing User Experience
Optimized images enhance the user experience by providing faster loading times and visually appealing content. A positive user experience can lead to increased engagement, longer site visits, and higher conversion rates.
7.3. Increasing Accessibility
Descriptive alt tags make images accessible to visually impaired users. Accessible websites are more inclusive and can reach a wider audience. Accessibility is an important factor in SEO and overall website quality.
8. Keeping Up with Image Compression Trends
Staying up-to-date with the latest image compression trends ensures you’re using the most efficient and effective techniques. New formats and tools are constantly emerging, offering improved compression and quality. Keeping informed will help you optimize your images and stay ahead of the curve.
8.1. WebP: The Next-Generation Image Format
WebP is a modern image format developed by Google that provides superior compression and quality compared to JPEG and PNG. It supports both lossless and lossy compression. WebP is becoming increasingly popular due to its ability to reduce file sizes without sacrificing image quality.
8.2. AVIF: A High-Performance Image Format
AVIF (AV1 Image File Format) is another next-generation image format that offers even better compression than WebP. It is based on the AV1 video codec and supports a wide range of features, including HDR and wide color gamut. AVIF is gaining traction as a high-performance alternative to JPEG and PNG.
8.3. AI-Powered Image Compression
AI-powered image compression tools use machine learning algorithms to optimize images for the best possible balance between file size and quality. These tools can analyze images and apply compression techniques tailored to the specific content. AI-powered compression is becoming more sophisticated and effective, offering significant improvements over traditional methods.
9. Advanced Image Compression Techniques
For those seeking the highest level of image optimization, advanced techniques can provide even greater file size reductions without sacrificing quality. These techniques require a deeper understanding of image compression principles and may involve using specialized tools. Mastering advanced techniques can lead to significant improvements in website performance and user experience.
9.1. Adaptive Compression
Adaptive compression involves adjusting the compression settings based on the specific characteristics of each image. This ensures that each image is optimized for the best possible balance between file size and quality. Adaptive compression can be implemented using custom scripts or specialized software.
9.2. Lossless Optimization Tools
Lossless optimization tools further reduce the file size of already compressed images without losing any quality. These tools work by removing unnecessary metadata and optimizing the compression algorithms. Lossless optimization is a valuable technique for maximizing the efficiency of your images.
9.3. Progressive JPEGs
Progressive JPEGs load gradually as they are downloaded, providing a better user experience for visitors with slow internet connections. Instead of waiting for the entire image to load, users see a low-resolution version of the image first, which gradually becomes clearer. Progressive JPEGs can improve perceived loading times and keep users engaged.
10. Conclusion: Optimize Your Visuals
Compressing photos in Windows is essential for website optimization, efficient storage, and improved user experience. By using the techniques and tools discussed in this article, you can reduce image file sizes without sacrificing quality. Regular image optimization ensures your website performs optimally and provides a seamless experience for your visitors. Visit dfphoto.net for more tips and resources on photography and image optimization. Address: 1600 St Michael’s Dr, Santa Fe, NM 87505, United States. Phone: +1 (505) 471-6001. Website: dfphoto.net.
Ready to elevate your photography skills and discover stunning visual content? Explore dfphoto.net today for expert tutorials, breathtaking photo collections, and a vibrant community of photographers. Start your journey now and unleash your creative potential!
Frequently Asked Questions (FAQ)
1. What is the best way to compress photos in Windows?
The best way to compress photos in Windows depends on your needs. For ease of use and speed, Shrink.media is a great option. For more control, Microsoft Paint or the Windows Photos app are good choices.
2. How can I compress an image without losing quality?
Use lossless compression techniques like PNG format or lossless optimization tools to compress images without losing quality.
3. Is it better to compress images using online tools or software?
Both online tools and software have their advantages. Online tools like Shrink.media are convenient and don’t require installation, while software like RIOT offer more advanced features and control.
4. What image format is best for web use?
JPEG is best for photographs, PNG for graphics with transparency, and WebP for superior compression and quality.
5. How does image compression affect website loading times?
Image compression reduces file sizes, which significantly improves website loading times. Faster loading times enhance user experience and SEO.
6. What are alt tags and why are they important?
Alt tags are descriptive text added to images to improve SEO and accessibility. They help search engines understand the image content and provide alternative text for visually impaired users.
7. How can I resize an image in Windows without losing quality?
Use image editing software like MS Paint or the Windows Photos app to resize images. Maintain aspect ratio and avoid over-compressing the image.
8. What is chroma subsampling and how does it work?
Chroma subsampling reduces the amount of color information in an image, taking advantage of the human eye’s greater sensitivity to brightness. This reduces file size without significant quality loss.
9. What are progressive JPEGs and why should I use them?
Progressive JPEGs load gradually as they are downloaded, providing a better user experience for visitors with slow internet connections.
10. How can I stay up-to-date with image compression trends?
Follow industry blogs, attend webinars, and explore new image formats like WebP and AVIF to stay informed about the latest image compression trends.