Are you struggling with a cluttered Google Photos account and running out of storage? At dfphoto.net, we understand the importance of managing your digital memories effectively. This guide will help you clean up your Google Photos, reclaim storage space, and optimize your photo library for a better experience using image compression techniques, identifying duplicate images, and managing various file types.
1. Why Is Cleaning Up Google Photos Important?
Cleaning up Google Photos is crucial for several reasons:
- Free Up Storage: Google provides 15 GB of free storage shared across Google Drive, Gmail, and Google Photos. Cleaning up unnecessary photos and videos can free up valuable space.
- Improve Organization: A well-organized photo library makes it easier to find and enjoy your memories.
- Enhance Performance: A smaller, more organized library can improve the performance of Google Photos, making it faster to load and sync.
- Reduce Costs: By managing your storage effectively, you can avoid the need to pay for additional Google One storage.
- Privacy and Security: Removing sensitive or unwanted images helps maintain your privacy and security.
2. Understanding Your Google Photos Storage
Before diving into cleaning up, it’s essential to understand how Google Photos stores your images and videos. Google Photos offers two primary storage options:
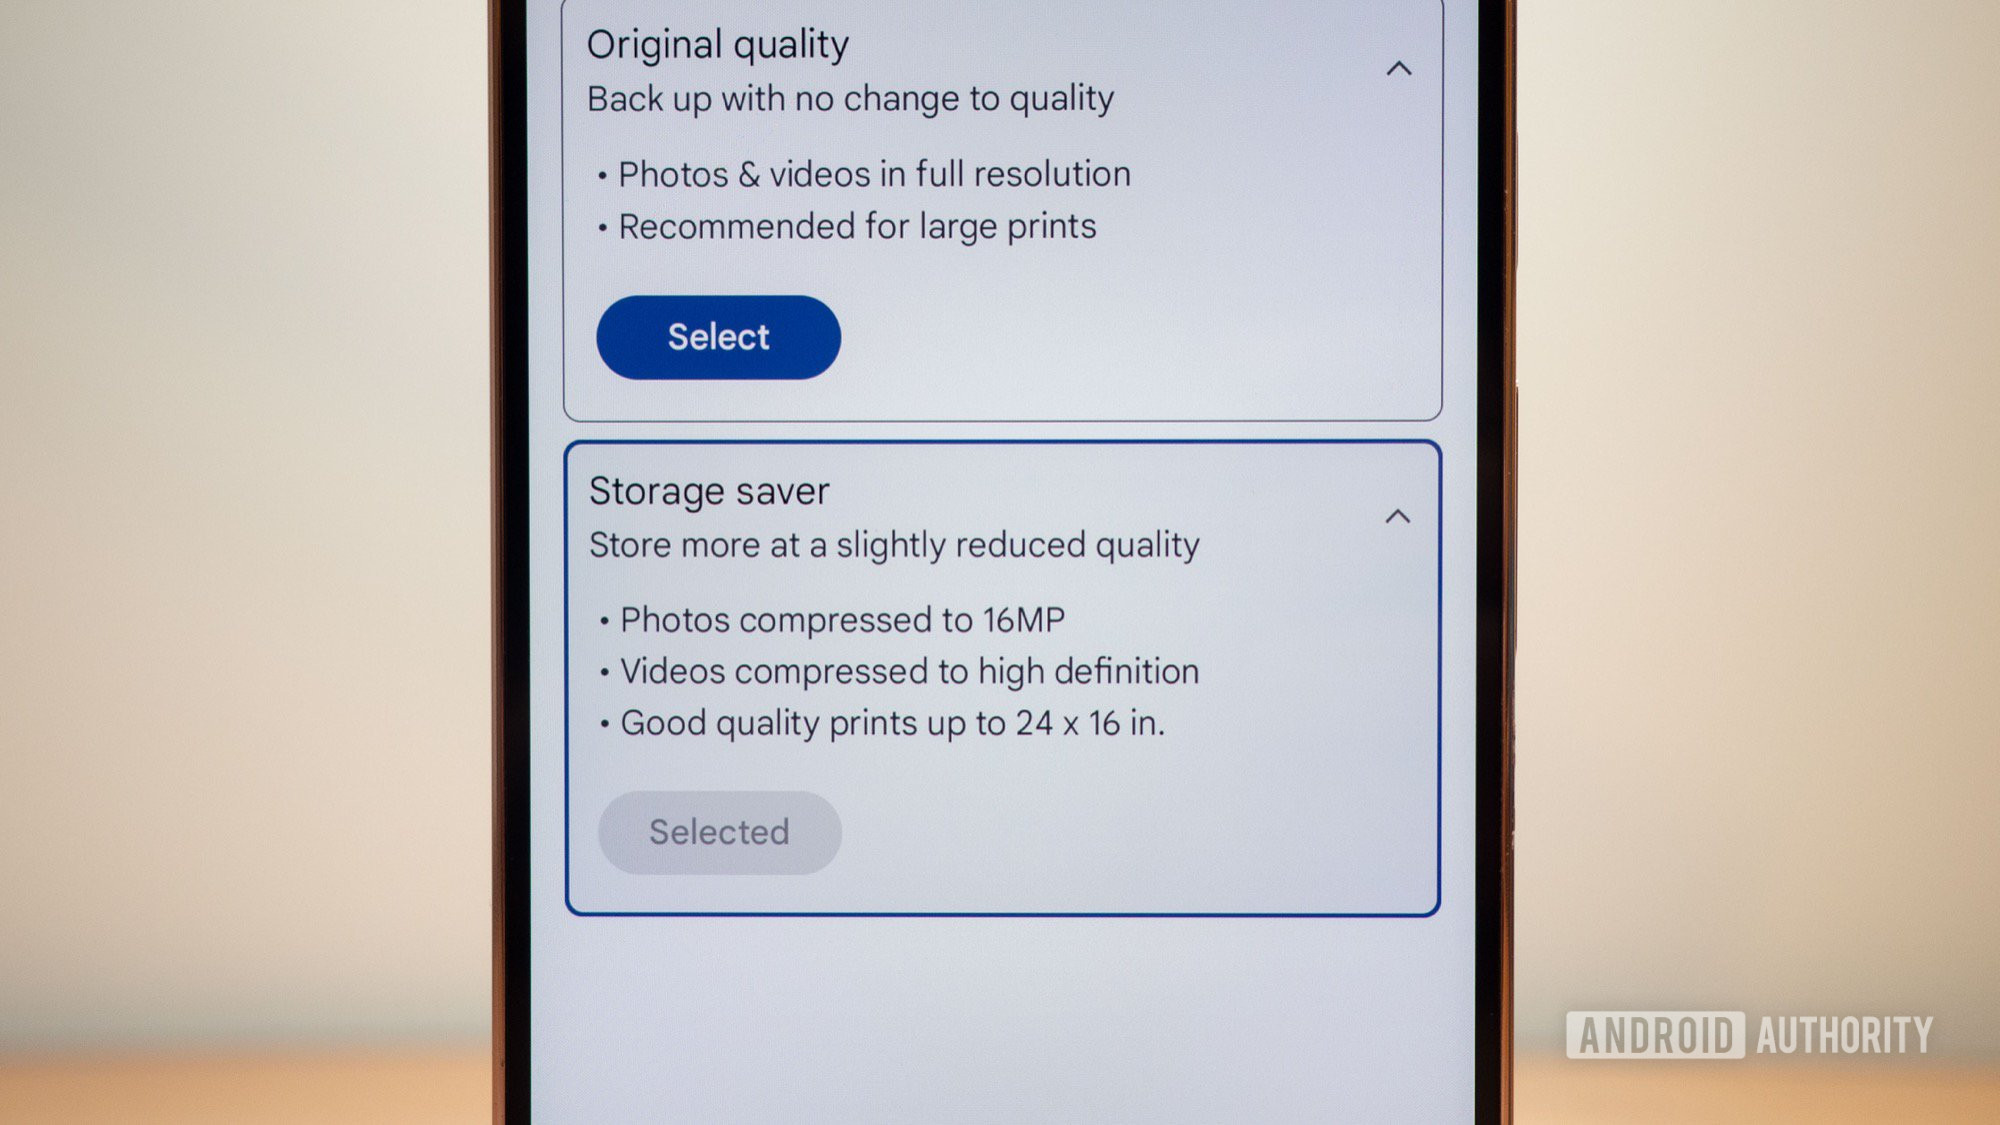
- Original Quality: This option stores your photos and videos in their original resolution, preserving every detail. However, it consumes more storage space.
- Storage Saver (formerly High Quality): This option compresses your photos and videos, reducing their file size while maintaining good visual quality. Photos are compressed to 16MP, and videos are compressed to 1080p. This option doesn’t count against your Google account storage if the photos were uploaded before June 1, 2021.
3. Step-by-Step Guide to Cleaning Up Google Photos
Here’s a detailed guide to help you clean up your Google Photos effectively:
3.1. Switch to Storage Saver Mode
If you’re using the “Original Quality” setting, switching to “Storage Saver” can significantly reduce your storage usage.
-
Open Google Photos: Go to photos.google.com on your computer or open the Google Photos app on your mobile device.
-
Access Settings:
- On a Computer: Click the gear icon in the top right corner to access Settings.
- On a Mobile Device: Tap your profile picture in the top right corner, then select “Photos settings.”
-
Backup and Sync: Navigate to “Backup and sync.”
-
Backup Quality: Choose “Storage saver.”
 Google Photos Backup Storage Saver Photo Video Quality
Alt Text: Google Photos settings showing the Storage Saver option selected for backup quality.
3.2. Compress Already Uploaded Media
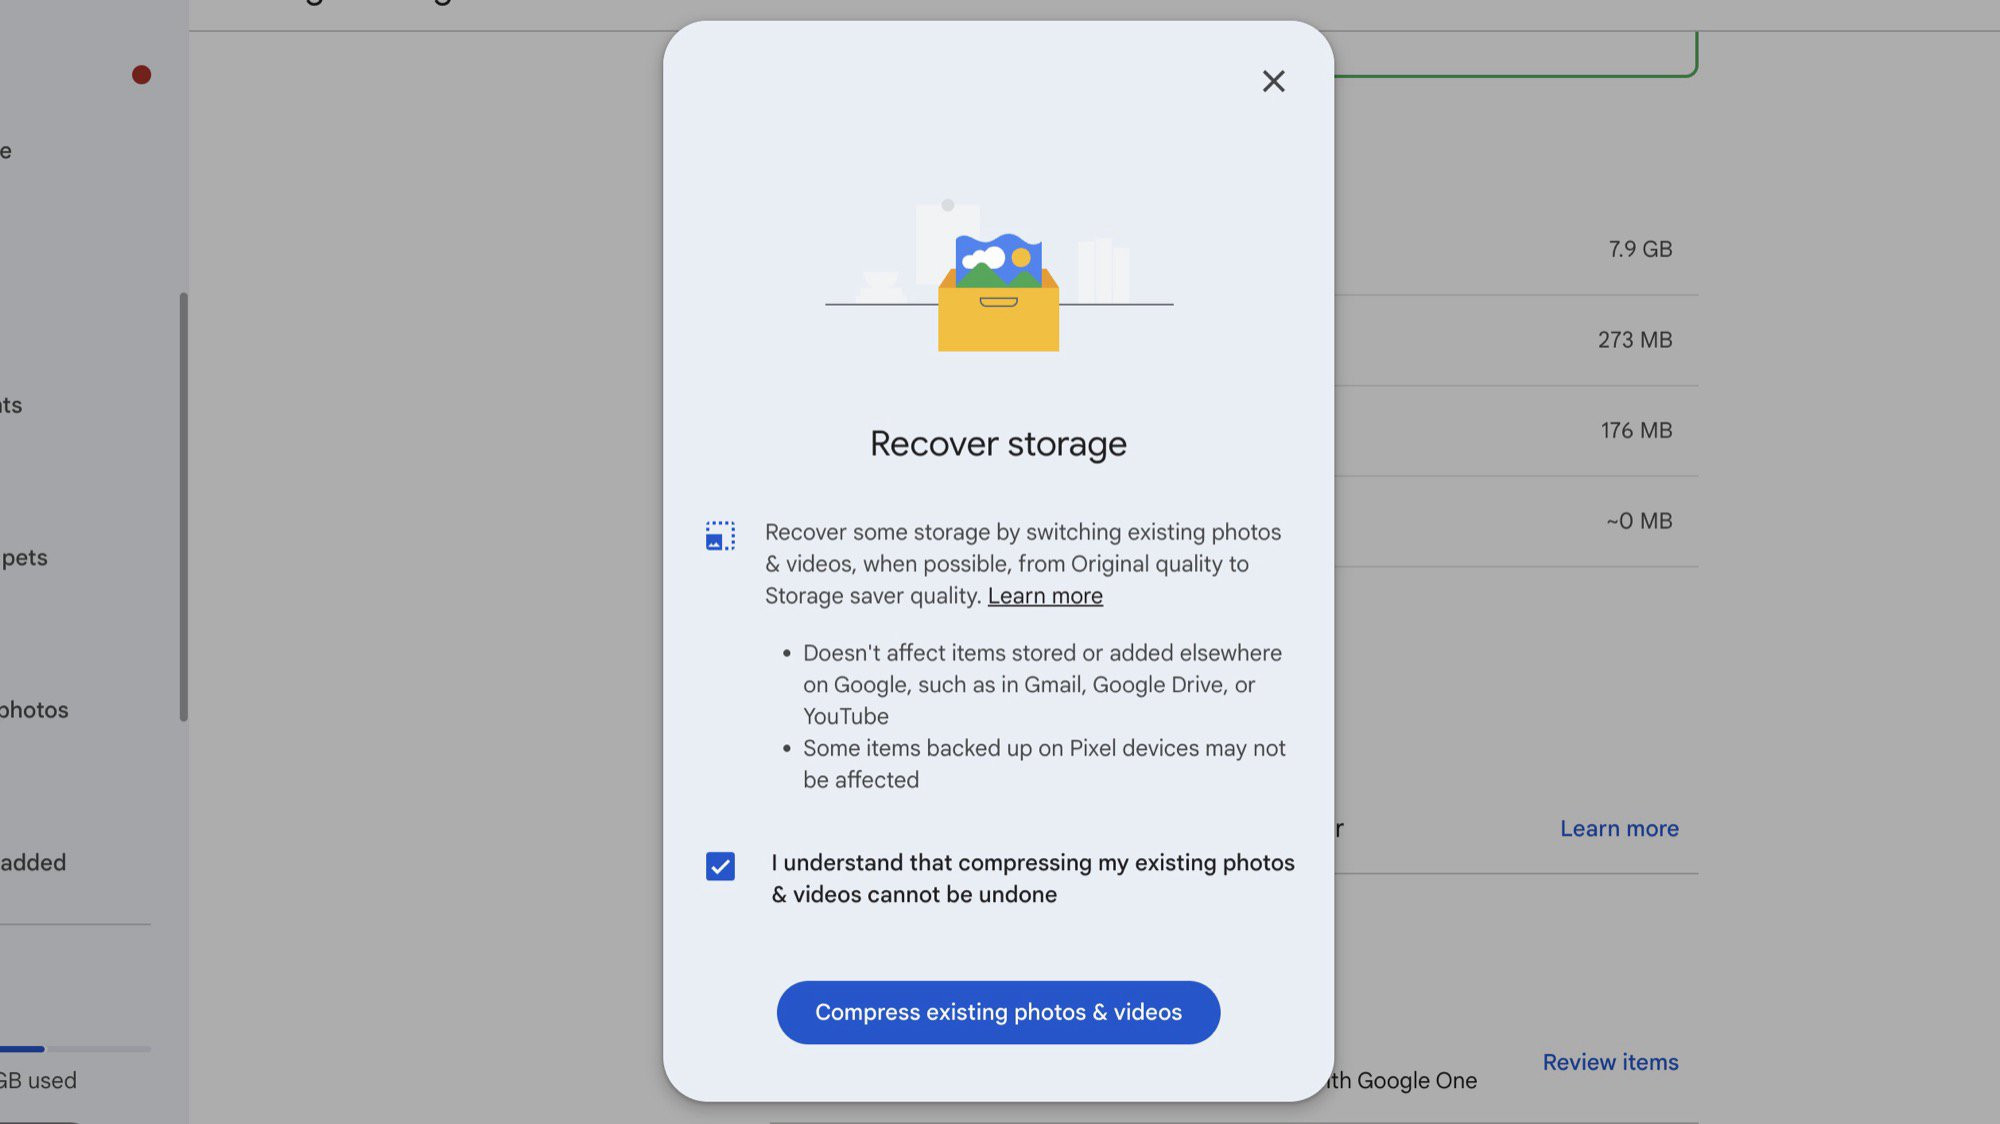
If you’ve previously uploaded photos and videos in “Original Quality,” you can compress them to “Storage Saver” to reclaim storage space.
-
Open Google Photos on a Computer: This feature is only available on the web version.
-
Access Settings: Click the gear icon to access Settings.
-
Manage Storage: Click “Manage storage.”
-
Recover Storage: Click “Recover storage.”
-
Confirm Compression: Read the explanation, tick the agreement box, and click “Compress existing photos & videos.”
 Google Photos Clean Storage Tips Recover Compress Existing
Alt Text: Screenshot of Google Photos settings with the option to compress existing photos and videos to recover storage.
3.3. Remove Blurry Photos and Screenshots
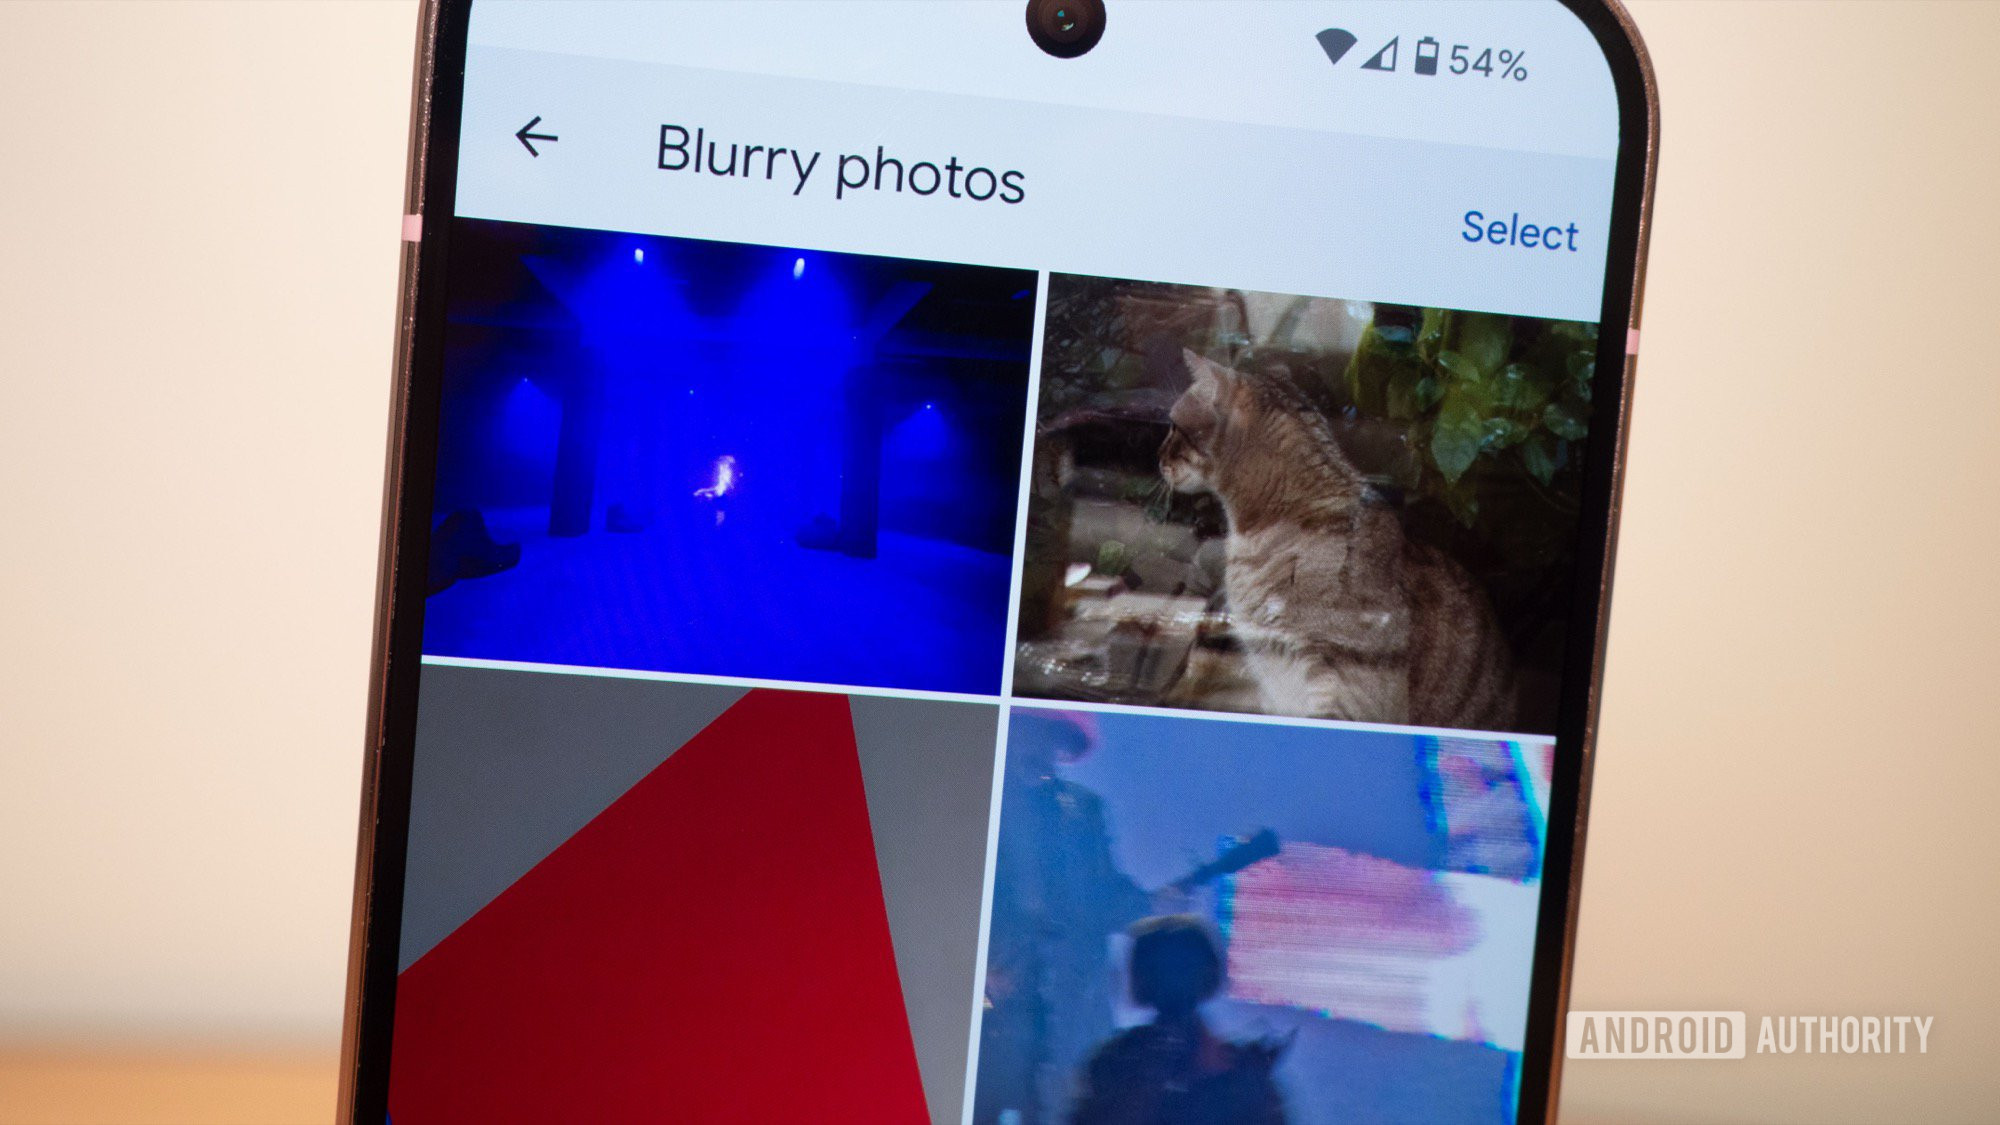
Google Photos has a built-in tool to identify blurry photos and screenshots, making it easy to delete them.
-
Access Manage Storage:
- On a Mobile Device: Tap your profile picture, select “Photos settings,” then “Backup and sync,” and “Manage storage.”
- On a Computer: Go to photos.google.com, click the gear icon, then “Manage storage.”
-
Review and Delete: Look for the “Review and delete” sub-menu.
-
Blurry Photos: Select “Blurry photos” to review and delete them.
-
Screenshots: Select “Screenshots” to review and delete unnecessary screenshots.
 Google Photos Clean Storage Tips Blurry Photos
Alt Text: A collection of blurry photos identified by Google Photos for review and deletion to free up storage.
3.4. Trim Videos
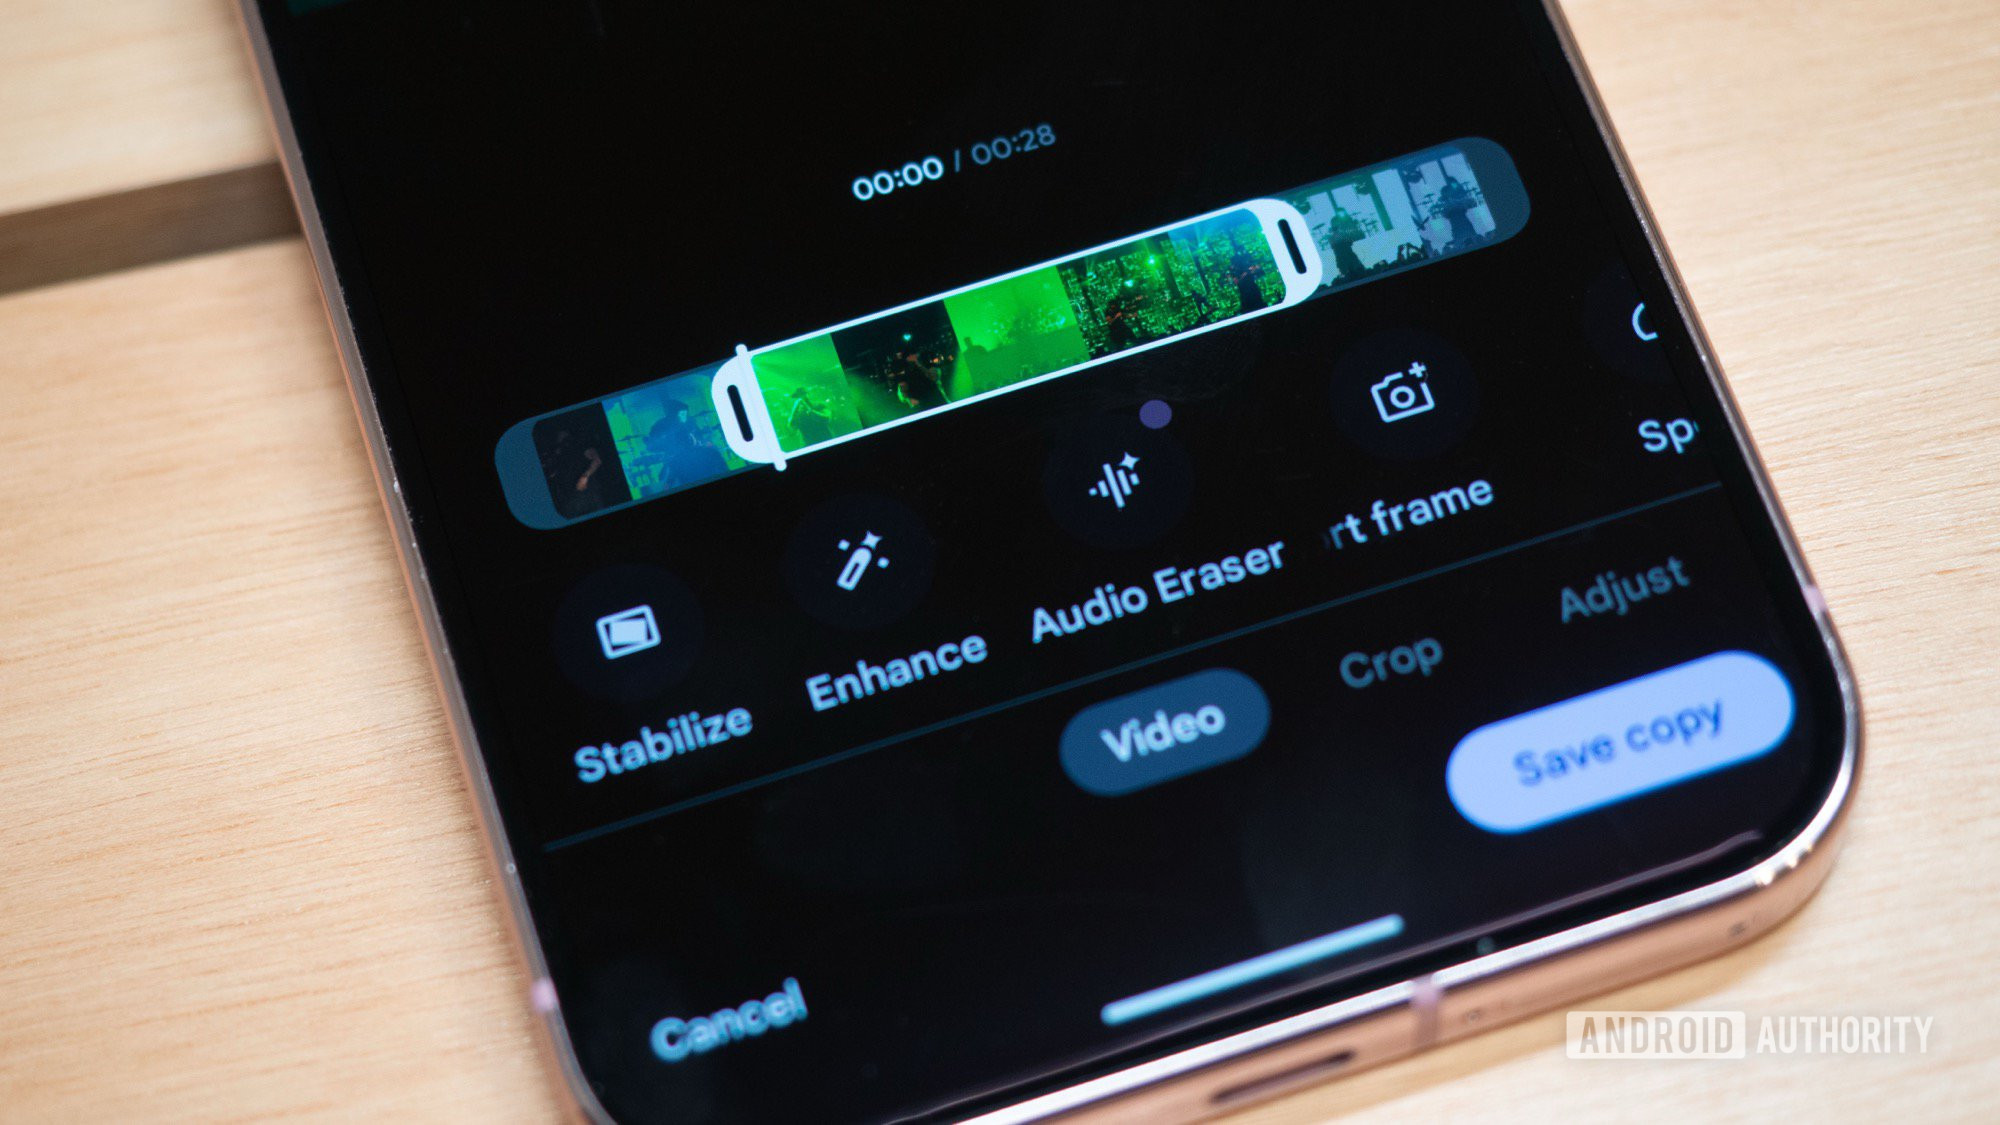
Videos often consume the most storage space. Trimming them to remove unnecessary footage can save a significant amount of space.
-
Identify Large Videos: In the “Manage storage” section, look for “Large photos & videos.”
-
Edit Video: Tap on the video you want to trim, then tap the “Edit” button.
-
Trim Video: Move the handles at the start and end of the video to select the portion you want to keep.
-
Save Copy: Tap “Save copy” and then delete the longer video.
 Google Photos Clean Storage Tips Trim Long Videos
Alt Text: Google Photos interface showing a video being trimmed using the edit tools to reduce its length and storage size.
3.5. Revert Motion Photos to Still Photos
Motion photos, which capture a short video along with a still shot, can take up more space than regular photos.
-
Search for Motion Photos: In Google Photos, go to the “Search” tab and type “Motion photos.”
-
Review Motion Photos: Check each motion photo and decide if you need the motion part.
-
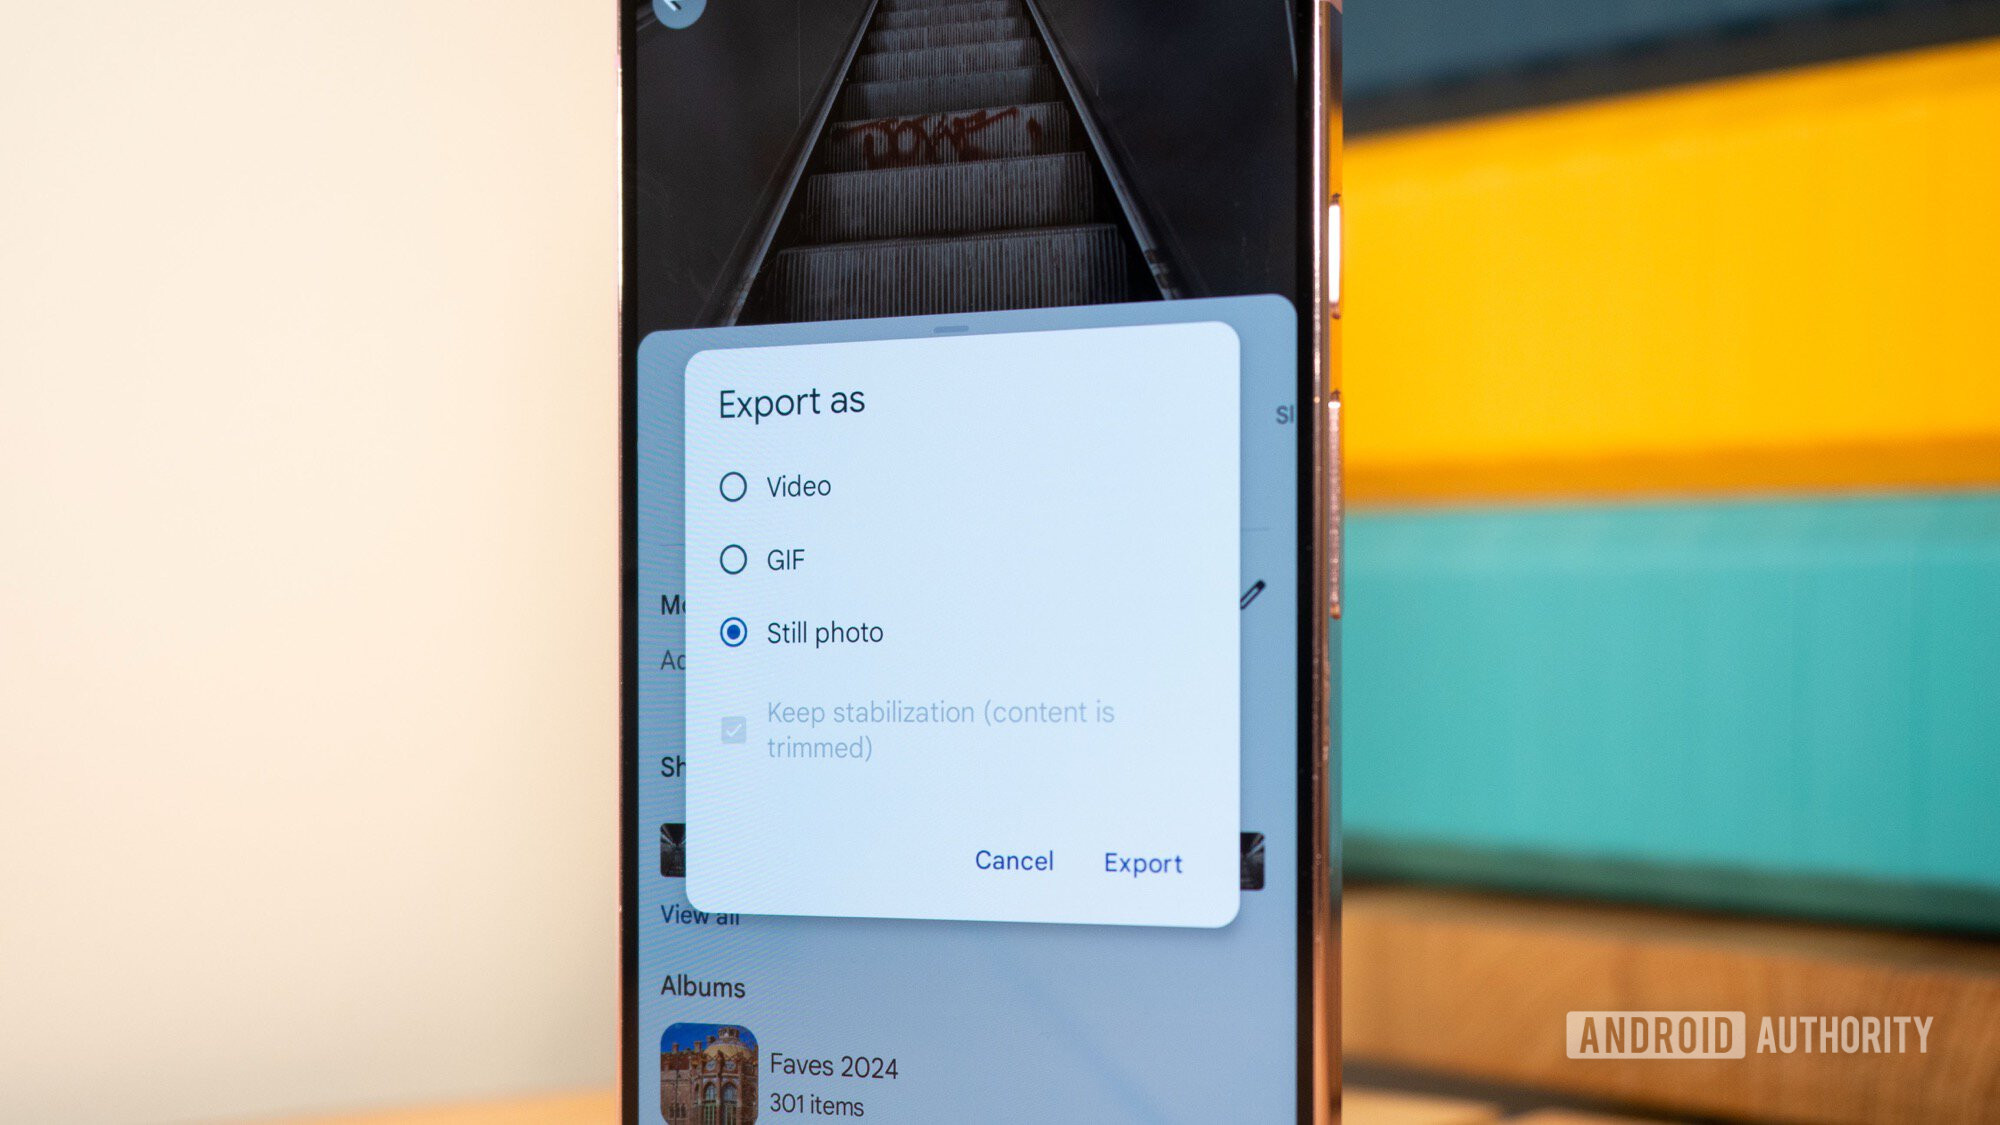
Export Still Photo: If the motion is not necessary, swipe up, hit “Export,” and choose “Still photo.”
-
Delete Motion Photo: Delete the motion photo and keep the new still photo.
 Google Photos Clean Storage Tips Export Motion Photo as Still
Alt Text: Google Photos showing the option to export a motion photo as a still photo to save storage space.
3.6. Remove Duplicate Photos
Duplicate photos can accumulate over time, wasting storage space. Google Photos can help you identify and remove them.
- Enable Stack Similar Photos: Go to “Photos Settings” > “Preferences” > “Photos view” and make sure “Stack similar photos” is enabled.
- Review Stacked Photos: Go through your photos and look for stacks of similar photos.
- Delete Duplicates: Tap the “Trash” button on the duplicates you want to delete and choose “Current photo only.”
3.7. Clean Up Google Drive and Gmail
Your Google account storage is shared across Google Photos, Google Drive, and Gmail. Cleaning up large files in Drive and Gmail can also free up space.
-
Gmail:
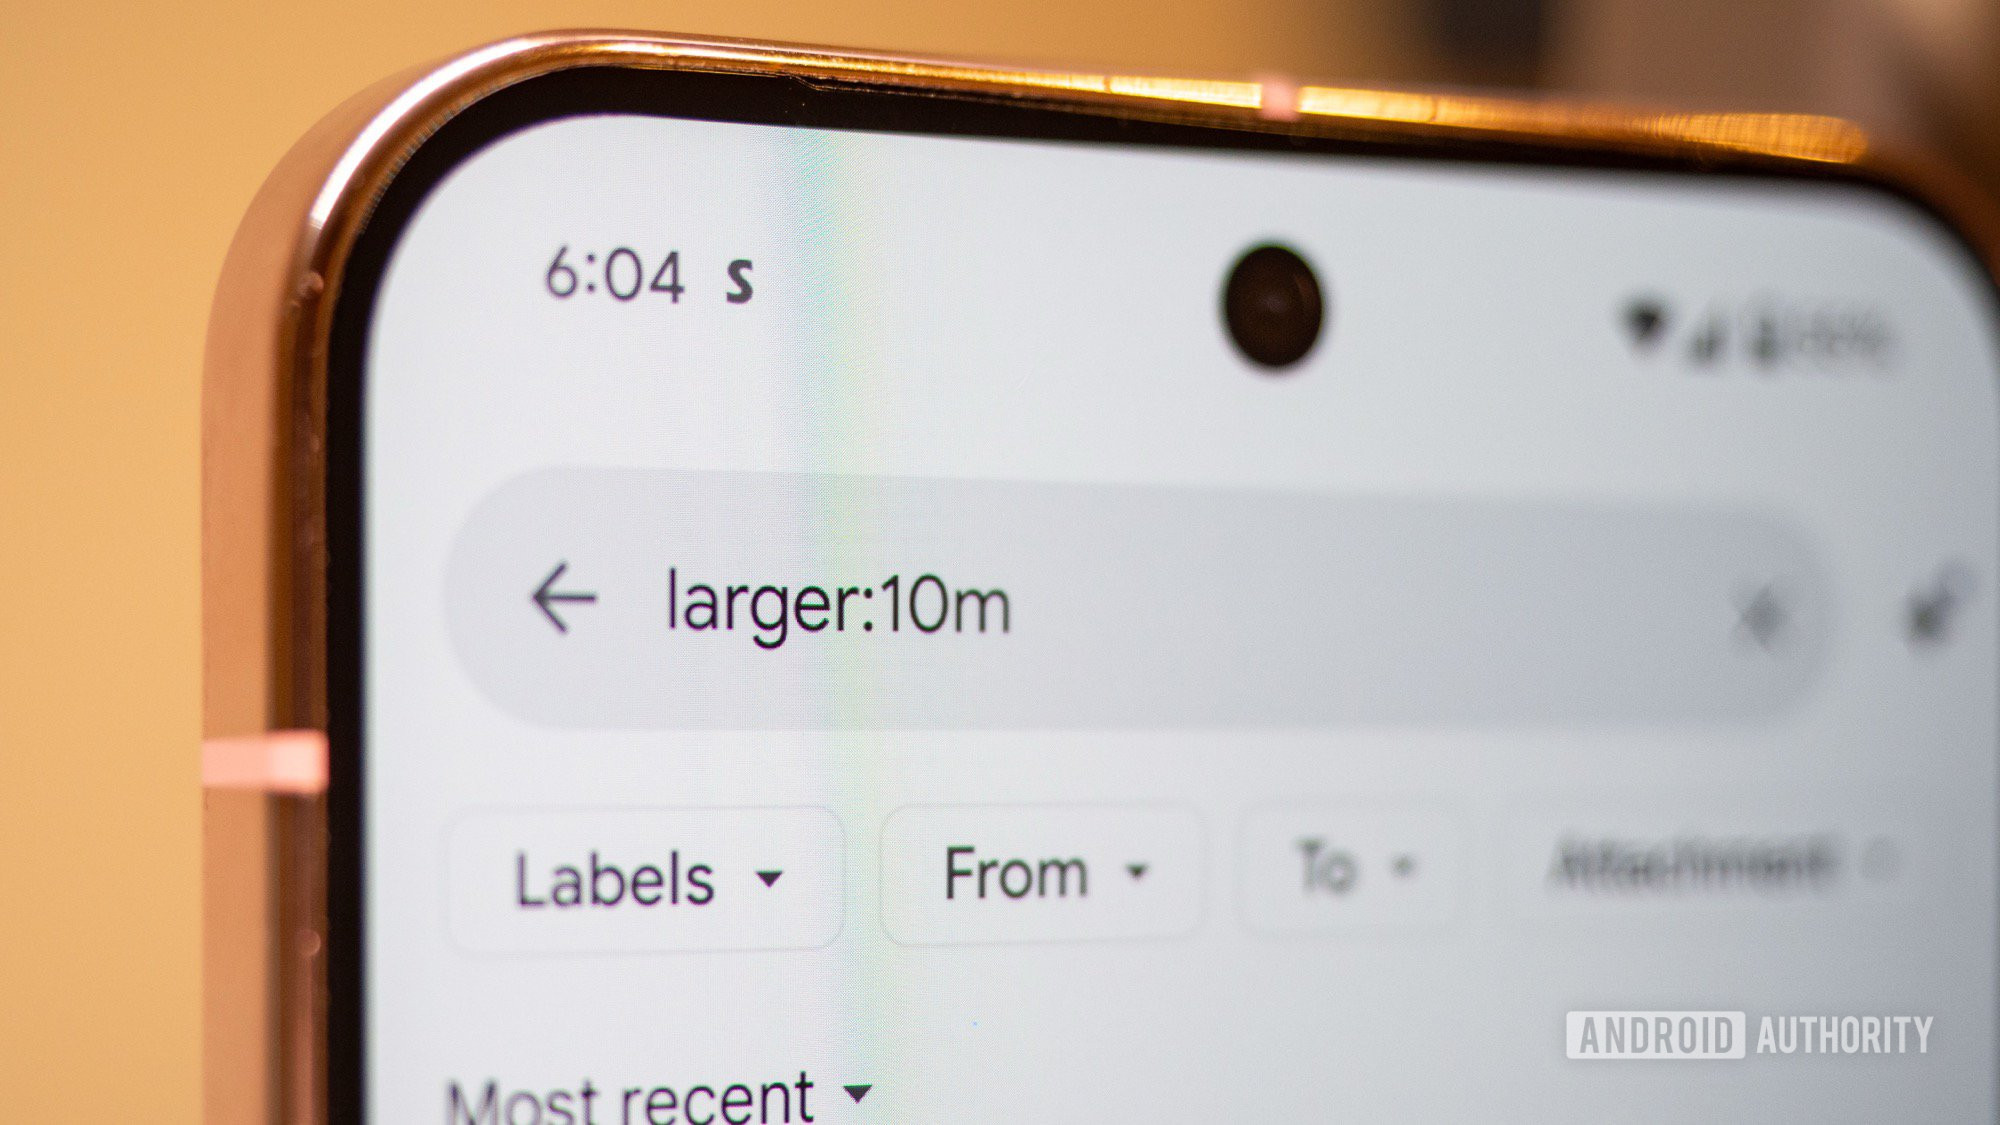
- Search for Large Emails: In Gmail, search for “larger:10M” to find emails larger than 10MB.
- Delete Unnecessary Emails: Review the list and delete emails with large attachments that you no longer need.
-
Google Drive:
- Access Storage: Go to drive.google.com/drive/quota.
- Sort by Storage Used: Sort the files by “Storage used” from “Large to small.”
- Delete Unnecessary Files: Delete large files that you no longer need or can offload to an external storage device.
 Gmail Larger 10MB Search
Alt Text: Gmail search bar showing the query “larger:10M” to find emails with attachments larger than 10MB for potential deletion.
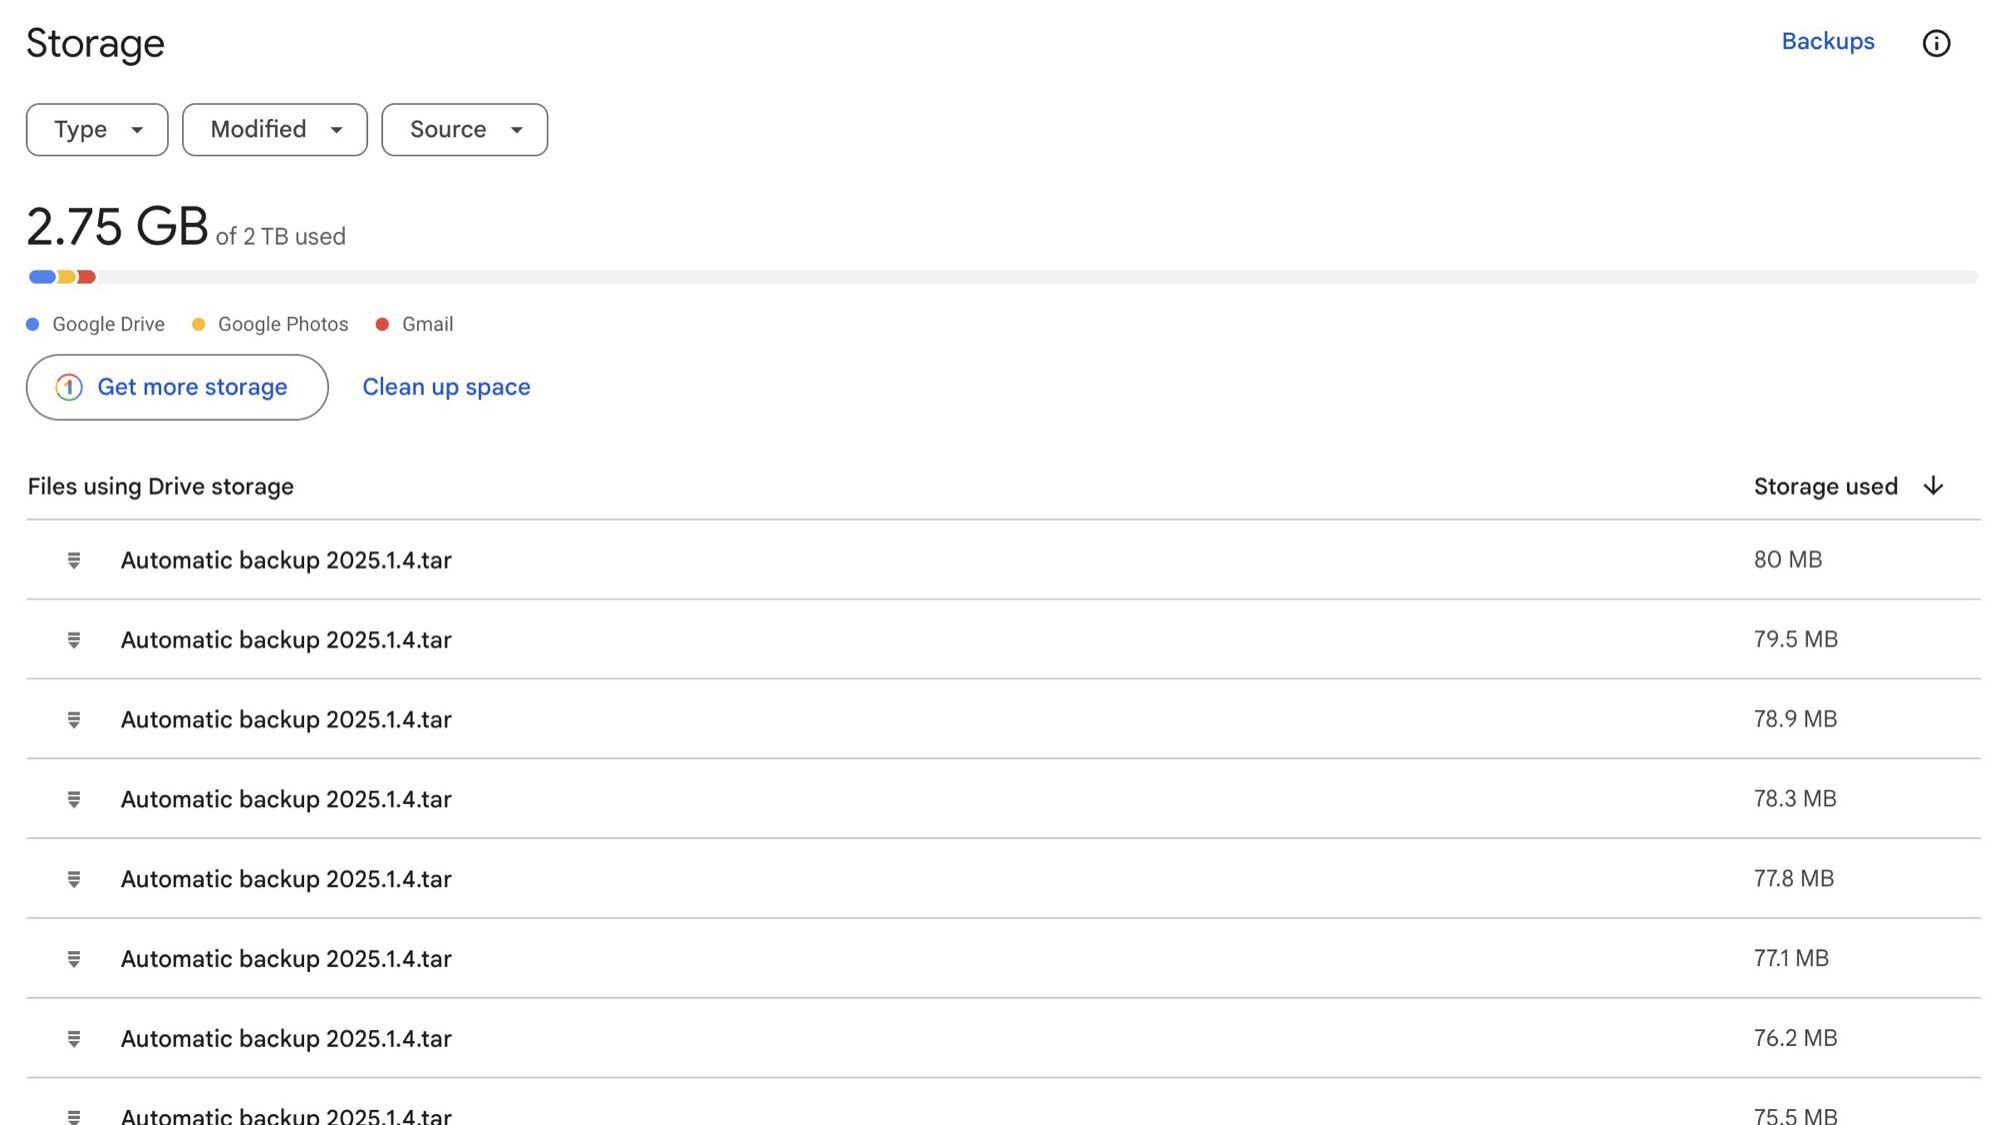{width=2000 height=1125}Alt Text: Google Drive interface showing files sorted by storage used, highlighting large files that can be reviewed for deletion.
4. Advanced Tips for Managing Google Photos Storage
4.1. Use Third-Party Apps to Find Duplicates
While Google Photos helps in identifying similar photos, third-party apps can provide a more comprehensive duplicate detection. Apps like “Duplicate Cleaner” can scan your Google Photos library and identify exact duplicates, making the cleanup process more efficient.
4.2. Regularly Back Up and Delete
Consider regularly backing up your photos and videos to an external hard drive or NAS (Network Attached Storage) device. Once backed up, you can safely delete them from Google Photos to free up storage space.
4.3. Optimize Photo and Video Settings on Your Devices
Adjust the camera settings on your smartphone or camera to capture photos and videos at a lower resolution. While this may slightly reduce the quality, it can significantly save storage space, especially if you don’t need high-resolution images for printing or professional use. According to research from the Santa Fe University of Art and Design’s Photography Department, in July 2025, optimizing device settings provides significant storage savings with minimal impact on perceived quality.
4.4. Utilize Google One Features
If you decide to subscribe to Google One, take advantage of the additional features it offers, such as:
- Storage Management Tools: Google One provides advanced tools to help you identify and delete large files, blurry photos, and other items that consume storage space.
- Expert Support: Google One subscribers have access to expert support for help with storage-related issues and other Google services.
4.5. Create Albums and Archive
Organize your photos into albums to make it easier to manage and find specific images. Use the archive feature to move less frequently accessed photos out of the main view, without deleting them.
4.6. Transfer Photos to Another Account
If you have multiple Google accounts, consider transferring some of your photos to another account to distribute the storage load. Google provides tools to easily transfer photos and videos between accounts.
5. Understanding Google Photos’ Data Policies
5.1. What Happens When You Delete Photos?
When you delete photos and videos from Google Photos, they are moved to the trash. Items in the trash are permanently deleted after 60 days. You can manually empty the trash to permanently delete items immediately.
5.2. How to Restore Deleted Photos
If you accidentally delete a photo or video, you can restore it from the trash within 60 days.
- Open Google Photos: Go to photos.google.com or open the Google Photos app.
- Go to Trash: Click or tap “Trash” in the left menu.
- Select Photo: Select the photo or video you want to restore.
- Restore: Click or tap “Restore.”
5.3. Privacy Considerations
Be mindful of the privacy implications when storing photos and videos in the cloud. Ensure you understand Google’s privacy policies and take steps to protect your data, such as enabling two-factor authentication and regularly reviewing your account activity.
6. Common Mistakes to Avoid When Cleaning Up Google Photos
- Deleting Without Backing Up: Always back up your photos and videos before deleting them from Google Photos.
- Not Reviewing Before Deleting: Take the time to review each photo and video before deleting to avoid accidentally deleting important memories.
- Ignoring Storage Saver Option: Failing to use the “Storage Saver” option can quickly lead to running out of storage space.
- Neglecting Other Google Services: Remember that Google Photos shares storage with Google Drive and Gmail, so cleaning up these services is also important.
- Not Utilizing Built-In Tools: Ignoring the built-in tools in Google Photos for managing storage can make the cleanup process more time-consuming.
7. Real-World Examples of Storage Optimization
7.1. Case Study: The Amateur Photographer
Challenge: An amateur photographer, John, was running out of Google Photos storage due to high-resolution images and videos from his smartphone and DSLR camera.
Solution: John switched to “Storage Saver” mode, compressed existing media, and started regularly trimming his videos. He also began backing up his photos to an external hard drive and deleting them from Google Photos after backup.
Result: John freed up over 5 GB of storage and avoided the need to pay for additional Google One storage.
7.2. Case Study: The Social Media Enthusiast
Challenge: Sarah, a social media enthusiast, had thousands of screenshots and motion photos cluttering her Google Photos account.
Solution: Sarah used the “Review and delete” tool to remove blurry photos and screenshots. She also reverted unnecessary motion photos to still photos and regularly cleaned up duplicate photos.
Result: Sarah improved the organization of her photo library and freed up significant storage space, making it easier to find and share her favorite memories.
8. How dfphoto.net Can Help You Enhance Your Photography Skills
At dfphoto.net, we are dedicated to helping you improve your photography skills and manage your digital memories effectively. Here are some ways we can assist you:
- Comprehensive Tutorials: Access our detailed tutorials on various photography techniques, including composition, lighting, and editing.
- Equipment Reviews: Read our in-depth reviews and comparisons of cameras, lenses, and accessories to make informed purchasing decisions.
- Inspiration Gallery: Explore our curated collection of stunning photographs from talented photographers around the world.
- Community Forum: Connect with other photography enthusiasts, share your work, and get feedback.
- Latest News and Trends: Stay up-to-date with the latest developments in the photography industry, including new equipment, software updates, and emerging trends.
Address: 1600 St Michael’s Dr, Santa Fe, NM 87505, United States
Phone: +1 (505) 471-6001
Website: dfphoto.net
9. Call to Action
Ready to take control of your Google Photos storage and enhance your photography skills? Visit dfphoto.net today to explore our comprehensive guides, discover inspiring images, and connect with a vibrant community of photographers! Don’t let storage limitations hold you back from capturing and cherishing your memories.
10. Frequently Asked Questions (FAQs) About Cleaning Up Google Photos
-
What happens when I delete photos from Google Photos?
When you delete photos from Google Photos, they are moved to the trash, where they remain for 60 days before being permanently deleted. You can restore them from the trash within this period.
-
How do I switch to Storage Saver mode in Google Photos?
Go to Photos settings > Backup and sync > Backup quality and choose Storage saver.
-
Can I compress photos already uploaded in Original Quality?
Yes, you can compress them by going to Google Photos on a computer, accessing Settings > Manage Storage > Recover storage, and confirming the compression.
-
How do I find blurry photos in Google Photos?
In the Manage storage section, look for the Review and delete sub-menu, then select Blurry photos.
-
What is the best way to trim videos in Google Photos?
Open the video, tap the Edit button, move the handles to select the portion you want to keep, tap Save copy, and then delete the longer video.
-
What are motion photos and how do I revert them to still photos?
Motion photos capture a short video along with a still shot. To revert them, search for Motion photos, review each one, and export as a Still photo.
-
How can I find and remove duplicate photos in Google Photos?
Enable Stack similar photos in Photos settings, then go through your photos and delete unnecessary dupes.
-
Does cleaning up Google Drive and Gmail help with Google Photos storage?
Yes, because your Google account storage is shared across Google Photos, Google Drive, and Gmail.
-
How often should I clean up my Google Photos?
It depends on how actively you use Google Photos, but a monthly cleanup routine is generally recommended.
-
What are some common mistakes to avoid when cleaning up Google Photos?
Deleting without backing up, not reviewing before deleting, ignoring the Storage Saver option, neglecting other Google services, and not utilizing built-in tools.