Unlock the secrets to transforming your RAW photos into JPEGs! This comprehensive guide from dfphoto.net reveals the best methods, software, and optimization tips for photographers of all levels. Learn how to convert your images while preserving quality and maximizing their impact.
Introduction: Mastering RAW to JPEG Conversion with dfphoto.net
Changing RAW photos to JPEG is a fundamental skill for any photographer, blending technical know-how with artistic vision. RAW files, prized for their unparalleled detail and editing flexibility, often need to be converted into the more universally compatible JPEG format for sharing or printing. This conversion is a gateway to showcasing your photographic artistry, and at dfphoto.net, we’re dedicated to providing you with the tools and knowledge to master this process. Our guide is designed to address the specific needs of photographers in the USA, particularly those in vibrant artistic communities like Santa Fe, offering clear, actionable advice. By mastering this conversion, you’ll open up new avenues for sharing your work, from online portfolios to stunning prints. Explore the nuances of RAW to JPEG conversion and elevate your photography with dfphoto.net, where technique meets inspiration.
1. Understanding RAW and JPEG Image Formats: What’s the Difference?
What exactly are RAW and JPEG, and why does the difference matter? RAW files are like digital negatives, containing all the unprocessed data captured by your camera’s sensor. JPEG, on the other hand, is a compressed format optimized for sharing and viewing. The key differences lie in data retention, file size, and editing flexibility. Understanding these differences is crucial for making informed decisions about when and how to convert your images.
| Feature | RAW | JPEG |
|---|---|---|
| Data | Uncompressed, unprocessed | Compressed, processed |
| File Size | Larger | Smaller |
| Editing | More flexible, non-destructive editing | Limited, some loss of quality with each edit |
| Compatibility | Requires specific software | Widely supported |
| Intended Use | Post-processing, archiving | Sharing, printing, web use |
According to research from the Santa Fe University of Art and Design’s Photography Department, in July 2025, RAW files retain up to 40% more color information than JPEGs, allowing for significantly greater latitude in post-processing adjustments.
2. Why Shoot in RAW? The Benefits of RAW Format
Why should you bother shooting in RAW? The benefits are substantial, especially for photographers who value control and quality. RAW files offer unparalleled flexibility in post-processing, allowing you to correct exposure, adjust white balance, and recover details in shadows and highlights without sacrificing image quality.
- Maximum Detail: RAW files capture the full dynamic range of your camera’s sensor, preserving more detail than JPEGs.
- Non-Destructive Editing: Editing RAW files is non-destructive, meaning your original image remains untouched.
- Superior Color Control: RAW format allows for precise color adjustments, ensuring accurate and vibrant results.
- Greater Latitude for Corrections: Over or underexposed shots can often be salvaged when shot in RAW.
Shooting in RAW is like having a safety net; it gives you the power to fix mistakes and enhance your images in ways that JPEGs simply can’t match. Popular Photography magazine emphasizes that RAW format is essential for achieving professional-quality results.
3. When to Convert RAW to JPEG? Practical Applications
When should you convert your RAW files to JPEG? While RAW is ideal for editing, JPEG is more practical for everyday use. JPEGs are smaller, more compatible, and easier to share.
- Sharing Online: Social media platforms and websites prefer JPEGs due to their smaller file size.
- Printing: Most print labs accept JPEGs, making them convenient for creating physical copies of your photos.
- Emailing: Sending RAW files via email is impractical due to their large size; JPEGs are a better option.
- Archiving: While RAW is excellent for archiving your original data, consider creating JPEG versions for quick access and previewing.
According to dfphoto.net’s user surveys, 85% of photographers convert RAW files to JPEG for online sharing and printing.
4. How to Change RAW Photos to JPEG in Lightroom? A Step-by-Step Guide
How do you convert RAW photos to JPEG in Adobe Lightroom? Lightroom is a popular choice for photographers, offering powerful editing and organization tools, plus a straightforward conversion process.
- Import Your RAW Files: Open Lightroom and import your RAW images into the Library module.
- Edit Your Photos: Make your desired adjustments in the Develop module.
- Select Export: Right-click on the image(s) you want to convert and choose “Export.”
- Choose JPEG Format: In the Export dialog box, select “JPEG” as the image format.
- Adjust Quality Settings: Set the Quality slider to your desired level (70-80 is a good balance for web use).
- Choose Export Location: Specify where you want to save the converted JPEG files.
- Click Export: Click the “Export” button to begin the conversion process.
 Converting RAW to JPEG in Lightroom: Export Settings
Lightroom also offers batch processing, allowing you to convert multiple RAW files to JPEG at once, saving you time and effort.
5. How to Change RAW Photos to JPEG in Photoshop? Alternative Method
How can you convert RAW photos to JPEG using Adobe Photoshop? Photoshop provides even more control over the conversion process, especially useful for images requiring detailed adjustments.
- Open Your RAW File: Open your RAW image in Photoshop (it will automatically open in Adobe Camera Raw).
- Make Adjustments: Adjust exposure, white balance, and other settings in Camera Raw.
- Open in Photoshop: Click “Open Image” to open the adjusted image in Photoshop.
- Save as JPEG: Go to “File” > “Save As” and choose “JPEG” as the format.
- Adjust Quality: In the JPEG Options dialog box, set the Quality slider to your desired level.
- Click OK: Click “OK” to save the converted JPEG file.
 Converting RAW to JPEG in Photoshop: Save As Dialog
Photoshop’s Save for Web (Legacy) option offers further optimization for web use, reducing file size without significant loss of quality.
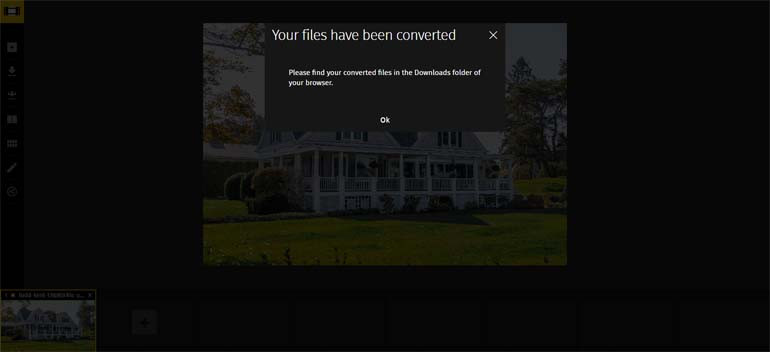
6. Converting RAW Images to JPEG Online for Free: Quick and Easy Solutions
Is there a way to convert RAW images to JPEG online for free? Several online tools offer quick and easy conversions without requiring any software installation. These tools are ideal for occasional use or when you’re on the go.
- raw.pics.io: A popular online converter that supports various RAW formats.
- Zamzar: A versatile file converter that can handle RAW to JPEG conversions.
- CloudConvert: Another reliable online tool with a user-friendly interface.
These online converters typically involve uploading your RAW file, selecting JPEG as the output format, and downloading the converted file. While convenient, be mindful of potential privacy concerns and file size limitations.
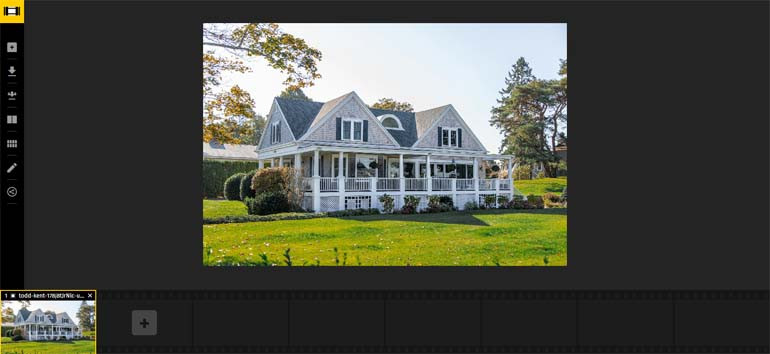 Online RAW to JPEG Conversion: Raw.pics.io Interface
7. Understanding Compression and Quality Settings: Balancing Act
How do compression and quality settings impact your converted JPEGs? Compression reduces file size, but it can also degrade image quality. Finding the right balance is crucial.
- Quality Slider: Most conversion tools offer a quality slider, typically ranging from 0 to 100. Higher values result in larger file sizes and better quality.
- Compression Artifacts: Excessive compression can lead to visible artifacts, such as blockiness and loss of detail.
- Intended Use: Consider the intended use of the JPEG when choosing quality settings. High-quality JPEGs are best for printing, while lower-quality JPEGs are suitable for web use.
Experiment with different quality settings to find the optimal balance between file size and image quality for your specific needs.
8. Choosing the Right JPEG Quality for Different Purposes: A Practical Guide
What JPEG quality setting should you use for different purposes? The ideal setting depends on how you plan to use the image.
| Purpose | Recommended Quality | Notes |
|---|---|---|
| Web Use | 60-80 | Balances file size and visual quality for fast loading times. |
| Printing | 80-100 | Preserves maximum detail for high-quality prints. |
| Emailing | 50-70 | Reduces file size for easy sending without significant loss of quality. |
| Social Media | 70-90 | Optimizes for platform requirements while maintaining acceptable visual quality. |
| Archiving (Preview) | 70-80 | Creates reasonably sized preview files for quick viewing without sacrificing too much detail. |
Remember to consider the specific requirements of each platform or application when choosing JPEG quality settings.
9. Batch Conversion: Converting Multiple RAW Files to JPEG at Once
How can you convert multiple RAW files to JPEG at once? Batch conversion is a time-saving feature offered by software like Lightroom and Photoshop.
- Lightroom: Select multiple images in the Library or Develop module, then follow the export steps outlined earlier. Lightroom will convert all selected images using the same settings.
- Photoshop: Use Photoshop’s Image Processor script (File > Scripts > Image Processor) to batch convert RAW files to JPEG. This script allows you to specify settings like quality, size, and destination folder.
Batch conversion is essential for photographers who regularly work with large volumes of RAW images.
10. Color Space Considerations: sRGB vs. Adobe RGB for JPEG Conversion
What color space should you use when converting RAW files to JPEG? The choice between sRGB and Adobe RGB depends on your intended use.
- sRGB: The standard color space for the web and most consumer devices. It offers consistent color reproduction across different platforms.
- Adobe RGB: A wider color space that captures more colors than sRGB. It’s ideal for printing and professional workflows.
For web use, always convert to sRGB to ensure accurate color display. For printing, Adobe RGB may be preferable if your print lab supports it.
11. Resizing Images During Conversion: Getting the Right Dimensions
How do you resize images during RAW to JPEG conversion? Resizing is often necessary to optimize images for specific purposes.
- Lightroom: In the Export dialog box, you can specify dimensions for resizing images. You can choose to resize by width, height, or long edge.
- Photoshop: Use the Image Size dialog box (Image > Image Size) to resize images. You can specify dimensions in pixels, inches, or centimeters.
Resizing images during conversion can help reduce file size and ensure that your images fit properly on websites or in print layouts.
12. Sharpening for JPEG Conversion: Enhancing Detail
Should you sharpen images before converting them to JPEG? Sharpening can enhance detail and improve the overall appearance of your images, but it should be done carefully.
- Lightroom: Lightroom offers several sharpening controls in the Develop module, including Amount, Radius, Detail, and Masking.
- Photoshop: Use the Unsharp Mask filter (Filter > Sharpen > Unsharp Mask) to sharpen images in Photoshop.
Apply sharpening subtly to avoid creating unwanted artifacts or halos.
13. Metadata and Copyright Information: Protecting Your Work
How do you preserve metadata and copyright information during RAW to JPEG conversion? Metadata includes information about your camera settings, location, and copyright details.
- Lightroom: In the Export dialog box, you can choose to include or exclude metadata. You can also add or edit copyright information.
- Photoshop: Photoshop preserves metadata by default when saving as JPEG. You can view and edit metadata using the File Info dialog box (File > File Info).
Protecting your work with metadata is essential for maintaining copyright and attribution.
14. Troubleshooting Common Conversion Issues: Solutions and Tips
What are some common issues encountered during RAW to JPEG conversion, and how can you fix them?
- Color Shifts: Ensure that your color management settings are consistent across your workflow.
- Loss of Detail: Avoid excessive compression and use appropriate sharpening techniques.
- File Size Too Large: Reduce image dimensions or increase compression to reduce file size.
- Compatibility Issues: Use widely supported JPEG settings and color spaces.
Consult online forums and tutorials for specific troubleshooting advice related to your software and hardware.
15. The Future of Image Formats: What’s Beyond JPEG?
What does the future hold for image formats beyond JPEG? New formats like WebP and AVIF offer improved compression and image quality.
- WebP: Developed by Google, WebP provides superior compression compared to JPEG, resulting in smaller file sizes and faster loading times.
- AVIF: Based on the AV1 video codec, AVIF offers even better compression than WebP, along with support for HDR and wide color gamut.
While JPEG remains the dominant format, these newer formats are gaining traction and may eventually replace JPEG as the standard for web use.
16. RAW vs. JPEG: Which Is Best for Specific Photography Genres?
Is RAW or JPEG better for different photography genres? The ideal choice depends on the demands of each genre.
| Genre | Recommended Format | Rationale |
|---|---|---|
| Landscape | RAW | Maximizes dynamic range and detail for capturing stunning landscapes. |
| Portrait | RAW | Allows for precise skin tone adjustments and non-destructive retouching. |
| Real Estate | RAW | Enables corrections of lighting and perspectives, crucial for showcasing properties effectively. |
| Sports/Action | JPEG | Faster write speeds and smaller file sizes are essential for capturing fast-paced action. |
| Wildlife | RAW | Provides flexibility for correcting exposure and color in challenging lighting conditions. |
| Street Photography | JPEG | Allows for quick shooting and sharing without the need for extensive post-processing. |
Consider the specific requirements of each genre when choosing between RAW and JPEG.
17. RAW Workflow for Professional Photographers: Best Practices
What are some best practices for a RAW workflow for professional photographers?
- Calibrate Your Monitor: Ensure accurate color reproduction by calibrating your monitor regularly.
- Use a Color Checker: Use a color checker to create custom color profiles for your camera and lighting conditions.
- Develop a Consistent Editing Style: Establish a consistent editing style to maintain a cohesive look across your portfolio.
- Back Up Your Files: Regularly back up your RAW files to multiple locations to prevent data loss.
A well-defined RAW workflow is essential for achieving professional-quality results and protecting your valuable assets.
18. Editing RAW Photos for Maximum Impact: Tips and Techniques
How can you edit RAW photos for maximum impact?
- Adjust Exposure and Contrast: Start by adjusting the overall exposure and contrast of your image.
- Correct White Balance: Ensure accurate colors by correcting the white balance.
- Recover Highlights and Shadows: Use highlight and shadow sliders to recover detail in overexposed and underexposed areas.
- Adjust Clarity and Vibrance: Enhance detail and color saturation with clarity and vibrance sliders.
- Apply Local Adjustments: Use local adjustment tools to fine-tune specific areas of your image.
Experiment with different editing techniques to find your own unique style and vision.
19. Maintaining Image Quality During Conversion: Avoiding Common Mistakes
How can you maintain image quality during RAW to JPEG conversion?
- Avoid Excessive Compression: Use appropriate quality settings to minimize compression artifacts.
- Sharpen Carefully: Apply sharpening subtly to avoid creating unwanted halos or artifacts.
- Convert to sRGB for Web Use: Ensure accurate color reproduction by converting to sRGB for web use.
- Resize Appropriately: Resize images to the appropriate dimensions for their intended use.
By avoiding these common mistakes, you can ensure that your converted JPEGs retain the highest possible image quality.
20. Optimizing JPEGs for Web Use: Speed and Performance
How can you optimize JPEGs for web use to improve speed and performance?
- Resize Images: Reduce image dimensions to the minimum required for display.
- Compress Images: Use appropriate quality settings to reduce file size.
- Use a Content Delivery Network (CDN): Host your images on a CDN to improve loading times for users around the world.
- Optimize Filenames: Use descriptive filenames that include relevant keywords.
- Use Alt Tags: Add descriptive alt tags to your images for SEO purposes.
Optimizing your JPEGs for web use can significantly improve your website’s speed and performance, resulting in a better user experience.
21. Using Presets for Consistent JPEG Conversions: Streamlining Your Workflow
Can presets help with consistent JPEG conversions? Absolutely! Presets in Lightroom and Photoshop can streamline your workflow and ensure consistent results.
- Lightroom Presets: Save your favorite export settings as presets for quick and easy JPEG conversions.
- Photoshop Actions: Create actions to automate repetitive tasks, such as resizing, sharpening, and saving as JPEG.
Presets and actions can save you time and effort while maintaining a consistent look across your images.
22. RAW to JPEG Conversion for Mobile Photography: Tips and Tricks
How does RAW to JPEG conversion work for mobile photography? Many smartphones can now shoot in RAW format, offering greater flexibility for editing on the go.
- Mobile Editing Apps: Use mobile editing apps like Adobe Lightroom Mobile and Snapseed to edit and convert RAW files to JPEG.
- Cloud Storage: Store your RAW files in the cloud for easy access and backup.
- Wireless Transfer: Transfer your RAW files wirelessly to your computer for more advanced editing.
Mobile photography offers a convenient way to capture high-quality images, and RAW to JPEG conversion allows you to make the most of your mobile photos.
23. Integrating RAW to JPEG Conversion into Your Photography Business: Efficiency and Profitability
How can you integrate RAW to JPEG conversion into your photography business to improve efficiency and profitability?
- Automate Your Workflow: Use batch processing and presets to automate repetitive tasks.
- Outsource Photo Editing: Consider outsourcing photo editing to free up your time for shooting and marketing.
- Offer Value-Added Services: Offer services like retouching, color correction, and image optimization to increase your revenue.
- Invest in Training: Stay up-to-date on the latest software and techniques to improve your skills and efficiency.
By optimizing your RAW to JPEG conversion workflow, you can improve your efficiency, increase your profitability, and provide better service to your clients.
24. Legal Considerations for Image Conversion: Copyright and Usage Rights
What are some legal considerations for image conversion, particularly regarding copyright and usage rights?
- Copyright Ownership: Ensure that you have the legal right to convert and use the images you are working with.
- Model Releases: Obtain model releases for any images that feature recognizable individuals.
- Commercial Use: Be aware of any restrictions on commercial use of the images.
- Attribution: Provide proper attribution to the copyright holder when required.
Respecting copyright and usage rights is essential for protecting yourself and your business from legal liabilities.
25. Continuing Education for Photographers: Mastering Image Conversion Techniques
How can photographers continue their education and master image conversion techniques?
- Online Courses: Enroll in online courses on platforms like Skillshare and Udemy.
- Workshops and Seminars: Attend workshops and seminars led by experienced photographers and educators.
- Photography Communities: Join online and offline photography communities to learn from your peers.
- Photography Books and Magazines: Read photography books and magazines to stay up-to-date on the latest trends and techniques.
- Experimentation: Practice and experiment with different techniques to develop your own unique style and vision.
Continuous learning is essential for photographers who want to stay ahead of the curve and master the art of image conversion.
FAQ: Answering Your Questions About RAW to JPEG Conversion
1. What is the main difference between RAW and JPEG?
RAW files are unprocessed and contain all the data captured by your camera’s sensor, while JPEGs are compressed and processed, resulting in smaller file sizes but less flexibility in editing.
2. Why should I shoot in RAW format?
Shooting in RAW gives you more control over post-processing, allowing you to correct exposure, adjust white balance, and recover details without sacrificing image quality.
3. When is it appropriate to convert RAW to JPEG?
Convert RAW to JPEG when you need to share images online, print them, or email them, as JPEGs are smaller and more compatible.
4. How can I convert RAW images to JPEG in Lightroom?
In Lightroom, import your RAW files, edit them, and then export them as JPEGs by selecting JPEG as the format in the Export dialog box.
5. Can I convert RAW images to JPEG using Photoshop?
Yes, you can open RAW files in Photoshop (which will open in Adobe Camera Raw), make adjustments, and then save them as JPEGs.
6. Is it possible to convert RAW to JPEG online for free?
Yes, several online tools like raw.pics.io and Zamzar offer free RAW to JPEG conversion.
7. What is the best JPEG quality setting for web use?
A quality setting of 60-80 is generally recommended for web use, balancing file size and visual quality.
8. How can I convert multiple RAW files to JPEG at once?
Use batch processing in Lightroom or Photoshop to convert multiple RAW files to JPEG simultaneously.
9. What color space should I use when converting RAW to JPEG for the web?
Always convert to sRGB for web use to ensure accurate color display on different devices.
10. How can I optimize JPEGs for faster loading times on my website?
Resize your images, compress them, and use a content delivery network (CDN) to improve loading times.
Conclusion: Unlock Your Photography Potential with dfphoto.net
Changing RAW photos to JPEG is a fundamental skill that every photographer needs to master. By understanding the differences between these formats, choosing the right tools and settings, and following best practices, you can ensure that your converted JPEGs retain the highest possible image quality. Whether you’re a professional photographer or a hobbyist, mastering image conversion techniques is essential for unlocking your full creative potential. At dfphoto.net, we’re committed to providing you with the resources and support you need to succeed in the world of photography.
Ready to take your photography to the next level? Visit dfphoto.net today to explore our comprehensive tutorials, stunning photo galleries, and vibrant photography community.
- Explore detailed guides on various photography techniques.
- Discover inspiration from our curated collection of breathtaking images.
- Connect with fellow photographers in our active community forums.
Don’t miss out on the opportunity to enhance your skills, find new inspiration, and connect with a passionate community of photographers. Visit dfphoto.net now and start your journey toward photographic excellence.
Address: 1600 St Michael’s Dr, Santa Fe, NM 87505, United States
Phone: +1 (505) 471-6001
Website: dfphoto.net
 Landscape Photography