Changing the background of a photo to white can be incredibly useful for various purposes, from creating product photos for online stores to generating professional headshots. If you are a Mac user, you might be pleased to know that you can achieve this directly using built-in tools, without needing to purchase any third-party software. This guide will show you how to easily change your photo background to white using your Mac’s Photos app and Preview.
Step-by-Step Guide to Changing Photo Background to White on Mac
This method leverages the “Copy Subject” feature available on macOS 13 (Ventura) or later, combined with the Preview application to create a white background. Here’s how to do it:
1. Isolate the Subject Using ‘Copy Subject’ in Photos
The first step is to isolate the main subject of your photo. Apple’s Photos app has a handy feature that makes this process surprisingly simple.
- Open your image in the Photos app on your Mac.
- Control-click (or right-click) on the photo.
- From the context menu, select “Copy Subject”. This command intelligently detects the subject of your photo and copies its outline to the clipboard, effectively removing the background.
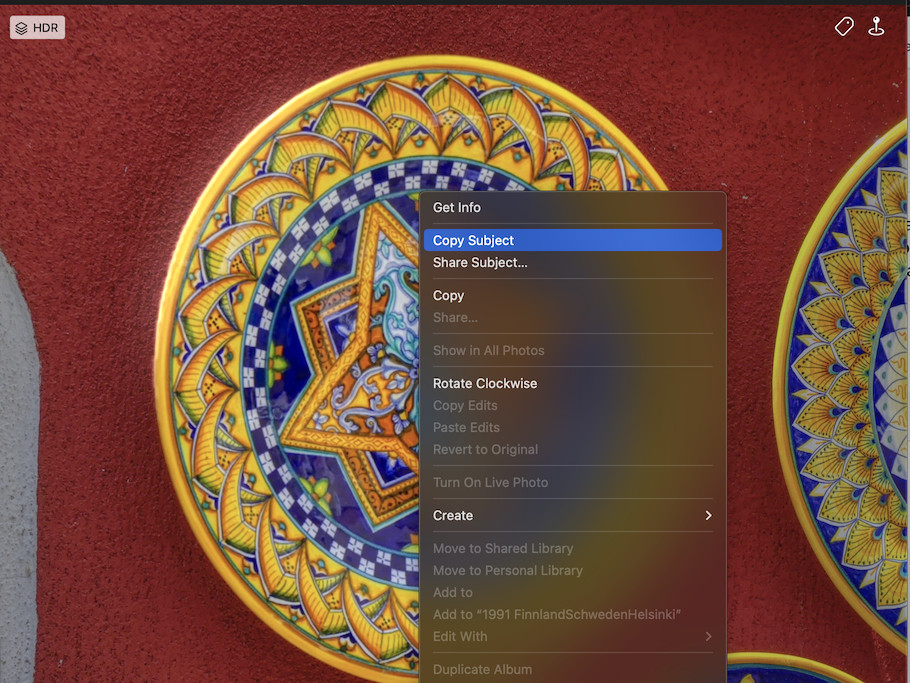 Control-click on the image and select Copy Subject
This image shows the step of control-clicking on a photo in the Photos app on Mac and selecting the “Copy Subject” option from the context menu.
2. Create a White Background using Preview
Once you have copied the subject, you can use Preview to place it on a white background.
- Launch the Preview application. If Preview prompts you to open a file, ignore it.
- Go to the “File” menu in the Preview menu bar.
- Select “New from Clipboard”. This action will create a new image in Preview using the subject you copied from Photos, but with a transparent background.
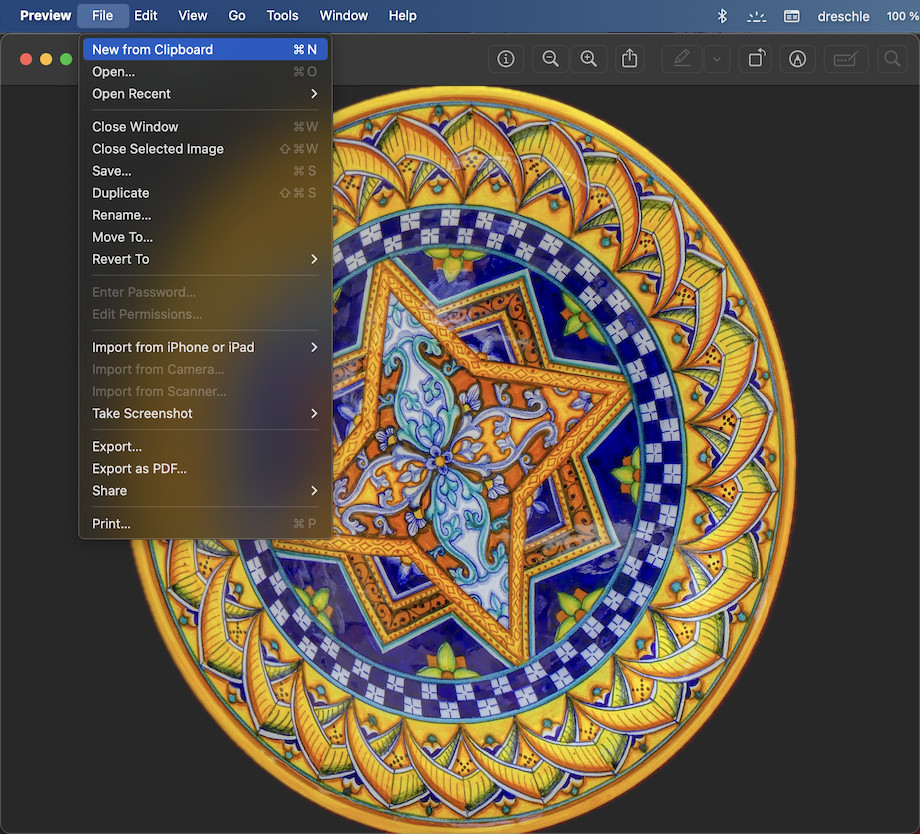 Preview application showing "New from Clipboard" option under the File menu
This image displays the Preview application interface with the File menu expanded, highlighting the “New from Clipboard” option.
3. Export with a White Background
To finalize the process and get your image with a white background, you need to export it correctly from Preview.
- Go to the “File” menu in Preview again.
- Select “Export…”.
- In the export dialog, ensure you are exporting in a format that supports background color, such as JPEG or PNG. If you choose JPEG, the transparent background will automatically be filled with white. For PNG, to ensure a white background, you may need to flatten the image or ensure no alpha channel transparency is enabled during export, depending on the specific export settings.
- Save your image.
When you re-import this exported image back into Photos or view it, you will see that the background has been changed to white.
 Exported image from Preview with a white background
This image showcases the final result: a photo with the subject isolated and placed against a solid white background after exporting from Preview.
Why Choose This Method?
This method is particularly appealing because:
- It’s Free: You don’t need to pay for any additional software. You are using the built-in applications that come with your Mac.
- It’s Convenient: The “Copy Subject” feature is incredibly quick and easy to use.
- No Third-Party Software Required: You avoid the need to download, install, and learn new software.
- Relatively Quick: For images with clear subjects, the process is very fast.
Tips for Best Results
- Image Clarity: This method works best when the subject of your photo has clear and defined edges.
- macOS Version: Ensure your Mac is running macOS 13 Ventura or later to have the “Copy Subject” feature available in the Photos app. For older macOS versions, you might need to explore other methods or third-party tools.
- Experiment with Export Settings: Depending on your needs and the export format, experiment with Preview’s export settings to achieve the desired white background and image quality.
By following these simple steps, you can efficiently change your photo background to white on a Mac using just the Photos app and Preview. This is a great way to quickly prepare images for various uses without the complexity of professional photo editing software.
