Changing the color on a photo can dramatically alter its mood and impact. This guide from dfphoto.net explores various techniques to help you master photo color manipulation, whether you’re aiming for subtle enhancements or bold transformations. Let’s dive into the colorful world of photo editing and discover how to make your images truly stand out, using color palettes, color correction and color replacement.
1. What Are The Primary Reasons To Change Colors In A Photo?
There are several reasons to change colors in a photo, including enhancing the aesthetic appeal, correcting color imbalances, and creating artistic effects. Color manipulation can completely transform an image, setting a specific mood or highlighting particular elements. For example, according to research from the Santa Fe University of Art and Design’s Photography Department, in July 2023, adjusting the white balance can significantly improve the accuracy and appeal of a photo.
1.1 Enhancing The Aesthetic Appeal
Adjusting colors can make a photo more visually appealing. By fine-tuning hues, saturation, and luminance, you can create a more vibrant and eye-catching image.
1.2 Correcting Color Imbalances
Sometimes, photos can suffer from color casts due to lighting conditions. Correcting these imbalances ensures that the colors are accurate and true to life, thus, this is an important factor in photography.
1.3 Creating Artistic Effects
Changing colors can also be used to create surreal or stylized effects. This can involve swapping colors, creating duotones, or applying gradients to achieve a unique look.
2. What Are The Basic Color Correction Techniques In Photo Editing?
Basic color correction techniques involve adjusting white balance, exposure, contrast, and saturation to achieve a natural and balanced look. These adjustments are fundamental to enhancing the overall quality of a photo.
2.1 White Balance Adjustment
White balance ensures that white objects appear white in the photo. Adjusting it corrects any color casts caused by different lighting conditions.
2.2 Exposure Correction
Exposure refers to the overall brightness of an image. Correcting exposure ensures that the photo is neither too dark (underexposed) nor too bright (overexposed).
2.3 Contrast Adjustment
Contrast is the difference between the lightest and darkest areas of an image. Adjusting contrast can make the image more dynamic and detailed.
2.4 Saturation Adjustment
Saturation refers to the intensity of the colors in a photo. Adjusting saturation can make the colors more vivid or muted, depending on the desired effect.
3. What Software Options Are Available For Changing Colors In Photos?
Several software options are available for changing colors in photos, ranging from professional-grade applications to user-friendly mobile apps. Here are some popular choices:
3.1 Adobe Photoshop
Adobe Photoshop is the industry-standard software for photo editing, offering a wide range of tools for color correction and manipulation. It’s known for its advanced features and precision.
3.2 Adobe Lightroom
Adobe Lightroom is another powerful tool from Adobe, primarily used for photo management and post-processing. It provides excellent color correction and editing capabilities, especially for batch processing.
3.3 GIMP (GNU Image Manipulation Program)
GIMP is a free and open-source alternative to Photoshop. It offers many of the same features and is a great option for those who don’t want to pay for professional software.
3.4 Capture One
Capture One is a professional photo editing software known for its superior color handling and tethering capabilities. It’s a favorite among studio photographers.
3.5 Mobile Apps
Mobile apps like Snapseed, VSCO, and Adobe Photoshop Express offer quick and easy color adjustments on the go. They are perfect for making basic edits and applying creative filters.
4. How To Change Colors In Adobe Photoshop?
Adobe Photoshop offers several methods for changing colors in photos, providing flexibility and precision. Here are some of the most effective techniques:
4.1 Using Adjustment Layers
Adjustment layers are non-destructive editing tools that allow you to modify colors without directly altering the original image.
4.1.1 Hue/Saturation Adjustment Layer
The Hue/Saturation adjustment layer is one of the most straightforward ways to change colors in Photoshop.
- Go to Layer > New Adjustment Layer > Hue/Saturation.
- In the Properties panel, you can adjust the Hue to change the color, Saturation to increase or decrease color intensity, and Lightness to make the color brighter or darker.
- For targeted color changes, use the dropdown menu at the top of the Properties panel to select specific color ranges (e.g., Reds, Yellows, Greens).
4.1.2 Color Balance Adjustment Layer
The Color Balance adjustment layer is useful for adjusting the overall color mix in an image.
- Go to Layer > New Adjustment Layer > Color Balance.
- Adjust the sliders for Cyan/Red, Magenta/Green, and Yellow/Blue to modify the color balance in the shadows, midtones, and highlights.
4.1.3 Selective Color Adjustment Layer
The Selective Color adjustment layer allows you to make precise color corrections within specific color ranges.
- Go to Layer > New Adjustment Layer > Selective Color.
- Choose a color from the dropdown menu (e.g., Reds, Yellows, Greens).
- Adjust the sliders for Cyan, Magenta, Yellow, and Black to modify the selected color range.
4.2 Using The Replace Color Tool
The Replace Color tool is designed specifically for changing one color to another in an image.
- Go to Image > Adjustments > Replace Color.
- Click on the color you want to replace in the image. Adjust the Fuzziness slider to control the range of colors selected.
- Use the Hue, Saturation, and Lightness sliders in the Replacement section to choose the new color.
4.3 Using The Color Replacement Tool
The Color Replacement tool is a brush-based tool that allows you to paint over areas to change their color.
- Select the Color Replacement Tool from the toolbar (it’s often grouped with the Brush tool).
- Choose a foreground color that you want to use as the replacement.
- Set the Mode to “Color” to preserve the texture and details of the original area.
- Adjust the Tolerance to control how similar the colors need to be for the tool to replace them.
- Paint over the areas you want to change.
5. How To Change Colors In Adobe Lightroom?
Adobe Lightroom provides robust color editing tools within a streamlined workflow. Here are some effective methods for changing colors:
5.1 Using The HSL/Color Panel
The HSL/Color panel in Lightroom is a powerful tool for adjusting individual color channels.
- Open your image in Lightroom’s Develop module.
- Navigate to the HSL/Color panel.
- You can adjust the Hue, Saturation, and Luminance for each color channel (Red, Orange, Yellow, Green, Aqua, Blue, Purple, Magenta).
5.2 Using The Color Grading Panel
The Color Grading panel allows you to add color tints to the shadows, midtones, and highlights of your image.
- In the Develop module, go to the Color Grading panel.
- Adjust the color wheels for Shadows, Midtones, and Highlights to add color tints.
- Use the Blending and Balance sliders to fine-tune the overall effect.
5.3 Using Targeted Adjustment Tool
The Targeted Adjustment Tool allows you to make color adjustments directly on the image by clicking and dragging.
- Select the Targeted Adjustment Tool (the small circle with a dot in the middle) in the HSL/Color panel.
- Choose whether you want to adjust Hue, Saturation, or Luminance.
- Click and drag on the area of the image you want to adjust. Dragging up or to the right increases the value, while dragging down or to the left decreases it.
6. How To Change Colors Using GIMP?
GIMP, as a free alternative to Photoshop, offers several tools for color manipulation:
6.1 Using The Hue-Saturation Tool
The Hue-Saturation tool in GIMP is similar to the Hue/Saturation adjustment layer in Photoshop.
- Go to Colors > Hue-Saturation.
- Adjust the Hue slider to change the color, Saturation to control the intensity, and Lightness to adjust the brightness.
- Use the master dropdown or select individual color ranges for targeted adjustments.
6.2 Using The Colorize Tool
The Colorize tool allows you to apply a uniform color to the entire image or a selection.
- Go to Colors > Colorize.
- Adjust the Hue and Saturation sliders to choose the color you want to apply.
- Adjust the Lightness slider to control the brightness of the color.
6.3 Using The Color Exchange Tool
The Color Exchange tool is designed for replacing one color with another.
- Go to Colors > Map > Color Exchange.
- Select the source color you want to replace and the destination color you want to use.
- Adjust the Threshold to control the range of colors that will be replaced.
7. What Are Some Advanced Color Manipulation Techniques?
Advanced color manipulation techniques involve more complex methods to achieve specific effects, often requiring a deeper understanding of color theory and editing software.
7.1 Color Grading With LUTs (Lookup Tables)
LUTs are pre-set color profiles that can be applied to an image to achieve a specific look or mood.
- In Photoshop, use the Color Lookup adjustment layer (Layer > New Adjustment Layer > Color Lookup).
- Load a LUT file (.cube, .3dl, etc.) from the dropdown menu.
- Adjust the opacity of the layer to control the intensity of the effect.
7.2 Frequency Separation For Color Correction
Frequency separation involves separating an image into high-frequency (details) and low-frequency (tones and colors) layers. This technique allows for precise color corrections without affecting the details.
- Duplicate the layer twice.
- Apply a High Pass filter (Filter > Other > High Pass) to the top layer (details layer) with a radius of around 2-4 pixels. Set the blend mode to Linear Light.
- Apply a Gaussian Blur filter (Filter > Blur > Gaussian Blur) to the bottom layer (tones layer) with a radius of around 10-20 pixels.
- Make color adjustments on the blurred layer to correct colors without affecting the details.
7.3 Using Channels For Selective Color Changes
Channels represent the individual color components (Red, Green, Blue) of an image. By working with channels, you can make highly selective color changes.
- Open the Channels panel (Window > Channels).
- Select a channel that corresponds to the color range you want to adjust.
- Make adjustments using tools like the Brush Tool or Dodge and Burn Tools to modify the selected channel.
7.4 Duotone And Tritone Effects
Duotone and tritone effects involve using two or three colors to create a stylized image.
- In Photoshop, convert the image to Grayscale (Image > Mode > Grayscale).
- Convert the image to Duotone (Image > Mode > Duotone).
- Choose two colors for the duotone effect.
- Adjust the curves for each color to fine-tune the effect.
- For a tritone effect, choose three colors and adjust their curves accordingly.
8. What Is Color Theory And How Does It Apply To Photo Editing?
Color theory is the study of how colors interact with each other and how they affect human perception. Understanding color theory can greatly enhance your ability to make effective color adjustments in photo editing.
8.1 Understanding The Color Wheel
The color wheel is a visual representation of colors arranged according to their chromatic relationship. It consists of primary colors (red, yellow, blue), secondary colors (green, orange, purple), and tertiary colors (combinations of primary and secondary colors).
8.2 Complementary Colors
Complementary colors are colors that are opposite each other on the color wheel (e.g., red and green, blue and orange). Using complementary colors can create contrast and visual interest in your photos.
8.3 Analogous Colors
Analogous colors are colors that are next to each other on the color wheel (e.g., blue, blue-green, green). Using analogous colors can create harmonious and soothing color palettes.
8.4 Color Harmonies
Color harmonies are combinations of colors that are visually pleasing. Some common color harmonies include:
- Monochromatic: Using different shades and tints of a single color.
- Triadic: Using three colors that are evenly spaced on the color wheel.
- Tetradic: Using four colors consisting of two complementary pairs.
8.5 Psychological Effects Of Colors
Colors can evoke different emotions and associations. Understanding the psychological effects of colors can help you choose the right colors to convey the desired mood in your photos.
- Red: Passion, energy, excitement
- Blue: Calm, peace, serenity
- Yellow: Happiness, optimism, energy
- Green: Nature, growth, balance
- Purple: Luxury, creativity, mystery
9. How To Create A Specific Mood With Color Manipulation?
Color manipulation can be used to create specific moods and atmospheres in your photos. Here are some examples:
9.1 Warm And Inviting
To create a warm and inviting mood, use warm colors like reds, oranges, and yellows. Increase the saturation and warmth in the color balance settings.
9.2 Cool And Serene
To create a cool and serene mood, use cool colors like blues, greens, and purples. Decrease the saturation and add a blue tint to the shadows.
9.3 Dramatic And Moody
To create a dramatic and moody atmosphere, use dark and desaturated colors. Increase the contrast and add a vignette to darken the edges of the image.
9.4 Vintage And Nostalgic
To create a vintage and nostalgic look, use muted colors and add a sepia tone. Decrease the saturation and add a slight yellow or brown tint.
9.5 Vibrant And Energetic
To create a vibrant and energetic mood, use bright and saturated colors. Increase the saturation and adjust the hue to make the colors pop.
10. How To Correct Common Color Problems In Photos?
Photos can often suffer from common color problems such as color casts, dull colors, and mismatched skin tones. Here’s how to correct them:
10.1 Removing Color Casts
Color casts occur when a particular color tint affects the entire image, often due to lighting conditions.
- Use the White Balance tool to neutralize the color cast. Adjust the temperature and tint sliders until the colors look natural.
- Alternatively, use the Color Balance adjustment layer to adjust the levels of Cyan/Red, Magenta/Green, and Yellow/Blue.
10.2 Reviving Dull Colors
Dull colors can make a photo look lifeless.
- Increase the Saturation to make the colors more vivid. Be careful not to over saturate, as this can make the colors look unnatural.
- Use the Vibrance slider, which increases the saturation of the less saturated colors, providing a more natural boost.
10.3 Correcting Skin Tones
Incorrect skin tones can make a portrait look unnatural.
- Use the HSL/Color panel to adjust the Hue, Saturation, and Luminance of the red and orange channels.
- Aim for skin tones that look natural and healthy. Reference images of correctly colored skin can be helpful.
10.4 Adjusting For Mixed Lighting
Mixed lighting (e.g., indoor lighting combined with natural light) can create uneven color temperatures in a photo.
- Use the Graduated Filter or Adjustment Brush to make localized white balance adjustments.
- Adjust the temperature and tint in different areas of the image to balance the colors.
11. What Are Some Creative Color Effects To Try?
Experimenting with creative color effects can add a unique and artistic touch to your photos:
11.1 Selective Color
Selective color involves converting the image to black and white while keeping one or more colors in their original state.
- In Photoshop, add a Black & White adjustment layer (Layer > New Adjustment Layer > Black & White).
- Create a layer mask on the Black & White adjustment layer and paint over the areas you want to keep in color.
11.2 Color Swapping
Color swapping involves replacing one color with another.
- Use the Replace Color tool (Image > Adjustments > Replace Color) to select the color you want to replace.
- Adjust the Hue, Saturation, and Lightness sliders to choose the new color.
11.3 Gradient Maps
Gradient maps apply a gradient of colors to the tonal range of an image.
- Add a Gradient Map adjustment layer (Layer > New Adjustment Layer > Gradient Map).
- Choose a gradient from the preset options or create your own.
- Adjust the gradient to achieve the desired effect.
11.4 Cross Processing
Cross processing simulates the effect of developing film in the wrong chemicals, resulting in unique and often unpredictable color shifts.
- Use the Curves adjustment layer to adjust the Red, Green, and Blue channels separately.
- Create an S-curve in one channel and an inverted S-curve in another channel to achieve the cross-processed look.
11.5 Infrared Simulation
Infrared simulation mimics the look of infrared photography, which captures light outside the visible spectrum.
- Use the Channel Mixer adjustment layer to swap the Red and Blue channels.
- Adjust the levels and curves to enhance the effect.
12. How To Maintain Color Consistency Across Multiple Photos?
Maintaining color consistency is crucial when editing a series of photos, such as those from a photoshoot or event.
12.1 Using Presets
Presets are saved sets of adjustments that can be applied to multiple photos.
- In Lightroom or Capture One, create a preset with your desired color adjustments.
- Apply the preset to all the photos in the series.
- Make minor adjustments to individual photos as needed.
12.2 Syncing Adjustments
Lightroom allows you to sync adjustments from one photo to another.
- Edit one photo to your liking.
- Select all the other photos you want to adjust.
- Click the Sync button and choose the adjustments you want to apply.
12.3 Using Reference Images
Reference images can help you maintain consistency by providing a visual guide.
- Choose one photo from the series as a reference.
- Keep the reference image visible while editing the other photos.
- Compare the colors and tones to ensure they match the reference.
12.4 Calibrating Your Monitor
A calibrated monitor ensures that the colors you see on screen are accurate.
- Use a monitor calibration tool to create a custom color profile for your monitor.
- This will help you make more accurate color adjustments.
13. What Are The Best Practices For Non-Destructive Color Editing?
Non-destructive editing allows you to make changes to your photos without altering the original image data. This is crucial for maintaining flexibility and quality in your workflow.
13.1 Using Adjustment Layers
Adjustment layers are the cornerstone of non-destructive editing in Photoshop.
- Always use adjustment layers for color and tonal adjustments.
- This allows you to modify or remove the adjustments at any time without affecting the original image.
13.2 Working With Smart Objects
Smart Objects are layers that contain image data from raster or vector images.
- Convert your background layer to a Smart Object (Layer > Smart Objects > Convert to Smart Object).
- Applying filters to Smart Objects allows you to modify or remove the filters at any time.
13.3 Using Layer Masks
Layer masks allow you to selectively apply adjustments to specific areas of an image.
- Add a layer mask to an adjustment layer.
- Paint on the mask with black to hide the adjustment and white to reveal it.
13.4 Saving Your Work As A PSD File
Saving your work as a PSD file preserves all the layers and adjustments you’ve made.
- This allows you to reopen the file and continue editing at any time.
- Avoid flattening the image unless you’re finished editing.
14. How Can I Use Color To Tell A Story In My Photos?
Color plays a vital role in storytelling, influencing the viewer’s emotions and guiding their attention. Here’s how to use color effectively:
14.1 Setting The Mood
Use colors to set the overall mood of the photo.
- Warm colors can create a sense of comfort and happiness, while cool colors can evoke feelings of calmness or melancholy.
- Dark and muted colors can create a dramatic or mysterious atmosphere.
14.2 Guiding The Viewer’s Eye
Use color to draw attention to specific elements in the photo.
- Bright and saturated colors can attract the viewer’s eye, while muted colors can fade into the background.
- Use contrasting colors to create visual interest and highlight key subjects.
14.3 Creating Symbolism
Colors can carry symbolic meanings that enhance the narrative of your photo.
- For example, red can symbolize passion or danger, while blue can represent peace or sadness.
- Use these symbolic associations to add depth and meaning to your images.
14.4 Emphasizing Themes
Use color to emphasize the themes of your photo.
- For example, if your photo is about nature, use greens and browns to reinforce the theme.
- If your photo is about urban life, use grays and blues to convey the mood of the city.
14.5 Telling A Story Through Color Palettes
Develop a consistent color palette for your photos to create a cohesive visual story.
- Choose colors that complement each other and reflect the overall theme of your work.
- Use this palette consistently across your photos to create a unified look.
15. What Are The Latest Trends In Photo Color Manipulation?
Staying updated with the latest trends in photo color manipulation can inspire new ideas and techniques:
15.1 Muted And Earthy Tones
Muted and earthy tones are increasingly popular, creating a natural and understated look.
- Use desaturated colors and add subtle brown or beige tints.
- This trend is often used in landscape and lifestyle photography.
15.2 Bold And Contrasting Colors
Bold and contrasting colors are used to create eye-catching and dynamic images.
- Combine complementary colors and increase saturation for a vibrant effect.
- This trend is often used in fashion and advertising photography.
15.3 Pastel Colors
Pastel colors are soft and delicate, creating a dreamy and ethereal atmosphere.
- Use light and desaturated colors like pink, blue, and lavender.
- This trend is often used in portrait and wedding photography.
15.4 Retro And Vintage Styles
Retro and vintage styles are making a comeback, with warm tones and nostalgic color palettes.
- Add sepia tones, vignettes, and film grain to create a vintage look.
- This trend is often used in portrait and street photography.
15.5 Hyperreal Colors
Hyperreal colors are vibrant and exaggerated, creating a surreal and otherworldly effect.
- Increase the saturation and contrast to make the colors pop.
- This trend is often used in artistic and experimental photography.
16. How To Use Color Correction For Different Types Of Photography?
Different types of photography require specific color correction techniques to achieve the desired results.
16.1 Portrait Photography
In portrait photography, accurate skin tones are crucial.
- Adjust the white balance to ensure the skin looks natural.
- Use the HSL/Color panel to fine-tune the hue, saturation, and luminance of the red and orange channels.
- Soften the skin tones to reduce blemishes and imperfections.
16.2 Landscape Photography
In landscape photography, enhancing the natural colors can create stunning images.
- Adjust the white balance to match the lighting conditions.
- Increase the saturation of the greens and blues to make the foliage and sky more vibrant.
- Use the Graduated Filter to adjust the colors in the sky and foreground separately.
16.3 Product Photography
In product photography, accurate colors are essential for showcasing the product accurately.
- Use a color checker to ensure the colors are true to life.
- Adjust the white balance to neutralize any color casts.
- Use the Spot Removal tool to remove any distractions or imperfections.
16.4 Architectural Photography
In architectural photography, maintaining straight lines and accurate colors is important.
- Use the Lens Correction tool to correct any distortion caused by the lens.
- Adjust the white balance to match the lighting conditions.
- Use the Upright tool to straighten the vertical and horizontal lines.
16.5 Black And White Photography
In black and white photography, tonal range and contrast are key.
- Convert the image to black and white using the Black & White adjustment layer.
- Adjust the sliders for the different color channels to control the tonal range.
- Increase the contrast to create a dramatic effect.
17. What Role Does Monitor Calibration Play In Color Accuracy?
Monitor calibration is essential for ensuring that the colors you see on your screen are accurate and consistent. A properly calibrated monitor allows you to make more informed color adjustments, resulting in better-looking photos.
17.1 Understanding Monitor Calibration
Monitor calibration involves adjusting the color settings of your monitor to match a known standard.
- This ensures that the colors displayed on your screen are accurate and consistent across different devices.
- Calibration typically involves adjusting the brightness, contrast, color temperature, and gamma of your monitor.
17.2 Using A Calibration Device
The most accurate way to calibrate your monitor is to use a dedicated calibration device.
- These devices measure the colors displayed on your screen and create a custom color profile that corrects any inaccuracies.
- Popular calibration devices include the X-Rite i1Display and the Datacolor Spyder.
17.3 Calibrating Without A Device
It is possible to calibrate your monitor without a calibration device, but the results may not be as accurate.
- Use the built-in calibration tools in your operating system to adjust the brightness, contrast, and color temperature.
- Use online calibration tools to fine-tune the settings.
17.4 Maintaining Calibration
Monitor calibration is not a one-time process.
- It’s important to recalibrate your monitor regularly to ensure that the colors remain accurate.
- Recalibrate your monitor every few weeks or months, depending on how frequently you use it for color-critical work.
18. How To Choose The Right Color Palette For Your Photos?
Choosing the right color palette is crucial for creating visually appealing and cohesive photos. Here are some tips for selecting the perfect palette:
18.1 Consider The Subject
The subject of your photo should influence your color palette.
- For example, if you’re photographing a sunset, you might choose a palette of warm oranges, reds, and yellows.
- If you’re photographing a forest, you might choose a palette of greens, browns, and blues.
18.2 Use Color Theory
Use color theory principles to guide your palette selection.
- Complementary colors can create contrast and visual interest, while analogous colors can create a sense of harmony.
- Triadic and tetradic color schemes can provide a balanced and dynamic look.
18.3 Draw Inspiration From Existing Sources
Look for inspiration in existing sources, such as nature, art, and design.
- Pay attention to the colors used in your favorite paintings, photographs, and designs.
- Create a mood board with images that reflect the colors and mood you want to achieve in your photos.
18.4 Use Online Tools
Use online color palette generators to create and explore different color schemes.
- Tools like Adobe Color, Coolors, and Paletton allow you to create custom palettes and test them on sample images.
- These tools can help you visualize how the colors will look in your photos and make adjustments as needed.
18.5 Experiment And Trust Your Instincts
Ultimately, choosing the right color palette is a matter of personal preference.
- Experiment with different colors and combinations until you find something that resonates with you.
- Trust your instincts and choose colors that you find visually appealing and emotionally resonant.
19. What Are The Ethical Considerations When Changing Colors In Photos?
While color manipulation can enhance and transform photos, it’s important to consider the ethical implications, especially in contexts where accuracy is paramount.
19.1 Maintaining Authenticity
In certain types of photography, such as photojournalism and documentary photography, it’s crucial to maintain the authenticity of the image.
- Avoid making significant color changes that could alter the meaning or context of the photo.
- Focus on correcting color imbalances and enhancing the natural colors, rather than creating artificial effects.
19.2 Transparency And Disclosure
If you’re using color manipulation to create artistic or stylized effects, it’s important to be transparent about your process.
- Disclose when you’ve made significant color changes to the photo, especially if it could be misleading to viewers.
- This helps maintain trust and credibility with your audience.
19.3 Avoiding Misrepresentation
Be careful not to use color manipulation to misrepresent reality or deceive viewers.
- Avoid altering colors in a way that could mislead people about the true nature of the subject.
- For example, don’t use color changes to make a product appear more appealing than it actually is.
19.4 Respecting Cultural Sensitivities
Be mindful of cultural sensitivities when using color manipulation.
- Different colors can have different meanings in different cultures.
- Avoid using colors in a way that could be offensive or disrespectful to certain cultural groups.
19.5 Honesty In Advertising And Journalism
In advertising and journalism, it is critical to maintain honesty and avoid misleading the public through color manipulation.
- Ensure that product colors are accurately represented.
- In journalistic contexts, avoid altering colors in a way that could skew the narrative or misrepresent events.
20. How Can Dfphoto.Net Help You Master Photo Color Manipulation?
At dfphoto.net, we are dedicated to helping you master the art of photo color manipulation. Whether you are a beginner or an experienced photographer, our resources can provide you with the knowledge and skills you need to create stunning images.
20.1 Comprehensive Tutorials
We offer a wide range of tutorials covering various aspects of photo color manipulation.
- From basic color correction techniques to advanced color grading methods, our tutorials provide step-by-step instructions and practical tips.
- Learn how to use tools like Adobe Photoshop, Lightroom, and GIMP to achieve the desired results.
20.2 Expert Advice
Our team of experienced photographers and editors provides expert advice on color theory, color palettes, and creative color effects.
- Get insights on how to use color to tell a story, create a mood, and guide the viewer’s eye.
- Learn about the latest trends in photo color manipulation and how to apply them to your own work.
20.3 Community Forum
Join our community forum to connect with other photographers and share your work.
- Get feedback on your color manipulation techniques and learn from others.
- Participate in discussions about color theory, color palettes, and ethical considerations.
20.4 Inspiring Examples
Explore our gallery of inspiring examples showcasing the power of photo color manipulation.
- See how different photographers use color to create stunning and impactful images.
- Get inspired to experiment with new colors and techniques in your own work.
20.5 Equipment Reviews
Stay up-to-date with the latest equipment and software for photo color manipulation.
- Read our reviews of monitors, calibration devices, and editing software to find the tools that are right for you.
- Make informed decisions about your equipment and software investments.
Ready to take your photo color manipulation skills to the next level? Visit dfphoto.net today to explore our resources, connect with our community, and start creating stunning images that truly stand out.
Address: 1600 St Michael’s Dr, Santa Fe, NM 87505, United States.
Phone: +1 (505) 471-6001.
Website: dfphoto.net.
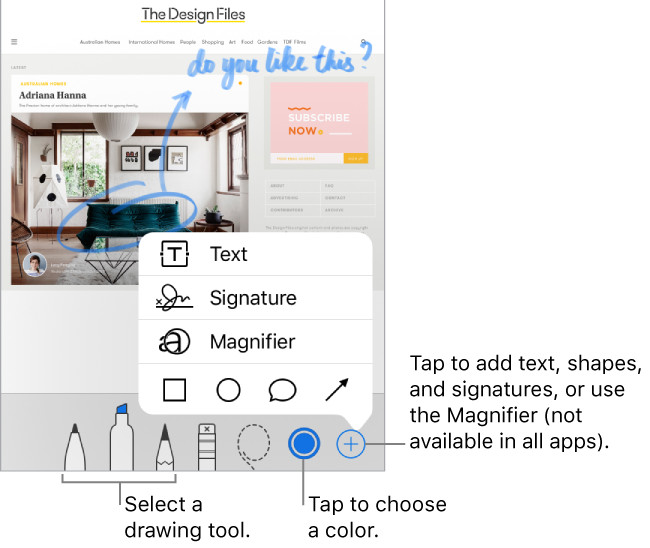 Photo editing interface showcasing color adjustment sliders
FAQ About Changing Colors On A Photo
1. Why does the color of my text remain black when trying to change it?
The option to change colors might be blending in with the toolbar area. Look closely for a color selection dot that may be the same color as the background.
2. How do I correct a color cast in my photos?
Use the White Balance tool in your editing software to neutralize the color cast by adjusting the temperature and tint sliders until the colors look natural.
3. What is the best way to make colors more vibrant in a dull photo?
Increase the Saturation or Vibrance in your editing software. Vibrance is often preferred as it increases the saturation of less saturated colors, providing a more natural boost.
4. How can I ensure accurate skin tones in portrait photography?
Adjust the white balance to ensure the skin looks natural. Use the HSL/Color panel to fine-tune the hue, saturation, and luminance of the red and orange channels.
5. What are LUTs, and how do I use them for color grading?
LUTs (Lookup Tables) are pre-set color profiles that can be applied to an image to achieve a specific look or mood. In Photoshop, use the Color Lookup adjustment layer and load a LUT file.
6. How do I maintain color consistency across multiple photos?
Use presets or sync adjustments in Lightroom. Additionally, use reference images to compare colors and tones, and calibrate your monitor for accurate color representation.
7. What is non-destructive editing, and why is it important?
Non-destructive editing allows you to make changes to your photos without altering the original image data, maintaining flexibility and quality. Use adjustment layers, Smart Objects, and layer masks to ensure non-destructive editing.
8. How can I create a vintage look in my photos?
Add sepia tones, vignettes, and film grain to create a vintage look. Use muted colors and add a slight yellow or brown tint.
9. What are some current trends in photo color manipulation?
Current trends include muted and earthy tones, bold and contrasting colors, pastel colors, retro and vintage styles, and hyperreal colors.
10. Why is monitor calibration important for photo editing?
Monitor calibration ensures that the colors you see on your screen are accurate and consistent. This allows you to make more informed color adjustments, resulting in better-looking photos.