Changing the background on your iPhone photos can dramatically enhance your images, whether for professional use or personal enjoyment. This guide, brought to you by dfphoto.net, will explore various methods to achieve stunning results, from using built-in features to leveraging powerful third-party apps. Learn how to isolate subjects, seamlessly blend backgrounds, and create visually appealing compositions, and unlock new creative possibilities with your iPhone photography, creating striking portraits and artistic photo manipulations. This guide covers tips, tools, and techniques to make background changes look natural and professional, including photo editing techniques, image manipulation, and creative photography tricks.
1. Why Change the Background on Photos iPhone?
There are several compelling reasons to change the background of photos on your iPhone:
- Improving Composition: A cluttered or unappealing background can distract from the main subject. Changing it allows you to create a cleaner, more focused image.
- Enhancing Aesthetics: Swapping a mundane background for something more visually interesting can elevate the overall aesthetic appeal of your photo.
- Creative Expression: Changing backgrounds opens up avenues for creative photo manipulation, enabling you to create surreal or fantastical images.
- Professional Use: For product photography or portraits, a clean or customized background can make your images look more professional and polished.
- Removing Distractions: Eliminate unwanted elements or people from your photos by replacing the background.
- Creating Consistent Branding: For businesses, using a consistent background across product photos can help establish a strong brand identity.
- Adding Visual Interest: A new background can inject life into an otherwise dull photo, making it more engaging.
- Storytelling: Altering the background can help tell a story or convey a specific mood or emotion.
2. Built-in iPhone Features for Basic Background Adjustments
While the iPhone doesn’t offer a one-click background removal tool, several built-in features can help make basic adjustments.
2.1. Portrait Mode
Portrait mode is excellent for blurring backgrounds, creating a shallow depth of field that emphasizes the subject.
How to use it:
- Open the Camera app.
- Select “Portrait” mode.
- Frame your subject and ensure adequate lighting.
- Tap the shutter button.
Benefits:
- Creates a professional-looking bokeh effect.
- Simple and quick to use.
- Ideal for portraits and close-up shots.
Limitations:
- Doesn’t completely remove the background, only blurs it.
- Works best with well-defined subjects.
2.2. Depth Control
After taking a Portrait mode photo, you can adjust the background blur intensity using the Depth Control feature.
How to use it:
- Open the Photos app and select the Portrait photo.
- Tap “Edit.”
- Adjust the Depth slider to increase or decrease the background blur.
- Tap “Done.”
Benefits:
- Fine-tunes the blur effect to your liking.
- Adds a more natural look to the background.
- Easy to adjust after the photo is taken.
Limitations:
- Still doesn’t remove the background entirely.
- The effect is limited to blurring.
2.3. Focus Adjustment
You can manually adjust the focus point to blur the background to some extent, even in regular photo mode.
How to use it:
- Open the Camera app.
- Tap on the subject you want to focus on.
- The background will naturally blur as the subject comes into focus.
Benefits:
- Simple to use in any photo mode.
- Helps draw attention to the main subject.
Limitations:
- The blur effect is subtle and depends on the distance between the subject and the background.
- Not as effective as Portrait mode.
3. Third-Party Apps for Changing Backgrounds on iPhone
For more advanced background removal and replacement, third-party apps offer powerful tools and features.
3.1. Phonto
Phonto is a versatile photo editing app that excels at background removal and replacement.
Key Features:
- Automatic background removal with AI.
- Manual refinement tools for precise editing.
- Extensive library of backgrounds and templates.
- Ability to add text, stickers, and other effects.
How to Use It:
- Download and open Phonto.
- Upload the photo you want to edit.
- Use the background removal tool to isolate the subject.
- Select a new background from the library or upload your own.
- Adjust the subject’s placement and size.
- Add any additional effects or text.
- Save the edited photo.
Pros:
- User-friendly interface.
- Accurate background removal.
- Wide range of editing options.
Cons:
- Some features may require a subscription.
- The quality of automatic removal can vary.
3.2. Adobe Photoshop Fix
Adobe Photoshop Fix is a mobile version of the industry-standard photo editing software, offering powerful background editing capabilities.
Key Features:
- Precise selection tools for isolating subjects.
- Healing and cloning tools for seamless background replacement.
- Advanced editing options like color correction and perspective adjustment.
- Integration with Adobe Creative Cloud.
How to Use It:
- Download and open Adobe Photoshop Fix.
- Import the photo you want to edit.
- Use the selection tools to isolate the subject.
- Replace the background with a solid color, another image, or a gradient.
- Use the healing and cloning tools to blend the subject into the new background.
- Adjust colors and lighting for a natural look.
- Save the edited photo.
Pros:
- Professional-grade editing tools.
- Seamless integration with other Adobe products.
- Precise control over background replacement.
Cons:
- Requires an Adobe Creative Cloud subscription for full access.
- Steeper learning curve compared to simpler apps.
3.3. PicsArt
PicsArt is a popular all-in-one photo and video editing app with robust background removal and editing features.
Key Features:
- AI-powered background removal.
- Extensive library of backgrounds, stickers, and effects.
- Collage maker and drawing tools.
- Social media integration.
How to Use It:
- Download and open PicsArt.
- Upload the photo you want to edit.
- Use the background removal tool to isolate the subject.
- Choose a new background from PicsArt’s library or upload your own.
- Adjust the subject’s position and size.
- Add stickers, text, or other effects.
- Save and share the edited photo.
Pros:
- Comprehensive editing features.
- Large community and social sharing options.
- Easy to use with a wide range of tools.
Cons:
- Contains ads and in-app purchases.
- The quality of automatic removal can vary.
3.4. Background Eraser
As the name suggests, Background Eraser is specifically designed for removing and changing photo backgrounds.
Key Features:
- Automatic and manual background removal tools.
- Magic Brush tool for precise selections.
- Ability to add new backgrounds or make the background transparent.
- Simple and intuitive interface.
How to Use It:
- Download and open Background Eraser.
- Upload the photo you want to edit.
- Use the automatic or manual tools to remove the background.
- Add a new background from your photo library or use a solid color.
- Adjust the subject’s placement and refine the edges.
- Save the edited photo.
Pros:
- Easy to use for quick background changes.
- Precise manual removal tools.
- Good for creating transparent backgrounds.
Cons:
- Limited editing features beyond background removal.
- Contains ads.
3.5. Superimpose X
Superimpose X is a powerful layering and masking app that allows for advanced background manipulation.
Key Features:
- Sophisticated masking tools for precise selections.
- Layering capabilities for complex compositions.
- Blend modes and adjustment tools for seamless integration.
- Non-destructive editing.
How to Use It:
- Download and open Superimpose X.
- Load the foreground and background images.
- Use the masking tools to isolate the subject in the foreground image.
- Superimpose the subject onto the background image.
- Adjust the position, size, and blend modes to create a natural look.
- Use adjustment tools to match the colors and lighting.
- Save the edited photo.
Pros:
- Advanced masking and layering capabilities.
- High-quality results with precise control.
- Suitable for complex photo manipulations.
Cons:
- Steeper learning curve.
- Requires practice to master the masking tools.
4. Step-by-Step Guide: Changing Backgrounds on iPhone Using Phonto
Here’s a detailed guide on how to change the background of your iPhone photos using Phonto.
4.1. Download and Install Phonto
- Open the App Store on your iPhone.
- Search for “Phonto.”
- Download and install the app.
4.2. Upload Your Photo
- Open Phonto.
- Tap the “+” button to upload a photo from your library.
- Select the photo you want to edit.
4.3. Remove the Original Background
- Tap on the photo.
- Select the “Cutout” option.
- Use the “Auto” tool for automatic background removal.
- Refine the selection with the “Manual” tool if needed.
- Tap the checkmark to confirm the removal.
4.4. Choose a New Background
- Tap the “Background” option.
- Select a background from Phonto’s library or upload your own.
4.5. Adjust the Subject
- Use your fingers to resize and reposition the subject on the new background.
- Adjust the brightness, contrast, and saturation to blend the subject with the background.
4.6. Add Additional Effects
- Explore Phonto’s other editing options, such as adding text, stickers, or filters.
- Customize the photo to your liking.
4.7. Save Your Edited Photo
- Tap the “Save” icon.
- Choose the desired resolution and format.
- Save the photo to your iPhone’s photo library.
5. Tips for Seamless Background Changes
To ensure your background changes look natural and professional, consider these tips:
- Use High-Resolution Images: Start with high-quality photos to avoid pixelation or blurriness after editing.
- Ensure Consistent Lighting: Match the lighting of the subject and the new background for a realistic look.
- Pay Attention to Shadows: Add or adjust shadows to ground the subject in the new environment.
- Refine Edges Carefully: Use precise selection tools to avoid jagged or uneven edges around the subject.
- Use Appropriate Blend Modes: Experiment with different blend modes to seamlessly integrate the subject and background.
- Adjust Colors and Tones: Match the color palettes of the subject and background for a cohesive look.
- Maintain Perspective: Ensure the perspective of the subject aligns with the background.
- Add Depth of Field: Use blur effects to create a sense of depth and realism.
- Avoid Over-Editing: Subtle changes often look more natural than drastic alterations.
- Practice Regularly: The more you practice, the better you’ll become at creating seamless background changes.
6. Common Mistakes to Avoid
Avoid these common mistakes to achieve professional-looking results:
- Poor Edge Refinement: Leaving jagged or uneven edges around the subject.
- Inconsistent Lighting: Mismatching the lighting between the subject and background.
- Incorrect Perspective: Failing to align the perspective of the subject and background.
- Overuse of Filters: Applying too many filters, resulting in an artificial look.
- Ignoring Shadows: Neglecting to add or adjust shadows to ground the subject.
- Low-Resolution Images: Using low-quality images that appear pixelated after editing.
- Rushing the Process: Trying to complete the edit too quickly, leading to sloppy results.
- Not Blending Colors: Failing to match the color palettes of the subject and background.
- Ignoring Depth of Field: Not using blur effects to create a sense of depth.
- Over-Editing: Making too many drastic changes that look unnatural.
7. The Impact of Backgrounds on Photo Composition
The background plays a crucial role in the overall composition of a photograph. It can either enhance or detract from the main subject, influencing the viewer’s perception and emotional response.
- Creating Focus: A clean, uncluttered background helps draw attention to the subject, making it the focal point of the image.
- Adding Context: The background can provide context and tell a story about the subject, adding depth and meaning to the photograph.
- Establishing Mood: The colors, textures, and elements in the background can evoke specific emotions and set the mood of the photo.
- Balancing Elements: A well-chosen background can balance the composition, creating a harmonious and visually pleasing image.
- Enhancing Aesthetics: A beautiful or interesting background can elevate the overall aesthetic appeal of the photo.
- Removing Distractions: An undesirable background can distract from the subject, making the photo less effective.
- Creating Depth: The background can create a sense of depth and dimension, making the image more immersive.
- Adding Visual Interest: A dynamic or textured background can add visual interest and prevent the photo from feeling flat.
- Supporting the Narrative: The background can support the narrative of the photo, reinforcing the story or message.
- Complementing the Subject: A complementary background can enhance the subject, creating a more visually appealing and impactful image.
8. Creative Ideas for Background Replacement
Here are some creative ideas to inspire your background replacement projects:
- Travel Adventures: Place yourself in exotic locations around the world without leaving your home.
- Fantasy Worlds: Create surreal or fantastical scenes with otherworldly backgrounds.
- Historical Settings: Transport yourself back in time with historical backgrounds.
- Artistic Effects: Use abstract backgrounds to create artistic and modern images.
- Seasonal Themes: Change backgrounds to reflect different seasons or holidays.
- Dreamscapes: Create dreamlike scenes with dreamy and ethereal backgrounds.
- Movie Scenes: Recreate iconic movie scenes by placing yourself in the background.
- Book Covers: Design custom book covers with unique and eye-catching backgrounds.
- Personalized Greetings: Create personalized greeting cards with customized backgrounds.
- Social Media Posts: Enhance your social media posts with creative and engaging backgrounds.
9. Ethical Considerations When Changing Backgrounds
While changing backgrounds can be fun and creative, it’s essential to consider the ethical implications, especially when using the images for commercial or journalistic purposes.
- Transparency: Be transparent about the fact that the background has been altered, especially if the image is used in a context where authenticity is important.
- Avoiding Misrepresentation: Do not use altered backgrounds to misrepresent facts or deceive viewers.
- Respecting Copyright: Ensure you have the right to use the background images you are incorporating into your photos.
- Avoiding Harmful Stereotypes: Be mindful of the cultural and social implications of the backgrounds you choose, and avoid perpetuating harmful stereotypes.
- Obtaining Consent: If the background includes recognizable people or private property, obtain consent before using the image.
- Maintaining Integrity: Uphold the integrity of your work by being honest about the changes you have made.
- Considering Context: Take into account the context in which the image will be used and ensure that the background is appropriate and does not mislead viewers.
- Being Accountable: Be prepared to answer questions about the changes you have made and take responsibility for the impact of your work.
- Following Guidelines: Adhere to the ethical guidelines and standards of your profession or industry.
- Using Responsibly: Use background changes responsibly and ethically, respecting the rights and perceptions of others.
10. Enhancing Your Photography Skills
Changing backgrounds is just one aspect of photography. To truly excel, focus on developing your overall photography skills.
- Mastering Composition: Learn the principles of composition, such as the rule of thirds, leading lines, and symmetry, to create visually appealing images.
- Understanding Lighting: Study different types of lighting and how they affect your photos.
- Experimenting with Angles: Try shooting from different angles to find unique perspectives.
- Learning Manual Mode: Take control of your camera settings by learning how to shoot in manual mode.
- Practicing Regularly: The more you practice, the better you’ll become at capturing great photos.
- Studying Other Photographers: Look at the work of other photographers for inspiration and ideas.
- Taking Workshops: Attend photography workshops to learn new skills and techniques.
- Reading Books and Articles: Educate yourself by reading books and articles about photography.
- Joining Photography Communities: Connect with other photographers to share knowledge and feedback.
- Being Patient: Photography takes time and patience, so don’t get discouraged if you don’t see results immediately.
11. The Future of Background Editing on iPhones
The future of background editing on iPhones looks promising, with advancements in AI and machine learning expected to bring even more sophisticated and user-friendly tools.
- AI-Powered Background Removal: Expect more accurate and seamless background removal with AI-powered tools.
- Real-Time Background Replacement: Imagine changing backgrounds in real-time while shooting photos or videos.
- 3D Backgrounds: Explore the possibility of adding 3D backgrounds that interact with the subject in a realistic way.
- Augmented Reality Integration: Integrate augmented reality elements into your backgrounds for immersive experiences.
- Cloud-Based Editing: Access powerful editing tools and resources through cloud-based platforms.
- Simplified Workflows: Enjoy more intuitive and streamlined editing workflows with user-friendly interfaces.
- Enhanced Collaboration: Collaborate with other editors and artists on background editing projects.
- Customizable AI: Train AI models to recognize specific subjects and backgrounds for personalized editing.
- Advanced Lighting and Color Matching: Achieve even more realistic results with advanced lighting and color matching algorithms.
- Professional-Grade Tools: Access professional-grade editing tools on your iPhone for high-quality background changes.
12. Case Studies: Successful Background Changes
Let’s look at some case studies where changing the background significantly improved the photo:
- Product Photography: A small business owner replaced a cluttered background with a clean white background, resulting in a more professional and appealing product image.
- Portrait Photography: A photographer enhanced a portrait by replacing a distracting background with a blurred, bokeh-filled scene, drawing more attention to the subject.
- Travel Photography: A traveler created a stunning travel photo by replacing a dull sky with a vibrant sunset, adding drama and visual interest to the image.
- Real Estate Photography: A real estate agent improved the appeal of a property photo by replacing an overgrown lawn with a lush, manicured lawn, making the property more attractive to potential buyers.
- Event Photography: An event planner removed unwanted elements from a photo by replacing the background with a clean, event-themed backdrop, creating a more polished and professional image.
13. Essential Equipment for iPhone Photography
While your iPhone is a capable camera, these accessories can enhance your photography:
- Tripod: Provides stability for sharp, blur-free images, especially in low light.
- Lens Kit: Offers a variety of lenses, such as wide-angle, telephoto, and macro, to expand your creative options.
- External Flash: Provides additional light for portraits and indoor photography.
- Portable Reflector: Bounces light onto your subject, reducing shadows and creating a more flattering look.
- Remote Shutter: Allows you to trigger the shutter without touching the phone, reducing camera shake.
- Gimbal Stabilizer: Provides smooth and stable video footage.
- Microphone: Improves audio quality for video recording.
- Phone Case with Lens Mount: Allows you to attach external lenses securely.
- Portable Power Bank: Ensures your phone stays charged during long photo shoots.
- Cleaning Kit: Keeps your lenses and screen clean for optimal image quality.
14. Maintaining Privacy While Using Photo Editing Apps
Protecting your privacy while using photo editing apps is crucial. Here’s how:
- Review App Permissions: Check which permissions the app requests and only grant access to necessary features.
- Read Privacy Policies: Understand how the app collects, uses, and shares your data.
- Use Secure Passwords: Protect your account with a strong, unique password.
- Enable Two-Factor Authentication: Add an extra layer of security to your account.
- Be Cautious with Cloud Storage: Understand how your photos are stored and secured in the cloud.
- Disable Location Services: Prevent the app from tracking your location.
- Limit Data Sharing: Opt out of sharing your data with third parties.
- Keep Apps Updated: Install the latest updates to patch security vulnerabilities.
- Be Aware of Phishing Scams: Watch out for suspicious emails or links that could compromise your account.
- Regularly Review and Adjust Settings: Periodically review your privacy settings and make adjustments as needed.
15. Overcoming Challenges in Background Editing
Background editing can be challenging. Here’s how to overcome common issues:
- Difficult Selections: Use precise selection tools and masking techniques to isolate the subject accurately.
- Inconsistent Lighting: Adjust the lighting and colors to match the subject and background.
- Perspective Issues: Correct the perspective to align the subject and background.
- Blurry Images: Use sharpening tools to enhance the details and reduce blur.
- Jagged Edges: Refine the edges with smoothing tools and feathering.
- Low Resolution: Start with high-resolution images to avoid pixelation.
- Complex Backgrounds: Simplify the background by using blur effects or replacing it with a solid color.
- Shadow Problems: Add or adjust shadows to ground the subject in the new environment.
- Color Mismatches: Adjust the color balance and saturation to match the subject and background.
- Lack of Realism: Pay attention to details and use realistic effects to create a natural look.
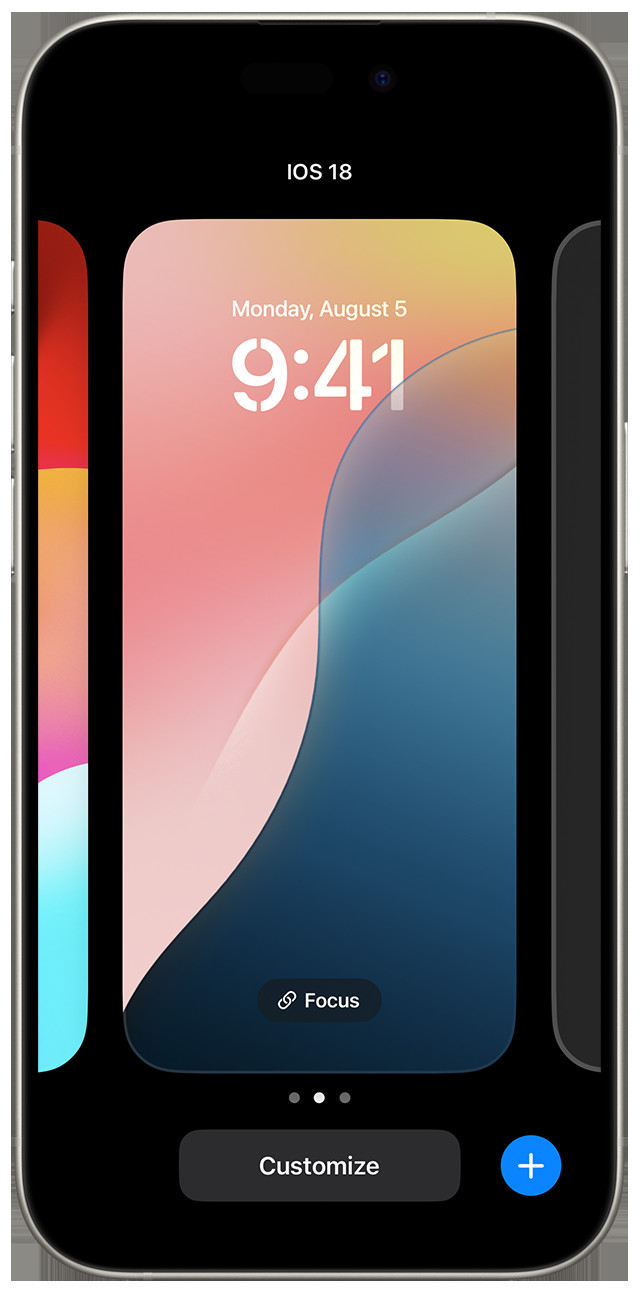 Lock Screen wallpaper options, you can link a wallpaper with a specific Focus setting using Focus button
16. Essential Vocabulary for Background Editing
- Masking: A technique for isolating specific areas of an image.
- Layering: Combining multiple images or elements on top of each other.
- Blend Modes: Options for blending layers together in different ways.
- Selection Tools: Tools for selecting specific areas of an image.
- Feathering: Softening the edges of a selection.
- Opacity: The degree to which a layer is transparent or opaque.
- Clipping Mask: Using one layer to define the visibility of another layer.
- Non-Destructive Editing: Making changes that don’t permanently alter the original image.
- Healing Tool: A tool for removing blemishes and imperfections.
- Cloning Tool: A tool for copying pixels from one area to another.
17. The Role of dfphoto.net in Photography Education
dfphoto.net is dedicated to providing comprehensive resources and education for photographers of all levels. From in-depth tutorials and gear reviews to inspiring showcases and community forums, dfphoto.net is your one-stop destination for all things photography.
- Extensive Tutorials: Access a wide range of tutorials covering various photography topics, from basic techniques to advanced editing skills.
- Gear Reviews: Stay up-to-date with the latest camera equipment and accessories through detailed reviews and comparisons.
- Inspirational Showcases: Discover stunning photography from talented artists around the world and find inspiration for your own work.
- Community Forums: Connect with fellow photographers, share your work, and get feedback in a supportive and engaging community.
- Expert Advice: Learn from experienced photographers and industry professionals through articles, interviews, and workshops.
- Skill Development: Enhance your photography skills with practical exercises, assignments, and challenges.
- Creative Inspiration: Find new ideas and inspiration for your photography projects through curated collections and themed galleries.
- Industry News: Stay informed about the latest trends, events, and developments in the photography industry.
- Career Resources: Explore career opportunities and resources for aspiring professional photographers.
- Continuous Learning: Expand your knowledge and skills through ongoing learning and development opportunities.
18. How to Stay Updated with the Latest Trends
- Follow Photography Blogs: Subscribe to popular photography blogs and websites to stay informed about the latest trends.
- Attend Industry Events: Attend photography conferences, workshops, and exhibitions to learn from experts and network with peers.
- Join Online Communities: Participate in online forums and social media groups to discuss trends and share ideas with other photographers.
- Follow Influencers: Follow influential photographers and industry professionals on social media to stay updated on their latest work and insights.
- Read Photography Magazines: Subscribe to photography magazines to discover new trends and techniques.
- Experiment with New Styles: Try out new photography styles and techniques to stay ahead of the curve.
- Analyze Popular Images: Study popular images on social media and photography platforms to identify emerging trends.
- Take Online Courses: Enroll in online photography courses to learn about new tools, techniques, and trends.
- Network with Other Photographers: Connect with other photographers to exchange ideas and insights about the latest trends.
- Stay Curious: Maintain a curious and open-minded approach to photography and be willing to experiment with new ideas.
19. Using iPhone Photos for Professional Purposes
Using iPhone photos for professional purposes requires attention to detail:
- High Resolution: Shoot in the highest resolution possible.
- Proper Lighting: Ensure adequate and flattering lighting.
- Stable Shooting: Use a tripod or stabilizer for sharp images.
- Careful Composition: Pay attention to composition and framing.
- Professional Editing: Use professional editing apps or software.
- Consistent Style: Maintain a consistent style and aesthetic.
- Branding Elements: Incorporate branding elements where appropriate.
- Legal Rights: Ensure you have the legal rights to use the images.
- Client Approval: Obtain client approval before using the images.
- Backup and Storage: Properly backup and store your images.
20. FAQ: Changing Backgrounds on iPhone
Q1: Can I change the background of a photo directly on my iPhone without using any apps?
No, the iPhone doesn’t have a built-in feature for directly removing and replacing backgrounds. You’ll need to use a third-party app for this purpose.
Q2: Which is the best app for changing backgrounds on iPhone?
Many great apps are available, including Phonto, Adobe Photoshop Fix, PicsArt, Background Eraser, and Superimpose X. The best choice depends on your specific needs and skill level.
Q3: Is it possible to make the background of a photo transparent on iPhone?
Yes, apps like Background Eraser allow you to remove the background and save the image with a transparent background.
Q4: How can I ensure that the background change looks natural?
Pay attention to lighting, shadows, perspective, and color matching. Refine the edges carefully and use appropriate blend modes.
Q5: Do I need to pay for an app to change backgrounds on iPhone?
Some apps are free with limited features, while others offer more advanced tools through a subscription or one-time purchase.
Q6: Can I use Portrait mode to change the background?
Portrait mode blurs the background but doesn’t remove it completely. It’s a good option for creating a shallow depth of field.
Q7: What is the best resolution to use when editing photos on iPhone?
Always use the highest resolution possible to maintain image quality.
Q8: How can I avoid pixelation when changing backgrounds?
Start with high-resolution images and avoid excessive resizing or cropping.
Q9: Can I change the background of a video on iPhone?
Yes, some video editing apps offer background removal and replacement features.
Q10: What should I do if the automatic background removal tool doesn’t work well?
Use manual selection tools to refine the edges and remove the background more precisely.
We hope this comprehensive guide has provided you with the knowledge and inspiration to start changing backgrounds on your iPhone photos. Visit dfphoto.net for more photography tips, tutorials, and resources. Explore our collection of stunning images, connect with fellow photographers, and unlock your creative potential today. Our address is 1600 St Michael’s Dr, Santa Fe, NM 87505, United States. You can call us at +1 (505) 471-6001, or visit our website, dfphoto.net, to learn more. Let dfphoto.net be your guide as you embark on a journey of creativity and visual storytelling.