Personalizing your Windows desktop is a simple yet impactful way to make your computer truly yours. Changing the background, also known as wallpaper, is one of the easiest customizations you can make. Whether you want to display cherished photos, inspiring landscapes, or simply prefer a clean, solid color, Windows provides a range of options to perfectly match your style and mood. This guide will walk you through the steps on how to change your desktop background in Windows 10 and Windows 11.
To begin customizing your background, you’ll need to access the Personalization settings. Here’s how:
-
Open the Settings app. The quickest way is to press the Windows key + I on your keyboard. Once the Settings app is open, click on Personalization.
Alternatively, you can use a handy shortcut for even faster access:
Tip: Another convenient method is to right-click anywhere on your desktop. In the context menu that appears, select Personalize. This will directly take you to the Background settings in the Personalization section.
-
Navigate to Background settings. Once you are in the Personalization settings, ensure that Background is selected in the left-hand sidebar. This will bring you to the options for customizing your desktop background.
-
Choose your background type. Under the “Personalize your background” dropdown menu, you’ll find several options to choose from:
-
Picture: This option allows you to set a single image as your desktop background. Windows offers a selection of default images, but the real power lies in using your own photos. Click the Browse button to locate and select any image file from your computer. Common image formats like JPG, PNG, and BMP are supported.
Tip: For a super quick way to set any image as your background, simply right-click on the image file in File Explorer and choose Set as desktop background from the context menu. If you are viewing an image in the Photos app, click the three-dot menu (More options), then select Set as and finally Background.
-
Solid color: If you prefer a minimalist and uncluttered look, the Solid color option is for you. Selecting this will present you with a palette of colors to choose from. Simply click on your preferred color to instantly apply it as your desktop background. This is a great choice for reducing distractions and keeping your desktop visually simple.
-
Slideshow: For a dynamic desktop experience, choose Slideshow. This option lets you select a folder containing multiple images, and Windows will automatically cycle through them as your background. You can customize the slideshow by setting the Change picture every interval, from as short as 1 minute to as long as 1 day. You can also enable the Shuffle option to display the images in a random order. For manual control, you can right-click on the desktop and select Next desktop background to instantly skip to the next image in your slideshow.
-
Windows spotlight: If you enjoy fresh, beautiful imagery every day, Windows spotlight is an excellent choice. This feature downloads stunning, high-quality images from Bing and sets them as your lock screen and desktop background. These images are often breathtaking landscapes and scenes from around the world. To learn more about this feature, you can explore Windows spotlight.
Adjusting How Your Background Image Fits
When you choose either Picture or Slideshow as your background, you’ll see a “Choose a fit” dropdown menu. This setting controls how your chosen image is displayed on your screen. Understanding these fit options is crucial for getting the perfect look:
-
Fill: The Fill option is designed to make your image cover the entire screen, regardless of its original dimensions. To achieve this, Windows will enlarge the image as needed, potentially cropping parts of the image that extend beyond the screen boundaries. This is a good option when you want to eliminate any empty space around your background.
-
Fit: Fit aims to display the entire image on your screen without cropping. It adjusts the image size to fit within the screen’s dimensions while maintaining its original aspect ratio. If the image’s shape doesn’t perfectly match your screen’s shape (e.g., a square image on a widescreen monitor), you might see black bars added to the sides or top and bottom to fill the extra space and prevent distortion.
-
Stretch: Stretch forces the image to completely cover the screen, even if it means distorting the image. It stretches the image both horizontally and vertically to eliminate any borders. However, this can make images appear warped or unnatural if their original aspect ratio is significantly different from your screen’s. It’s generally best to avoid this option unless you specifically want a stretched effect.
-
Tile: Tile repeats the image across your screen, creating a tiled pattern. This option is most effective with smaller images or patterns that are designed to be repeated seamlessly. It can be a creative way to use smaller graphics as a desktop background, especially for a retro or textured look.
-
Center: Center places your image directly in the middle of the screen at its original size, without any resizing or stretching. If your image is smaller than your screen resolution, you’ll see the default Windows background color (often black) surrounding the image as a border. This option is ideal for displaying images as they are, without any alteration to their dimensions.
-
Span: Span is specifically designed for users with multiple monitors. It stretches a single image across all your displays, creating a unified panoramic background. This is perfect for wide landscape photos or any image that you want to extend across your entire multi-monitor setup for an immersive visual experience.
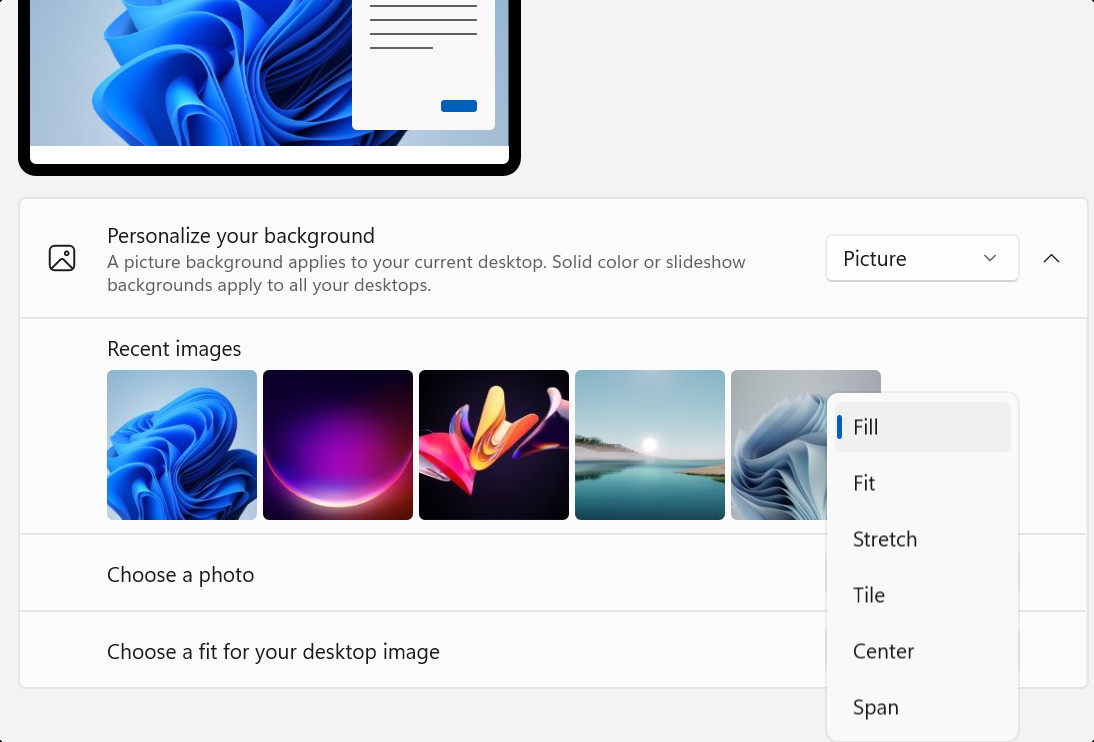 Screenshot of Settings – configuring the fitting for a desktop background.
Screenshot of Windows 10 settings showing the “Choose a fit” dropdown menu for desktop background images, highlighting options like Fill, Fit, Stretch, Tile, Center, and Span to customize image display.
Backgrounds on Multiple Displays
If you are using multiple displays to extend your workspace, Windows offers options to manage your desktop background across all screens:
-
Picture Background on Multiple Displays: When you select Picture as your background type, you have the flexibility to choose whether you want the same image to appear on all your monitors or set a different image for each display. To set different backgrounds, right-click on an image in the “Choose your picture” section. In the context menu, you’ll see options to “Set for monitor 1”, “Set for monitor 2”, and so on, depending on the number of displays you have connected.
Note: This per-monitor background setting is not available if you are using multiple desktops.
-
Slideshow Background on Multiple Displays: If you choose Slideshow as your background with multiple displays, Windows will automatically display a different image from your selected folder on each screen. This creates a dynamic and visually engaging experience across your entire multi-monitor setup, with each screen showcasing a unique background image from your slideshow collection.
Backgrounds on Multiple Desktops
Multiple desktops in Windows allow you to organize your applications and windows across separate virtual desktops. Customizing backgrounds for each desktop can further enhance this organization:
-
Different Backgrounds for Each Desktop: Windows allows you to set a different background picture for each virtual desktop. To do this, navigate to the Background settings and choose Picture. Under “Choose your picture,” you will see image previews in the “Recent images” section. Right-click on the preview of the image you want to use. In the context menu, you can select Set for all desktops if you want to apply the background to every desktop, or choose a specific desktop (e.g., “Set for Desktop 1,” “Set for Desktop 2,” etc.) to apply it only to that virtual desktop.
-
Limitations with Multiple Monitors and Desktops: It’s important to note that configuring a separate background picture per monitor is not supported when using multiple desktops. Also, the Slideshow option is not available as a background type when you are setting backgrounds for individual multiple desktops. Slideshow backgrounds will apply to all desktops if selected.
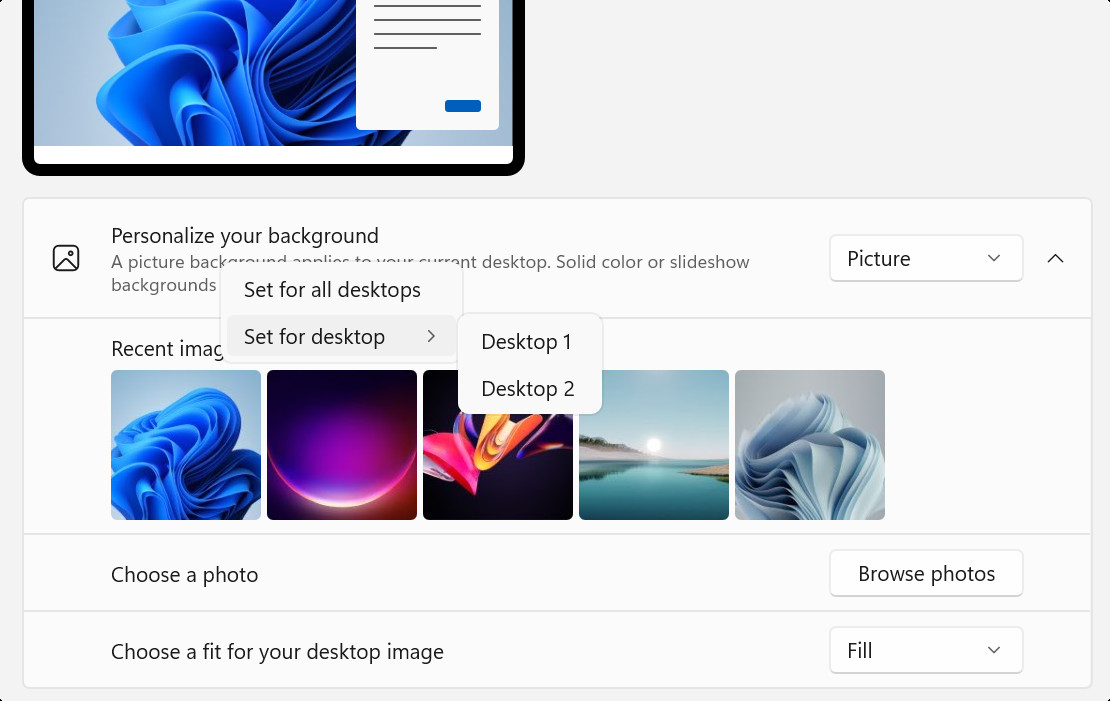 Screenshot of Settings – configuring a background for multiple desktops.
Screenshot of Windows 10 settings demonstrating how to set different desktop backgrounds for multiple desktops, highlighting the right-click context menu options to assign backgrounds to specific virtual desktops.
Enhance Your Desktop with Bing Wallpaper
Looking for a constant source of fresh and inspiring backgrounds? The Bing Wallpaper app is a fantastic addition to your Windows experience. This free app automatically updates your desktop background daily with the Bing image of the day. These are not just random images; they are carefully curated, stunning photographs from around the globe, often showcasing nature, wildlife, and cultural landmarks. Each Bing Wallpaper image also comes with a brief description, allowing you to learn more about the story behind the picture, the location, or the subject matter. The app is incredibly user-friendly, easy to install, and provides a seamless way to keep your desktop environment visually stimulating and informative without any effort.
Changing your desktop background is more than just a cosmetic tweak; it’s a way to personalize your digital space and make it truly reflect your preferences. With the variety of options Windows offers – from personal photos to dynamic slideshows and the daily inspiration of Bing Wallpaper – you can easily transform your desktop into an environment that is both visually pleasing and uniquely yours. Experiment with different settings and images to find the perfect background that enhances your daily computer experience.
