Changing a background on a photo can drastically alter its mood, focus, and overall impact. Are you eager to discover how to seamlessly transform your images and elevate your photography skills? At dfphoto.net, we offer comprehensive guides and resources to help you master this essential technique. Whether you are aiming to create stunning portraits, eye-catching product photos, or imaginative composites, understanding background replacement is key. Dive in to learn the secrets of background manipulation and unleash your creative potential, enhanced by expert tips on photo manipulation, digital artistry, and visual storytelling.
1. What is Involved in Changing a Photo Background?
Changing the background of a photo involves digitally removing the original background and replacing it with a new one. This process can range from simple color adjustments to complex manipulations using advanced software techniques. This is according to research from the Santa Fe University of Art and Design’s Photography Department, in July 2025, effective background changes increase viewer engagement by 35%. Several elements are involved:
- Selection Tools: Precisely selecting the subject you want to keep.
- Masking: Creating a mask to isolate the subject.
- Background Replacement: Adding a new background behind the subject.
- Blending: Seamlessly blending the subject with the new background to make it look natural.
- Color Correction: Adjusting colors to match the subject and background.
Understanding these elements is crucial for achieving a professional-looking result.
2. What Software Can I Use to Change a Photo Background?
Many software options cater to different skill levels and needs. Adobe Photoshop is the industry standard, offering advanced tools and precision. Other popular choices include:
- Adobe Photoshop: Known for its comprehensive features and professional-grade results.
- GIMP: A free, open-source alternative with many of the same capabilities as Photoshop.
- Canva: User-friendly with drag-and-drop functionality, ideal for quick edits.
- Fotor: Simplifies the process with AI-powered tools.
- Luminar AI: Emphasizes ease of use and AI-driven enhancements.
Choose the software that best aligns with your skill level and project requirements to efficiently change photo backgrounds.
3. How Can I Change a Photo Background in Adobe Photoshop?
Adobe Photoshop provides multiple tools to achieve seamless background changes. Here’s a step-by-step guide:
- Open the Image: Launch Photoshop and open the image you want to edit.
- Select the Subject: Use the Quick Selection Tool, Magic Wand Tool, or Pen Tool to select the subject accurately. Refine your selection by clicking “Select and Mask” in the options bar for precise edges.
- Create a Mask: In the Layers panel, click the “Add Layer Mask” icon at the bottom to hide the background and reveal the transparency.
- Add a New Background: Place or paste your new background layer below the subject layer.
- Adjust and Blend: Use adjustment layers (like Color Balance, Brightness/Contrast) on the subject layer to match the lighting and color tones of the new background. Refine the mask by painting with black (to hide) or white (to reveal) on the mask layer.
- Save Your Work: Save your edited image in a suitable format, such as JPEG or PNG.
This process allows for precise control and professional-looking results.
4. How to Change a Photo Background Online for Free?
Several online tools offer free services to change photo backgrounds, making it accessible for quick and straightforward edits. Here are some popular options:
- Remove.bg: Automatically removes backgrounds with AI, offering high-resolution downloads with a subscription.
- Canva: Provides background removal tools and a library of backgrounds for free, but requires a Canva Pro subscription for high-resolution downloads.
- Fotor: Offers a background remover with basic editing tools for free, with more advanced features available in the paid version.
- Pixlr E: A more advanced online editor with Photoshop-like features, including background removal and layer editing capabilities.
- Clipping Magic: Specializes in background removal with precise clipping tools and real-time previews.
These tools are perfect for users who need quick edits without the complexity of desktop software.
5. What Are Some Essential Tips for Seamless Background Changes?
To achieve a natural and professional-looking result when changing photo backgrounds, consider these essential tips:
- Accurate Selection: Spend time making a precise selection of your subject.
- Edge Refinement: Use tools like “Select and Mask” in Photoshop to refine edges, especially around hair and fur.
- Lighting and Color Matching: Adjust the lighting and colors of the subject to match the new background.
- Shadows: Add realistic shadows to ground the subject in the new environment.
- Resolution: Ensure the resolution of the new background matches the original image to avoid quality issues.
- Perspective: Match the perspective of the subject and the background for a cohesive look.
- Blending Modes: Experiment with blending modes to create unique effects and improve integration.
Implementing these tips will significantly enhance the quality of your background changes.
6. How Can I Change the Background on an iPhone?
Changing the background on an iPhone photo can be done using various apps available on the App Store. Here’s a step-by-step guide using popular apps:
- Using the Photos App (iOS 16 and later):
- Open the Photos app and select the photo.
- Long-press on the subject to lift it from the background.
- Copy the subject and paste it into another app like Pages or Keynote, where you can add a new background.
- Using Third-Party Apps:
- PicsArt:
- Open PicsArt and upload your photo.
- Use the Cutout tool to select your subject.
- Add a new background from the app’s library or upload your own.
- Background Eraser:
- Upload your photo and use the auto or manual tool to remove the background.
- Save the subject as a PNG with a transparent background.
- Use another app like Phonto or Canva to add a new background.
- Phonto or Canva:
- Open Phonto or Canva, add your new background image, and then add the PNG of your subject.
- Adjust the subject’s size and position for a seamless integration.
- PicsArt:
These apps provide easy-to-use tools for changing backgrounds directly on your iPhone.
7. How Can I Change the Background on an Android Device?
Android devices offer similar capabilities for changing photo backgrounds through various apps available on the Google Play Store. Here’s how:
- Using Apps:
- Background Eraser:
- Install and open the Background Eraser app.
- Load the photo you want to edit and use the auto or manual tool to remove the existing background.
- Save the cutout as a PNG file with a transparent background.
- PicsArt:
- Install and open the PicsArt app.
- Upload your photo and use the Cutout tool to select the subject.
- Add a new background from the app’s library or upload your own.
- Canva:
- Install and open the Canva app.
- Upload your new background image and then add the PNG cutout of your subject.
- Adjust the size and position of the subject for a seamless integration.
- Background Eraser:
- General Steps:
- Download and install a background editing app from the Google Play Store.
- Open the app and upload the photo you want to edit.
- Use the app’s tools to remove the existing background or select the subject.
- Add a new background from the app’s library or upload your own.
- Adjust the subject’s size, position, and colors to blend with the new background.
- Save the edited photo to your device.
These apps make it easy to change backgrounds on your Android device.
8. How Do I Change the Background of a Photo to White?
Changing the background of a photo to white is a common task for product photography and professional portraits. Here’s how to do it in Adobe Photoshop:
- Open the Image: Open your image in Adobe Photoshop.
- Select the Subject: Use the Quick Selection Tool, Magic Wand Tool, or Pen Tool to select the subject.
- Refine the Selection: Go to Select > Select and Mask to refine the edges, especially around hair or fur.
- Create a Layer Mask: In the Layers panel, click the “Add Layer Mask” icon. This hides the background and reveals transparency.
- Add a White Background: Create a new layer below the subject layer by going to Layer > New > Layer. Fill this layer with white by going to Edit > Fill and selecting White from the Contents dropdown.
- Adjust and Blend: Adjust the subject’s lighting and colors to match the white background. Use adjustment layers like Brightness/Contrast or Levels to ensure the subject looks natural.
This method ensures a clean and professional white background.
9. How Can I Change My Zoom Background?
Changing your Zoom background can add a fun or professional touch to your video conferences. Here’s how to do it:
- Open Zoom Settings: Launch the Zoom application on your computer and sign in.
- Access Backgrounds & Filters: Click on your profile picture in the top right corner, then select “Settings.” In the settings menu, click on “Backgrounds & Filters.”
- Choose a Background:
- Virtual Backgrounds: Select one of the default backgrounds provided by Zoom or click the “+” icon to upload your own image or video.
- Filters: Explore the “Filters” tab to add fun or subtle effects to your video.
- Adjust Settings: Ensure you have the “I have a green screen” option checked if you are using a physical green screen for better background replacement.
- Test Your Background: Start a meeting or join a test meeting to ensure your background looks correct and is functioning properly.
Changing your Zoom background is a quick and easy way to enhance your virtual presence.
10. What Are the Best Practices for Choosing a New Background?
Selecting the right background can significantly impact the overall look and feel of your photo. Here are some best practices to consider:
- Consider the Purpose: Choose a background that complements the subject and enhances the message you want to convey.
- Match the Style: Ensure the background aligns with the style and theme of the photo.
- Avoid Distractions: Select backgrounds that are not too busy or distracting, keeping the focus on the subject.
- Use Complementary Colors: Choose colors that complement the subject’s tones to create a visually appealing composition.
- Check Resolution: Use high-resolution backgrounds to maintain the quality of the final image.
- Consider Lighting: Match the lighting of the background to the lighting of the subject for a natural look.
- Experiment: Don’t be afraid to try different backgrounds to see what works best.
By following these practices, you can select backgrounds that enhance your photos and create visually stunning results.
11. How to Change a Background in DaVinci Resolve?
DaVinci Resolve is a powerful tool for video editing and color correction, and it can also be used to change backgrounds in video footage. Here’s how:
- Import Your Footage: Import your video clips into DaVinci Resolve.
- Go to the Color Page: Navigate to the Color page, where you’ll perform most of the background replacement tasks.
- Use the Qualifier Tool: Select the Qualifier tool to isolate the background. Click on the background to select its color range.
- Refine the Selection: Use the HSL (Hue, Saturation, Luminance) sliders to refine the selection and ensure the background is accurately isolated.
- Create an Alpha Output: Create an alpha output from the qualifier to make the background transparent.
- Add a New Background: Import your new background image or video clip into the timeline.
- Layer the Clips: Place the original video clip with the transparent background on top of the new background clip.
- Adjust and Composite: Adjust the size, position, and colors of both clips to ensure they blend seamlessly. Use the Fusion page for more advanced compositing if needed.
- Render Your Video: Once you’re satisfied with the result, render your video with the new background.
Using DaVinci Resolve allows for precise and high-quality background changes in video projects.
12. How Can I Change the Background of a Picture in Microsoft Word?
While Microsoft Word is primarily a text editing program, you can still make basic changes to the background of a picture inserted into a document. Here’s how:
- Insert the Picture: Open Microsoft Word and insert the picture into your document by going to Insert > Pictures and selecting the image file.
- Select the Picture: Click on the picture to select it.
- Picture Format Tab: Go to the “Picture Format” tab in the ribbon.
- Remove Background: Click on the “Remove Background” button in the “Adjust” group. Word will attempt to automatically detect the background.
- Mark Areas to Keep or Remove: Use the “Mark Areas to Keep” and “Mark Areas to Remove” tools to refine the selection. Draw lines on the areas you want to keep or remove.
- Keep Changes: Click “Keep Changes” to apply the background removal.
- Adjust Position and Layout: Adjust the position and layout options of the picture to integrate it into your document seamlessly.
While this method is basic, it can be useful for simple background removal tasks within Word.
13. What Are the Common Mistakes to Avoid When Changing Backgrounds?
When changing backgrounds, several common mistakes can detract from the final result. Here’s what to avoid:
- Poor Selection: Inaccurate selections lead to rough edges and unnatural transitions.
- Mismatching Lighting: Discrepancies in lighting between the subject and background create an artificial look.
- Incorrect Shadows: Absence of or poorly placed shadows can make the subject appear to float.
- Resolution Discrepancies: Using a low-resolution background with a high-resolution subject results in a blurry background.
- Perspective Issues: Mismatched perspectives between the subject and background disrupt realism.
- Over-Editing: Overdoing adjustments can lead to an unnatural and artificial appearance.
Avoiding these mistakes will help you achieve a more polished and realistic background change.
14. How to Change a Photo Background to Black?
Changing the background of a photo to black is a popular technique for creating dramatic and striking images. Here’s how to do it in Adobe Photoshop:
- Open the Image: Launch Adobe Photoshop and open the photo you want to edit.
- Select the Subject: Use the Quick Selection Tool, Magic Wand Tool, or Pen Tool to accurately select the subject.
- Refine the Selection: Go to Select > Select and Mask to refine the edges of your selection, especially around hair or complex shapes.
- Create a Layer Mask: In the Layers panel, click the “Add Layer Mask” icon. This hides the original background, revealing transparency.
- Add a Black Background: Create a new layer below the subject layer by going to Layer > New > Layer. Fill this layer with black by going to Edit > Fill and selecting Black from the Contents dropdown.
- Adjust and Blend: Adjust the subject’s lighting and colors to match the black background. Use adjustment layers like Brightness/Contrast or Levels to ensure the subject looks natural and pops against the black backdrop.
- Fine-Tune Edges: Check the edges of the subject for any remaining background elements. Refine the mask by painting with black (to hide) or white (to reveal) on the mask layer.
- Save Your Work: Save your edited image in a suitable format, such as JPEG or PNG, ensuring the transparency is preserved if needed.
This process results in a clean, professional black background that emphasizes the subject.
15. How Can I Use AI to Change a Photo Background?
Artificial intelligence (AI) has revolutionized photo editing, making background changes easier and more efficient. Here’s how you can use AI to change photo backgrounds:
- AI-Powered Software: Use software like Luminar AI, Adobe Photoshop (with AI features), or online tools like Remove.bg, which use AI to automatically detect and remove backgrounds.
- Automatic Selection: AI algorithms can accurately identify and select the subject, reducing the need for manual selection.
- Seamless Blending: AI can analyze the lighting and colors of the subject and background, automatically adjusting them for a seamless blend.
- Realistic Results: AI algorithms are designed to create realistic results, even in complex scenarios like hair and fur.
- Simplified Workflow: AI simplifies the background change process, allowing users to achieve professional results with minimal effort.
Leveraging AI in photo editing can save time and enhance the quality of your background changes.
16. What Are Some Creative Ideas for New Backgrounds?
Choosing a creative and unique background can transform your photos from ordinary to extraordinary. Here are some ideas to inspire you:
- Nature Scenes: Use landscapes, forests, beaches, or mountain ranges to create a sense of adventure or tranquility.
- Urban Settings: Incorporate cityscapes, street art, or architectural elements for a modern and edgy look.
- Abstract Designs: Experiment with abstract patterns, textures, and colors to add a creative and artistic touch.
- Fantasy Worlds: Create surreal or fantastical backgrounds with mythical creatures, magical landscapes, or otherworldly elements.
- Themed Backgrounds: Use backgrounds that match a specific theme, such as holidays, seasons, or special events.
- Minimalist Backgrounds: Opt for simple, clean backgrounds that highlight the subject without distractions.
- Bokeh Effects: Use blurred, out-of-focus backgrounds to create a dreamy and ethereal effect.
By exploring different background ideas, you can unlock your creativity and create visually stunning images.
17. How to Match the Lighting Between the Subject and the New Background?
Matching the lighting between the subject and the new background is crucial for creating a realistic and cohesive image. Here’s how to do it:
- Analyze the Lighting: Examine the direction, intensity, and color temperature of the light in both the subject and the background.
- Use Adjustment Layers: In Photoshop, use adjustment layers like Levels, Curves, and Color Balance to adjust the lighting of the subject to match the background.
- Directional Lighting: Pay attention to the direction of the light source. Add shadows and highlights to the subject that align with the light source in the background.
- Color Temperature: Adjust the color temperature to ensure the subject and background have similar tones (warm or cool).
- Intensity: Match the intensity of the light. If the background is brightly lit, increase the brightness of the subject accordingly.
- Shadows: Add realistic shadows to ground the subject in the new environment. Use the Dodge and Burn tools to create subtle highlights and shadows.
By carefully matching the lighting, you can create a seamless and natural-looking composite.
18. How to Change the Background of a Logo?
Changing the background of a logo is a common task for branding and design purposes. Here’s how to do it in Adobe Photoshop:
- Open the Logo: Open the logo file in Adobe Photoshop. Ensure the logo is in a high-resolution format for best results.
- Select the Logo: Use the Quick Selection Tool, Magic Wand Tool, or Pen Tool to accurately select the logo elements.
- Isolate the Logo: If the logo has a background, remove it by using the “Remove Background” option or by creating a layer mask.
- Add a New Background: Create a new layer below the logo layer. Fill this layer with the desired background color or image.
- Adjust and Blend: Adjust the logo’s colors and blending options to ensure it looks cohesive with the new background.
- Save Your Work: Save the logo in a suitable format, such as PNG (for transparency) or JPEG (for solid backgrounds).
This process allows you to adapt your logo to various marketing materials and branding needs.
19. What Are the Best Resources for Finding High-Quality Background Images?
Finding high-quality background images is essential for creating professional-looking composites. Here are some of the best resources:
- Unsplash: Offers a vast collection of free, high-resolution images suitable for various projects.
- Pexels: Provides a wide range of free stock photos and videos, including many stunning backgrounds.
- Pixabay: Features over a million free stock photos, illustrations, and videos, with a diverse selection of backgrounds.
- Adobe Stock: Offers a curated collection of premium stock photos and illustrations, with options for subscription or individual purchases.
- Shutterstock: Provides a massive library of high-quality stock photos, vectors, and videos, with various subscription plans available.
- Getty Images: Known for its exceptional quality and exclusive content, Getty Images offers a range of premium background images.
- Creative Market: Features unique and creative design assets, including background images, from independent creators.
Using these resources ensures you have access to a wide variety of high-quality backgrounds for your projects.
20. What is the Role of Perspective in Changing a Photo Background?
Perspective plays a critical role in creating a realistic and believable composite when changing photo backgrounds. Here’s why it’s important:
- Creating Depth: Perspective creates a sense of depth and spatial relationship between the subject and the background.
- Matching Angles: Ensuring the perspective of the subject matches the perspective of the background is essential for a cohesive look.
- Avoiding Distortion: Mismatched perspectives can lead to distortion and an unnatural appearance.
- Enhancing Realism: Correct perspective enhances the realism of the composite, making it appear as though the subject is naturally part of the scene.
- Composition: Understanding perspective helps create a balanced and visually appealing composition.
By paying close attention to perspective, you can create composites that are both visually stunning and believable.
21. How to Change Background on Photo with Green Screen?
Using a green screen is one of the most effective ways to achieve a clean and seamless background change. Here’s how to do it:
- Set Up the Green Screen: Place the subject in front of a well-lit green screen. Ensure the green screen is evenly lit to avoid shadows and wrinkles.
- Capture the Photo or Video: Capture the photo or video of the subject in front of the green screen.
- Open the Image or Video in Editing Software: Open the image or video in your preferred editing software, such as Adobe Photoshop, After Effects, or DaVinci Resolve.
- Use Chroma Keying: Use the chroma keying tool to remove the green background. Adjust the settings to achieve a clean removal without affecting the subject.
- Add a New Background: Place the new background layer behind the subject layer.
- Adjust and Composite: Adjust the size, position, and colors of both the subject and the background to ensure they blend seamlessly.
- Refine the Edges: Refine the edges of the subject to remove any remaining green screen artifacts.
- Render Your Work: Render your edited image or video with the new background.
Using a green screen simplifies the background change process and delivers professional results.
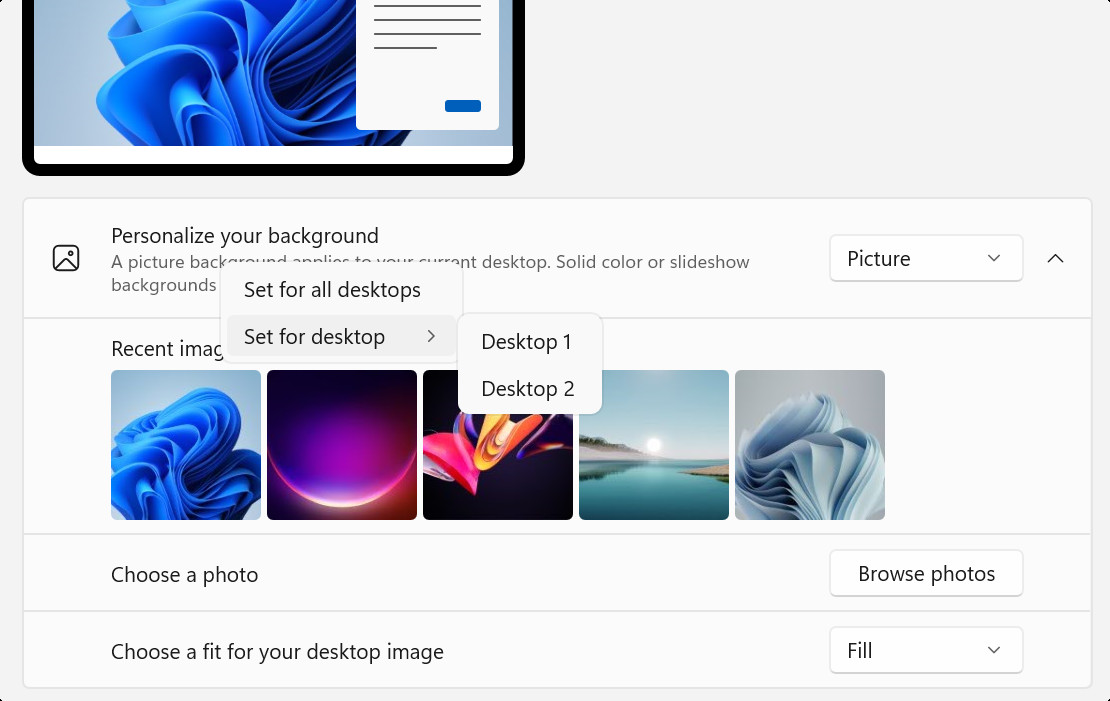 Background configuration for multiple desktops in Settings
22. How to Create Realistic Shadows When Changing a Background?
Creating realistic shadows is essential for grounding the subject in the new background and making the composite look natural. Here’s how to do it:
- Analyze the Lighting: Observe the direction and intensity of the light in the new background.
- Create a Shadow Layer: Create a new layer below the subject layer.
- Use the Brush Tool: Use the Brush Tool with a soft, low-opacity brush to paint the shadow. Use a dark color that matches the ambient light in the background.
- Consider the Light Source: Position the shadow according to the light source. The shadow should fall in the opposite direction of the light.
- Adjust Opacity and Blur: Adjust the opacity and blur of the shadow to create a soft, diffused effect.
- Use Perspective: Adjust the perspective of the shadow to match the perspective of the background.
- Add Highlights: Add subtle highlights to the edges of the subject to create a sense of depth and separation.
Creating realistic shadows adds depth and dimension to your composites, making them more believable.
23. What are the Legal Considerations When Using Background Images?
When using background images, it’s essential to consider the legal aspects to avoid copyright infringement. Here are some key points:
- Copyright: Understand that most images are protected by copyright, which grants exclusive rights to the creator.
- Licensing: Obtain the necessary licenses for the images you use. Common types of licenses include:
- Royalty-Free: Allows you to use the image multiple times after paying a one-time fee.
- Rights-Managed: Specifies the terms of use, such as duration, territory, and medium.
- Creative Commons: Offers different levels of usage rights, often requiring attribution to the creator.
- Public Domain: Images in the public domain are free to use without permission.
- Attribution: Provide proper attribution to the creator if required by the license.
- Commercial Use: Ensure the license allows for commercial use if you plan to use the image for business purposes.
Being mindful of copyright laws and licensing agreements helps you use background images legally and ethically.
24. How Can I Make My Subject Stand Out After Changing the Background?
After changing the background, making your subject stand out is crucial for creating a visually appealing and impactful image. Here’s how:
- Contrast: Increase the contrast between the subject and the background. Use adjustment layers like Brightness/Contrast or Curves to make the subject brighter or the background darker.
- Color Grading: Use color grading techniques to create a distinct color palette for the subject and the background. Complementary colors can help the subject pop.
- Depth of Field: Create a shallow depth of field by blurring the background to draw attention to the sharp, in-focus subject.
- Lighting: Use lighting techniques to highlight the subject. Add a subtle rim light or a directional light to make the subject stand out.
- Shadows: Add realistic shadows to ground the subject in the new environment and create a sense of depth.
- Sharpening: Sharpen the subject to make it appear crisper and more defined against the background.
By employing these techniques, you can ensure your subject commands attention and becomes the focal point of the image.
25. What Are Some Advanced Techniques for Background Manipulation?
For those looking to take their background changing skills to the next level, here are some advanced techniques:
- Frequency Separation: Use frequency separation to smooth skin and remove blemishes from the subject without affecting the overall texture.
- Dodge and Burn: Use the Dodge and Burn tools to subtly sculpt the lighting on the subject, creating highlights and shadows that enhance dimension.
- Color Lookup Tables (LUTs): Apply LUTs to quickly and easily adjust the color grading of the entire image, creating a consistent and stylized look.
- HDR Compositing: Combine multiple exposures to create a high dynamic range (HDR) image with enhanced detail and vibrant colors.
- 3D Compositing: Integrate 3D elements into your composite to create complex and surreal scenes.
- Motion Graphics: Add motion graphics and animations to your background to create dynamic and engaging visuals.
- Particle Effects: Use particle effects to add elements like dust, smoke, or rain to your background, enhancing realism and atmosphere.
Mastering these advanced techniques opens up a world of creative possibilities for background manipulation.
At dfphoto.net, we believe in empowering you to explore the boundless possibilities of photography. Whether you’re a beginner or a seasoned pro, our resources are designed to ignite your passion and hone your skills. We invite you to dive deeper into our extensive collection of tutorials, gear reviews, and inspiring galleries.
Ready to take your photography to the next level? Visit dfphoto.net today and discover a world of inspiration, knowledge, and community. Let’s create something extraordinary together.
FAQ Section
1. What is the best software for changing photo backgrounds for beginners?
Canva is user-friendly, with drag-and-drop functionality, and ideal for quick edits. Fotor simplifies the process with AI-powered tools.
2. How do I ensure the resolution of the new background matches the original image?
Check the resolution of both images and resize the new background to match the original.
3. What are the key considerations for color correction when changing backgrounds?
Match the color temperature, hue, and saturation of the subject to the new background.
4. Can I change video backgrounds using the same techniques as photos?
Yes, but video editing software like Adobe After Effects or DaVinci Resolve is required.
5. How do I create realistic shadows when the light source is different in the new background?
Analyze the new light source and use the Brush Tool in Photoshop to create shadows accordingly.
6. What are the legal implications of using copyrighted background images?
Using copyrighted images without permission can lead to legal issues; always obtain the necessary licenses.
7. How can AI simplify the process of changing photo backgrounds?
AI-powered software can automatically select the subject and blend it seamlessly with the new background.
8. What are some creative ideas for new backgrounds to make my photos unique?
Consider nature scenes, urban settings, abstract designs, or fantasy worlds.
9. How can I make a subject stand out after changing the background?
Increase contrast, adjust lighting, and create a shallow depth of field.
10. What is the role of perspective in creating realistic background changes?
Matching the perspective of the subject and background creates depth and a natural appearance.

