Building a picture frame might seem simple, but crafting one that’s strong, elegant, and built to last requires careful technique. This guide outlines a furniture maker’s approach to building picture frames, focusing on achieving perfect miter joints and reinforcing them with splines for long-lasting durability.
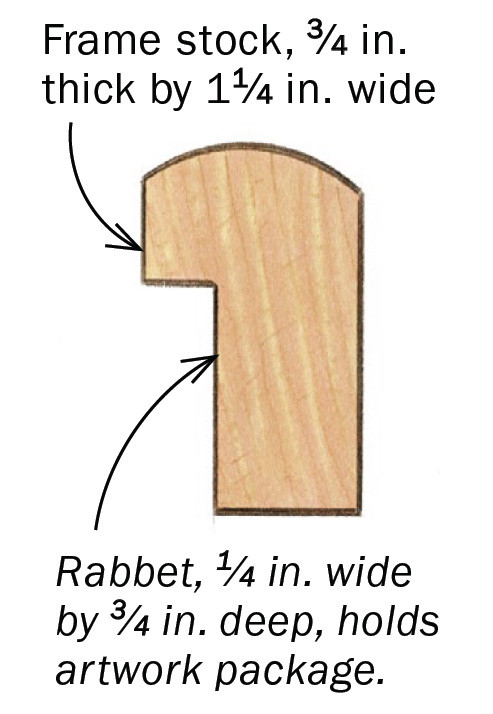 Basic picture frame molding
Mastering Miter Cuts for Picture Frames
The foundation of any great picture frame lies in accurate miter cuts. A perfect 45-degree angle is crucial for tight joints and a professional look. Here’s how to achieve flawless miters:
-
Table Saw Method: Whenever possible, use a table saw with the blade tilted to 45 degrees and the workpiece in a standard crosscut position. This method provides a cleaner cut and allows for easier use of stop blocks. Using a sled, miter gauge, or sliding table enhances accuracy and control.
-
Ensuring Accuracy: Use scrap wood from the same material as your frame to test your saw’s settings. Employ a miter clamp to hold the test pieces together and a framing square to verify the angle. Fine-tune the blade tilt until you achieve a perfect 45-degree cut.
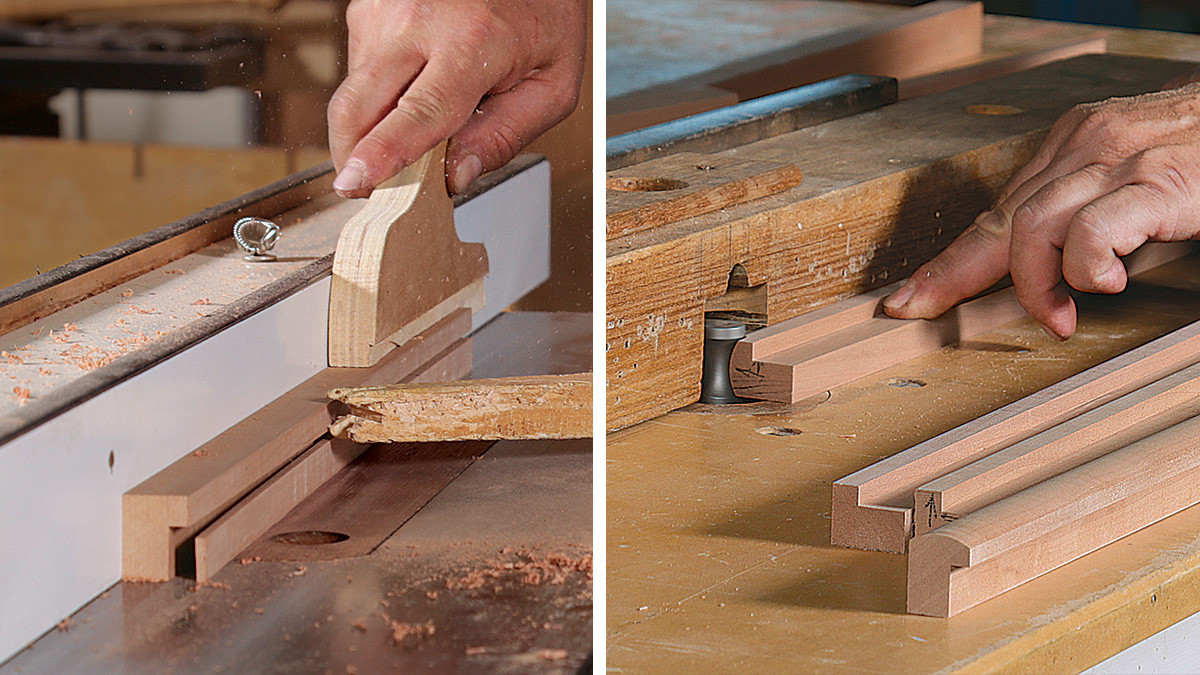 Creating picture frame molding
Reinforcing with Splines for Strength and Style
While many commercial frames rely on nails or fasteners, using splines to reinforce miter joints significantly enhances strength and longevity.
-
Cutting Grooves: A router table with a slot cutter is ideal for creating the grooves for splines. It ensures a flat-bottomed kerf for optimal glue contact. For wider frames requiring deeper grooves, use a tablesaw with a cradle jig and clean up the groove bottom with a chisel.
-
Gluing and Finishing: Once the grooves are cut, glue the splines into place. After the glue dries, carefully flush the splines with the frame surface for a seamless finish. This extra step elevates the frame from simple to sophisticated.
Achieving a Professional Finish
With the miters cut and splines in place, your frame is almost complete. A few final touches can elevate its appearance:
- Molding: Consider adding a decorative molding to the front of the frame using a router and an appropriate bit. This adds visual interest and enhances the frame’s overall aesthetic. An oval edge bit, for instance, can create a subtle, pillowed effect.
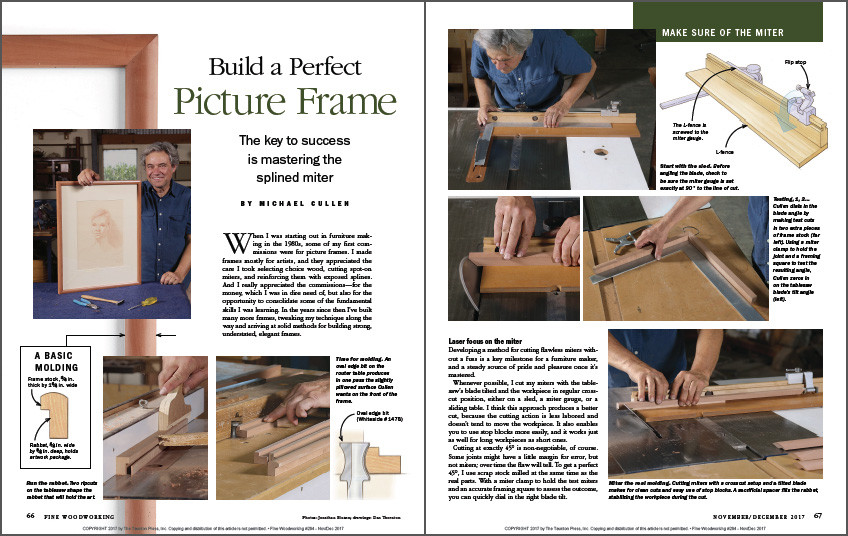 How to build a perfect picture frame spread
Conclusion
Building a picture frame with strong miter joints and spline reinforcement ensures its durability and enhances its visual appeal. By mastering these techniques, you can create custom frames that showcase your artwork or photographs beautifully for years to come. This approach, focusing on precise joinery and thoughtful reinforcement, distinguishes a handcrafted frame from a mass-produced one.