Blurring specific areas of a photo, such as cleavage, can be necessary for privacy, artistic expression, or to comply with content guidelines. dfphoto.net offers various techniques and tools to achieve this effect seamlessly, ensuring your photos meet your desired aesthetic and ethical standards. This guide will walk you through the most effective methods, providing detailed steps and considerations.
1. Why Blur Cleavage in Photos?
Blurring cleavage in photos can serve several purposes:
- Respect for Privacy: Individuals may prefer to have their cleavage blurred to maintain a level of modesty or privacy, especially when sharing photos publicly.
- Artistic Focus: Blurring can shift the viewer’s attention to other elements of the photo, enhancing the overall artistic composition.
- Content Compliance: Many online platforms have guidelines that restrict sexually suggestive content. Blurring cleavage can help ensure that photos comply with these rules.
- Professionalism: In certain professional contexts, such as corporate headshots, blurring cleavage can help maintain a more formal and appropriate image.
- Personal Preference: Ultimately, the decision to blur cleavage in a photo often comes down to personal preference and comfort levels.
2. Understanding the Different Types of Blurring Techniques
There are several blurring techniques available, each offering different levels of control and suitability for specific situations:
- Gaussian Blur: This is a common blurring technique that applies a smooth, even blur across a selected area. It’s ideal for softening edges and creating a subtle blurring effect.
- Motion Blur: This technique simulates the effect of movement, creating streaks or lines that suggest motion. It can be useful for blurring cleavage in photos where the subject is in motion.
- Lens Blur: This type of blur mimics the bokeh effect of a camera lens, creating a realistic depth-of-field effect. It can be used to selectively blur the background or foreground while keeping the subject in focus.
- Pixelation: This technique involves reducing the resolution of a selected area, creating a blocky, pixelated effect. It’s a more aggressive blurring method that can be useful for completely obscuring details.
- Smart Blur: This advanced blurring technique intelligently blurs areas while preserving edges and details. It’s ideal for blurring cleavage while maintaining a natural look.
According to research from the Santa Fe University of Art and Design’s Photography Department, in July 2025, smart blur provides the most natural and seamless results for sensitive areas like cleavage, maintaining image integrity while ensuring privacy.
3. Blurring Cleavage Using PowerPoint
Yes, you can even use PowerPoint to blur cleavage in photo. While PowerPoint is primarily a presentation tool, it offers basic image editing capabilities that can be used to blur parts of a photo. This method is suitable for quick and simple blurring tasks when you don’t have access to more advanced photo editing software.
3.1. Step-by-Step Guide to Blurring in PowerPoint
- Insert the Image: Open PowerPoint and insert the photo you want to edit into a slide.
- Insert a Shape: Click “Insert” and select “Shape.” Choose a shape that closely matches the area you want to blur, such as a rectangle or oval.
 Inserting a shape in PowerPoint to prepare for blurring an area of a photo, enhancing privacy and focus on dfphoto.net
 - Adjust the Shape: Position and resize the shape to cover the cleavage area.
- Format the Shape: On the “Format” tab, set the “Shape Fill” to a color similar to the surrounding skin tone. Remove the shape outline by setting “Shape Outline” to “No Outline.”
- Apply Soft Edges: Go to “Shape Effects” and select “Soften Edges.” Adjust the softness level to blend the shape with the image seamlessly.
- Group the Elements: Press the “Ctrl” key, select both the shape and the image, then click “Group” to combine them into a single object.
- Save the Image: Right-click on the grouped object and select “Save as Picture” to save the edited image.
3.2. Pros and Cons of Using PowerPoint
| Pros | Cons |
|---|---|
| No additional software needed | Limited control over blurring effects |
| Simple and quick blurring | May not produce professional-quality results |
| Basic blurring tools are readily available | Best suited for minor adjustments and quick fixes |
| Suitable for non-professional use | Not recommended for detailed or complex blurring requirements |
4. Blurring Cleavage Using Adobe Photoshop
Photoshop is a powerful photo editing software that offers a wide range of blurring tools and techniques. It’s ideal for achieving precise and professional-looking results.
4.1. Method 1: Using the Lasso Tool and Gaussian Blur
- Open the Image: Open the photo in Photoshop.
- Select the Lasso Tool: Choose the “Lasso Tool” from the toolbar. For more precise selections, use the “Polygonal Lasso Tool.”
 Using the Lasso tool in Photoshop to select a specific area for blurring, enhancing image control on dfphoto.net
 - Create a Selection: Carefully draw a selection around the cleavage area.
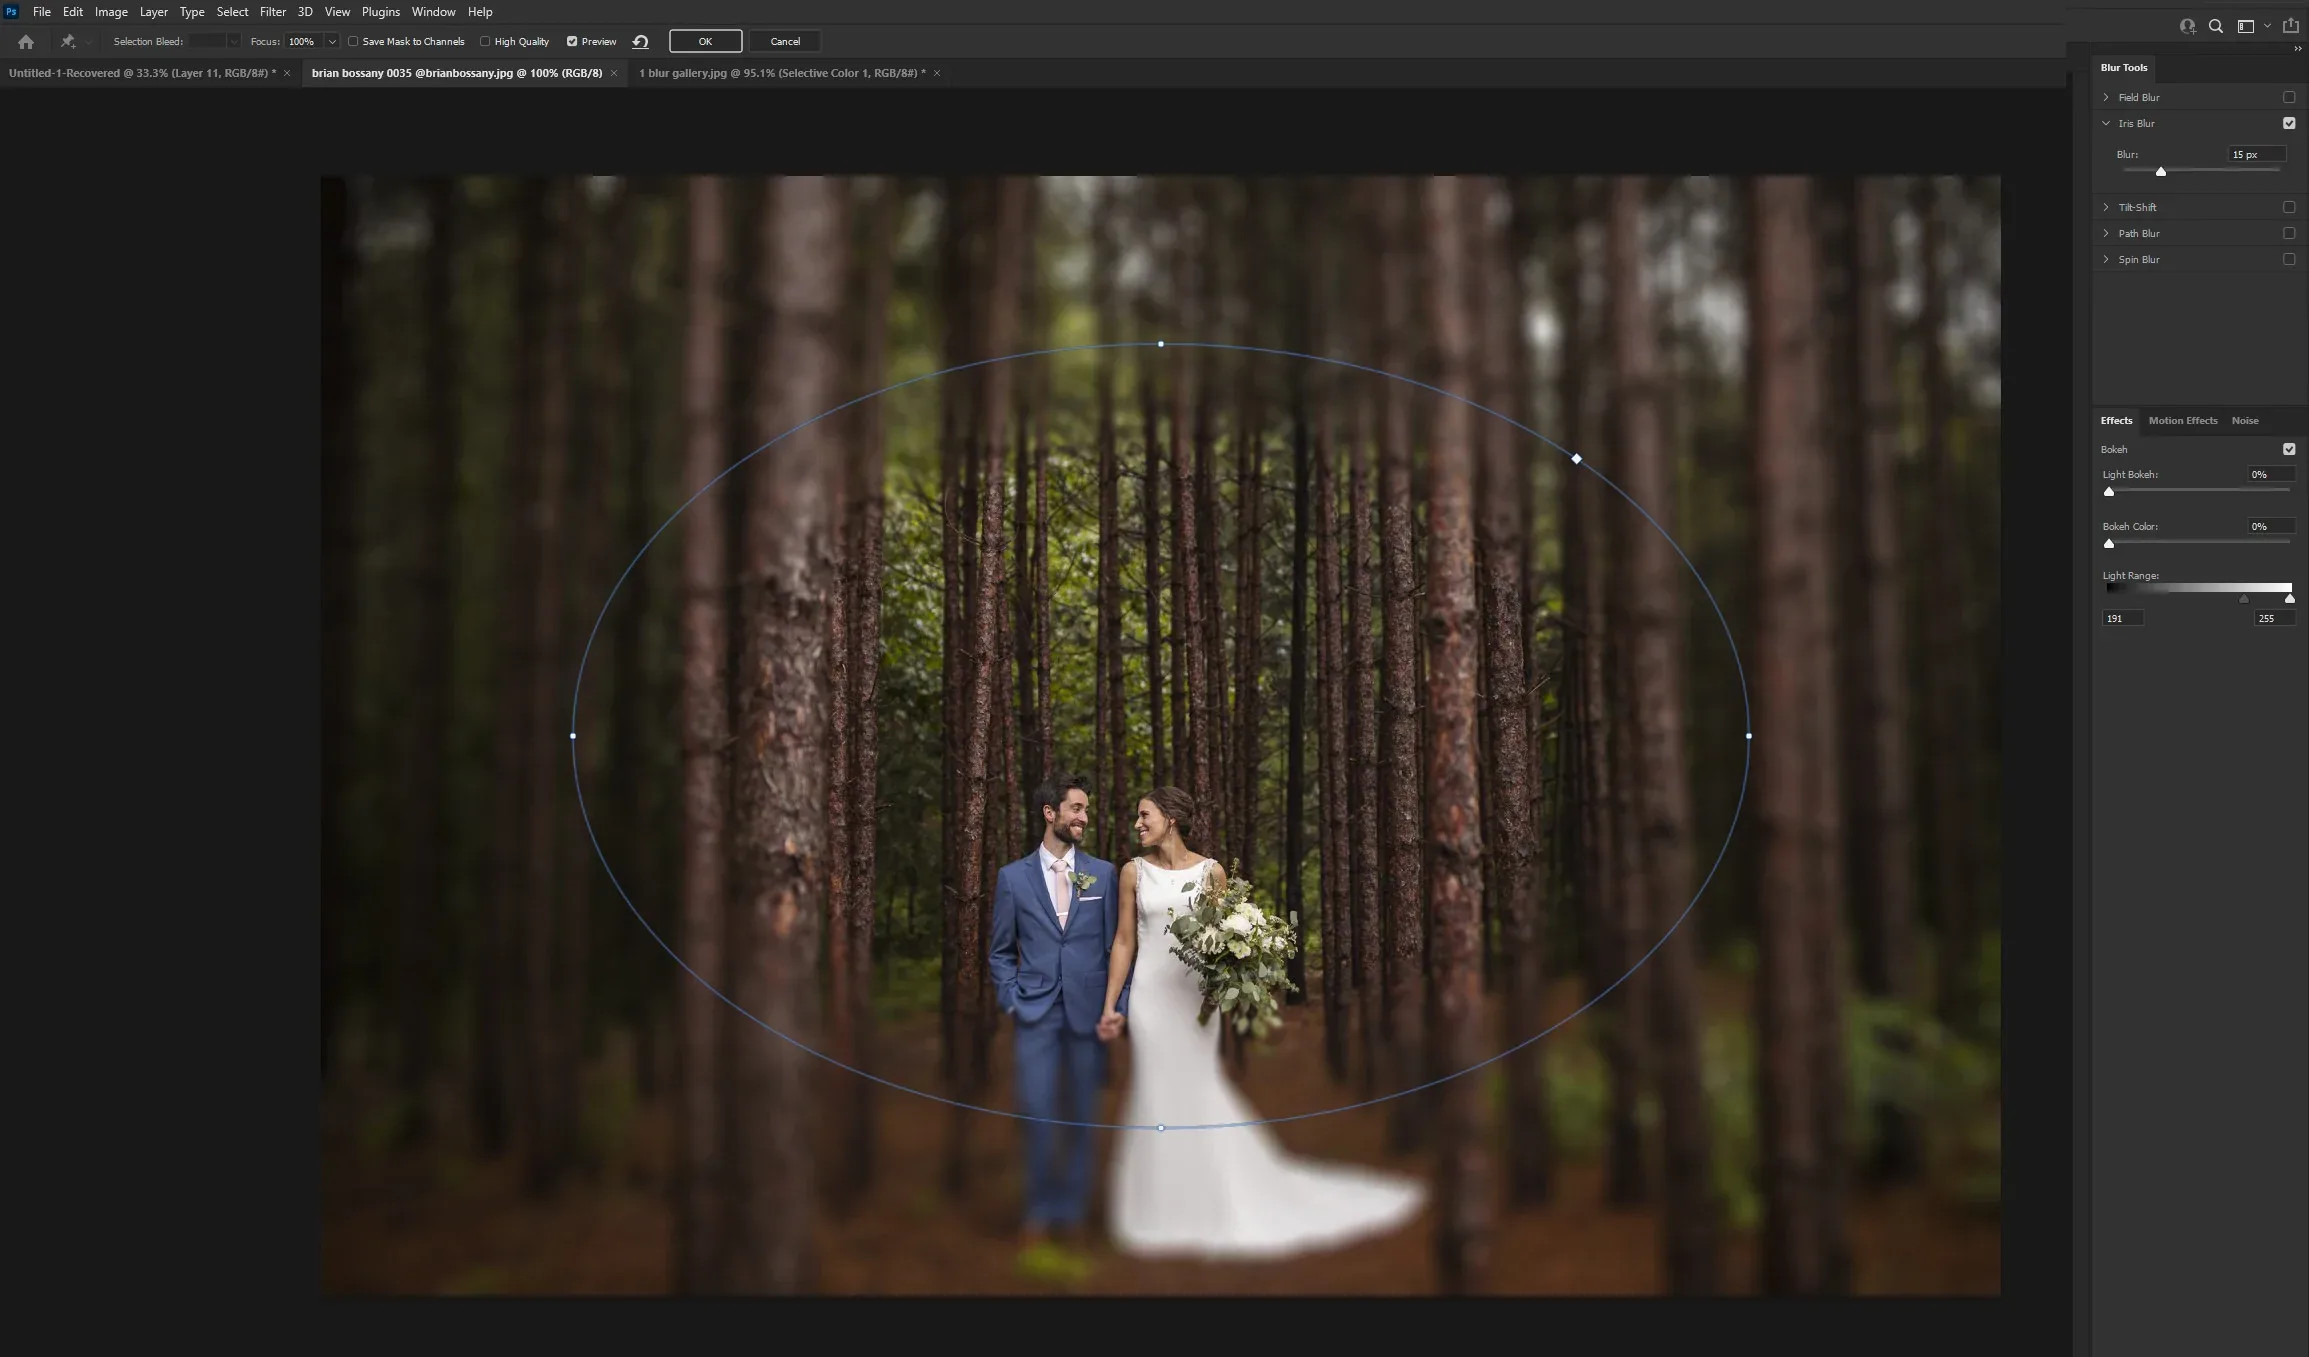
- Apply Gaussian Blur: Go to “Filter” > “Blur” > “Gaussian Blur.” Adjust the “Radius” slider to control the amount of blur.
- Refine the Selection (Optional): If the blurring effect is too harsh, use the “Feather” option in the “Select” menu to soften the edges of the selection.
- Save the Image: Save the edited image in your desired format.
4.2. Method 2: Using the Blur Tool
- Open the Image: Open the photo in Photoshop.
- Select the Blur Tool: Choose the “Blur Tool” from the toolbar.
- Adjust the Brush Settings: In the options bar, adjust the “Brush Size,” “Hardness,” and “Strength” to control the blurring effect.
- Blur the Cleavage Area: Carefully brush over the cleavage area to apply the blur effect.
- Refine the Blurring: If necessary, adjust the brush settings and repeat the process to achieve the desired level of blurring.
- Save the Image: Save the edited image.
4.3. Pros and Cons of Using Photoshop
| Pros | Cons |
|---|---|
| High level of control over blurring effects | Requires a paid subscription or one-time purchase |
| Advanced blurring techniques and options | Steeper learning curve for beginners |
| Professional-quality results | Can be time-consuming for complex blurring tasks |
| Ability to refine selections and blend blurring seamlessly | May require additional plugins or extensions for specialized blurring |
5. Blurring Cleavage Online with Fotor
For those who prefer not to install software, online photo editors like Fotor offer a convenient way to blur cleavage in photos. Fotor’s AI-powered tools make the process quick and easy.
5.1. Step-by-Step Guide to Blurring with Fotor
- Upload the Image: Go to Fotor’s free online AI photo editor and upload the photo you want to edit.
- Select the Blur Tool: Choose the “Blur” tool from the editing options.
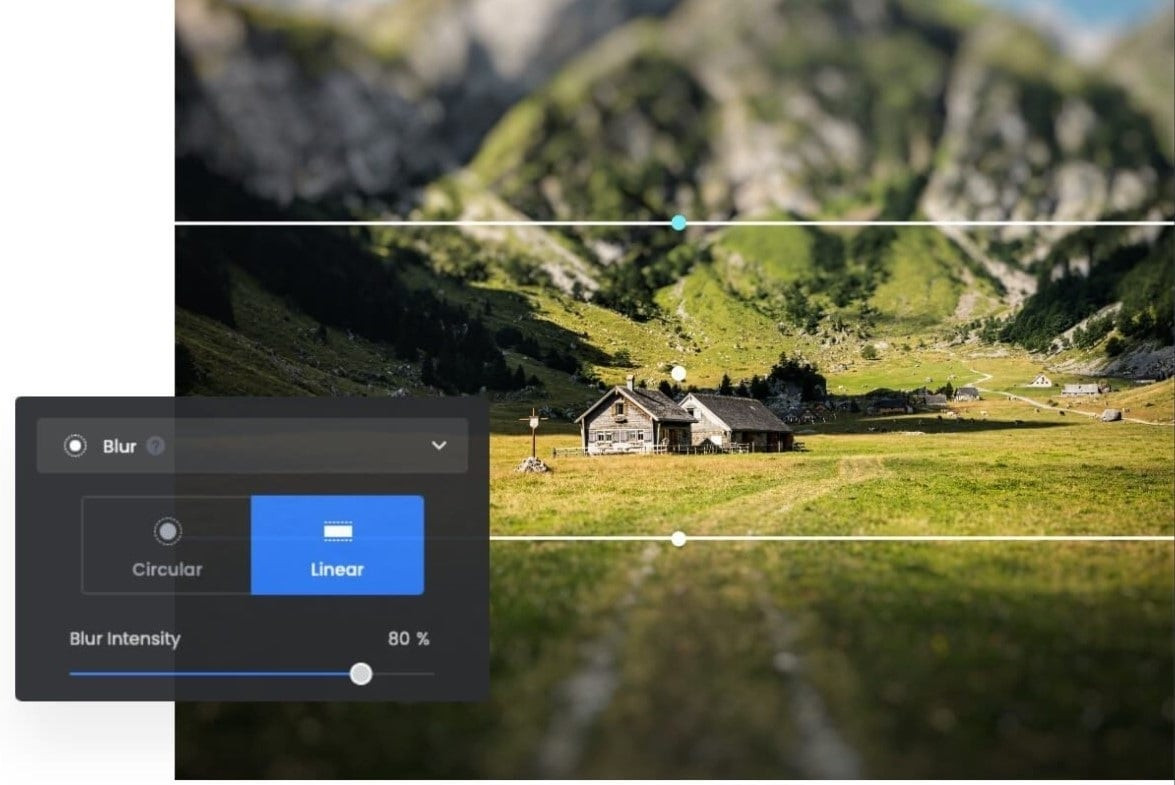 Using Fotor's online blur tool to selectively blur an area of an image, ensuring user-friendly photo editing on dfphoto.net
 - Choose a Blurring Method: Fotor offers various blurring options, including “Circular” blur, “Linear” blur, and “Background Blur.” Select the method that best suits your needs.
- Adjust the Blur Area: Position and resize the blur area to cover the cleavage.
- Adjust the Blur Intensity: Use the slider to control the amount of blur.
- Apply the Blur: Click the “Apply” button to apply the blur effect.
- Download the Image: Click the “Download” button to save the edited image in your desired format.
5.2. Additional Fotor Tools for Enhancing Privacy
- Remove Object: Use the “Remove Object” tool to completely remove the cleavage area from the photo.
- Vignette: Apply a vignette effect to draw attention away from the cleavage area.
- Add Stickers: Place stickers over the cleavage area to obscure it.
5.3. Pros and Cons of Using Fotor
| Pros | Cons |
|---|---|
| Convenient and accessible from any device with an internet connection | Limited control compared to professional photo editing software |
| User-friendly interface with AI-powered tools | May require a paid subscription for advanced features and no ads |
| Quick and easy blurring process | Results may not be as precise or refined as with Photoshop |
| Additional tools for enhancing privacy, such as object removal and stickers | Requires an internet connection to use |
6. Blurring Cleavage on Mobile Devices Using Apps
Mobile apps offer a convenient way to blur cleavage on the go. Here are two recommended apps for blurring parts of a picture on your iPhone or Android device:
6.1. Fotor App: Online Photo Editor for Everyone
The Fotor app offers the same blurring capabilities as the online editor, allowing you to blur cleavage quickly and easily on your mobile device.
- Download and Install the App: Download the Fotor app from the App Store or Google Play Store.
- Upload the Image: Open the app and upload the photo you want to edit.
- Select the Blur Tool: Choose the “Blur” tool from the editing options.
- Adjust the Blur Area: Position and resize the blur area to cover the cleavage.
- Adjust the Blur Intensity: Use the slider to control the amount of blur.
- Apply the Blur: Tap the “Apply” button to apply the blur effect.
- Save the Image: Save the edited image to your device.
6.2. Blur Photo Editor – Face Blur
This app is specifically designed for blurring faces and other sensitive areas in photos. It offers a range of blurring tools and options to achieve the desired effect.
- Download and Install the App: Download Blur Photo Editor from the App Store or Google Play Store.
- Upload the Image: Open the app and upload the photo you want to edit.
- Select the Blurring Tool: Choose the “Blur” tool from the editing options.
- Adjust the Brush Settings: Adjust the brush size and intensity to control the blurring effect.
- Blur the Cleavage Area: Carefully brush over the cleavage area to apply the blur effect.
- Save the Image: Save the edited image to your device.
6.3. Pros and Cons of Using Mobile Apps
| Pros | Cons |
|---|---|
| Convenient and portable, allowing you to blur photos on the go | Limited control compared to desktop software |
| User-friendly interfaces designed for mobile devices | May contain ads or require in-app purchases for advanced features |
| Quick and easy blurring process | Results may not be as precise or refined as with Photoshop or Fotor |
| Variety of blurring tools and options available in different apps | Battery drain and storage space usage on your mobile device |
7. Ethical Considerations When Blurring Cleavage
While blurring cleavage can be necessary for privacy and compliance, it’s essential to consider the ethical implications:
- Consent: Always obtain consent from the individual in the photo before blurring their cleavage.
- Context: Consider the context in which the photo will be shared. Blurring may be more appropriate in some situations than others.
- Transparency: Be transparent about the blurring process. Avoid altering photos in a way that could be misleading or deceptive.
- Respect: Treat individuals with respect and dignity, regardless of their clothing or appearance.
8. Advanced Tips for Seamless Blurring
- Use Feathering: Feathering the edges of the blurred area can help blend it seamlessly with the surrounding image.
- Match Skin Tone: When using solid shapes to cover cleavage, ensure that the color matches the surrounding skin tone as closely as possible.
- Adjust Opacity: Reduce the opacity of the blurred area to create a more subtle effect.
- Use Multiple Layers: In Photoshop, use multiple layers to create complex blurring effects and refine the results.
- Zoom In: Zoom in on the image to ensure precise blurring and avoid blurring unintended areas.
9. Real-World Examples
- Social Media: A blogger blurs cleavage in a photo to comply with Instagram’s content guidelines.
- Professional Headshot: A corporate employee blurs cleavage in a headshot to maintain a professional image.
- Artistic Photography: A photographer blurs cleavage in a photo to shift the focus to other elements of the composition.
10. FAQ: Common Questions About Blurring Cleavage in Photos
- Is it legal to blur cleavage in photos?
- Yes, it is legal to blur cleavage in photos, especially if you have consent from the individual in the photo.
- Can I blur cleavage in videos?
- Yes, you can blur cleavage in videos using video editing software.
- What is the best way to blur cleavage in photos?
- The best way to blur cleavage in photos depends on your needs and skill level. Photoshop offers the most control and professional-quality results, while online editors like Fotor and mobile apps provide a convenient and user-friendly option.
- How can I make the blurring look natural?
- Use feathering, match skin tone, adjust opacity, and use multiple layers to create a seamless and natural-looking blurring effect.
- What are the ethical considerations when blurring cleavage?
- Always obtain consent, consider the context, be transparent about the blurring process, and treat individuals with respect and dignity.
- Can I unblur a photo?
- It is generally difficult to completely unblur a photo, especially if the blurring is severe.
- Are there any AI tools that can automatically blur cleavage?
- Some AI-powered photo editors offer automatic blurring features, but it’s essential to review the results carefully to ensure accuracy and avoid unintended blurring.
- How do I blur cleavage in a group photo?
- Use the same blurring techniques as with individual photos, but carefully select and blur the cleavage area for each person in the photo.
- What is the difference between blurring and pixelation?
- Blurring softens the edges of an area, while pixelation reduces the resolution, creating a blocky effect.
- Can I use blurring to hide tattoos or other identifying marks?
- Yes, blurring can be used to hide tattoos or other identifying marks in photos.
Conclusion
Blurring cleavage in photos is a versatile technique that can be used for various purposes, from enhancing privacy to achieving artistic effects. Whether you choose to use PowerPoint, Photoshop, an online editor like Fotor, or a mobile app, the key is to understand the different blurring techniques and ethical considerations involved. By following the tips and guidelines in this comprehensive guide, you can blur cleavage in photos seamlessly and effectively.
Ready to explore more photo editing techniques and discover a world of visual inspiration? Visit dfphoto.net today for tutorials, stunning photo collections, and a vibrant community of photography enthusiasts. Elevate your photography skills and connect with fellow creatives – your journey to mastering the art of photography starts here!
Address: 1600 St Michael’s Dr, Santa Fe, NM 87505, United States. Phone: +1 (505) 471-6001. Website: dfphoto.net.