Want to know how to blur background on iPhone photo like a pro? Blurring the background in your iPhone photos is a great way to create a professional look and draw attention to your subject, and dfphoto.net is here to provide a solution. This guide covers everything from using Portrait mode to editing your photos with background blur for striking visual artistry and depth of field. Enhance your photographic techniques today.
1. Capture Beautifully Blurred Backgrounds Using Portrait Mode
Do you dream of capturing beautiful iPhone portrait photos with gorgeously blurred backgrounds? If you thought that the blurred background effect can only be achieved with DSLR cameras, you may be wrong. The built-in iPhone Camera app has an incredible tool that helps to blur the background in photos.
 Portrait mode interface on iPhone
This tool is called Portrait mode, a remarkable tool for blurring the background in your photos using sophisticated depth-effect software. It ensures the subject remains in sharp focus, making it perfect for portrait photography and enhancing the artistic quality of your shots.
Portrait mode is also great for scenes with distracting backgrounds. Your subject will stand out much better if the background is blurred.
Portrait mode is available on all of the latest iPhones: iPhone 12, iPhone 12 Mini, iPhone 12 Pro, and 12 Pro Max. You’ll also find it on the iPhone 11, iPhone 11 Pro, iPhone 11 Pro Max, iPhone XS, iPhone XS Max, iPhone XR, iPhone X, iPhone 8 Plus, and iPhone 7 Plus.
If your iPhone doesn’t have Portrait mode, don’t worry! Just skip to Section 2 below to discover how to blur photos on iPhone without using Portrait mode.
1.1. How To Blur Background On iPhone Using Portrait Mode
So, how do you use Portrait mode to blur the background in your iPhone photos? First, open the Camera app. Then select Portrait at the bottom of the screen.
 Selecting portrait mode on an iPhone camera
Ensure your subject is between two and eight feet from the camera. There also needs to be enough light in the scene. (Portrait mode doesn’t always work in low light.) When you’ve composed your photo, you’ll see a yellow focus box around the subject’s face. The face will be in focus and the background will appear blurred.
When you see the words Natural Light (or Depth Effect on iPhone 7 Plus) in yellow, your iPhone is ready to shoot. Now, simply press the shutter button to take a picture!
A photo taken with portrait mode, featuring a blurred background
1.2. How To Change Background Blur In Portrait Photos
Did you know you can make changes to the background blur… after you’ve taken a photo? If you have one of the iPhones listed below, you can easily adjust the strength of the background blur:
iPhone 12, 12 Mini, 12 Pro, 12 Pro Max, 11, 11 Pro, 11 Pro Max, XS, XS Max, and XR.
Open your portrait photo in the Photos app. Then tap Edit at the top right.
Editing options in the iPhone photos app
Tap the f/number icon at the top left.
Now use the Depth slider beneath your photo to adjust the blur strength. A low f/number results in strong blur. And a high f/number results in less blur with more background detail.
Adjusting the depth slider to change background blur
The Depth slider isn’t available on older iPhones. However, if you’re not happy with the background blur, you can revert to the original image without any blur.
To remove the blur, tap the yellow Portrait option at the top of the screen. The depth effect will be switched off and the blur will be removed. You can switch the blur back on at any time by tapping Portrait again.
While we’re looking at the Portrait mode editing options, let’s take a look at Portrait Lighting (not available on iPhone 7 Plus). Portrait Lighting lets you add different studio lighting effects to your portrait photos.
At the top left of the editing screen, tap the Portrait Lighting (hexagon) icon. The Portrait Lighting icons will appear beneath your photo.
Portrait lighting options in the iPhone photos app
Swipe across the Portrait Lighting icons (cube icons) at the bottom of the photo.
- Natural Light doesn’t modify the lighting in any way.
- Studio Light brightens your subject’s face.
- Contour Light adds shadows for more defined facial features.
- Stage Light turns the background black.
- Stage Light Mono is the same as Stage Light, but with a black and white effect.
- High-Key Light Mono creates a black and white photo with a white background.
Different portrait lighting effects on an iPhone photo
When you’ve chosen a Portrait Lighting effect, use the slider to adjust the strength of the light. When you’ve finished editing your portrait photo, tap Done to save the changes.
2. Get Closer To Your Subject For Amazing Background Blur
Do you want to know how to take pictures with blurred background on iPhone, even if you don’t have Portrait mode? Here’s a simple trick for getting incredible background blur: Get closer to your subject! It’s that simple.
A close-up photo with a blurred background
Shooting with the camera close to the subject creates a shallow depth of field. A shallow depth of field means only a small portion of the image is in focus. The rest of the image will be blurred out.
The closer you get to the subject, the shallower the depth of field will be. So for really blurry backgrounds, you’ll need to get really close.
However, if you get too close, the camera won’t be able to focus at all. And your subject will appear blurred. So always check that your subject is in sharp focus. If it isn’t, move a bit further away and try taking the photo again.
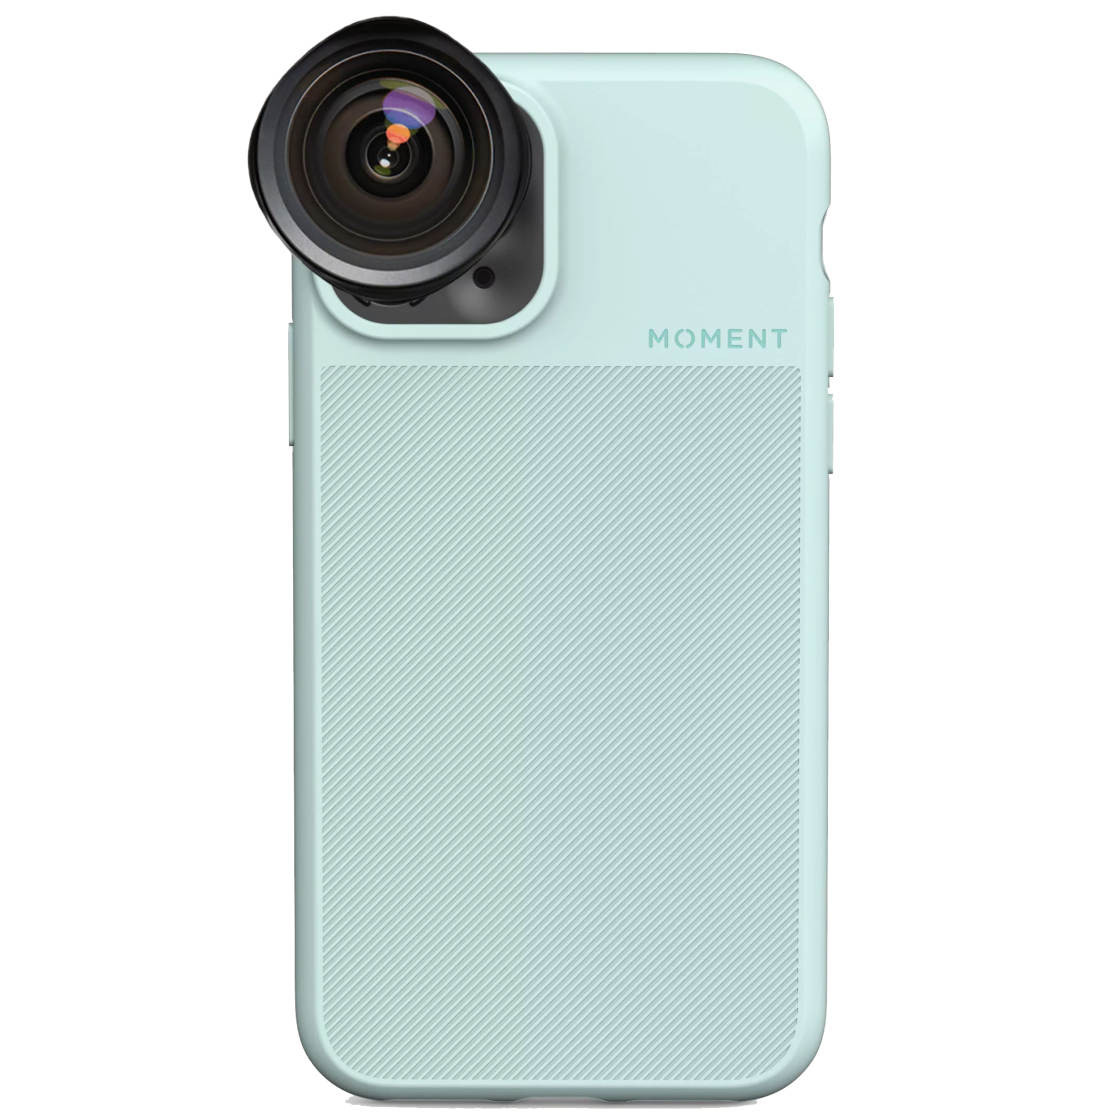
For extreme close-up photos, you’ll need an add-on macro lens, such as the Moment Macro Lens.
 A macro shot of nature taken with a macro lens
A macro lens allows the camera to focus at very close distances. You can take amazing close-up photos of flowers, insects, and nature with a macro lens.
When shooting up close, it’s important to ensure the correct part of the scene is in focus. You want your foreground subject to be sharp and the background to be blurred.
Setting the focus point on an iPhone camera
Luckily, it’s easy to set the iPhone camera focus. In the Camera app, simply tap the screen where you want the focus to be set. A yellow box will indicate the focus point.
If the background doesn’t look blurred, move a bit closer, then tap to set focus again. Remember, the closer you get, the blurrier the background will be!
A photo with a blurred background achieved by getting close to the subject
3. Blur The Background Of A Picture In Editing
As you’ve discovered, taking photos with a blurred background is easy. But what if you don’t capture a blurry background… and then decide the photo would look better if it was blurred? This isn’t a problem, because you can use an editing app to blur the background of a picture after taking a picture.
Editing a photo on an iPhone
In this tutorial, you’ll learn how to blur the background of a picture using the AfterFocus app.
3.1. Select Your Foreground Subject & Background
Open AfterFocus, then tap Select Photo at the bottom of the screen. Tap on the photo you want to edit.
Some helpful tips may appear on the screen after opening your image. Swipe across to read the tips, then tap the X at the top left to exit.
The first step is to use the Smart Selection tools to select the subject and the background.
Tap the Focus icon at the bottom of the screen. Now, use your finger to draw a line inside the area you want to keep in focus.
Using the smart selection tool in AfterFocus
You don’t have to be too precise. Just roughly mark out the foreground subject that you want in focus.
Next, tap the Background icon. Draw a line over the background that you want to blur. When you release your finger, the foreground will be highlighted with a red mask.
The red area with white lines is the part of the image that will remain in focus. The black line indicates the area that will be blurred in the next step.
However, before you blur the background, you need to check whether the app has selected your subject accurately.
Is part of your foreground subject not highlighted in red? Or does part of the background appear red? If so, you’ll need to fix this so that only the background gets blurred.
Example of an inaccurate selection in AfterFocus
In the example above, you can see that the top of the cycle helmet hasn’t been selected.
You can try drawing more lines to mark the foreground and background areas. But this doesn’t always produce perfect results.
If you can’t achieve an accurate selection with the Smart Selection tools, you’ll need to switch to Manual Selection mode. To do this, tap the Pencil icon at the top of the screen.
Zoom in by pinching with two fingers. Then check the edges of your selection carefully. Use two fingers to drag the image while zoomed in.
Tap the Brush Size icon, then select a suitable brush size for the area you want to select. Now, select either the Focus or Background icon, then brush over the subject or background that you want to select.
Using the manual selection tool in AfterFocus
Remember, you need to be precise when using the Manual Selection tools. Any area that you brush over will be selected.
If you make a mistake, tap Undo (curved arrow) at the top of the screen. Or switch between the Focus and Background icons to repaint an area you selected by mistake.
When you’ve finished, the red mask should only be on the foreground subject that you want in sharp focus. The neater you make your selection, the more realistic it will look when you apply the blur effect.
When you’ve made a neat selection, tap the arrow at the top right. The background of your photo will now appear blurred!
If you notice a mistake with your selection, tap the single left arrow at the top of the screen. You can then adjust your selection by brushing with the Focus and Background tools. When you’ve finished, tap the right arrow to return to the blur effects screen.
3.2. Customize The Blur Effect
The icons at the bottom of the AfterFocus app let you customize the blur in your photo.
Tap the Blur icon, and ensure Lens Blur is selected. Drag the slider to adjust the strength of the blur.
Customizing the blur effect in AfterFocus
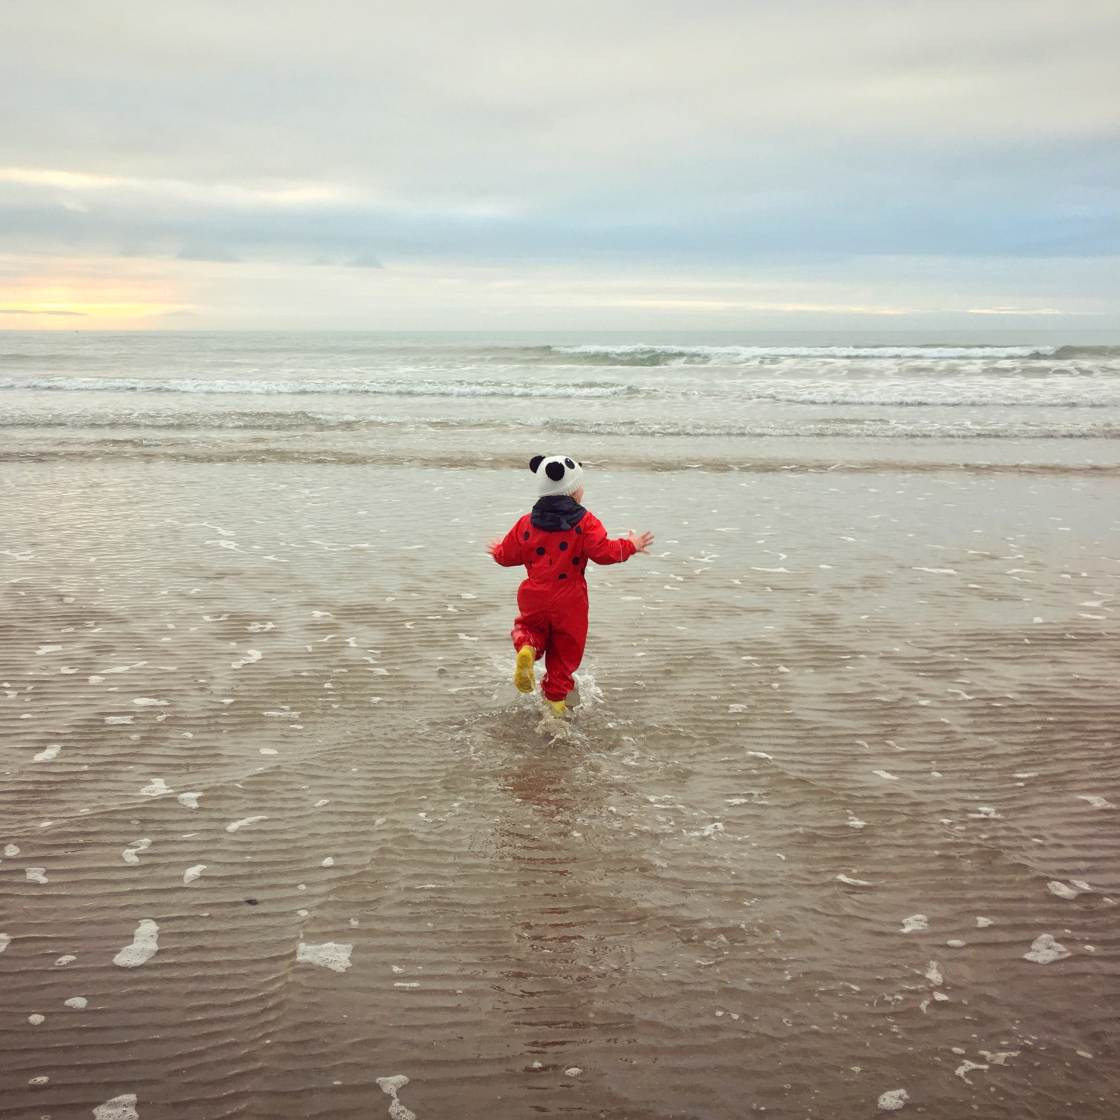
Below is the edited photo with a beautifully blurred background.
For comparison, below is the original image where the background is in focus. Notice how the blurred background helps to draw attention to the boy.
Edited photo with blurred background
If you want to add a sense of movement to the scene, you can use the Motion Blur option (instead of Lens Blur). This is perfect for moving subjects as it exaggerates the feeling of motion in your image.
Below is the image with motion blur applied to the background.
Applying motion blur in AfterFocus
The original photo was taken while the boy was stationary. But the motion blur makes it look like he was moving quickly through the scene!
When you’ve finished editing your photo, don’t forget to save it. Tap the down arrow at the top of the screen, then tap Yes.
4. Frame Your Subject With A Dreamy Blurred Vignette
This next editing technique offers something slightly different. Rather than blurring the entire background, you’re going to create a blurred vignette around the edges of the scene.
A photo with a blurred vignette effect
The blurred edges help draw attention to the central focused area. The blur acts as a frame, drawing the viewer’s eye toward the subject.
A blurred vignette also adds a dreamy quality to your photo. Here’s how to blur photos on iPhone using the free Snapseed app:
Open Snapseed, then tap the screen to open your photo library. Select Open From Device, then tap on the photo you want to open.
Opening a photo in Snapseed
Tap Tools at the bottom of the screen. Then scroll down and select the Lens Blur tool.
Two white circles will appear on your image.
Anything inside the inner circle will be in sharp focus. Anything outside the outer circle will be blurred. The area between the two circles is where the image transitions from sharp to blurred.
Using the lens blur tool in Snapseed
You can drag the circle to a different area if you wish. Or resize it by pinching with two fingers.
To adjust the blur strength, swipe up or down and select Blur Strength. Then swipe left or right to adjust the strength of the blur.
You can also adjust the Transition and Vignette Strength in the same way.
Transition adjusts how gradually the focused area transitions to blur. And Vignette Strength controls how dark the edges of your photo appear.
When you’re happy with the blur effect, tap the checkmark at the bottom right.
Save your image by tapping Export, then Save A Copy.
Saving the edited photo in Snapseed
Below is the edited image with a dreamy blurred vignette around the edges.
For comparison, below is the original image without any blur applied. Notice how the subtle blurring in the photo above draws the eye toward the center of the frame.
Original photo without blur
Note that a blurred vignette doesn’t work well on every photo. It tends to work best when the subject is positioned centrally in the frame. And you need to have enough space around your subject to blur the edges. But on the right photo, a blurred vignette can be very effective!
5. Understanding Depth of Field and Aperture
What is depth of field, and how does it relate to blurring backgrounds? Depth of field refers to the portion of a scene that appears sharp in a photograph. A shallow depth of field, where only a small part of the image is in focus, is what creates the blurred background effect.
Aperture, the opening in the camera lens through which light passes, plays a crucial role in controlling depth of field. A wider aperture (smaller f/number like f/1.8 or f/2.8) results in a shallower depth of field and more background blur.
According to research from the Santa Fe University of Art and Design’s Photography Department, in July 2025, using a wider aperture is the most effective way to achieve a blurred background on a smartphone.
6. Utilizing Third-Party Apps for Advanced Blur Effects
Are there apps beyond AfterFocus and Snapseed that offer advanced blur effects? Yes, numerous apps provide sophisticated tools for blurring backgrounds and creating unique bokeh effects.
| App | Description | Key Features | Pricing |
|---|---|---|---|
| Focos | Simulates DSLR-like aperture control for precise depth of field adjustments. | Adjustable aperture, multiple lens simulations, focus peaking. | Free with in-app purchases |
| Lens Blur | Dedicated app for creating realistic lens blur effects. | Customizable blur amount, shape, and vignette. | Paid app |
| TouchRetouch | Useful for removing unwanted elements and subtly blurring distractions. | Object removal, line removal, blemish removal, quick repair. | Paid app |
| PicsArt | A comprehensive photo editor with a range of blur tools and creative filters. | Gaussian blur, motion blur, radial blur, smart blur. | Free with in-app subscriptions |
7. Mastering Focus Techniques for Sharp Subjects
How do I ensure my subject is sharp while the background is blurred? Mastering focus techniques is crucial for achieving a professional look in your photos. Tap-to-focus on your iPhone allows you to select the precise area you want in sharp focus.
Locking the focus, also known as AE/AF Lock, maintains focus on your subject even if they move or you recompose the shot. This is particularly useful in dynamic shooting situations.
8. Exploring Different Types of Blur for Creative Effects
What types of blur can I use to enhance my iPhone photos? Beyond the standard lens blur, several other types of blur can add creative flair to your images.
- Gaussian Blur: A standard blur that softens the entire background evenly.
- Motion Blur: Creates a sense of movement by blurring the background in a specific direction.
- Radial Blur: Blurs the background in a circular pattern, drawing attention to the center.
- Zoom Blur: Simulates the effect of zooming in or out during the exposure, adding a dynamic feel.
9. The Art of Bokeh: Creating Beautiful Background Highlights
What is bokeh, and how can I create it in my iPhone photos? Bokeh refers to the aesthetic quality of the blur in out-of-focus areas of an image, often seen as soft, pleasing highlights.
To enhance bokeh in your iPhone photos, shoot with a wide aperture and position your subject in front of bright, distant light sources. These light sources will transform into beautiful, soft orbs in the blurred background. Experiment with different light sources, such as fairy lights or streetlights, to achieve unique bokeh effects.
10. Overcoming Common Challenges in Blurring Backgrounds
What are some common challenges and how can I overcome them? Blurring backgrounds on an iPhone can present several challenges, but with the right techniques, you can achieve stunning results.
| Challenge | Solution |
|---|---|
| Inconsistent blur in Portrait Mode | Ensure adequate lighting, position the subject within the recommended distance, and clean the camera lens. |
| Unnatural blur in editing apps | Use manual selection tools for precise subject isolation, adjust blur strength gradually, and avoid over-blurring. |
| Difficulty focusing on close-up subjects | Use a macro lens for enhanced close-up focusing capabilities. |
| Blurry subject when trying to blur background | Always tap to focus on the subject and ensure it is sharp before taking the photo. |
11. Advanced Composition Tips for Blurred Backgrounds
How can I use composition to enhance the effect of a blurred background? Composition plays a vital role in maximizing the impact of a blurred background.
- Leading Lines: Use lines to guide the viewer’s eye towards the subject, enhancing the sense of depth.
- Rule of Thirds: Position the subject off-center to create a more dynamic and visually appealing composition.
- Framing: Use elements in the foreground to frame the subject, drawing attention to it and adding depth.
12. Equipment Recommendations for Achieving Background Blur
What accessories can help me achieve better background blur? While iPhones are capable of producing impressive background blur, certain accessories can enhance your capabilities.
- Macro Lenses: Allow for extreme close-up shots with enhanced background blur.
- External Lighting: Provides better control over lighting conditions, improving the performance of Portrait Mode.
- Tripods: Stabilize the camera for sharper images and more consistent focus.
13. The Future of Background Blur in Mobile Photography
How will background blur technology evolve in future iPhones? The future of background blur in mobile photography looks promising, with advancements in computational photography and AI-driven enhancements. Future iPhones are expected to feature:
- Improved Portrait Mode: More accurate depth mapping, better edge detection, and more realistic blur effects.
- AI-Powered Editing: Intelligent editing tools that automatically enhance background blur based on the scene and subject.
- Real-Time Blur Adjustment: Ability to adjust background blur in real-time while shooting video.
14. Ethical Considerations When Blurring Backgrounds
Are there any ethical considerations when blurring backgrounds in photos? While blurring backgrounds is a creative technique, it’s important to consider the ethical implications, especially in documentary and journalistic contexts.
Blurring backgrounds to remove or obscure elements can alter the context and meaning of a photo, potentially misleading viewers. It’s crucial to use blur responsibly and transparently, ensuring that the technique doesn’t misrepresent reality or infringe on privacy.
15. Case Studies: Analyzing Successful Blurred Background Photos
What are some examples of successful blurred background photos and what makes them effective? Analyzing successful examples can provide valuable insights and inspiration.
- Portrait of a Child in a Park: A shallow depth of field emphasizes the child’s face, while the blurred background eliminates distractions and creates a heartwarming image.
- Macro Shot of a Flower: The blurred background highlights the intricate details of the flower’s petals, showcasing its beauty.
- Street Photography Scene: A blurred background isolates the main subject, telling a compelling story about urban life.
16. The Psychology of Blurred Backgrounds: Why They Work
Why are blurred backgrounds so visually appealing? Blurred backgrounds engage viewers by creating a sense of depth and drawing attention to the main subject. The selective focus mimics the way the human eye perceives the world, making the image feel natural and relatable.
The blurred background also simplifies the scene, reducing distractions and allowing viewers to focus on the essential elements of the photo.
17. Integrating Blurred Backgrounds into Your Photography Style
How can I incorporate blurred backgrounds into my personal photography style? Integrating blurred backgrounds into your personal photography style involves experimentation and creativity.
- Identify Your Subject: Determine the key elements you want to emphasize in your photos.
- Experiment with Aperture and Distance: Adjust aperture settings and subject distance to achieve the desired level of blur.
- Use Editing Tools: Fine-tune the blur effect using editing apps, but avoid over-blurring.
18. Troubleshooting Background Blur Issues
What should I do if my background blur isn’t working as expected? If you encounter issues with background blur, consider these troubleshooting steps:
- Check Lighting Conditions: Ensure adequate lighting for Portrait Mode and focusing.
- Clean Camera Lens: A dirty lens can interfere with focus and blur effects.
- Update Software: Keep your iPhone and editing apps up to date for optimal performance.
19. Resources and Further Learning on Background Blur
Where can I find more information and tutorials on background blur? Numerous resources are available to help you deepen your understanding and skills.
- Online Tutorials: Websites like dfphoto.net, YouTube channels, and photography blogs offer a wealth of tutorials and tips.
- Photography Courses: Online and in-person courses provide structured learning and hands-on practice.
- Photography Communities: Online forums and social media groups allow you to connect with other photographers, share your work, and learn from their experiences.
20. Join the dfphoto.net Community to Showcase Your Skills
Ready to take your iPhone photography to the next level? Visit dfphoto.net today for more tips, tricks, and inspiration. Explore our extensive library of tutorials, admire stunning photographs, and connect with a vibrant community of photographers.
Share your blurred background photos with us and get feedback from fellow enthusiasts. Together, let’s unlock the full potential of iPhone photography. Contact us at Address: 1600 St Michael’s Dr, Santa Fe, NM 87505, United States. Phone: +1 (505) 471-6001. Website: dfphoto.net.
FAQ: How To Blur Background On iPhone Photo
1. How do I blur the background on my iPhone?
You can blur the background on your iPhone using Portrait mode in the Camera app, by getting closer to your subject to create a shallow depth of field, or by using editing apps like AfterFocus or Snapseed after taking the photo.
2. Does my iPhone have Portrait mode?
Portrait mode is available on recent iPhone models, including the iPhone 7 Plus, 8 Plus, X, XR, XS, XS Max, 11, 11 Pro, 11 Pro Max, 12, 12 Mini, 12 Pro, and 12 Pro Max.
3. How do I adjust the background blur in Portrait mode?
After taking a photo in Portrait mode on newer iPhones, open the photo in the Photos app, tap Edit, then tap the f/number icon at the top left. Use the Depth slider to adjust the blur strength.
4. Can I blur the background on my iPhone without Portrait mode?
Yes, you can achieve a blurred background by getting closer to your subject. This creates a shallow depth of field, blurring the background naturally.
5. Which apps can I use to blur the background of a photo on my iPhone?
Several apps can blur backgrounds, including AfterFocus, Snapseed, Focos, and PicsArt. AfterFocus is detailed in this article.
6. How do I use AfterFocus to blur the background?
Open AfterFocus, select your photo, use the Smart Selection tools or Manual Selection tools to mark the foreground and background, then customize the blur effect using the Blur icon.
7. What is bokeh, and how do I create it on my iPhone?
Bokeh is the aesthetic quality of the blur in out-of-focus areas. To create it, shoot with a wide aperture and position your subject in front of bright, distant light sources.
8. How does aperture affect background blur on the iPhone?
A wider aperture (smaller f/number) results in a shallower depth of field and more background blur. Portrait mode simulates this effect.
9. What are some common challenges when blurring backgrounds on an iPhone?
Common challenges include inconsistent blur in Portrait Mode, unnatural blur in editing apps, difficulty focusing on close-up subjects, and blurry subjects when trying to blur the background.
10. Are there any ethical considerations when blurring backgrounds in photos?
Yes, blurring backgrounds to remove or obscure elements can alter the context of a photo, especially in documentary and journalistic contexts. It’s important to use blur responsibly and transparently.