Creating photos with beautifully blurred backgrounds, also known as bokeh, can elevate your iPhone photography from snapshots to stunning, professional-looking images. While achieving this effect might seem complex, especially if you’re used to point-and-shoot photography, it’s surprisingly easy to master on your iPhone. This guide will walk you through several effective techniques to blur the background in your iPhone photos, ensuring your subjects truly pop. Whether you’re using the latest iPhone with advanced features or an older model, you’ll discover simple yet powerful methods to achieve that sought-after background blur.
1. Mastering Portrait Mode for Instant Background Blur
One of the most straightforward and effective ways to blur the background on your iPhone is by utilizing Portrait mode. This built-in feature in your iPhone’s camera app is specifically designed to create a depth-of-field effect, mimicking the look achieved with professional DSLR cameras. Portrait mode leverages sophisticated software to intelligently blur the background while keeping your subject sharp and in focus. This is particularly useful for portrait photography, but it also works wonders for highlighting any subject against a distracting background.
Portrait mode is a game-changer for iPhone photographers, allowing you to capture professional-quality images directly from your smartphone. It’s readily available on a wide range of iPhone models, including the iPhone 7 Plus, 8 Plus, X, XR, XS, XS Max, 11, 11 Pro, 11 Pro Max, and all iPhone 12 and 13 models. If you own one of these iPhones, you have this powerful tool at your fingertips.
1.1 Step-by-Step Guide to Using Portrait Mode
Ready to start using Portrait mode? Here’s a simple guide:
- Open the Camera App: Launch the native Camera app on your iPhone.
- Select Portrait Mode: Swipe across the camera modes at the bottom of your screen until you reach Portrait.
- Position Your Subject: Ensure your subject is positioned between approximately 2 to 8 feet away from your iPhone. Also, make sure there’s adequate lighting, as Portrait mode performs best in good light conditions.
- Compose Your Shot: Frame your subject as desired. You’ll notice the background starting to blur in real-time. The iPhone will automatically detect faces and highlight them with a yellow focus box.
- Capture the Photo: When you see “Natural Light” or “Depth Effect” (depending on your iPhone model) appear in yellow on the screen, it indicates that Portrait mode is active and ready. Simply tap the shutter button to take your photo.
After capturing your photo in Portrait mode, you’ll have an image with a beautifully blurred background, making your subject stand out prominently.
1.2 Adjusting Background Blur Intensity After Shooting
The best part about Portrait mode on newer iPhones (iPhone XR, XS, XS Max, 11, 11 Pro, 11 Pro Max, and all iPhone 12 and 13 models) is the ability to adjust the background blur after you’ve taken the photo. This provides incredible flexibility and control over the final look of your image.
Here’s how to adjust the blur intensity:
- Open Photos App: Navigate to the Photos app and select the portrait photo you want to edit.
- Tap Edit: Press Edit located at the top right corner of the screen.
- Find the Depth Control: Look for the f/number icon at the top left of the editing interface. Tap on it.
- Adjust the Blur: Use the Depth slider that appears beneath your photo. Dragging the slider to the left (lower f/number) increases the background blur, while dragging it to the right (higher f/number) reduces the blur, bringing more of the background into focus.
Experiment with the Depth slider to achieve your desired level of background blur. A lower f-number creates a more pronounced blur, ideal for isolating your subject, while a higher f-number offers a subtler blur with more background context.
 Using depth slider to control background blur in Portrait photos
For older iPhones without the Depth slider, you can still remove the Portrait mode effect if you’re not satisfied with the initial blur. Simply tap the yellow Portrait option at the top of the editing screen to revert to the original photo without any background blur.
1.3 Exploring Portrait Lighting Effects
Beyond background blur, Portrait mode also offers creative Portrait Lighting effects (excluding iPhone 7 Plus). These effects simulate studio lighting conditions, adding another layer of artistic control to your portrait photos.
To access Portrait Lighting:
- Enter Edit Mode: Open your portrait photo in the Photos app and tap Edit.
- Locate Portrait Lighting Icon: Tap the hexagon icon (Portrait Lighting) at the top left.
- Choose Lighting Effect: Swipe through the cube icons displayed below your photo to preview different lighting effects:
- Natural Light: Preserves the original lighting of your photo.
- Studio Light: Brightens the subject’s face evenly.
- Contour Light: Adds dramatic shadows to define facial features.
- Stage Light: Makes the background completely black, isolating the subject.
- Stage Light Mono: Same as Stage Light, but in black and white.
- High-Key Light Mono: Creates a black and white image with a bright white background.
Exploring Portrait Lighting effects in iPhone Photos app
Select the Portrait Lighting effect that best complements your photo and subject. Use the slider to adjust the intensity of the lighting effect.
Applying different Portrait Lighting options for creative portraits
Once you’re satisfied with your adjustments to both background blur and lighting, tap Done to save your edited portrait photo.
2. Getting Closer to Your Subject: The Natural Blur Technique
What if your iPhone doesn’t have Portrait mode, or you want to achieve background blur in other camera modes? A fundamental photography technique that works across all iPhones is simply getting physically closer to your subject. This method leverages the physics of optics to create a naturally shallow depth of field, resulting in a beautifully blurred background.
Getting closer to subject for natural background blur
When you move closer to your subject, the lens focuses on a shorter distance, causing elements further away from the focal point to appear increasingly blurred. This is depth of field in action, and it’s a technique photographers have used long before smartphones. The closer you are, the shallower the depth of field and the more blurred your background will become.
However, there’s a limit to how close you can get. If you’re too close, your iPhone camera might struggle to focus, and your subject itself could become blurry. Always ensure your subject is sharp. If focus is an issue, slightly increase the distance until your subject comes into focus, and then recompose your shot.
For extreme close-up photography, consider using an add-on macro lens, like the Moment Macro Lens. These lenses allow your iPhone to focus at incredibly short distances, opening up a world of possibilities for capturing macro details with stunning background blur.
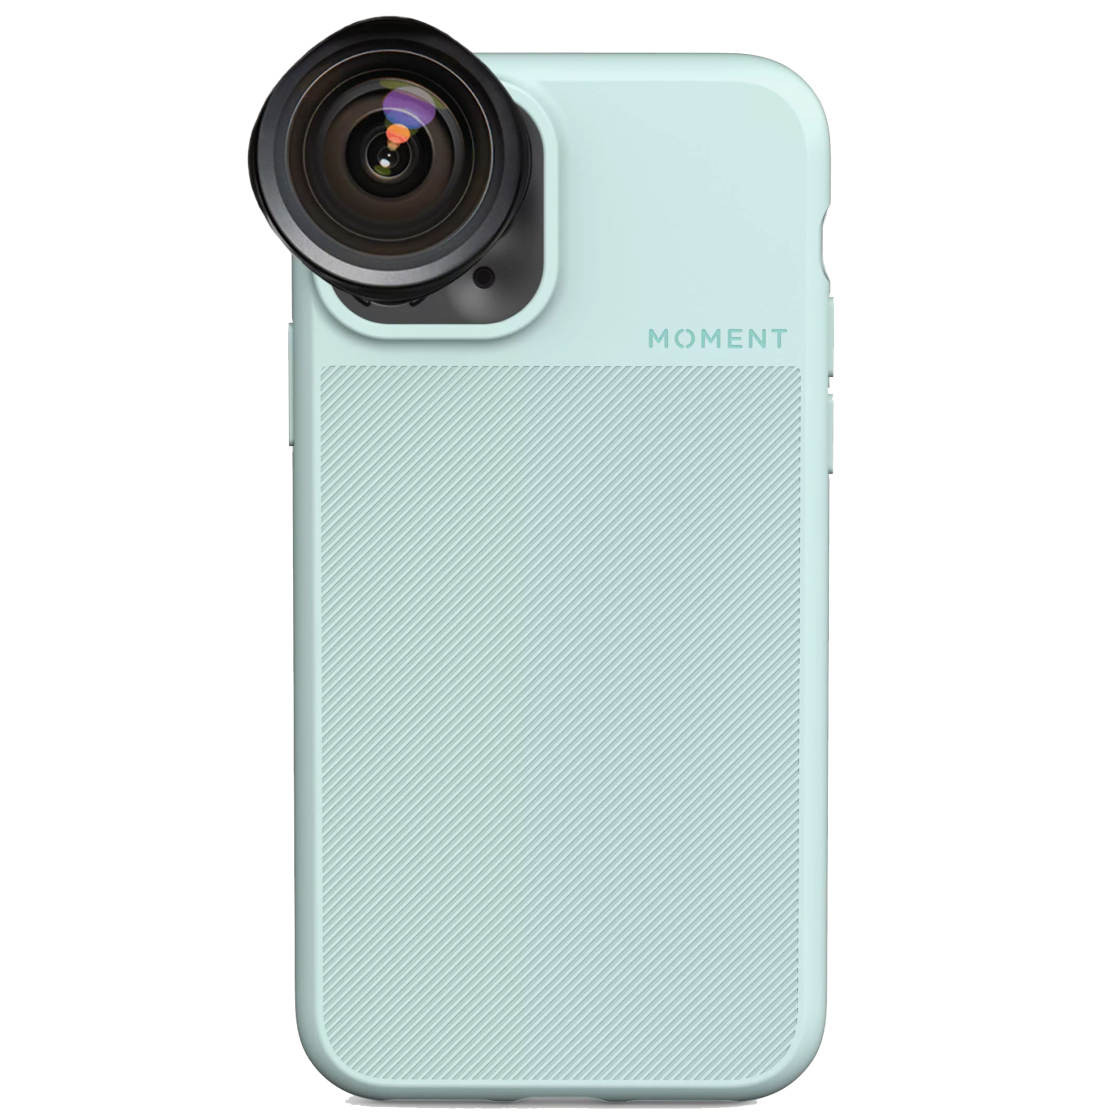 Macro lens for extreme close-up photography with blurred background
Macro lenses are fantastic for capturing the intricate details of flowers, insects, and textures in nature, all while maintaining a beautifully blurred background that emphasizes the minute details.
When shooting up close, precise focus is critical. To control focus, simply tap on your iPhone screen in the Camera app where you want the point of focus to be. A yellow box will appear, indicating your chosen focus point. Make sure to tap on your subject to ensure it’s sharp while the background melts away into a soft blur.
Tapping to focus on subject for sharp foreground and blurred background
Experiment by moving slightly closer or further away from your subject and tapping to refocus. Observe how the background blur changes with these adjustments. Remember, proximity is your key to achieving a naturally blurred background without relying on Portrait mode.
Adjusting distance to control the amount of background blur
3. Post-Capture Background Blur with Editing Apps
Sometimes, you might take a photo without intentionally blurring the background, or you might want to enhance the blur effect after the fact. Fortunately, numerous photo editing apps allow you to blur backgrounds in your photos after they’ve been taken. This gives you a second chance to achieve the desired background blur effect and provides more control over the final image.
 Editing app to blur background after taking photo
In this section, we’ll focus on using the AfterFocus app to demonstrate how to blur backgrounds in post-processing. AfterFocus is a dedicated app designed specifically for creating depth-of-field effects in photos, making it a powerful tool for achieving realistic background blur.
3.1 Selecting Foreground and Background in AfterFocus
To begin blurring the background using AfterFocus:
- Open AfterFocus: Launch the AfterFocus app on your iPhone.
- Select Photo: Tap Select Photo at the bottom of the screen and choose the image you want to edit from your photo library.
- Smart Selection: Tap the Focus icon. Use your finger to draw lines roughly inside the area you want to keep in focus (your subject). Don’t worry about being perfectly precise at this stage.
- Mark Background: Tap the Background icon and draw lines over the areas you want to blur.
Using Smart Selection tools in AfterFocus app
After marking the foreground and background, AfterFocus will use its “Smart Selection” to highlight the foreground subject with a red mask. The area outside the red mask is where the blur effect will be applied.
It’s crucial to carefully review the selection. If parts of your subject aren’t masked in red, or if background areas are incorrectly masked, you’ll need to refine the selection for accurate blurring.
Reviewing and refining selection in AfterFocus app
If the Smart Selection isn’t perfect, switch to Manual Selection mode by tapping the Pencil icon. Zoom in for detailed work and use the Brush Size tool to choose an appropriate brush size. Select either the Focus or Background icon and carefully brush over areas that need correction. The goal is to ensure only your subject is accurately masked in red.
Using Manual Selection tools for precise foreground selection
Take your time to create a clean and accurate selection. The more precise your selection, the more realistic and professional the background blur will look. Once you’re satisfied with the selection, tap the arrow at the top right to proceed to the blur effects screen.
3.2 Customizing the Blur Effect in AfterFocus
AfterFocus offers several blur customization options:
- Access Blur Options: Tap the Blur icon at the bottom. Ensure Lens Blur is selected for a natural-looking bokeh effect.
- Adjust Blur Strength: Use the slider to control the intensity of the background blur. Dragging the slider to the right increases the blur, and to the left decreases it.
Customizing Lens Blur effect in AfterFocus app
Below is an example of a photo with a blurred background created using AfterFocus. Notice how the blur emphasizes the subject and eliminates distractions.
Example of photo with background blur applied using AfterFocus
AfterFocus also offers Motion Blur. This effect simulates movement by blurring the background in a directional manner. This can be particularly effective for conveying a sense of speed or action in your photos.
Applying Motion Blur effect in AfterFocus for dynamic look
Experiment with both Lens Blur and Motion Blur to find the effect that best suits your image. Once you’re happy with the background blur, tap the down arrow icon to save your edited photo.
4. Creating a Dreamy Blurred Vignette with Snapseed
For a slightly different approach to background blur, consider creating a blurred vignette. Instead of blurring the entire background, this technique blurs the edges of your photo, drawing attention to the central subject and adding a dreamy, artistic touch. A blurred vignette acts as a visual frame, subtly guiding the viewer’s eye.
Blurred vignette effect to frame subject and create dreamy look
The free Snapseed app, developed by Google, is an excellent tool for creating blurred vignettes. Here’s how:
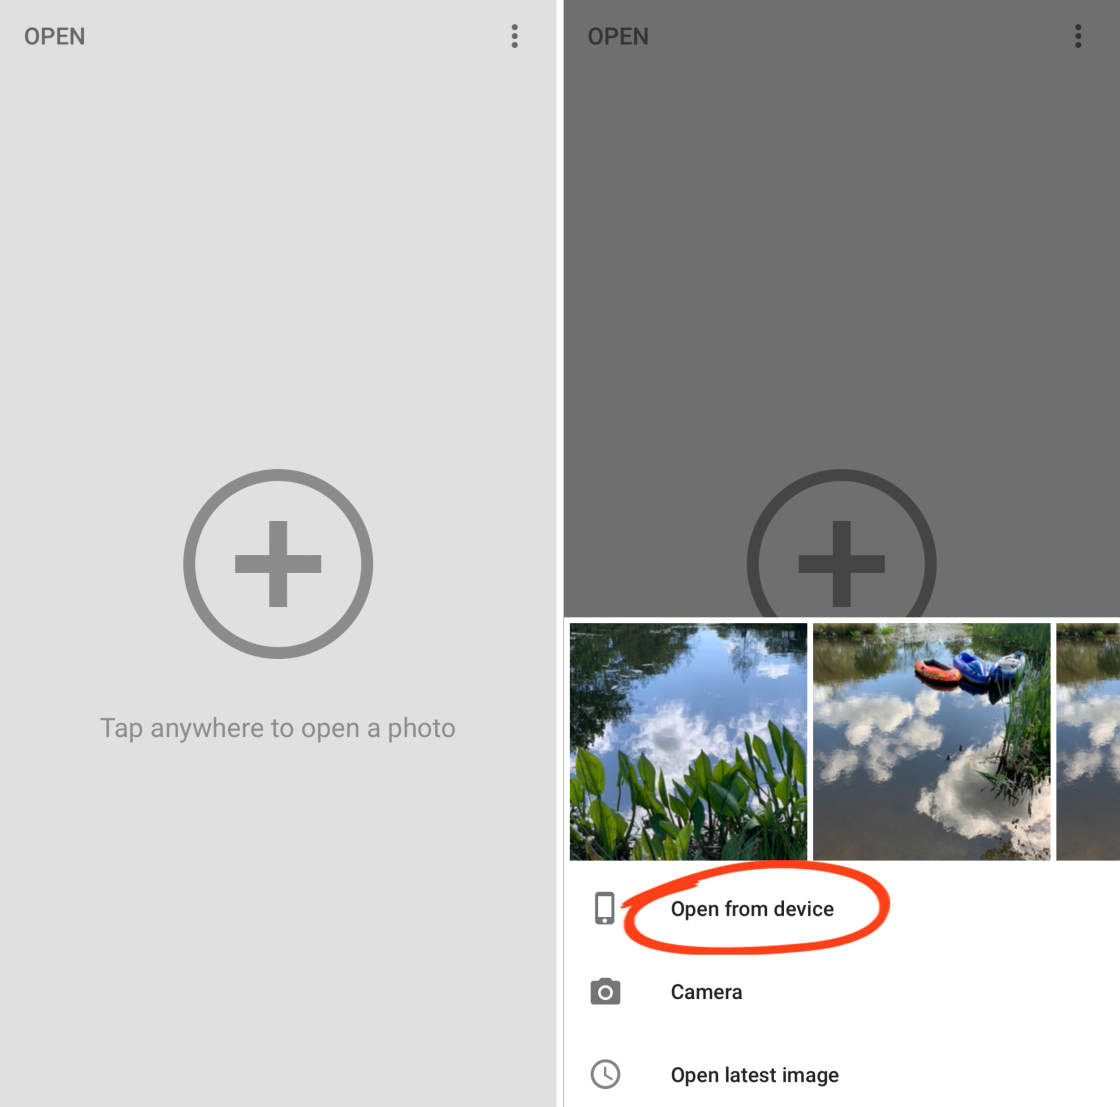
- Open Snapseed: Launch the Snapseed app. Tap anywhere on the screen and select Open From Device to choose the photo you want to edit.
- Access Lens Blur Tool: Tap Tools at the bottom, then scroll down and select Lens Blur.
- Adjust Blur Area: Two white circles will appear on your image. The area inside the inner circle remains in focus, the area outside the outer circle is blurred, and the space between them is the transition zone. Drag the circles to reposition the focused area or pinch to resize them.
Using Lens Blur tool in Snapseed to create vignette effect
- Customize Blur Settings: Swipe vertically on the image to access blur settings:
- Blur Strength: Adjust the intensity of the blur.
- Transition: Control the gradualness of the blur transition.
- Vignette Strength: Adjust the darkness of the blurred edges.
Adjusting blur strength and transition in Snapseed
Experiment with these settings to achieve the desired vignette effect. A subtle blur and transition usually work best for a natural, dreamy look. Once satisfied, tap the checkmark icon to apply the effect.
- Save Your Photo: Tap Export and then Save a copy to save your vignette-blurred image.
Below is an example of a photo with a blurred vignette created in Snapseed. Notice how it subtly frames the subject and adds a soft, ethereal feel.
Example of photo with blurred vignette effect created in Snapseed
Compared to the original photo without a vignette, the blurred edges draw more focus to the center of the frame, creating a more visually engaging image.
Original photo without blurred vignette for comparison
Keep in mind that blurred vignettes work best when your subject is centrally positioned and there’s enough space around them to create the blurred edges. When used appropriately, a blurred vignette can be a powerful tool for enhancing your iPhone photos and adding a touch of artistic flair.