Blending photos together is an art that can transform ordinary images into stunning visual narratives. At dfphoto.net, we’re dedicated to helping you master this technique, enhancing your photography skills and artistic expression. Discover how to blend photos, create surreal compositions, and achieve seamless transitions that captivate your audience. Explore various blending modes, masking techniques, and software tips to elevate your images.
1. What Are The Essential Software Tools For Blending Photos Together?
The essential software tools for blending photos together are Adobe Photoshop, Affinity Photo, and GIMP (GNU Image Manipulation Program). These programs offer a range of features, including layering, masking, and blending modes, which are crucial for achieving seamless and creative photo blends.
- Adobe Photoshop: This industry-standard software provides comprehensive tools for photo manipulation, including advanced blending modes, layer masks, and adjustment layers. Its versatility makes it ideal for both beginners and professionals.
- Affinity Photo: As a more budget-friendly alternative to Photoshop, Affinity Photo offers similar capabilities with a user-friendly interface and powerful blending options.
- GIMP (GNU Image Manipulation Program): This free, open-source software provides a robust set of tools for photo editing, including layers, masks, and blending modes, making it a great option for those on a budget.
These tools enable photographers and digital artists to seamlessly merge multiple images, create surreal compositions, and enhance their visual storytelling.
2. What Are Blending Modes And How Do They Work?
Blending modes are settings in photo editing software that determine how layers interact with each other. They control how the colors and tones of one layer blend with those of the layers beneath it, creating various effects from subtle adjustments to dramatic transformations.
- Normal: This mode is the default and simply overlays the selected layer on top of the layer below, obscuring it completely where the top layer is opaque.
- Dissolve: This mode randomly replaces pixels on the bottom layer with pixels from the top layer based on the opacity of the top layer. It’s often used to create a textured or grainy effect.
- Multiply: This mode multiplies the color values of the two layers, resulting in a darker image. It’s useful for creating shadows or darkening specific areas.
- Screen: This mode inverts the color values of both layers, multiplies them, and then inverts the result. It lightens the image and is often used for creating highlights or adding a glowing effect.
- Overlay: This mode combines Multiply and Screen modes. It darkens the darker areas and lightens the lighter areas, increasing contrast and vibrancy.
- Difference: This mode subtracts the color values of one layer from the other, resulting in unique and sometimes unpredictable color effects.
- Hue, Saturation, Color, Luminosity: These modes affect specific aspects of the image. Hue changes the color, Saturation adjusts the intensity of the colors, Color applies the color of one layer to the luminosity of another, and Luminosity affects only the brightness values.
Understanding and experimenting with these blending modes can significantly expand your creative options and help you achieve the desired look for your blended photos.
3. How Can I Use Layer Masks To Blend Photos?
Layer masks allow you to selectively reveal or hide portions of a layer, enabling precise control over how different images blend together. They are essential for creating seamless transitions and complex compositions.
- Add a Layer Mask: In Photoshop, select the layer you want to mask and click the “Add Layer Mask” icon at the bottom of the Layers panel. A white rectangle will appear next to your layer, representing the mask.
- Paint with Black and White: Use the Brush tool with black as your foreground color to hide portions of the layer. Painting with white reveals the layer. Grayscale values create varying degrees of transparency.
- Create Gradual Transitions: Use a soft-edged brush with low opacity to create smooth transitions between images. This technique is useful for blending skies, merging landscapes, or creating dreamy effects.
- Use Gradients: The Gradient tool can create linear or radial transitions. For example, a black-to-white gradient on a mask can smoothly fade one image into another.
- Refine Your Mask: Use the Refine Edge feature in Photoshop to improve the edges of your mask, especially when working with complex shapes like hair or foliage.
- Link or Unlink the Mask: By default, the mask is linked to the layer, so moving the layer also moves the mask. You can unlink them to move the mask independently, allowing you to fine-tune the blending effect.
Mastering layer masks is crucial for achieving professional-looking photo blends. They provide the flexibility and precision needed to create stunning visual effects.
4. What Are Some Creative Photo Blending Ideas?
Creative photo blending opens up a world of possibilities for unique and imaginative imagery. Here are several ideas to spark your inspiration:
- Double Exposure: Combine a portrait with a landscape, texture, or abstract pattern to create a surreal and artistic effect.
- Sky Replacement: Replace a dull or uninteresting sky with a more dramatic one to enhance the mood and impact of your landscape photos.
- Surreal Landscapes: Blend elements from different locations to create fantastical landscapes that defy reality.
- Time Blends: Combine multiple shots of the same scene taken at different times to show the passage of time or create a dynamic composition.
- Architectural Blends: Merge different architectural elements to create unique and imaginative structures.
- Texture Overlays: Add texture to your photos by blending them with images of surfaces like concrete, wood, or fabric.
- Abstract Art: Experiment with blending modes and colors to create abstract compositions that evoke emotion and intrigue.
- Portrait Enhancements: Soften skin, add light, or change eye color by blending layers with different adjustments.
- Dreamy Effects: Use soft brushes and blending modes to create ethereal and dreamlike images.
Experimenting with these ideas can lead to stunning and original works of art. The key is to think creatively and explore the possibilities that photo blending offers.
5. How Do I Ensure Realistic Lighting In Blended Photos?
Ensuring realistic lighting is crucial for creating believable and visually appealing blended photos. Inconsistent lighting can make your composite images look unnatural and disjointed.
- Analyze Light Sources: Before blending, carefully examine the light sources in each photo. Note the direction, intensity, and color temperature of the light.
- Match Light Direction: Align the primary light source in each image to create a sense of consistency. Use the Warp tool or Perspective Crop to adjust the alignment if necessary.
- Adjust Brightness and Contrast: Use adjustment layers like Levels or Curves to match the overall brightness and contrast of each image.
- Color Correction: Use adjustment layers like Color Balance or Photo Filter to match the color temperature and overall color cast of each image.
- Dodge and Burn: Use the Dodge and Burn tools to selectively lighten or darken areas, enhancing the lighting effects and creating depth.
- Add Shadows: Create shadows where necessary to ground objects in the scene and make them appear more realistic. Use a soft brush with low opacity and set the blending mode to Multiply.
- Use Global Adjustments: Apply global adjustments to the entire image to fine-tune the overall lighting and color.
- Consider Ambient Light: Pay attention to ambient light and how it affects the scene. Add subtle glows or shadows to mimic the effects of ambient light.
By carefully considering and matching the lighting in your blended photos, you can create seamless and believable compositions that captivate your audience.
6. What Role Does Color Correction Play In Photo Blending?
Color correction is essential in photo blending as it ensures that the colors in each image harmonize, creating a unified and believable final result. Without proper color correction, blended images can look disjointed and unnatural.
- White Balance: Adjust the white balance of each image to ensure accurate color representation. Use the White Balance tool or Camera Raw filter to correct any color casts.
- Color Balance: Use the Color Balance adjustment layer to fine-tune the overall color tones. Adjust the sliders for shadows, midtones, and highlights to achieve a consistent look.
- Hue/Saturation: Adjust the hue, saturation, and lightness of individual colors to match the overall color scheme. This is particularly useful for making specific elements stand out or blend in.
- Selective Color: Use the Selective Color adjustment layer to make precise color adjustments to specific color ranges.
- Match Color: In Photoshop, the Match Color feature can automatically adjust the colors of one image to match those of another.
- Color Grading: Use color grading techniques to create a specific mood or style. This involves making subtle adjustments to the colors to achieve a desired aesthetic.
By paying close attention to color correction, you can ensure that your blended photos look professional and visually appealing.
7. How Can I Blend Photos To Create A Panorama?
Blending photos to create a panorama involves seamlessly stitching together multiple images to create a wider field of view. This technique is ideal for capturing expansive landscapes or architectural scenes.
- Shoot Overlapping Images: When shooting for a panorama, ensure that each image overlaps the previous one by about 20-30%. This overlap is crucial for the software to accurately align and blend the images.
- Use a Tripod: A tripod helps maintain a consistent perspective and reduces the risk of misalignment.
- Set Manual Exposure: Use manual mode to set the exposure and white balance to ensure consistency across all images.
- Stitch the Images: Use photo editing software like Adobe Photoshop, Lightroom, or dedicated panorama software like PTGui to stitch the images together.
- Correct Perspective and Distortion: Use the software’s tools to correct any perspective or distortion issues.
- Blend the Images: The software will automatically blend the images together, but you may need to manually adjust the blending to ensure seamless transitions.
- Crop and Finalize: Crop the final panorama to remove any uneven edges and make any final adjustments to the colors and tones.
By following these steps, you can create stunning panoramic images that capture the full scope of a scene.
8. What Is The Best Way To Blend Portraits With Backgrounds?
Blending portraits with backgrounds requires careful attention to detail to ensure a natural and seamless result. The goal is to create an image where the subject looks like they belong in the new environment.
- Select the Subject: Use selection tools like the Quick Selection tool, Magic Wand, or Pen tool to accurately select the subject in the portrait.
- Refine the Selection: Use the Refine Edge feature to improve the edges of the selection, especially around hair or other complex details.
- Create a Layer Mask: Create a layer mask from the selection to isolate the subject from the original background.
- Place the Subject: Place the subject onto the new background layer.
- Adjust Lighting and Color: Use adjustment layers to match the lighting and color of the subject to the background. Pay attention to the direction and intensity of the light, as well as the overall color temperature.
- Add Shadows: Add shadows beneath the subject to ground them in the new environment. Use a soft brush with low opacity and set the blending mode to Multiply.
- Blend Edges: Use a soft brush on the layer mask to blend the edges of the subject with the background.
- Final Adjustments: Make any final adjustments to the colors, tones, and overall composition to ensure a seamless and natural-looking result.
By following these steps, you can create stunning portraits with backgrounds that enhance the subject and tell a compelling story.
9. How Do You Use Gradients For Seamless Photo Merging?
Gradients are powerful tools for creating smooth and seamless transitions between photos. They can be used in layer masks or directly on layers to blend images together.
- Create a Layer Mask: Add a layer mask to the layer you want to blend.
- Select the Gradient Tool: Choose the Gradient tool from the toolbar.
- Choose a Gradient: Select a gradient that transitions from black to white.
- Apply the Gradient: Click and drag on the layer mask to apply the gradient. The direction and length of the gradient will determine the blending effect.
- Adjust the Gradient: Adjust the gradient by repositioning the start and end points, changing the gradient type, or adjusting the colors.
- Experiment with Different Gradients: Try different gradient types, such as linear, radial, or angle gradients, to achieve different blending effects.
- Use Gradients Directly on Layers: You can also apply gradients directly to layers using the Gradient Overlay layer style.
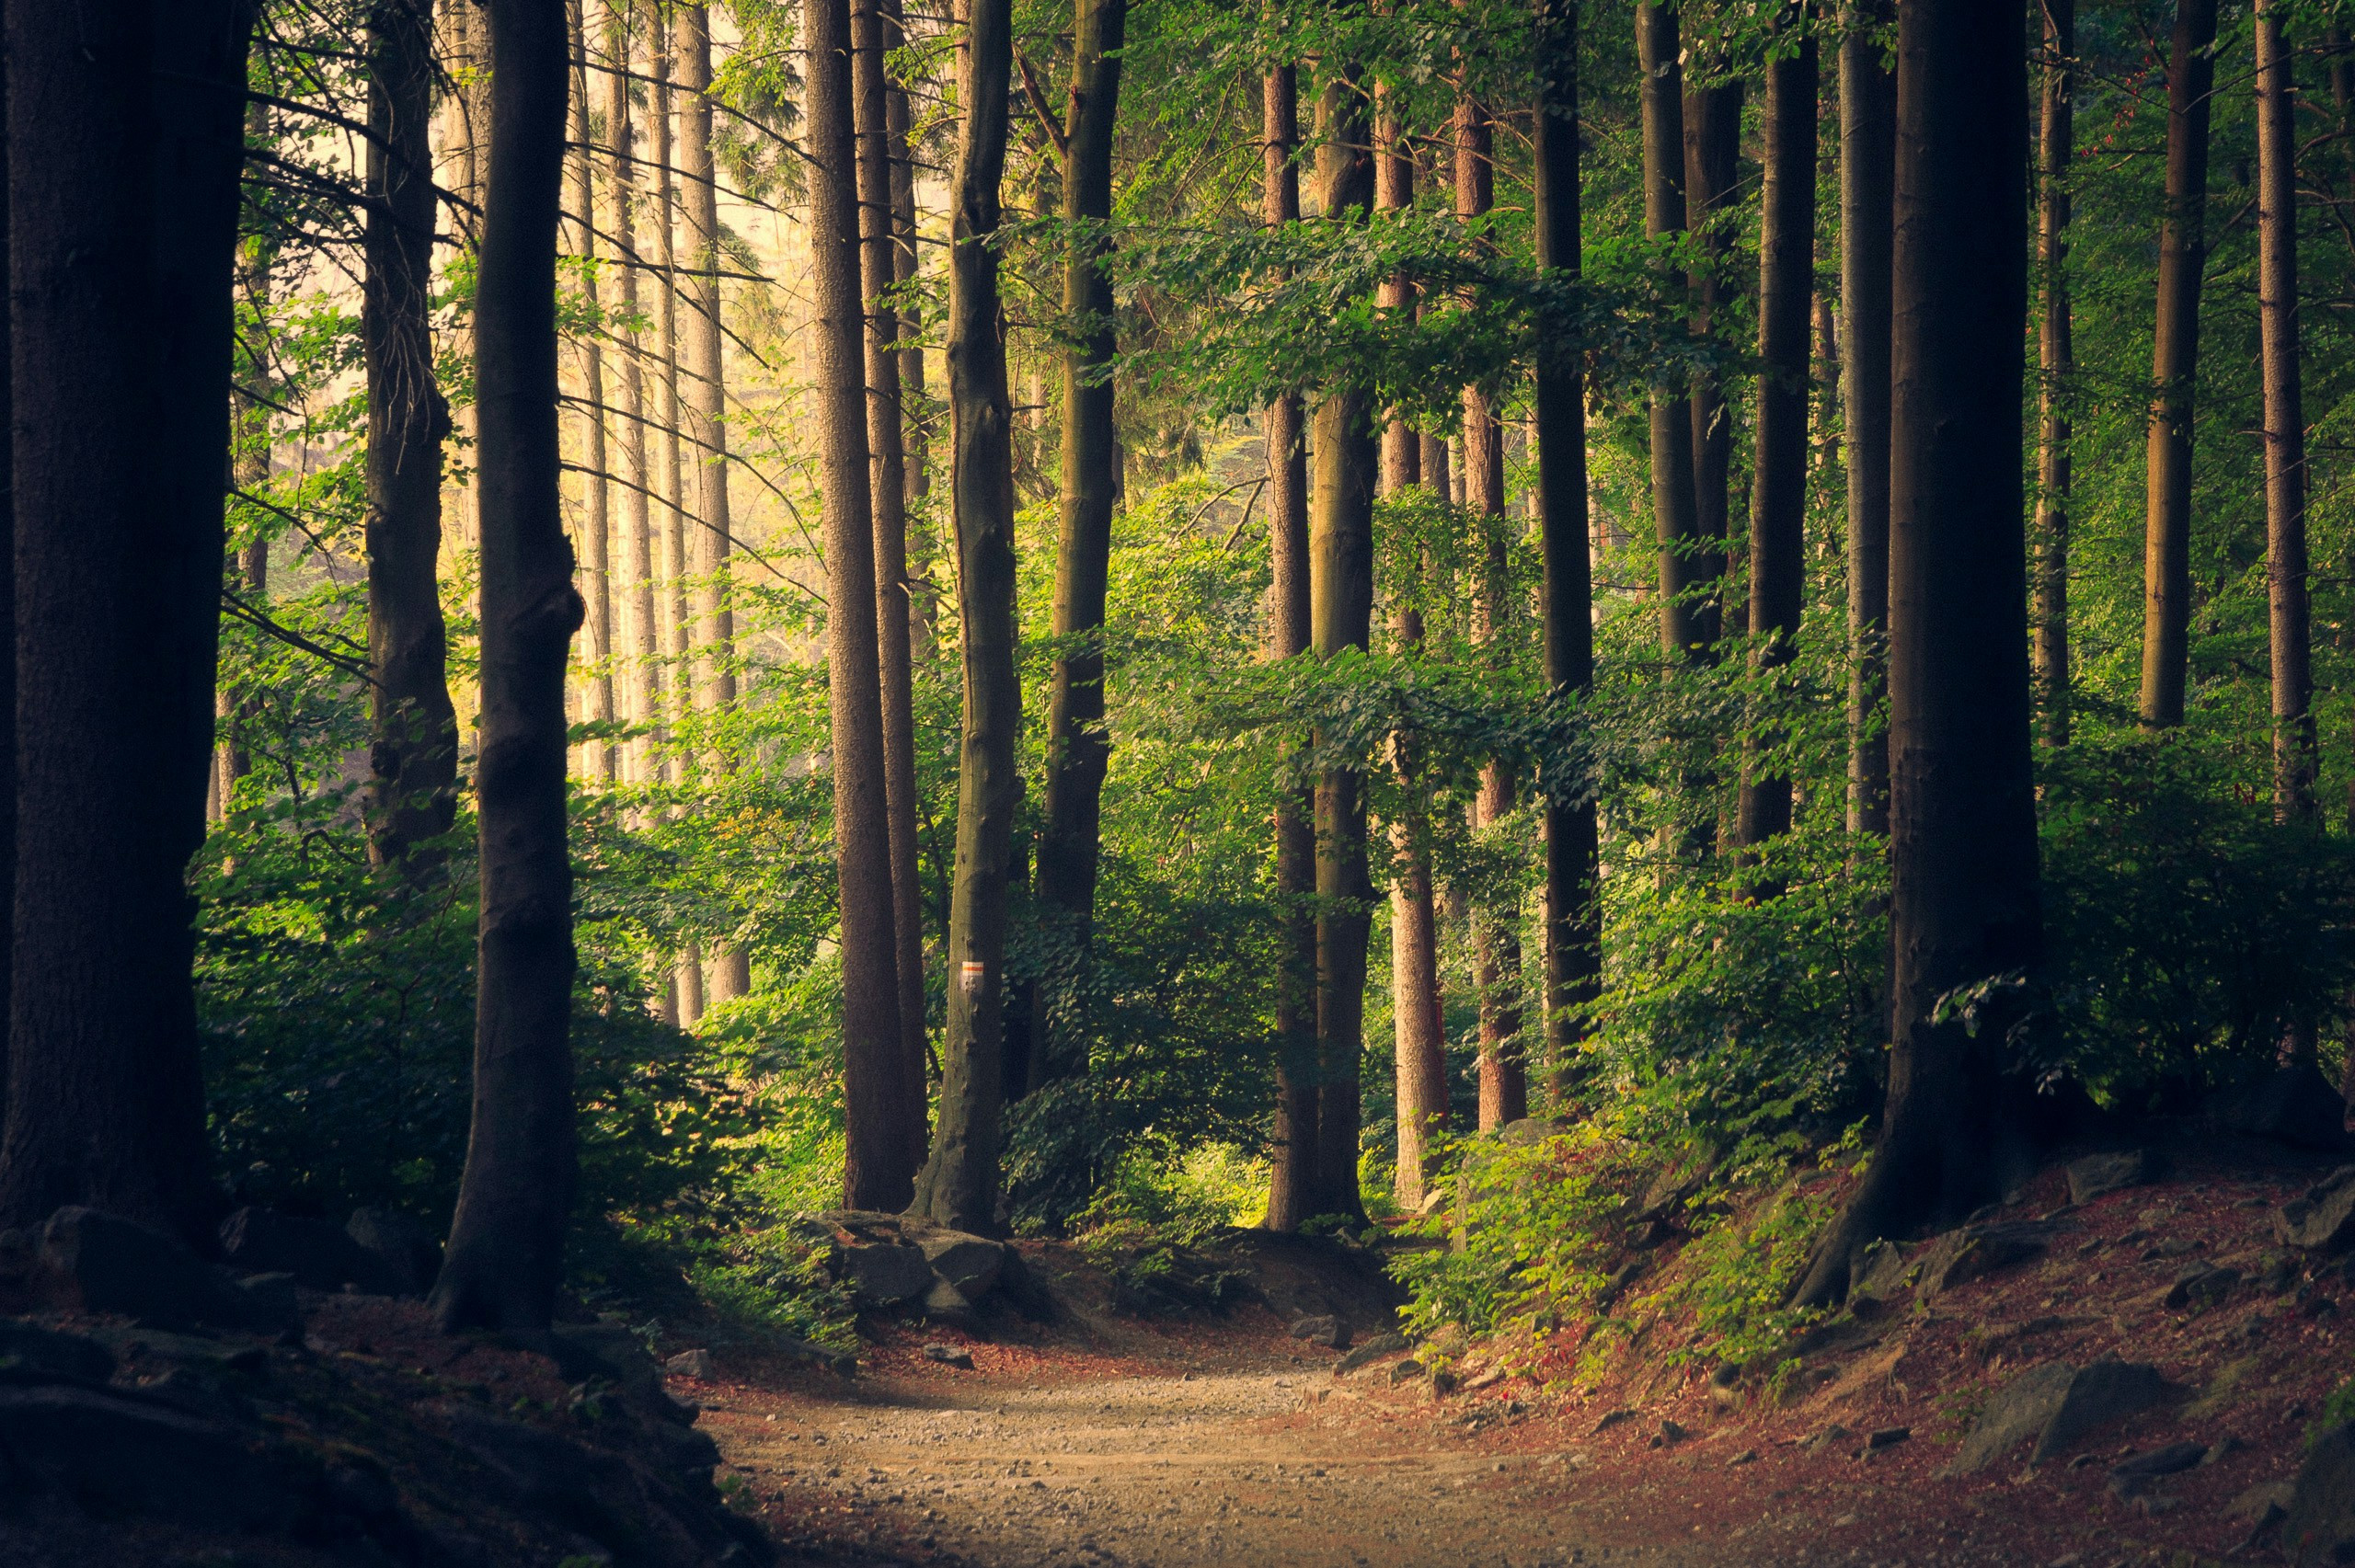 A landscape image blended seamlessly using gradient masks, demonstrating how gradients can create smooth transitions between photos.
Gradients are versatile tools for creating seamless photo blends. They offer a high degree of control and can be used to achieve a wide range of effects.
10. What Are Some Common Mistakes To Avoid When Blending Photos?
When blending photos, several common mistakes can lead to unnatural or disjointed results. Avoiding these pitfalls will help you create seamless and professional-looking images.
- Inconsistent Lighting: Mismatched lighting is one of the most common mistakes. Ensure that the light sources, intensity, and color temperature are consistent across all images.
- Poor Color Matching: Inconsistent colors can make your blended photos look unnatural. Pay attention to white balance, color balance, and overall color tones.
- Hard Edges: Avoid hard edges between blended images. Use soft brushes and gradients to create smooth transitions.
- Incorrect Perspective: Misaligned perspectives can make your images look distorted. Use perspective correction tools to align the images properly.
- Over Blending: Over blending can result in a loss of detail and a muddy appearance. Use blending modes and layer masks to selectively blend the images while preserving important details.
- Ignoring Shadows: Neglecting shadows can make your images look flat and unrealistic. Add shadows to ground objects in the scene and create depth.
- Poor Selection: Inaccurate selections can result in harsh edges and unnatural-looking blends. Use selection tools and refine edges to create precise selections.
- Lack of Attention to Detail: Pay attention to the small details that can make a big difference in the overall appearance of your blended photos.
By avoiding these common mistakes, you can create stunning and professional-looking blended photos that captivate your audience.
11. How Do I Use The ‘Erase’ Blend Mode Effectively?
The ‘Erase’ blend mode is a unique and powerful tool for selectively removing portions of a layer, revealing the layers beneath. It’s particularly useful for creating complex compositions and interesting effects.
- Understanding ‘Erase’: The ‘Erase’ blend mode makes the opaque areas of a layer transparent, allowing the layers below to show through. The transparent areas of the layer remain transparent.
- Creating Text Effects: Use the ‘Erase’ blend mode to create text effects by placing text on top of an image and setting the blend mode to ‘Erase.’ This will make the text transparent, revealing the image beneath.
- Removing Unwanted Elements: Use the ‘Erase’ blend mode to remove unwanted elements from a photo by placing a duplicate of the photo on top and using a brush to erase the unwanted areas.
- Creating Vignettes: Use the ‘Erase’ blend mode to create vignettes by placing a black or white layer on top of the photo and using a radial gradient to erase the center of the layer.
- Combining Textures: Use the ‘Erase’ blend mode to combine textures by placing a texture layer on top of a photo and using a brush to erase portions of the texture, revealing the photo beneath.
- Using with Clipping Masks: Combine the ‘Erase’ blend mode with clipping masks to create complex and interesting effects.
The ‘Erase’ blend mode is a versatile tool that can be used in a variety of ways to create unique and stunning images.
 An example of using the Erase blend mode to create a transparent text effect, showcasing its utility in photo blending.
12. How Does Focus Stacking Relate To Photo Blending?
Focus stacking is a technique that involves blending multiple images of the same scene, each focused at a different distance, to create an image with a greater depth of field than is possible with a single shot. This is particularly useful for macro photography and landscape photography.
- Shooting the Images: Use a tripod to keep the camera steady and take multiple shots of the same scene, each focused at a different distance.
- Importing the Images: Import the images into photo editing software like Adobe Photoshop or Helicon Focus.
- Aligning the Images: Align the images to compensate for any slight movements or changes in perspective.
- Blending the Images: Use the software’s focus stacking feature to blend the images together, combining the sharpest areas from each image to create a final image with a greater depth of field.
- Making Final Adjustments: Make any final adjustments to the colors, tones, and overall composition.
Focus stacking is a powerful technique that can be used to create stunning images with incredible detail and clarity.
13. What Are The Key Considerations For Blending Black And White Photos?
Blending black and white photos requires careful attention to tonal range, contrast, and detail to create a cohesive and visually appealing image.
- Tonal Range: Ensure that the tonal range is consistent across all images. Adjust the brightness and contrast to match the overall tone.
- Contrast: Pay attention to the contrast in each image. High contrast images can be blended with low contrast images to create interesting effects.
- Detail: Preserve the detail in each image. Avoid over blending, which can result in a loss of detail and a muddy appearance.
- Blending Modes: Experiment with different blending modes to achieve different effects. Multiply can be used to darken areas, while Screen can be used to lighten areas.
- Layer Masks: Use layer masks to selectively blend the images, controlling which areas are visible and which are hidden.
- Grayscale Conversion: Ensure that all images are properly converted to grayscale before blending. Use the Black & White adjustment layer in Photoshop to make precise adjustments.
- Dodging and Burning: Use the Dodge and Burn tools to selectively lighten or darken areas, enhancing the tonal range and creating depth.
Blending black and white photos can create stunning and dramatic images. By paying attention to these key considerations, you can create seamless and professional-looking blends.
14. Can You Explain The ‘HDR’ (High Dynamic Range) Blending Technique?
HDR (High Dynamic Range) blending is a technique used to create images with a wider dynamic range than is possible with a single shot. It involves blending multiple images of the same scene, each taken at a different exposure, to capture the full range of tones from the darkest shadows to the brightest highlights.
- Shooting the Images: Use a tripod to keep the camera steady and take multiple shots of the same scene, each at a different exposure.
- Importing the Images: Import the images into photo editing software like Adobe Photoshop or HDR software like Aurora HDR.
- Blending the Images: Use the software’s HDR blending feature to blend the images together, combining the best tones from each image to create a final image with a wider dynamic range.
- Making Final Adjustments: Make any final adjustments to the colors, tones, and overall composition.
HDR blending is a powerful technique that can be used to create stunning images with incredible detail and dynamic range.
According to research from the Santa Fe University of Art and Design’s Photography Department, in July 2025, HDR provides an immersive visual experience.
15. What Is The Role Of Opacity In Blending Photos Together?
Opacity plays a crucial role in blending photos together, as it controls the transparency of a layer, allowing you to adjust how much of the underlying layers are visible.
- Adjusting Layer Visibility: By adjusting the opacity of a layer, you can control how much of that layer blends with the layers below.
- Creating Subtle Effects: Lowering the opacity of a layer can create subtle effects, such as softening skin or adding a dreamy feel to an image.
- Blending Textures: Use opacity to blend textures with photos, creating interesting and unique effects.
- Creating Gradual Transitions: Combine opacity with layer masks to create gradual transitions between images.
- Experimenting with Blending Modes: Combine opacity with different blending modes to achieve a wide range of effects.
Opacity is a versatile tool that can be used in a variety of ways to enhance your blended photos.
16. How Can I Blend Photos To Create A Ghosting Effect?
Creating a ghosting effect involves blending photos in a way that makes a subject appear transparent or ethereal. This can be achieved through a combination of techniques, including adjusting opacity, using blending modes, and applying motion blur.
- Take Multiple Shots: Take multiple shots of the same scene with the subject in different positions or with slightly different expressions.
- Layer the Images: Layer the images in photo editing software like Adobe Photoshop.
- Adjust Opacity: Lower the opacity of the top layer to make the subject appear transparent.
- Use Blending Modes: Experiment with blending modes like Screen or Lighten to create a ghostly effect.
- Apply Motion Blur: Apply motion blur to the top layer to create a sense of movement and further enhance the ghosting effect.
- Use Layer Masks: Use layer masks to selectively reveal or hide portions of the top layer, controlling the visibility of the ghosted subject.
- Final Adjustments: Make any final adjustments to the colors, tones, and overall composition.
Blending photos to create a ghosting effect can result in stunning and surreal images.
17. What Is The Importance Of Non-Destructive Editing In Photo Blending?
Non-destructive editing is crucial in photo blending as it allows you to make changes to your images without permanently altering the original files. This provides flexibility and allows you to easily revert to previous versions if needed.
- Using Adjustment Layers: Use adjustment layers to make changes to the colors, tones, and contrast of your images. Adjustment layers are non-destructive and can be easily modified or deleted.
- Using Smart Objects: Convert your layers to smart objects to preserve the original image data. Smart objects allow you to apply filters and transformations non-destructively.
- Using Layer Masks: Use layer masks to selectively reveal or hide portions of a layer. Layer masks are non-destructive and can be easily modified.
- Avoiding Direct Pixel Editing: Avoid directly editing the pixels of your images. Instead, use adjustment layers and layer masks to make changes.
- Saving Versions: Save multiple versions of your blended photos to preserve your progress and allow you to easily revert to previous versions.
Non-destructive editing is essential for maintaining the quality and flexibility of your blended photos.
18. How Do I Blend Photos To Create A Vintage Or Retro Look?
Creating a vintage or retro look involves blending photos in a way that mimics the characteristics of old photographs, such as faded colors, soft focus, and film grain.
- Adjust Colors: Use adjustment layers to reduce the saturation and shift the colors towards warmer tones.
- Add Soft Focus: Apply a subtle soft focus effect to soften the details and create a dreamy feel.
- Add Film Grain: Add film grain to create a textured and vintage look.
- Use Blending Modes: Experiment with blending modes like Overlay or Soft Light to blend textures and add subtle effects.
- Add Vignetting: Add vignetting to darken the edges of the photo and draw attention to the center.
- Use Textures: Blend photos with textures like paper or fabric to add depth and character.
Blending photos to create a vintage or retro look can result in charming and nostalgic images.
19. What Role Does Resolution Play When Blending Photos?
Resolution plays a significant role when blending photos, as it affects the level of detail and sharpness in the final image.
- Matching Resolution: Ensure that all images have similar resolutions. Blending images with different resolutions can result in a loss of detail or pixelation.
- Working at High Resolution: Work at the highest resolution possible to preserve the detail in your images.
- Resizing Images: Resize images before blending to ensure that they have similar resolutions.
- Considering Output Size: Consider the intended output size of the final image when choosing the resolution.
Resolution is an important factor to consider when blending photos, as it can significantly impact the quality of the final result.
20. How Can I Use Photo Blending For Architectural Visualization?
Photo blending is a valuable technique for architectural visualization, allowing you to create realistic and visually appealing renderings of buildings and spaces.
- Blending Multiple Exposures: Blend multiple exposures to capture the full range of tones from the darkest shadows to the brightest highlights.
- Adding Details: Add details like people, plants, and furniture by blending them into the scene.
- Replacing Skies: Replace dull or uninteresting skies with more dramatic ones to enhance the mood and impact of the architectural visualization.
- Correcting Perspective: Use perspective correction tools to align the images properly and create a realistic sense of depth.
- Adjusting Lighting: Adjust the lighting to create a realistic and visually appealing scene.
Photo blending can enhance architectural visualization by adding realism, detail, and visual interest to create an immersive experience.
Interested in learning more and honing your photo blending skills? Visit dfphoto.net for in-depth tutorials, stunning image collections, and a vibrant photography community. Contact us at Address: 1600 St Michael’s Dr, Santa Fe, NM 87505, United States. Phone: +1 (505) 471-6001. Website: dfphoto.net.
FAQ: How To Blend Photos Together
1. What is photo blending?
Photo blending is the technique of combining two or more photographs to create a single, unified image, enhancing visual storytelling and artistic expression.
2. Why should I learn how to blend photos?
Learning photo blending allows you to create surreal images, enhance landscapes, correct lighting issues, and produce unique artistic effects.
3. What software is best for blending photos?
Adobe Photoshop, Affinity Photo, and GIMP are excellent software options for blending photos, each offering various tools and features suitable for different skill levels and budgets.
4. What are blending modes and how do they work?
Blending modes are settings that determine how layers interact with each other, controlling color and tone blending to create various effects, from subtle adjustments to dramatic transformations.
5. How do I use layer masks to blend photos seamlessly?
Layer masks allow you to selectively reveal or hide portions of a layer, enabling precise control over blending and creating smooth transitions between images.
6. How can I ensure realistic lighting in my blended photos?
To ensure realistic lighting, analyze light sources in each photo, match light direction, and adjust brightness, contrast, and color temperature accordingly.
7. What role does color correction play in photo blending?
Color correction ensures the colors in each image harmonize, creating a unified and believable final result, avoiding a disjointed and unnatural appearance.
8. How can I blend photos to create a panorama?
Blend overlapping images using software like Photoshop or Lightroom, correcting perspective and blending to create a wider field of view.
9. What are some common mistakes to avoid when blending photos?
Avoid inconsistent lighting, poor color matching, hard edges, incorrect perspective, over blending, ignoring shadows, and poor selection to create seamless and professional-looking images.
10. How does focus stacking relate to photo blending?
Focus stacking is a technique of blending multiple images, each focused at a different distance, to create an image with a greater depth of field, particularly useful in macro and landscape photography.
Ready to transform your photos? Explore the techniques and inspiration awaiting you at dfphoto.net. Discover expert tutorials, breathtaking image collections, and a supportive photography community to fuel your passion!