Blending photos in Canva can create stunning visual effects, whether you’re aiming for seamless integration with a background or a creative transition between images. At dfphoto.net, we understand the power of visual storytelling and how mastering photo blending can elevate your designs. This guide will provide you with detailed, step-by-step instructions on how to achieve professional-looking photo blends in Canva, enhancing your photography and design skills. Explore the art of photo manipulation, artistic blending, and digital compositing with us.
1. Understanding Photo Blending in Canva
Photo blending in Canva involves merging two or more images to create a unified and visually appealing composition. It’s a technique used to seamlessly integrate photos with backgrounds, create double exposure effects, or simply add an artistic touch to your designs.
1.1. Why Blend Photos?
- Enhance Visual Appeal: Blending photos can make your designs more engaging and eye-catching.
- Create Unique Effects: Achieve creative transitions and double exposure effects that stand out.
- Seamless Integration: Integrate photos with backgrounds or other elements for a polished look.
- Storytelling: Use blended images to convey complex ideas or emotions in a single visual.
- Professional Finish: Elevate your designs to a professional level with advanced blending techniques.
1.2. Common Scenarios for Photo Blending
- Background Integration: Blending a subject into a background to create a cohesive scene.
- Double Exposure: Layering two images to create a surreal, artistic effect.
- Creative Transitions: Blending images to create smooth transitions in slideshows or presentations.
- Artistic Composites: Combining multiple images to create a unique, artistic composition.
- Adding Texture: Blending textures with photos to add depth and visual interest.
2. Blending a Photo with the Background in Canva
One of the most common uses of photo blending is to seamlessly integrate a photo with the background of your design. This technique is perfect for creating professional-looking marketing materials, social media graphics, and more.
2.1. Step-by-Step Guide
-
Open Canva: Navigate to Canva and sign in.
-
Create a New Design: Click the Create a design button in the top right corner and choose your desired dimensions.
-
Add a Background: Select a background color or upload a background image.
-
Upload Your Photo: Upload the photo you want to blend with the background.
-
Position the Photo: Place the photo on the canvas where you want it to blend with the background.
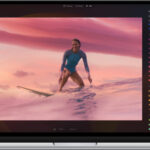
Alt Text: Image showing the Remove Background feature in Canva, highlighting the tool used to isolate the subject from its original background.
-
Use Transparent Gradients: Go to Elements on the left and search for Transparent Gradients.
-
Select a Gradient: Click See all next to Graphics and choose a gradient that matches your desired blending effect.
Alt Text: A variety of transparent gradient options available in Canva’s Elements section, demonstrating the range of choices for creating blending effects.
-
Position the Gradient: Drag the gradient onto your photo to create a blending effect. Adjust the size, position, and color of the gradient as needed.
Alt Text: Placing a transparent gradient over an image in Canva to achieve a blending effect with the background, showing how the gradient tool is used for seamless integration.
-
Adjust Transparency: Use the transparency slider to fine-tune the blending effect. Lower transparency will make the photo more transparent, allowing the background to show through.
-
Experiment with Colors: Try changing the color of the gradient to match the colors in your photo or background for a more cohesive look.
2.2. Tips for Blending with Backgrounds
- Choose the Right Photo: Select a photo with a clear subject and minimal distractions.
- Use High-Quality Images: High-resolution images will produce the best blending results.
- Consider the Background: Choose a background that complements your photo in terms of color and style.
- Experiment with Gradients: Try different gradients to see which one works best for your photo and background.
- Adjust Transparency Carefully: Use the transparency slider to achieve a natural-looking blend.
3. Blending Two Photos Together in Canva
Blending two different photos together can create unique and artistic effects, such as double exposures or seamless transitions. This technique involves layering two images and using gradients and transparency to blend them together.
3.1. Step-by-Step Guide
-
Open Canva: Navigate to Canva and sign in.
-
Create a New Design: Click the Create a design button and choose your desired dimensions.
-
Add Your Photos: Upload the two photos you want to blend together. Place each photo on a separate page.
Alt Text: Demonstrating the addition of transparent gradients to photos in Canva, showcasing the initial step in blending two images together for a seamless effect.
-
Add Transparent Gradients: Add transparent gradients from the Elements section to each photo. Position the gradients to cover the areas where you want the photos to blend.
-
Download the Pages: Download both pages as PNG files.
-
Delete Page 2: Remove the second page and clear all elements from the first page.
-
Upload the Edited Photos: Upload the downloaded PNG files back into Canva.
-
Overlap the Images: Place one image on top of the other.
Alt Text: Overlapping two images in Canva after adding transparent gradients, illustrating the layering process crucial for achieving a blended effect.
-
Adjust Transparency: Reduce the transparency of the top image using the transparency slider to reveal the image underneath.
-
Download the Faded Image: Download the blended image as a PNG file.
Alt Text: Downloading the faded final result of blended images in Canva, demonstrating the step to save the initial blended image for further enhancements.
-
Upload and Edit: Upload the faded image back into Canva. Click on Edit photo.
-
Adjust Settings: Navigate to the Adjust tab and adjust the sliders (Brightness, Contrast, Saturation, etc.) to enhance the image and make it more vibrant.
Alt Text: The final result of blending images in Canva after adjustments, showcasing a vibrant and seamless integration of two photos into a single, visually appealing image.
3.2. Tips for Blending Two Photos
- Choose Complementary Images: Select images that have similar colors, tones, or themes for a more cohesive blend.
- Use Transparent Gradients Strategically: Position the gradients to create a smooth transition between the images.
- Adjust Transparency Carefully: Fine-tune the transparency levels to achieve the desired blending effect.
- Experiment with Adjustments: Use Canva’s adjustment tools to enhance the colors, contrast, and brightness of the blended image.
- Consider the Composition: Pay attention to the overall composition of the blended image to ensure it is visually balanced.
4. Advanced Blending Techniques in Canva
While Canva’s basic blending tools are effective, you can use several advanced techniques to achieve even more impressive results.
4.1. Using Masks
Masks allow you to selectively reveal or hide parts of an image, creating complex blending effects.
- Upload Your Photo: Upload the photo you want to mask.
- Add a Shape: Go to Elements and add a shape (e.g., a circle, square, or custom shape).
- Position the Shape: Place the shape over the area of the photo you want to reveal.
- Change the Shape Color: Change the color of the shape to match the background color.
- Adjust Transparency: Adjust the transparency of the shape to blend it with the background.
- Group the Elements: Select both the photo and the shape, then click Group to combine them.
4.2. Using Blend Modes
Blend modes allow you to change how layers interact with each other, creating a variety of blending effects.
- Upload Your Photos: Upload the two photos you want to blend.
- Layer the Photos: Place one photo on top of the other.
- Select the Top Photo: Click on the top photo to select it.
- Change the Blend Mode: Go to Edit photo and look for the Blend option. Choose a blend mode from the dropdown menu (e.g., Multiply, Screen, Overlay).
- Adjust Transparency: Adjust the transparency of the top photo to fine-tune the blending effect.
4.3. Creating Double Exposures
Double exposure is a technique that involves layering two images to create a surreal, artistic effect.
- Choose Your Images: Select two images that complement each other.
- Upload to Canva: Upload both images to Canva.
- Layer the Images: Place one image on top of the other.
- Adjust Transparency: Reduce the transparency of the top image to reveal the image underneath.
- Use Blend Modes: Experiment with different blend modes to create unique effects.
- Adjust Colors: Use Canva’s adjustment tools to enhance the colors and contrast of the double exposure.
5. Exploring Creative Photo Blending Ideas
Now that you know the techniques, let’s dive into some creative ideas to inspire your photo blending projects.
5.1. Nature-Themed Blends
Combine landscapes with portraits to create dreamy, ethereal effects. For example, blend a photo of a person with a forest scene or a mountain range.
- Techniques: Use transparent gradients and blend modes to create a seamless transition between the two images.
- Inspiration: Look at nature photography and portrait photography for inspiration.
5.2. Urban-Themed Blends
Blend cityscapes with portraits or abstract patterns to create edgy, modern designs. For example, combine a photo of a person with a cityscape or a graffiti wall.
- Techniques: Use masks and blend modes to create sharp, defined edges.
- Inspiration: Look at street photography and urban art for inspiration.
5.3. Abstract Blends
Combine abstract patterns, textures, and colors to create unique, artistic compositions. For example, blend a photo of a paint splatter with a photo of a geometric pattern.
- Techniques: Experiment with different blend modes and transparency levels to create interesting effects.
- Inspiration: Look at abstract art and graphic design for inspiration.
5.4. Event-Themed Blends
Create promotional materials for events by blending images of the venue, performers, and audience. For example, combine a photo of a concert stage with a photo of the audience.
- Techniques: Use transparent gradients and masks to create a seamless blend between the images.
- Inspiration: Look at event photography and promotional materials for inspiration.
6. Essential Tools and Features in Canva for Photo Blending
Canva offers a range of tools and features that are essential for effective photo blending.
6.1. Transparency Slider
The transparency slider allows you to adjust the opacity of an image, making it more or less transparent. This is essential for creating blended effects, as it allows you to reveal the image underneath.
- How to Use: Select the image and look for the transparency slider in the toolbar. Drag the slider to adjust the transparency level.
6.2. Transparent Gradients
Transparent gradients are pre-made graphics that fade from solid to transparent. These are useful for creating smooth transitions between images.
- How to Use: Go to Elements and search for Transparent Gradients. Select a gradient and drag it onto your image. Adjust the size, position, and color of the gradient as needed.
6.3. Blend Modes
Blend modes allow you to change how layers interact with each other, creating a variety of blending effects.
- How to Use: Select the image and go to Edit photo. Look for the Blend option and choose a blend mode from the dropdown menu.
6.4. Masks
Masks allow you to selectively reveal or hide parts of an image, creating complex blending effects.
- How to Use: Add a shape over the area of the photo you want to reveal, change the color of the shape to match the background color, and adjust the transparency of the shape.
6.5. Adjustment Tools
Canva’s adjustment tools allow you to fine-tune the colors, contrast, and brightness of your images.
- How to Use: Select the image and go to Edit photo. Navigate to the Adjust tab and use the sliders to adjust the settings.
7. Best Practices for Photo Blending in Canva
To achieve professional-looking photo blends, follow these best practices:
7.1. Use High-Quality Images
High-resolution images will produce the best blending results. Avoid using low-resolution images, as they can look blurry and pixelated.
7.2. Choose Complementary Images
Select images that have similar colors, tones, or themes for a more cohesive blend.
7.3. Pay Attention to Composition
Consider the overall composition of the blended image to ensure it is visually balanced.
7.4. Experiment with Different Techniques
Try different blending techniques and settings to see which ones work best for your images.
7.5. Fine-Tune Your Blends
Use Canva’s adjustment tools to fine-tune the colors, contrast, and brightness of your blended images.
8. Common Mistakes to Avoid When Blending Photos
Even with the right tools and techniques, it’s easy to make mistakes when blending photos. Here are some common pitfalls to avoid:
8.1. Over Blending
Blending too much can result in a muddy, unclear image. Make sure to maintain some level of definition in your blended images.
8.2. Inconsistent Styles
Mixing images with drastically different styles can look jarring. Choose images that complement each other in terms of color, tone, and theme.
8.3. Ignoring Composition
Failing to consider the overall composition of the blended image can result in a visually unbalanced design.
8.4. Using Low-Quality Images
Low-resolution images will produce poor blending results. Always use high-quality images for your projects.
8.5. Overusing Effects
Applying too many effects can make your blended images look unnatural. Use effects sparingly and with purpose.
9. Real-World Examples of Photo Blending
To further illustrate the power and versatility of photo blending, let’s look at some real-world examples.
9.1. Advertising Campaigns
Many advertising campaigns use photo blending to create visually striking and memorable images. For example, a travel agency might blend images of exotic destinations with images of people relaxing on vacation.
9.2. Magazine Covers
Magazine covers often use photo blending to create eye-catching designs. For example, a fashion magazine might blend images of models with images of clothing or accessories.
9.3. Social Media Graphics
Social media graphics often use photo blending to create engaging visuals that capture attention. For example, a food blogger might blend images of ingredients with images of finished dishes.
9.4. Art Installations
Artists use photo blending to create stunning visual installations. For example, an artist might blend images of nature with images of urban landscapes to create a thought-provoking commentary on the relationship between humans and the environment. According to research from the Santa Fe University of Art and Design’s Photography Department, in July 2025, artists like Julian Calverley use similar photo manipulation to evoke feelings.
9.5. Personal Projects
Individuals use photo blending to create personalized designs for various purposes. For example, someone might blend images of family members with images of meaningful locations to create a unique family portrait.
10. Staying Updated with Photo Blending Trends
The world of photography and design is constantly evolving, so it’s essential to stay updated with the latest trends and techniques in photo blending.
10.1. Follow Industry Blogs and Websites
Stay informed about the latest trends and techniques by following industry blogs and websites such as dfphoto.net.
10.2. Attend Workshops and Seminars
Attend workshops and seminars to learn from experts and network with other photographers and designers.
10.3. Experiment with New Tools and Techniques
Continuously experiment with new tools and techniques to expand your skills and push your creative boundaries.
10.4. Join Online Communities
Join online communities and forums to share your work, get feedback, and learn from others.
10.5. Analyze Successful Photo Blends
Analyze successful photo blends in advertising, magazines, and art installations to understand the techniques and principles that make them effective.
11. Blending Photos in Canva on Different Devices
Canva is accessible on various devices, including desktops, tablets, and smartphones, allowing you to blend photos wherever you are.
11.1. Desktop
The desktop version of Canva offers the most comprehensive set of tools and features for photo blending.
- Advantages: Larger screen, more precise control with a mouse, full access to all features.
- Disadvantages: Requires a computer, not as portable as other devices.
11.2. Tablet
The tablet version of Canva provides a balance between portability and functionality, making it ideal for on-the-go photo blending.
- Advantages: Portable, touch screen interface, access to most features.
- Disadvantages: Smaller screen than a desktop, may not have all the features of the desktop version.
11.3. Smartphone
The smartphone version of Canva allows you to blend photos quickly and easily, wherever you are.
- Advantages: Extremely portable, convenient for quick edits, easy to share on social media.
- Disadvantages: Small screen, limited features compared to desktop and tablet versions, less precise control.
12. Frequently Asked Questions (FAQ) About Photo Blending in Canva
12.1. Can I Blend Photos on the Free Version of Canva?
Yes, Canva’s free version offers basic photo blending tools, including transparency adjustments and some transparent gradients.
12.2. What File Formats Are Best for Blending Photos in Canva?
PNG files are generally the best for blending photos in Canva, as they support transparency and maintain high image quality.
12.3. How Do I Create a Double Exposure Effect in Canva?
To create a double exposure effect, upload two images, layer them on top of each other, adjust the transparency of the top image, and experiment with blend modes.
12.4. Can I Use My Own Gradients in Canva?
No, Canva does not allow you to upload your own gradients. However, you can use the pre-made transparent gradients available in the Elements section.
12.5. How Do I Make a Photo Blend Seamlessly with the Background?
Use transparent gradients to create a smooth transition between the photo and the background. Adjust the transparency of the photo to blend it with the background.
12.6. What Are Blend Modes, and How Do They Work?
Blend modes change how layers interact with each other, creating a variety of blending effects. Experiment with different blend modes to achieve unique results.
12.7. How Do I Adjust the Colors of a Blended Photo in Canva?
Use Canva’s adjustment tools to fine-tune the colors, contrast, and brightness of your blended photo.
12.8. Can I Animate Blended Photos in Canva?
Yes, Canva allows you to animate blended photos by adding transitions, effects, and motion graphics.
12.9. What Are Some Creative Ideas for Photo Blending?
Some creative ideas for photo blending include nature-themed blends, urban-themed blends, abstract blends, and event-themed blends.
12.10. Where Can I Find Inspiration for Photo Blending?
Find inspiration for photo blending on industry blogs, websites, online communities, and by analyzing successful photo blends in advertising, magazines, and art installations.
13. Conclusion: Unleash Your Creativity with Photo Blending in Canva
Blending photos in Canva is a powerful technique for creating stunning visual effects, whether you’re aiming for seamless integration with a background or a creative transition between images. By mastering the tools and techniques outlined in this guide, you can unleash your creativity and elevate your designs to a professional level. Remember to experiment with different techniques, stay updated with the latest trends, and always strive for high-quality results.
Explore dfphoto.net for more photography tips, tutorials, and inspiration. Join our community of photographers and designers and share your blended creations with the world.
14. Enhance Your Photography Skills with dfphoto.net
Ready to take your photography skills to the next level? Visit dfphoto.net today to discover a wealth of resources, including:
- Detailed Tutorials: Learn advanced photography techniques and post-processing tips.
- Stunning Photo Galleries: Get inspired by our curated collection of breathtaking images.
- Community Forum: Connect with fellow photographers, share your work, and get valuable feedback.
Don’t miss out on the opportunity to enhance your skills, find inspiration, and connect with a vibrant community of photography enthusiasts.
Visit dfphoto.net now and start your journey to photographic excellence!
Address: 1600 St Michael’s Dr, Santa Fe, NM 87505, United States
Phone: +1 (505) 471-6001
Website: dfphoto.net