In today’s digital age, sharing photos via email remains a popular and convenient method. Whether you’re sending vacation snapshots to family or sharing product images for business, knowing how to efficiently attach photos to your emails is essential. This guide will walk you through various methods to attach photos in email, ensuring your precious memories or important visuals reach their destination smoothly.
Attaching photos to an email might seem straightforward, but different email clients and operating systems offer varying approaches. Understanding these methods can enhance your productivity and ensure compatibility across different platforms. This article provides a comprehensive overview, covering common scenarios and offering step-by-step instructions to make the process hassle-free.
Understanding the Basics of Email Photo Attachments
Before diving into specific methods, it’s crucial to grasp the fundamentals of attaching photos to emails. Most email services, like Gmail, Outlook, and Apple Mail, allow you to attach files, including photos, to your messages. These attachments are typically added as separate files that the recipient can download and view.
File size is a critical consideration when attaching photos. Large, high-resolution images can significantly increase email size, potentially leading to slow sending times or rejection by the recipient’s email server. Many email providers have limits on attachment sizes, often around 20-25MB. Therefore, understanding how to manage photo sizes for email attachments is important.
Method 1: Using the “Attach File” Option in Your Email Client
The most common and universally applicable method is using the “Attach File” button within your email client. This option is available in virtually all email platforms, whether you’re using a web-based interface or a desktop application like Outlook or Apple Mail.
Steps to Attach Photos Using “Attach File”:
- Compose a New Email: Open your email client and start composing a new email message.
- Locate the “Attach” Button: Look for an “Attach,” “Attach File,” or paperclip icon. This is usually located in the compose window, often near the “Send” button or formatting options.
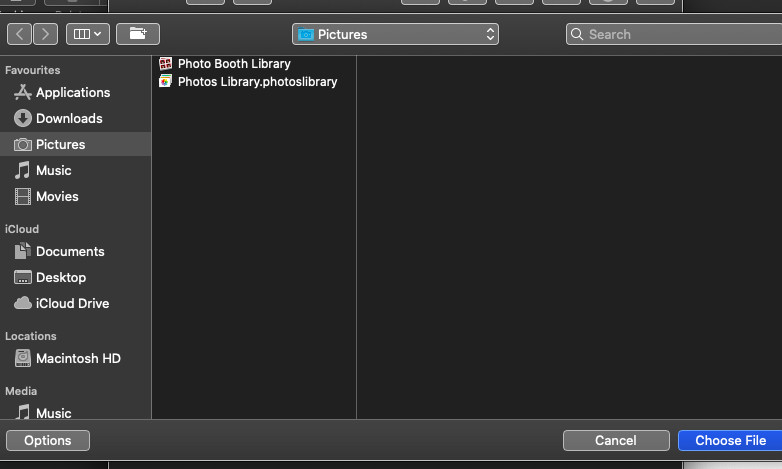
- Browse and Select Photos: Click the “Attach” button. A file explorer window will open, allowing you to browse your computer’s files.
- Select the Photo(s): Navigate to the folder where your photos are stored. Select the photo(s) you want to attach. You can usually select multiple photos by holding down the Ctrl or Shift key while clicking.
- Click “Open” or “Attach”: Once you’ve selected your photos, click the “Open” or “Attach” button in the file explorer window. The selected photos will be attached to your email.
- Complete and Send Your Email: Finish writing your email message, add the recipient’s email address, and click “Send.”
Alt Text: Email compose window showing the file attachment button, used to attach photos to emails.
This method is straightforward and works across different email clients and operating systems. It’s particularly useful when you know the exact location of your photos on your computer.
Method 2: Drag and Drop Photos Directly into Your Email
Another quick and easy way to attach photos is using the drag-and-drop method. This is often faster than using the “Attach File” option, especially when you have the photos readily accessible on your desktop or in a folder.
Steps to Drag and Drop Photos:
- Open Your Email Client and Compose a New Email: Start composing a new email as you normally would.
- Locate the Photos: Open the folder where your photos are stored and position the folder window and your email compose window side-by-side so you can see both.
- Select and Drag Photos: Select the photo(s) you want to attach. Click and hold your mouse button on the selected photo(s), then drag them directly into the body of your email message.
- Drop Photos into Email: Release the mouse button to drop the photos into the email. The photos will be attached to the email.
- Complete and Send Your Email: Finish your email and click “Send.”
 Drag and drop photos into email window
Drag and drop is a very intuitive method and is supported by most modern email clients and web browsers. It’s especially convenient for quickly attaching photos you are currently viewing or have easily accessible.
Method 3: Using the Photo Browser Button (Apple Mail Example)
Some email clients, like Apple Mail, offer a dedicated “Photo Browser” button directly within the compose window. This is designed to integrate seamlessly with your photo library, making it easy to select and attach photos directly from your photo management application.
Steps to Use the Photo Browser in Apple Mail:
- Compose a New Email in Apple Mail: Open Apple Mail and start composing a new email.
- Locate the Photo Browser Button: In the compose window toolbar, look for the “Photo Browser” button. It usually resembles a photo icon or a media browser icon.
- Open the Photo Browser: Click the “Photo Browser” button. A window or pane will open, displaying your photo library from the Photos app.
- Browse and Select Photos: Navigate through your photo library within the Photo Browser. You can browse albums, moments, or your entire library. Select the photos you want to attach.
- Attach Selected Photos: Once you’ve selected your photos, click the “Attach” or “Choose” button within the Photo Browser. The selected photos will be attached to your email.
- Complete and Send Your Email: Finish your email and click “Send.”
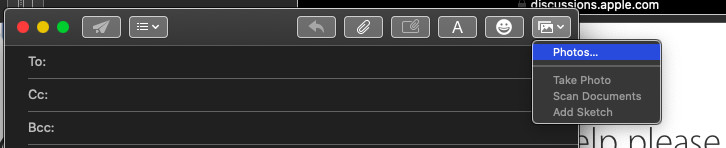 Photo browser button in Apple Mail compose window
Troubleshooting Apple Mail Photo Browser Issues:
Sometimes, users might encounter issues where the Photo Browser in Apple Mail appears empty or doesn’t show all photos. This can often be related to iCloud Photo Library settings.
- iCloud Photo Library and “Optimize Storage”: If you use iCloud Photos and have the “Optimize Mac Storage” option enabled in Photos preferences, your full-resolution photos might be stored in iCloud and not fully downloaded to your Mac. In this case, the Photo Browser might not display all your photos because they are not locally available.
- Solution: To ensure all photos are visible in the Photo Browser, you might need to select “Download Originals to this Mac” in Photos Preferences > iCloud. Alternatively, you can use other methods like drag and drop or sharing directly from the Photos app (see below).
- System Photo Library: Ensure your Photos Library is set as the System Photo Library. In Photos app, go to Photos Preferences > General, and check if “Use as System Photo Library” is greyed out. If not, click it.
Method 4: Sharing Photos Directly from Your Photo Application
Many photo management applications, like Apple Photos, Google Photos, or Adobe Lightroom, offer direct sharing options that include email. This method allows you to select photos within your photo app and initiate an email directly, with the selected photos already attached.
Steps to Share from Apple Photos via Email:
- Open Apple Photos: Launch the Photos application on your Mac.
- Select Photos: Select the photo(s) you want to share via email.
- Click the Share Button: Click the Share button (usually an upward-pointing arrow) in the Photos toolbar.
- Choose “Mail”: In the Share menu, select “Mail.” This will open a new email compose window with your default email client, and the selected photos will be attached.
- Complete and Send Your Email: Add the recipient’s email address, write your message, and click “Send.”
 Share button in Apple Photos application
Note for Default Email Client: If “Mail” is not available in the Share menu, you need to set Mail as your Default Mail Reader in Mail Preferences > General. If you prefer using a different email client like Outlook, this direct share option might not work as seamlessly.
Best Practices for Attaching Photos in Email
- Resize Large Photos: Before attaching high-resolution photos, consider resizing them to a smaller, email-friendly size. Many photo editing tools or online services can help you reduce file sizes without significant quality loss for screen viewing.
- Compress Multiple Photos (ZIP): If you need to send many photos, consider compressing them into a ZIP file. This reduces the overall file size and keeps your email cleaner. The recipient can easily download and extract the photos.
- Consider Cloud Sharing for Large Batches: For very large collections of photos or videos, email might not be the most efficient method. Consider using cloud storage services like Google Drive, Dropbox, or iCloud Drive to share a link to a folder containing your photos.
- Check Attachment Limits: Be mindful of attachment size limits imposed by your email provider and the recipient’s provider.
- Descriptive Subject Lines: Use clear and descriptive subject lines so recipients know what the email is about, for example, “Vacation Photos from Hawaii” or “Product Images for Review.”
Conclusion
Attaching photos to email is a fundamental skill for effective digital communication. By understanding the different methods available – from simple “Attach File” and drag-and-drop to integrated Photo Browsers and direct sharing from photo applications – you can choose the most efficient approach for your needs. Remember to consider file sizes and best practices to ensure smooth and successful photo sharing via email. Whether you are using Apple Mail, Outlook, Gmail, or another email service, these techniques will empower you to share your visual stories and important images with ease.