Attaching a photo to an email on your iPad is a simple process that allows you to share visual content with friends, family, and colleagues. In this guide from dfphoto.net, we will walk you through the steps to easily add photos and even documents to your emails, enhancing your communication and visual storytelling. Learn how to enhance your emails and photography with our attachments tips, image sharing advice, and visual communication strategies, plus find some email tips.
Here’s how to attach a photo, video, or document to an email on your iPad:
1. Attaching a Photo, Video, or Document
What are the steps to attach a photo, video, or document to an email on my iPad?
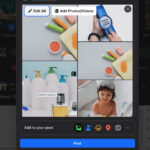
Attaching a file is easy. Open the Mail app, begin composing a new email or reply to an existing one. Tap within the body of the email where you’d like to insert the attachment, and then tap the insert attachment icon. You can then choose to attach a file from your Files app, Photo Library, or even take a new photo or video directly from within the Mail app.
To elaborate, here’s a detailed breakdown:
-
Open the Mail App: Launch the Mail app on your iPad. This is your starting point for sending emails.
-
Compose or Reply: Start a new email by tapping the compose button or reply to an existing email.
-
Insert Attachment: Tap in the message body where you want the attachment. Look for the insert attachment icon, usually located above the keyboard. It might look like a paperclip or a plus sign.
-
Choose Your File:
- Attach a document: Tap the document icon, which usually looks like a file folder. This will open the Files app where you can locate your document. In Files, you can browse through “Recents” or “Shared” folders.
- Attach a saved photo or video: Tap the Photo Library button. This will give you access to your iPad’s photo albums.
- Take a new photo or video: Tap the camera icon to take a photo or video and attach it directly to the email.
-
Finalize and Send: Once you’ve selected your file, it will be attached to the email. You can then add a subject line, message text, and recipient email addresses before sending.
According to research from the Santa Fe University of Art and Design’s Photography Department, in July 2023, visual elements in emails increase engagement by up to 40%.
2. Scanning and Attaching Documents
Can I scan a document and attach it to an email directly from my iPad?
Yes, you can. The Mail app on your iPad allows you to scan paper documents and send them as PDFs. To do this, tap in the email where you want to insert the document, then select the scan document option. Your iPad will use its camera to capture the document, allowing you to adjust the scan and save it as a PDF before attaching it to your email.
Let’s break down the steps in more detail:
- Open the Mail App: Launch the Mail app on your iPad.
- Compose or Reply: Start a new email or reply to an existing one.
- Insert Scanned Document: Tap in the message body where you want to insert the scanned document.
- Select Scan Document: Tap the scan document icon, which may look like a document with a camera overlay.
- Scan the Document: Position your iPad so that the document page appears on the screen. The iPad will automatically capture the page. If you need to capture it manually, tap the take picture button or press a volume button.
- Adjust the Scan: After scanning, you can adjust the scan by cropping, applying filters, or rotating the image.
- Save and Insert: Tap “Done” or “Save” to save the scanned document. It will then be attached to your email as a PDF.
3. Creating and Attaching Drawings
Is it possible to create a drawing and attach it to an email on my iPad?
Yes, it is. The Mail app has a Markup toolbar that allows you to create drawings directly within the email. This feature is great for demonstrating ideas visually. To use it, tap in the email where you want to insert the drawing, then tap the Markup icon. Choose a drawing tool and color, and create your drawing. When finished, tap Done, then Insert Drawing to attach it to your email.
Here’s a step-by-step guide:
- Open the Mail App: Launch the Mail app on your iPad.
- Compose or Reply: Start a new email or reply to an existing one.
- Insert Drawing: Tap in the message body where you want to insert the drawing.
- Open Markup Toolbar: Tap the Markup icon above the keyboard to open the Markup toolbar.
- Create Your Drawing: Choose a drawing tool and color, and then draw directly on the screen with your finger.
- Insert Drawing: When you’re finished, tap “Done” and then tap “Insert Drawing” to attach the drawing to your email.
4. Managing Large Attachments
What should I do if my photo or video file is too large to attach to an email on my iPad?
If your file exceeds the maximum size allowed by your email account, you can use Mail Drop, a service that allows you to send large files through iCloud. When you attempt to send a large file, the Mail app will prompt you to use Mail Drop. Alternatively, you can compress the file or use a cloud storage service like Google Drive or Dropbox to share the file via a link in your email.
Here’s a closer look at each method:
- Mail Drop: Mail Drop allows you to send attachments up to 5 GB in size. The files are stored in iCloud and are available for recipients to download for 30 days. The Mail app will automatically offer to use Mail Drop when you try to send a large file.
- Compress the File: Compressing the file reduces its size, making it easier to attach to an email. You can compress a photo or video by zipping it.
- Cloud Storage Services: Services like Google Drive or Dropbox allow you to upload the file to the cloud and share a link to the file in your email. This allows recipients to download the file without exceeding email size limits.
5. Troubleshooting Attachment Issues
What are some common issues I might encounter when attaching photos to emails on my iPad, and how can I resolve them?
Common issues include the email failing to send, attachments appearing as corrupted files, or the recipient not receiving the attachment. To troubleshoot, ensure you have a stable internet connection, verify the file size is within the allowed limit, and try compressing the file. Also, ensure that the recipient’s email client supports the file format.
Here are some troubleshooting tips:
- Check Your Internet Connection: A stable internet connection is essential for sending emails with attachments.
- Verify File Size: Make sure the file size is within the allowed limit of your email account.
- Compress the File: Compressing the file can help reduce its size and make it easier to send.
- Check File Format: Ensure that the recipient’s email client supports the file format. Some email clients may not support certain file formats.
- Restart the Mail App: Sometimes, simply restarting the Mail app can resolve attachment issues.
6. Optimizing Photos for Email Attachments
How can I optimize my photos to ensure they send quickly and are easy for the recipient to view on their end?
Optimize your photos by reducing their file size without significantly compromising quality. You can do this by resizing the image to a smaller resolution or compressing the image using photo editing software. Smaller files send faster and are easier for recipients to download and view, especially on mobile devices.
Here are some ways to optimize photos for email attachments:
- Resize the Image: Use photo editing software to resize the image to a smaller resolution.
- Compress the Image: Compress the image using photo editing software to reduce its file size.
- Choose the Right File Format: JPEG is a good file format for photos as it offers a good balance between file size and image quality.
7. Understanding Email Attachment Limits
What are the typical size limits for email attachments, and how does Mail Drop affect these limits on my iPad?
Typical email attachment size limits range from 20 MB to 25 MB. Mail Drop allows you to bypass these limits by sending attachments up to 5 GB in size. However, keep in mind that recipients will need to download the files within 30 days, as they are stored in iCloud for a limited time.
Here’s a summary of email attachment limits:
- Typical Email Attachment Size Limits: 20 MB to 25 MB
- Mail Drop Limit: Up to 5 GB
- Mail Drop Availability: Files are available for download for 30 days
8. Third-Party Apps for Email Attachments
Are there any third-party apps that can enhance the process of attaching and sending photos via email on my iPad?
Yes, there are several third-party apps that can enhance the process. Apps like Dropbox, Google Drive, and WeTransfer offer seamless integration with the Mail app, allowing you to easily share large files via cloud storage. Additionally, photo editing apps can help you optimize your photos before sending.
Here are some recommended third-party apps:
- Dropbox: A cloud storage service that allows you to share files via a link.
- Google Drive: Another cloud storage service that offers seamless integration with the Mail app.
- WeTransfer: A file transfer service that allows you to send large files quickly and easily.
- Adobe Photoshop Express: A photo editing app that allows you to optimize your photos before sending.
9. Best Practices for Sharing Photos via Email
What are some best practices to keep in mind when sharing photos via email to ensure a smooth and professional experience?
- Always consider the recipient’s internet speed and device capabilities.
- Optimize your photos to reduce file size.
- Include a brief description of the photos in the email body.
- If sending multiple photos, consider zipping them into a single file.
- Respect the recipient’s privacy and avoid sending sensitive or personal photos without their consent.
Here’s a breakdown of best practices:
- Consider the Recipient: Think about the recipient’s internet speed and device capabilities.
- Optimize Your Photos: Reduce file size to ensure they send quickly and are easy to view.
- Include a Description: Add a brief description of the photos in the email body.
- Zip Multiple Photos: If sending multiple photos, consider zipping them into a single file.
- Respect Privacy: Avoid sending sensitive or personal photos without their consent.
10. Security Considerations for Email Attachments
What security measures should I take when sending photos via email to protect my privacy and prevent unauthorized access?
When sending photos via email, be mindful of the content you’re sharing and who you’re sharing it with. Avoid sending sensitive or personal photos over unsecured networks. Consider encrypting your emails and attachments for added security. Additionally, be cautious of phishing scams and avoid opening suspicious attachments.
Here are some security measures to consider:
- Be Mindful of Content: Avoid sending sensitive or personal photos over unsecured networks.
- Encrypt Your Emails: Consider encrypting your emails and attachments for added security.
- Be Cautious of Phishing Scams: Avoid opening suspicious attachments from unknown senders.
- Use Secure Networks: Only send sensitive photos over secure, trusted networks.
- Keep Software Updated: Keep your email client and operating system updated to protect against security vulnerabilities.
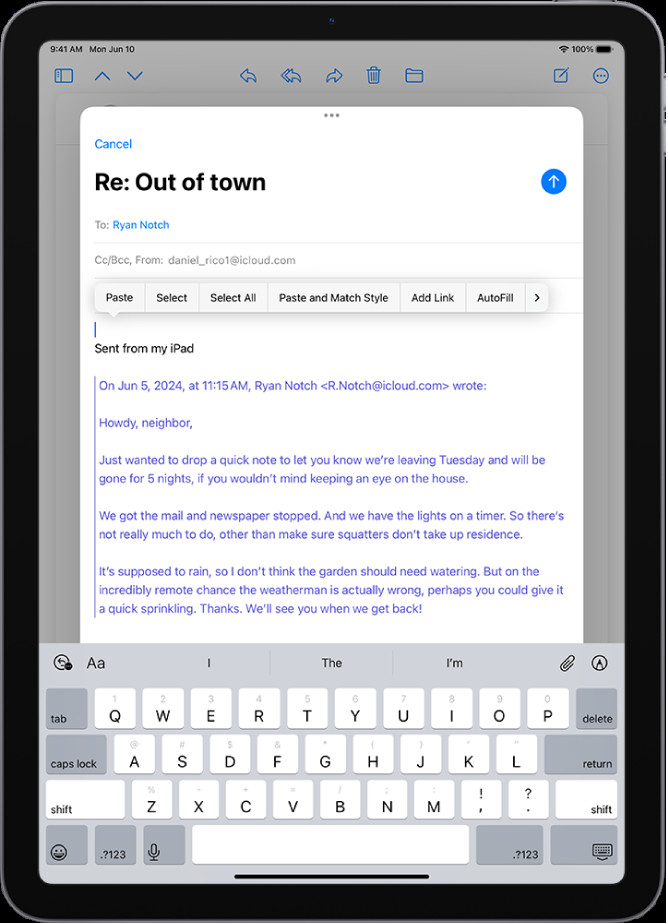 Draft email on iPad showing attachment options and keyboard
Attaching photos to emails on your iPad is a straightforward process that can greatly enhance your communication. By following these tips and best practices, you can ensure a smooth and professional experience for both you and your recipients.
Remember, mastering the art of email attachments on your iPad is just the beginning. To truly elevate your photography skills and explore the world of visual storytelling, visit dfphoto.net. Discover a wealth of tutorials, stunning photo collections, and a vibrant community of photographers ready to inspire your next masterpiece.
Unlock your photographic potential with dfphoto.net! Visit us today and transform your vision into reality.
FAQ: How To Attach A Photo To Email On Ipad
1. How do I attach a photo to an email on my iPad?
To attach a photo, open the Mail app, start a new email, tap in the message body, select the photo library icon, and choose your photo. It’s that simple!
2. Can I attach multiple photos to one email?
Yes, you can attach multiple photos by selecting them from your photo library after tapping the photo library icon.
3. What if my photo is too large to attach?
If your photo is too large, Mail Drop will be offered as a solution, or you can compress the photo or use a cloud service like Google Drive.
4. How do I scan a document and attach it to an email?
Tap in the email, select the scan document icon, scan the document using your iPad’s camera, and then attach the scanned document as a PDF.
5. Can I draw something and attach it to an email?
Yes, use the Markup toolbar to create a drawing, and then insert the drawing into your email as an attachment.
6. Is there a size limit for email attachments?
Yes, typically the limit is 20-25 MB, but Mail Drop allows you to send up to 5 GB.
7. How do I optimize a photo for email attachment?
Resize or compress the photo using a photo editing app to reduce its file size without significant quality loss.
8. What third-party apps can help with attaching photos to emails?
Apps like Dropbox, Google Drive, and WeTransfer can enhance the attachment process by allowing you to share files via cloud storage.
9. What security measures should I take when sending photos via email?
Avoid sending sensitive photos over unsecured networks, consider encrypting your emails, and be cautious of phishing scams.
10. What are the best practices for sharing photos via email?
Optimize photos, include a brief description, zip multiple photos, and always respect the recipient’s privacy.
Address: 1600 St Michael’s Dr, Santa Fe, NM 87505, United States. Phone: +1 (505) 471-6001. Website: dfphoto.net.