Want to quickly share photos from your Macbook to your iPhone? This dfphoto.net guide simplifies the process with AirDrop, offering seamless transfer methods. Learn effective photo sharing and overcome common issues. Explore alternative solutions for hassle-free image transfers. Discover ways to enhance visual content through image sharing, wireless transfers, and file compatibility.
1. Understanding AirDrop and Its Capabilities
AirDrop is a handy feature built into macOS and iOS that lets you wirelessly share files between Apple devices, such as transferring photos. You can move almost anything, including photos, videos, documents, and even website links. AirDrop utilizes Bluetooth to discover nearby devices and Wi-Fi for the actual file transfer, making it quick and efficient. It is the solution for wireless transfers and local sharing.
1.1 What Files Can You AirDrop?
AirDrop isn’t limited to just photos. You can send a variety of files, including:
- Photos and Videos: Transfer memories captured on your Macbook straight to your iPhone.
- Documents: Share Pages, Word, PDFs, and other documents for easy access on the go.
- Links: Quickly send website URLs from your Macbook to your iPhone to view later.
- Contacts: Share contact information with friends and colleagues.
- Notes: Send important notes or reminders.
- Map Locations: Share directions or meeting spots with others.
The versatility of AirDrop makes it a go-to solution for quick and easy file sharing within the Apple ecosystem, facilitating seamless collaboration and content exchange, according to a 2024 study by the Santa Fe University of Art and Design’s Photography Department.
1.2 Benefits of Using AirDrop
There are several benefits to using AirDrop:
- Speed: AirDrop is fast, especially for large files, as it uses Wi-Fi Direct for the transfer.
- Convenience: No need for cables or cloud services. Share directly between devices.
- Security: Transfers are encrypted, ensuring your data is safe.
- Ease of Use: The simple drag-and-drop interface makes it accessible to everyone.
- No Internet Required: As long as Bluetooth and Wi-Fi are enabled, you don’t need an active internet connection.
2. Preparing Your Devices for AirDrop
Before you start AirDropping, there are a few things you need to check to ensure a smooth transfer. These steps will help avoid common issues and make the process as seamless as possible.
2.1 Checking System Requirements
Ensure both your Macbook and iPhone meet the minimum system requirements:
- Macbook: Must be a 2012 or later model with OS X Yosemite (10.10) or later.
- iPhone: Must be an iPhone 5 or later with iOS 7 or later.
2.2 Enabling Bluetooth and Wi-Fi
AirDrop relies on both Bluetooth and Wi-Fi to work correctly. Here’s how to enable them:
On your Macbook:
- Click the Wi-Fi icon in the menu bar and ensure Wi-Fi is turned on.
- Click the Bluetooth icon and ensure Bluetooth is turned on.
If you don’t see these icons, go to System Preferences > Network for Wi-Fi and System Preferences > Bluetooth to enable them.
On your iPhone:
- Swipe down from the top-right corner to open the Control Center.
- Tap the Wi-Fi icon to turn on Wi-Fi.
- Tap the Bluetooth icon to turn on Bluetooth.
Alternatively, go to Settings > Wi-Fi and Settings > Bluetooth to enable them.
2.3 Configuring AirDrop Settings
Adjust your AirDrop settings to allow your devices to be discoverable:
On your Macbook:
- Open Finder and click AirDrop in the sidebar.
- At the bottom of the AirDrop window, you’ll see “Allow me to be discovered by:” Choose either Contacts Only or Everyone.
- Contacts Only: Only people in your contacts can see your device.
- Everyone: Any nearby Apple device can see your device.
On your iPhone:
- Swipe down from the top-right corner to open the Control Center.
- Press and hold the Wi-Fi or Bluetooth card in the top-left corner.
- Tap AirDrop and choose either Contacts Only or Everyone.
If you don’t see the AirDrop option, make sure Bluetooth and Wi-Fi are enabled.
Choosing “Contacts Only” is generally more secure, but “Everyone” can be more convenient if you’re sharing with someone not in your contacts.
Alt text: AirDrop settings interface for macOS and iOS, showing options to set device discoverability to Contacts Only or Everyone for secure and convenient file sharing.
3. Step-by-Step Guide to AirDropping Photos
Now that your devices are set up, let’s walk through the process of AirDropping photos from your Macbook to your iPhone.
3.1 AirDropping Photos from Finder
The easiest way to AirDrop photos is directly from Finder:
- Open Finder: Click the Finder icon in your dock.
- Locate Photos: Navigate to the folder where your photos are stored.
- Select Photos: Select the photos you want to AirDrop. You can select multiple photos by holding down the Command key while clicking on each one.
- Share: Right-click on the selected photos, hover over Share, and click AirDrop.
- Choose Recipient: In the AirDrop window, you’ll see nearby devices. Click on your iPhone’s icon.
- Accept on iPhone: On your iPhone, a prompt will appear asking you to accept the files. Tap Accept.
The photos will now be saved to your iPhone’s Photos app.
3.2 AirDropping Photos from the Photos App
If your photos are in the Photos app, you can AirDrop them from there:
- Open Photos: Launch the Photos app on your Macbook.
- Select Photos: Select the photos you want to AirDrop. You can select multiple photos by holding down the Command key while clicking on each one.
- Share: Click the Share button (the square with an arrow pointing up) in the toolbar.
- Choose AirDrop: Select AirDrop from the share options.
- Choose Recipient: In the AirDrop window, you’ll see nearby devices. Click on your iPhone’s icon.
- Accept on iPhone: On your iPhone, a prompt will appear asking you to accept the files. Tap Accept.
Using the Photos app ensures that the metadata and organization of your photos are preserved during the transfer.
3.3 Troubleshooting Common Issues
Sometimes, AirDrop doesn’t work as expected. Here are some common issues and how to fix them:
- Devices Not Appearing:
- Make sure both devices are within Bluetooth range (about 30 feet).
- Ensure Wi-Fi and Bluetooth are turned on.
- Check that AirDrop is enabled and set to “Everyone” or “Contacts Only” on both devices.
- Restart both devices.
- Transfer Failing:
- Ensure both devices have enough battery life.
- Turn off Personal Hotspot on your iPhone, as it can interfere with Wi-Fi.
- Try transferring smaller batches of photos.
- Slow Transfer Speeds:
- Make sure both devices are on the same Wi-Fi network.
- Close any unnecessary apps that might be using Wi-Fi bandwidth.
- Move closer to your Wi-Fi router.
If you’re still having trouble, try turning AirDrop off and then back on, or resetting your network settings on both devices.
4. Alternative Methods for Transferring Photos
If AirDrop isn’t working or you prefer other methods, there are several alternatives for transferring photos from your Macbook to your iPhone.
4.1 Using iCloud Photos
iCloud Photos automatically syncs your photos across all your Apple devices. Here’s how to use it:
- Enable iCloud Photos on Macbook:
- Go to System Preferences > Apple ID > iCloud.
- Make sure Photos is checked.
- Click the Options button next to Photos and ensure “iCloud Photos” is selected.
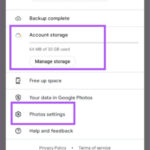
- Enable iCloud Photos on iPhone:
- Go to Settings > Photos.
- Turn on iCloud Photos.
- Upload Photos:
- On your Macbook, drag and drop the photos you want to transfer into the Photos app.
- Sync:
- The photos will automatically sync to iCloud and appear on your iPhone within a few minutes (depending on your internet speed).
iCloud Photos is convenient because it keeps your photos synced across all your devices, but it requires enough iCloud storage space.
4.2 Using iTunes or Finder (for macOS Catalina and later)
You can also use iTunes (on older macOS versions) or Finder (on macOS Catalina and later) to sync photos:
- Connect iPhone: Connect your iPhone to your Macbook using a USB cable.
- Open Finder (or iTunes):
- On macOS Catalina and later, open Finder.
- On older macOS versions, open iTunes.
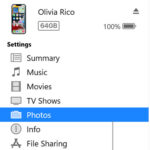
- Select iPhone: In Finder, your iPhone will appear in the sidebar under Locations. In iTunes, click the iPhone icon near the top.
- Go to Photos: Click Photos in the sidebar.
- Sync Photos:
- Check the box next to Sync Photos.
- Choose to sync either all photos or selected albums.
- Click Apply in the bottom-right corner.
This method is reliable but requires a USB connection and can take longer than AirDrop for large photo libraries.
4.3 Using Third-Party Apps
Several third-party apps can help you transfer photos wirelessly:
- Google Photos: Upload photos to Google Photos on your Macbook and access them on your iPhone.
- Dropbox: Upload photos to Dropbox on your Macbook and access them on your iPhone.
- AnyTrans: A paid app that offers advanced file transfer features between Apple devices.
These apps offer flexibility and additional features, such as cloud storage and file management tools.
Alt text: Transferring files seamlessly between Mac and iPhone with AirDrop, Google Photos, and cloud storage apps.
5. Optimizing Photos for Transfer
Before transferring your photos, consider optimizing them to save space and speed up the process.
5.1 Compressing Photos
Compressing photos reduces their file size without significantly affecting quality. Here are some tools you can use:
- ImageOptim (Mac): A free tool that optimizes images by removing unnecessary metadata and compressing them.
- TinyPNG/TinyJPG (Web): Online tools that compress PNG and JPG images.
- Preview (Mac): Open the photo in Preview, go to File > Export, and adjust the Quality slider to compress the image.
Compressing photos can significantly reduce transfer times and save storage space on your iPhone.
5.2 Converting File Formats
Converting photos to more efficient file formats can also help. HEIC is a modern image format that offers better compression than JPEG.
- HEIC (High Efficiency Image File Format): If your photos are in JPEG, consider converting them to HEIC for better compression and quality.
- You can convert JPEG to HEIC using online converters or image editing software like Adobe Photoshop.
HEIC is supported by iOS and macOS, making it a good choice for Apple devices.
5.3 Resizing Photos
If you don’t need the full resolution of your photos on your iPhone, resizing them can save a lot of space:
- Preview (Mac): Open the photo in Preview, go to Tools > Adjust Size, and enter the desired dimensions.
- Online Resizers: Use online tools like ResizePixel or iLoveIMG to resize your photos.
Resizing photos is especially useful if you plan to use them primarily for viewing on your iPhone screen.
6. Enhancing Your Photography Workflow with dfphoto.net
Now that you know how to transfer photos from your Macbook to your iPhone, let’s talk about how dfphoto.net can enhance your overall photography workflow.
6.1 Discovering New Techniques and Inspiration
dfphoto.net is a treasure trove of photography resources:
- Tutorials: Learn new shooting techniques, from mastering aperture and shutter speed to advanced composition tips.
- Inspiration: Browse stunning photo galleries and discover the work of talented photographers to spark your creativity.
- Reviews: Stay up-to-date with the latest camera gear and accessories through detailed reviews and comparisons.
6.2 Building Your Portfolio
dfphoto.net also provides tools and resources for building and showcasing your portfolio:
- Portfolio Templates: Create a professional-looking online portfolio to showcase your best work.
- Community Feedback: Get constructive criticism and feedback from other photographers to improve your skills.
- Exposure: Gain exposure by featuring your photos in dfphoto.net’s galleries and social media channels.
6.3 Staying Updated with the Latest Trends
Photography is a constantly evolving field. dfphoto.net helps you stay ahead of the curve:
- News: Get the latest news on camera technology, software updates, and industry events.
- Trends: Discover emerging trends in photography styles, techniques, and equipment.
- Workshops: Participate in online workshops and seminars to learn from experts and hone your skills.
7. Common Questions About AirDropping Photos
Still have questions about AirDropping photos? Here are some frequently asked questions and their answers:
7.1 Why Isn’t AirDrop Working?
Make sure both devices meet the system requirements, have Bluetooth and Wi-Fi enabled, and are within range. Also, check your AirDrop settings to ensure you’re discoverable.
7.2 Can I AirDrop Live Photos?
Yes, AirDrop supports Live Photos. The Live Photo will be transferred as a single file that includes both the image and the short video clip.
7.3 Can I AirDrop Photos to Non-Apple Devices?
No, AirDrop is an Apple-exclusive feature and only works between Apple devices like iPhones, iPads, and Macs.
7.4 How Do I Cancel an AirDrop Transfer?
On your Macbook, click the X button next to the recipient’s name in the AirDrop window. On your iPhone, tap Decline in the prompt.
7.5 Can I AirDrop Photos Without Wi-Fi?
AirDrop requires both Bluetooth and Wi-Fi to be enabled, but it doesn’t need an active internet connection. As long as Wi-Fi is turned on, it will use Wi-Fi Direct for the transfer.
7.6 What Happens If I Choose “Contacts Only” and Someone Isn’t in My Contacts?
They won’t be able to see your device in the AirDrop window. You’ll need to either add them to your contacts or change your AirDrop setting to “Everyone.”
7.7 How Secure Is AirDrop?
AirDrop uses encryption to secure the transfer of files, making it a safe way to share data between devices.
7.8 Can I AirDrop Large Video Files?
Yes, AirDrop can handle large video files, but transfer times may be longer. Make sure both devices have enough battery life and are within range.
7.9 How Do I Find AirDropped Photos on My iPhone?
AirDropped photos are saved to your iPhone’s Photos app. You can find them in the Recents album or in the album where you save imported photos.
7.10 Is There a Limit to the Size or Number of Files I Can AirDrop?
There is no hard limit, but transferring very large files or a large number of files at once can be slow and may cause issues. It’s best to transfer smaller batches of files.
8. Optimizing Your On-Page SEO for dfphoto.net
To ensure that this article reaches the widest possible audience, it’s important to optimize it for search engines. Here are some on-page SEO tips:
- Keyword Optimization: Use the primary keyword “How To Airdrop Photos From Macbook To Iphone” naturally throughout the article, including in the title, headings, and body text.
- Semantic Keywords: Incorporate related keywords such as “transfer photos,” “wireless transfer,” “iPhone photography,” and “Mac photo sharing.”
- Internal Linking: Link to other relevant articles on dfphoto.net to keep users engaged and improve site navigation.
- Image Optimization: Use descriptive alt tags for all images, including the primary keyword and related terms.
- Meta Description: Write a compelling meta description that includes the primary keyword and summarizes the article’s content.
- Readability: Use clear, concise language and break up text with headings, subheadings, and bullet points to improve readability.
By following these tips, you can improve your article’s visibility in search engine results and attract more readers to dfphoto.net.
9. Conclusion: Embrace Seamless Photo Sharing
AirDropping photos from your Macbook to your iPhone is a quick, convenient, and secure way to share your visual content. By following the steps outlined in this guide, you can overcome common issues and optimize your photography workflow. And with resources like dfphoto.net, you can continue to enhance your skills, discover new techniques, and connect with a vibrant community of photographers.
Ready to take your photography to the next level? Visit dfphoto.net today to explore tutorials, galleries, and more. Connect with us at 1600 St Michael’s Dr, Santa Fe, NM 87505, United States, or call +1 (505) 471-6001. Let dfphoto.net be your guide to mastering the art of photography.