Transferring photos from your iPhone to your Mac can sometimes feel like a hurdle. While options like iCloud, iTunes, or third-party services such as Dropbox exist, Apple’s AirDrop offers a seamless and rapid wireless solution. Especially with the advancements in iOS 18, AirDrop has become even more user-friendly for Apple ecosystem users.
Introduced with OS X Lion, AirDrop simplifies file sharing between Apple devices, including effortlessly transferring photos from iPhone to Mac. With iOS 18 and later, this feature provides an intuitive way to share photos and various files across your Apple devices. It’s also an excellent method to export your precious photos from your iPhone to your Mac for safekeeping and further editing.
Note: If you’re also looking to transfer data to a Windows PC, we have a dedicated guide on how to use AirDrop from iPhone to Windows PC.
Part 1. Understanding AirDrop: Functionality and Usage
AirDrop is Apple’s proprietary feature designed for wireless file transfers between iOS and macOS devices. While previously available on Macs, its utility was somewhat limited due to differing iOS device technologies. However, AirDrop has evolved, especially for Mac, to facilitate seamless file sharing between various Apple devices, even those not on the same network. Being integrated into the core Apple operating system, AirDrop doesn’t natively support transfers between Android and Mac. For those scenarios, alternative solutions are available.
Before diving into the process of how to AirDrop from iPhone to Mac, it’s crucial to understand the necessary prerequisites and setup steps to ensure a smooth transfer. This includes system compatibility checks and enabling AirDrop on your Mac.
To AirDrop to a Mac, you need to activate AirDrop mode on both devices involved in the file sharing. Then, simply select the files on your iPhone and AirDrop them to your Mac. AirDrop leverages both Wi-Fi and Bluetooth on your iPhone and Mac to create a direct, peer-to-peer connection. A significant advantage of AirDrop is its ability to function without an active internet connection.
So, how do you enable AirDrop on both your Mac and iPhone to facilitate photo transfers? Follow the instructions detailed below:
-
Device Compatibility Check: AirDrop compatibility starts from iPhone 5 and later, iPad (4th generation and newer), iPad Air, iPad Pro, iPad mini, and iPod touch (5th generation and later) running iOS 7 or later. For Macs, you’ll need a Mac computer with OS X Yosemite or later, or a MacBook introduced in 2012 or later.
-
Enabling AirDrop on iPhone and Mac: Ensure AirDrop is turned on for both devices. On your iPhone, navigate to Settings > General > AirDrop and toggle it on. To enable AirDrop on Mac, go to Finder > AirDrop and confirm that it is activated. Alternatively, on both iPhone and Mac, you can access Control Center and tap/click on AirDrop to choose your visibility settings:
- Off: Disables AirDrop completely.
- Contacts Only: Your device is discoverable only by your contacts.
- Everyone: Anyone nearby with AirDrop can see your device.
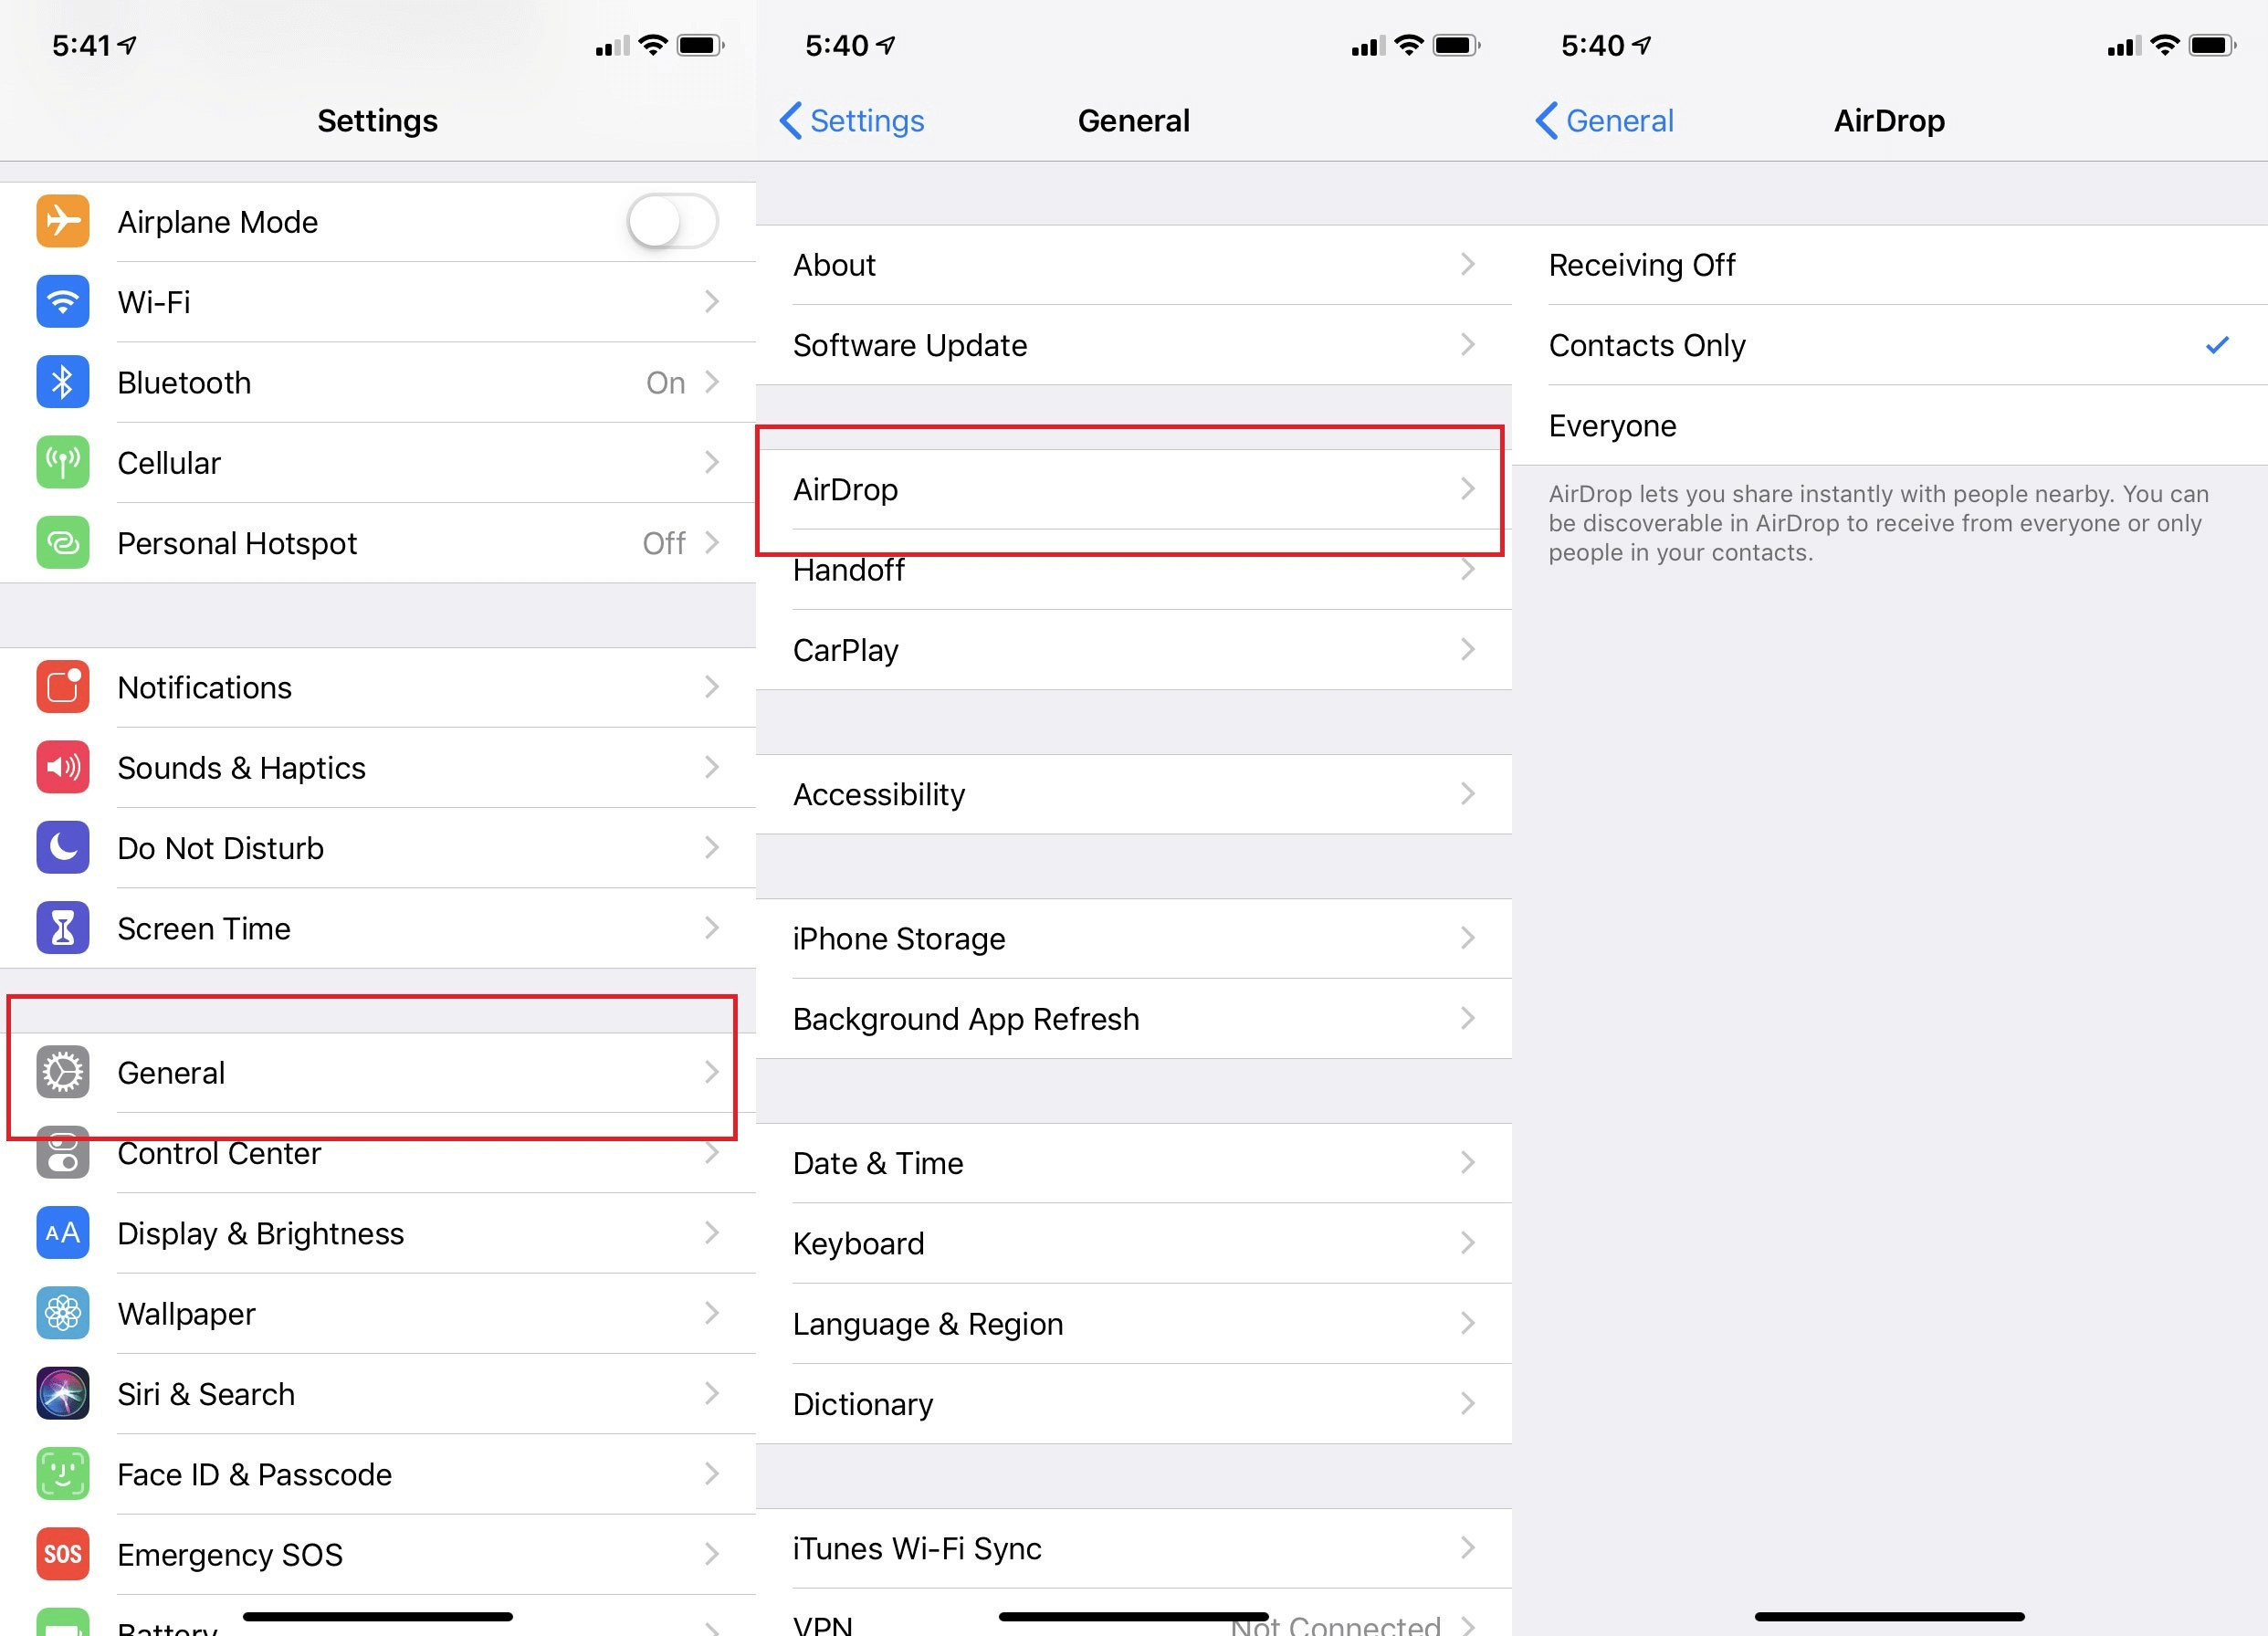 Turning on AirDrop on iPhone and Mac
 -
Wi-Fi and Bluetooth Activation: AirDrop requires both Wi-Fi and Bluetooth to establish a connection between your devices. Ensure both are enabled on your iPhone and Mac. On your iPhone, enable them through Settings > Wi-Fi and Settings > Bluetooth. On your Mac, click the Wi-Fi icon in the menu bar and select “Turn Wi-Fi On,” and similarly for Bluetooth.
-
Proximity of Devices: AirDrop performs optimally when devices are close to each other, ideally within 30 feet (9 meters). Keep your iPhone and Mac in close proximity for the best transfer speeds and reliability.
Part 2. Step-by-Step Guide: How to AirDrop Photos from iPhone to Mac
Understanding How To Airdrop Photos From Iphone To Mac is essential for efficient data transfer. Notably, transferring photos via AirDrop from iPhone to Mac does not necessitate being logged into the same iCloud account on both devices. AirDrop offers the advantage of streamlined transfers, often not requiring explicit approval for each file, especially when sending from your own iPhone to your own Mac.
Detailed Steps for AirDropping Photos from iPhone to Mac
Step 1: On your iPhone, open the Photos app and locate the photo or photos you wish to transfer to your Mac.
 Selecting photos to AirDrop from iPhone to Mac
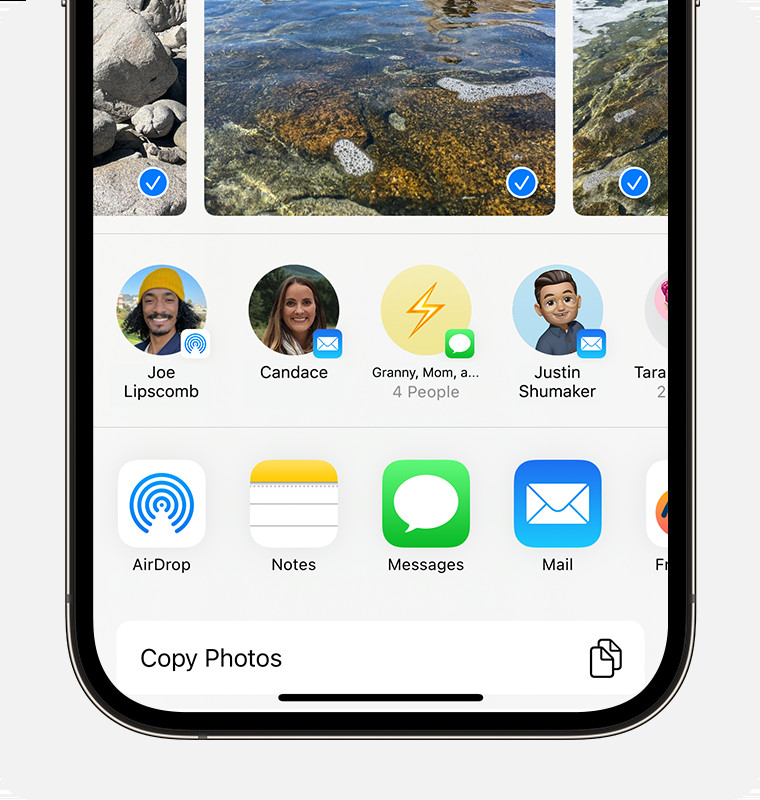
Step 2: Tap the Share icon (a square with an upward arrow), typically found at the bottom left of the screen. In the Share Sheet that appears, find and tap the AirDrop icon.
Step 3: Your iPhone will begin searching for nearby AirDrop-enabled devices. After a brief scan, your Mac should appear in the list of available devices, usually identified by your Mac’s name or your Apple ID name. Tap on your Mac’s name to initiate the photo transfer.
 Initiating AirDrop from iPhone to a Mac device
Step 4: On your Mac, an AirDrop notification will pop up, displaying a preview of the photo being sent from your iPhone. Click the “Accept” button to proceed with the transfer.
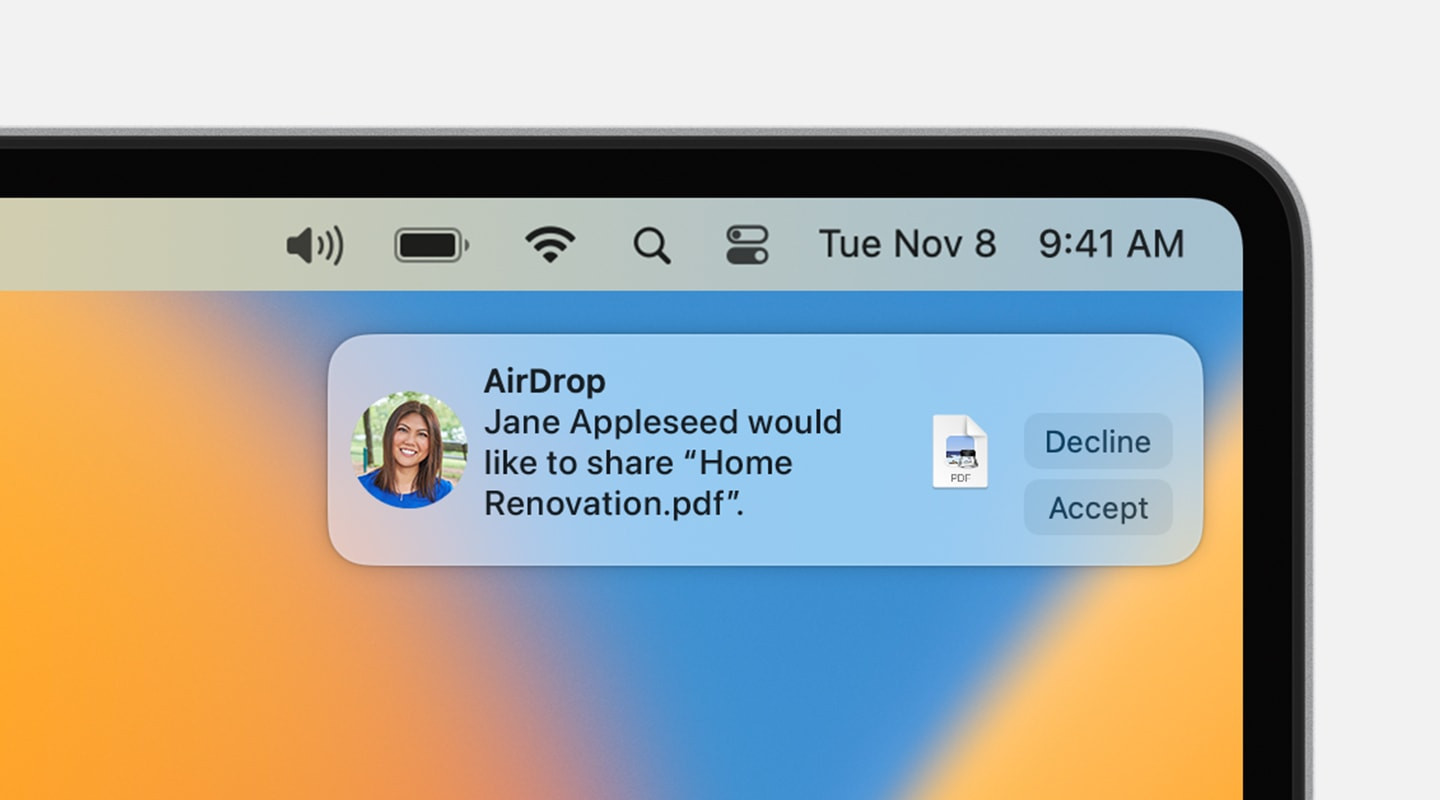 Accepting AirDrop photo transfer request on Mac
Step 5: The photos will now be transferred from your iPhone to your Mac. Once the transfer is complete, your Mac will play a brief sound, and the transferred photos will be saved in your Downloads folder by default. You can then access and manage your photos on your Mac.
Part 3. Alternative Methods: Transferring iPhone Photos to Mac Without AirDrop
MobileTrans provides a robust alternative for transferring photos and other data between iPhones and Macs, as well as Android devices. Beyond simple transfers, MobileTrans offers features for data backup, restoration, and phone-to-phone transfers. If you are seeking an alternative to AirDrop for transferring photos from iPhone to Mac, MobileTrans offers a reliable solution. It also supports transferring files between Android and Mac devices.
Introducing MobileTrans – iPhone to Mac Transfer
Transfer iPhone Data to Mac in Just One Click!
- Effortlessly transfer photos, videos, contacts, calendars, and messages from iPhone to Mac.
- Backup and restore your device data to your computer with a single click.
- Quick process, usually completed in under 10 minutes.
4,085,556+ Downloads 4.5/5 Excellent Rating
Step 1. Download and Install MobileTrans, then Connect Your iPhone to Your Mac
Establish a connection between your iPhone and Mac using a USB cable. Once connected, your Mac should recognize the new device. Launch the MobileTrans software and choose the “Backup & Restore” module, then select “Phone Backup”.
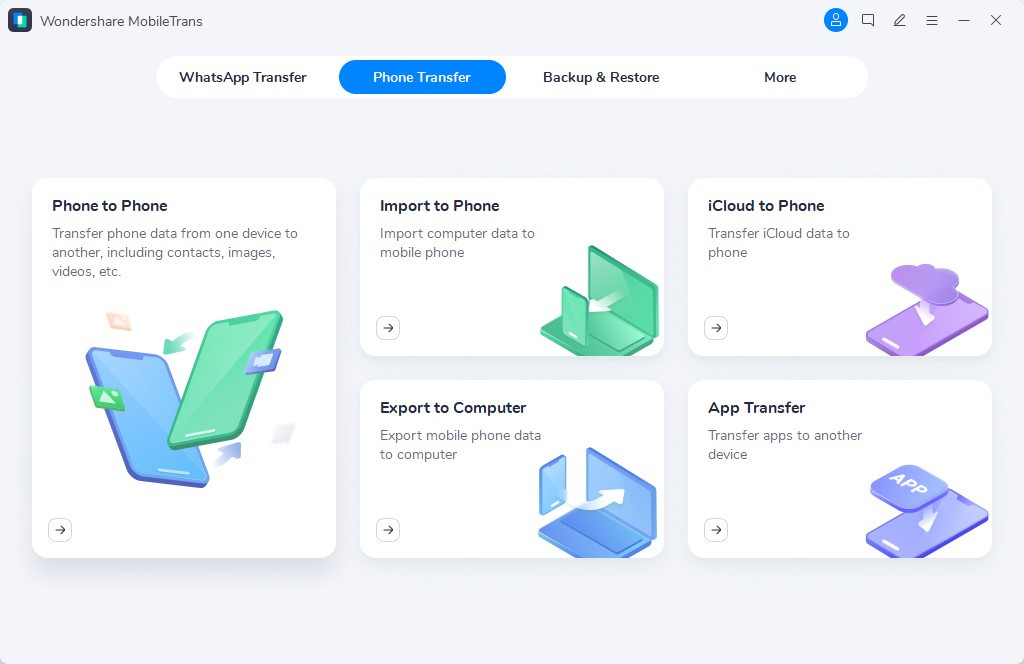 Connecting iPhone to Mac for file transfer using MobileTrans
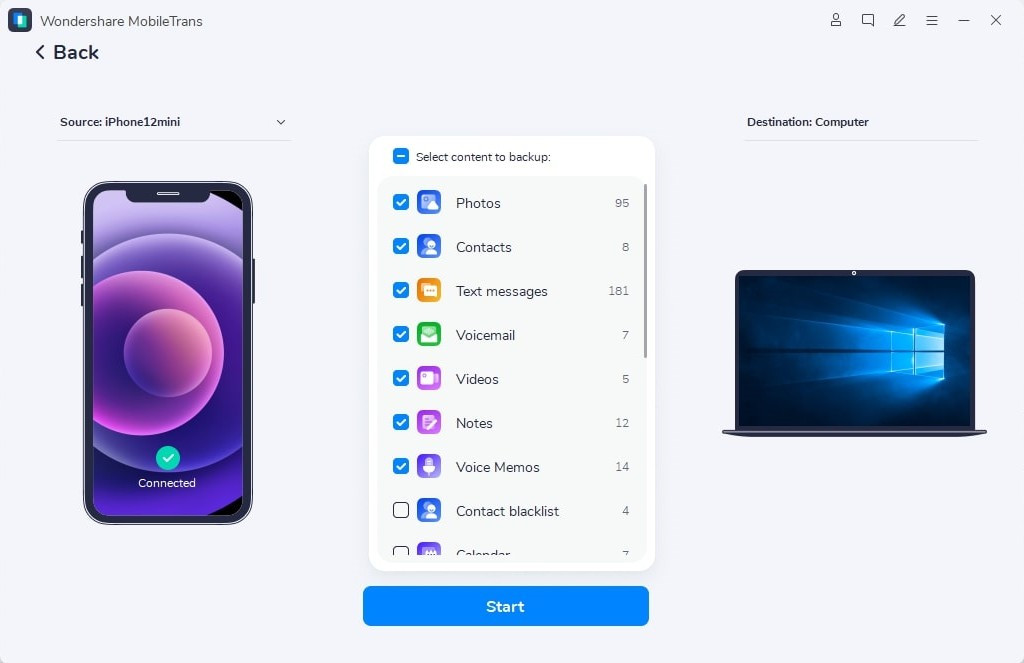
Step 2. Select the Photo Files for Transfer
MobileTrans will display a list of all file types available on your iPhone. Select “Photos” from the list to choose the photos you wish to transfer to your Mac.
 Selecting photo files for iPhone to Mac transfer in MobileTrans
Step 3. Initiate the Transfer Process
Click the “Start” button to begin transferring your selected photos to your Mac. You can choose to back them up on your Mac for future access and restoration if needed. The photo backup process to your Mac will commence shortly.
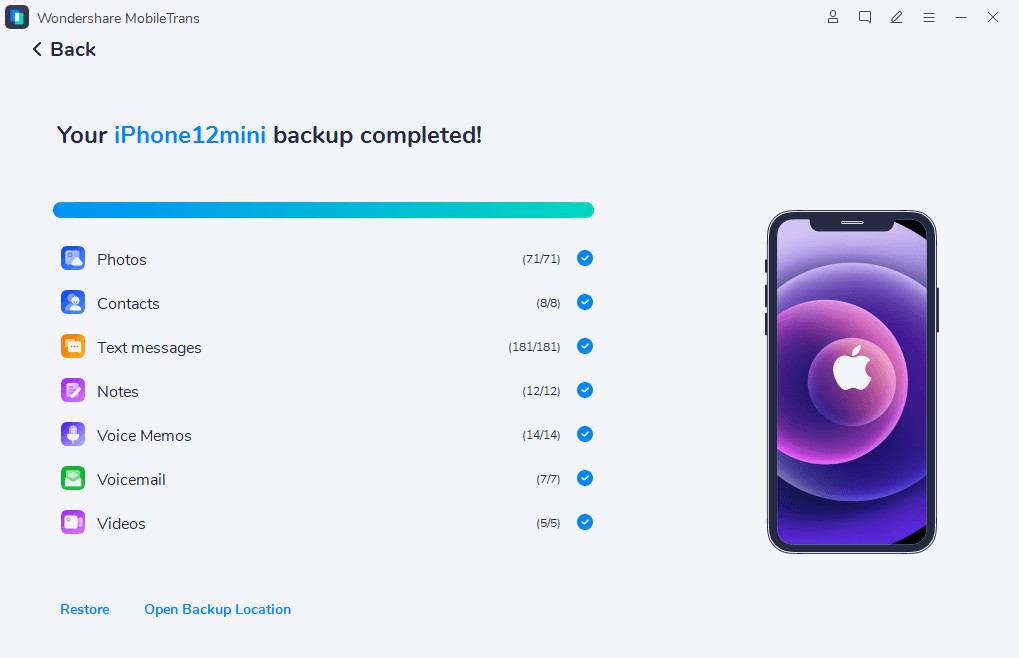 Starting photo transfer from iPhone to Mac using MobileTrans software
Part 4. Troubleshooting Common AirDrop Issues
While AirDrop is generally reliable, you may encounter issues when trying to AirDrop photos from iPhone to Mac. Common problems include:
- AirDrop icon not appearing in the Control Center.
- Inability to AirDrop music files (often due to DRM restrictions).
- Limitation to Apple devices only; cannot transfer to non-iOS devices directly.
- Range limitations; devices must be within approximately 30 feet for optimal connection.
To ensure a smoother AirDrop experience, consider these troubleshooting tips:
- Keep Devices Updated: Regularly update both your iPhone and Mac to the latest iOS and macOS versions. Updates often include performance improvements and bug fixes for features like AirDrop.
- Restart Devices: If AirDrop is malfunctioning, restarting both your iPhone and Mac can often resolve temporary glitches and connectivity issues.
- Check AirDrop Visibility Settings: On your iPhone, go to Settings > General > AirDrop and verify that your visibility is set to “Everyone” or “Contacts Only” as per your preference. On your Mac, check AirDrop settings in Finder > AirDrop.
- Disable Personal Hotspot & Interference: Turn off Personal Hotspot on your iPhone and any potential sources of interference like Bluetooth accessories or Wi-Fi extenders, which can sometimes disrupt AirDrop connections.
- Restart Wi-Fi and Bluetooth: Try toggling Wi-Fi and Bluetooth off and then on again on both devices to refresh the wireless connections if AirDrop is still not working correctly.
- Consider Cloud Storage: For broader accessibility and sharing across devices and platforms, consider utilizing cloud storage services like iCloud, Google Drive, or Dropbox in conjunction with or as an alternative to AirDrop for photo management.
Part 5. Frequently Asked Questions about AirDrop
1. Why is AirDrop not working from my iPhone to my Mac?
If you’re facing issues with AirDrop, first check your Wi-Fi and Bluetooth connections on both devices. Ensure that Firewall settings on your Mac are not blocking AirDrop and verify that your AirDrop receiving settings in Finder are correctly configured to allow discovery.
2. Why is my AirDrop transfer stuck on “Waiting”?
Common causes for AirDrop being stuck on “Waiting” include: devices being too far apart, devices not meeting AirDrop system requirements, disabled Wi-Fi or Bluetooth on either device, or Personal Hotspot being enabled, which can interfere with AirDrop.
3. What could cause AirDrop to fail when transferring from iPhone to Mac?
If AirDrop fails, ensure Wi-Fi and Bluetooth are enabled and functioning correctly on both your iPhone and Mac. Confirm that both Apple devices are updated to the latest software versions, and your iPhone is unlocked during the transfer process. Restarting both devices after adjusting settings can often resolve persistent AirDrop issues.
Conclusion
By following this guide, you should now have a clear understanding of how to AirDrop photos from your iPhone to your Mac effectively. AirDrop is generally a straightforward and efficient method for transferring photos and files within the Apple ecosystem.
Try MobileTrans Free Try MobileTrans for Mac Free
Explore More:
How to Transfer MP3 to iPhone: 7 Quick and Easy Methods
How to Transfer Music from iPhone Android: 5 Step-by-Step Guides
How To Transfer Files From iPhone To Mac
How to Copy Contacts from iPhone to Huawei | 5 Efficient Guides
By Nicola Massimo
Staff Editor