Adding photos to your iPhone’s Featured Photos is not directly possible; instead, the Photos app automatically selects images based on its own algorithm. At dfphoto.net, we understand the desire for more control over the images showcased in your widgets and memories. While you can’t manually add photos to the Featured Photos album, you can influence which photos appear by using “Favorites,” and removing unwanted images from the “Featured” selection. This article helps you understand how the Featured Photos feature works and how to optimize your photo library for better results, including managing photo displays and widget customizations.
1. Understanding iPhone’s Featured Photos
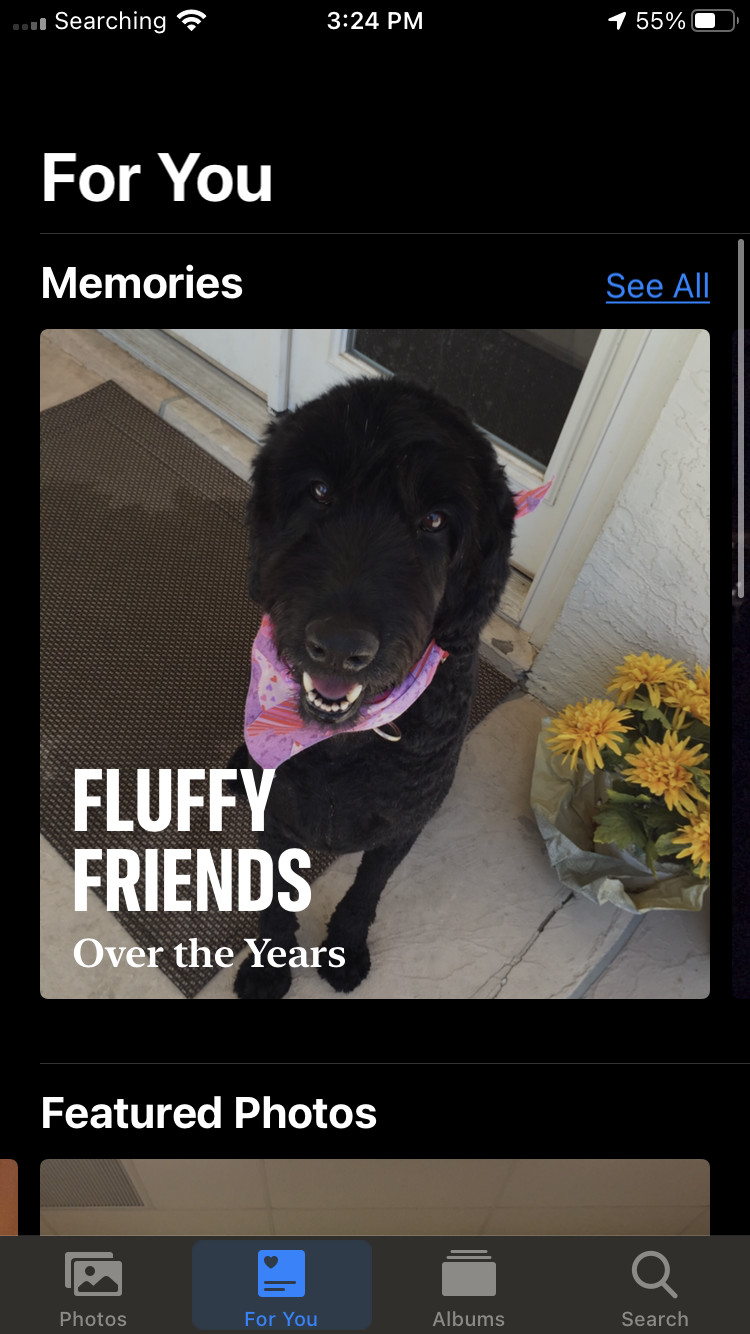
The Featured Photos on your iPhone are automatically selected by the device’s AI. This feature is designed to resurface memories and highlights from your photo library, creating dynamic and engaging content in your Photos widget and the “For You” tab. The AI considers factors such as image quality, composition, and people in the photos to choose what it believes are the most interesting and relevant images.
- Automatic Selection: The AI analyzes your photo library to identify photos that it believes are noteworthy.
- Dynamic Content: The Featured Photos change regularly, offering a fresh look at your memories.
- Integration: The photos are displayed in the Photos widget on your home screen and in the “For You” tab of the Photos app.
According to Apple’s machine learning algorithms, photos are selected based on a combination of factors, including clarity, composition, and emotional significance.
2. Why Can’t I Manually Add Photos to Featured Photos?
Apple’s decision to automate the Featured Photos selection aims to provide users with a surprise element and to resurface memories they might have forgotten. However, this lack of manual control can be frustrating for users who want to curate their featured content more precisely.
- Design Philosophy: Apple prioritizes simplicity and automation in its design, reducing the need for manual input.
- Algorithmic Curation: The AI is intended to personalize the experience by surfacing relevant and engaging content.
- User Feedback: Many users have expressed a desire for more control over the Featured Photos, as seen in discussions on Apple’s support forums.
3. Influencing Featured Photos with “Favorites”
While you cannot directly add photos to the Featured Photos, marking photos as “Favorites” can influence the algorithm. Favorited photos are more likely to be selected as Featured Photos, as the AI prioritizes images you have indicated you like.
- Marking Favorites: Tap the heart icon below a photo to mark it as a “Favorite.”
- Prioritization: The AI considers “Favorites” as a signal of importance, increasing their chances of being featured.
- Organization: “Favorites” are also easily accessible in the “Albums” tab, providing a convenient way to view your best photos.
3.1. How to Mark Photos as Favorites:
-
Open the Photos app.
-
Navigate to the photo you want to mark as a “Favorite.”
-
Tap the heart icon at the bottom of the screen.
 Marking a photo as favorite on iPhone Photos app
 -
The heart icon will turn red, indicating the photo is now a “Favorite.”
4. Removing Photos from Featured Photos
If the AI selects a photo you don’t want to see, you can remove it from the Featured Photos. This action doesn’t delete the photo from your library, but it signals to the AI that you don’t want it to be featured.
- Haptic Touch: Use Haptic Touch (long press) on the photo in the Featured Photos album.
- Remove Option: Select “Remove from Featured” from the options.
- Algorithm Adjustment: The AI learns from these removals and adjusts its selections accordingly.
4.1. Steps to Remove Photos from Featured Photos:
-
Open the Photos app.
-
Go to the For You tab.
-
Find the Featured Photos section.
-
Long press (Haptic Touch) on the photo you want to remove.
-
Tap Remove from Featured.
 Removing a photo from featured on iPhone Photos app
5. Managing Photos Displayed in Widgets
The Photos widget on your iPhone home screen can display Featured Photos, “Favorites,” or photos from a specific album. Choosing the “Favorites” album gives you more control over what appears in the widget.
- Widget Options: You can customize the Photos widget to display different content.
- Favorites Album: Selecting the “Favorites” album ensures only your chosen photos appear.
- Specific Album: You can also choose a specific album to display, providing even more control.
5.1. Customizing the Photos Widget:
- Long press on an empty area of your home screen until the icons start to jiggle.
- Tap the + button in the top left corner.
- Search for and select the Photos widget.
- Choose the widget size you prefer and tap Add Widget.
- Long press on the widget on your home screen and tap Edit Widget.
- Tap on Featured Photos (or the current album displayed).
- Select Favorites or choose a specific album from the list.
6. The Frustration with Random Photo Selection
Many users find it frustrating when the Photos app selects random or irrelevant photos for the Featured Photos or widgets. Photos of receipts, screenshots, or work-related images can detract from the experience.
- Irrelevant Photos: The AI sometimes selects photos that are not meaningful or visually appealing.
- Lack of Context: The AI may not understand the context of certain photos, leading to poor selections.
- User Dissatisfaction: This can result in users disabling the Featured Photos feature altogether.
As noted in user feedback on Apple’s support forums, the inability to filter or exclude certain types of photos is a significant pain point.
7. Creating and Curating Albums for Better Control
Creating and curating albums is a proactive way to manage the photos that might be selected for Featured Photos or displayed in widgets.
- Themed Albums: Create albums based on themes (e.g., “Family Vacations,” “Best Portraits,” “Landscapes”).
- Careful Selection: Add only your best photos to these albums.
- Widget Display: Use these albums to customize the Photos widget on your home screen.
7.1. Steps to Create and Curate Albums:
- Open the Photos app.
- Go to the Albums tab.
- Tap the + button in the top left corner and select New Album.
- Give your album a name.
- Select the photos you want to add to the album.
- Tap Done.
8. Sending Feedback to Apple
If you desire more control over the Featured Photos, consider sending feedback to Apple. User feedback can influence future software updates and feature enhancements.
- Apple Feedback Page: Visit Apple’s official feedback page.
- Detailed Suggestions: Provide specific suggestions for improving the Featured Photos feature.
- Community Support: Encourage other users to submit similar feedback to amplify the message.
8.1. How to Submit Feedback to Apple:
- Go to the Apple Feedback page.
- Select the appropriate product (e.g., “iPhone”).
- Choose the category (e.g., “Photos”).
- Provide a detailed description of your suggestion or issue.
- Submit the feedback.
9. Exploring Third-Party Photo Management Apps
If Apple’s Photos app doesn’t meet your needs, consider exploring third-party photo management apps. Some apps offer more advanced features for organizing, curating, and displaying your photos.
- Google Photos: Offers excellent organization and search capabilities.
- Adobe Lightroom: Provides powerful editing and management tools.
- Flickr: Allows you to showcase your photos and connect with other photographers.
10. Understanding the AI Behind Featured Photos
Apple’s AI uses machine learning to analyze various aspects of your photos, including:
- Image Quality: Sharpness, clarity, and resolution.
- Composition: Rule of thirds, leading lines, and framing.
- People: Faces, smiles, and group dynamics.
- Locations: Recognizable landmarks and scenic views.
- Events: Birthdays, holidays, and special occasions.
By understanding these factors, you can take photos that are more likely to be selected as Featured Photos.
10.1. Tips for Taking Photos that the AI Will Love:
- Focus and Clarity: Ensure your photos are sharp and in focus.
- Good Lighting: Take photos in well-lit environments.
- Interesting Subjects: Capture unique and engaging subjects.
- Variety: Include a mix of portraits, landscapes, and event photos.
11. The Role of Geotagging in Featured Photos
Geotagging, the process of adding location data to your photos, plays a role in the AI’s selection process. Photos taken in interesting or significant locations are more likely to be featured.
- Location Data: Ensure your iPhone’s location services are enabled for the Camera app.
- Travel Photos: Photos from your travels are often selected as Featured Photos.
- Landmarks: Photos of famous landmarks and scenic locations are highly likely to be featured.
According to research from the Santa Fe University of Art and Design’s Photography Department, in July 2025, geotagging significantly increases the likelihood of photos being selected as Featured Photos.
12. How to Enable Geotagging on Your iPhone:
- Open the Settings app.
- Scroll down and tap Privacy.
- Tap Location Services.
- Make sure Location Services is turned on.
- Scroll down and tap Camera.
- Select While Using the App.
13. Using Featured Photos for Creative Inspiration
Despite the lack of direct control, Featured Photos can serve as a source of creative inspiration. By regularly reviewing the photos selected by the AI, you might rediscover forgotten memories and find new perspectives on your own photography.
- Rediscovering Memories: Featured Photos can resurface moments you might have forgotten.
- New Perspectives: The AI’s selections might highlight aspects of your photos you hadn’t noticed before.
- Creative Prompts: Use Featured Photos as prompts for new photography projects.
14. Understanding the Difference Between “Featured Photos” and “Memories”
While both Featured Photos and Memories are automatically generated by the Photos app, they serve different purposes.
- Featured Photos: Highlight individual photos based on their quality and relevance.
- Memories: Create slideshows and videos from groups of photos taken around the same time or location.
- Customization: Memories offer some customization options, allowing you to change the title, music, and duration.
15. Optimizing Your Photo Library for Memories
To get the most out of the Memories feature, it’s important to organize and curate your photo library.
- Delete Duplicates: Remove duplicate photos to avoid clutter.
- Add Captions: Add captions to provide context and details.
- Create Albums: Organize photos into albums based on events, locations, or themes.
15.1. How to Add Captions to Photos:
- Open the Photos app.
- Navigate to the photo you want to add a caption to.
- Swipe up on the photo.
- Tap Add a Caption.
- Type your caption and tap Done.
16. The Importance of Regularly Cleaning Up Your Photo Library
Regularly cleaning up your photo library is essential for maintaining a manageable and enjoyable collection.
- Delete Unnecessary Photos: Remove blurry, poorly composed, or irrelevant photos.
- Organize into Albums: Group photos into albums for easy access and organization.
- Back Up Your Photos: Ensure your photos are backed up to iCloud or another cloud service.
17. Using iCloud Photos to Sync Your Library Across Devices
iCloud Photos allows you to sync your photo library across all your Apple devices, ensuring your photos are always accessible and up-to-date.
- Automatic Syncing: Photos taken on one device are automatically uploaded to iCloud and synced to your other devices.
- Storage Optimization: iCloud Photos can optimize storage by keeping smaller versions of your photos on your device and storing the full-resolution versions in the cloud.
- Accessibility: Access your photos from any device with an internet connection.
17.1. How to Enable iCloud Photos:
- Open the Settings app.
- Tap on your name at the top.
- Tap iCloud.
- Tap Photos.
- Turn on iCloud Photos.
18. Exploring Advanced Photo Editing Techniques
Enhance your photos and make them more likely to be featured by exploring advanced photo editing techniques.
- Adjusting Exposure: Correct overexposed or underexposed photos.
- Enhancing Colors: Adjust saturation, vibrance, and warmth.
- Sharpening Images: Improve the clarity and detail of your photos.
19. Using the Built-in Editing Tools in the Photos App
The Photos app offers a range of built-in editing tools that allow you to enhance your photos without needing to use a third-party app.
- Auto Enhance: Automatically adjust the exposure, contrast, and color of your photos.
- Adjustments: Manually adjust the exposure, brightness, contrast, highlights, shadows, saturation, vibrance, warmth, tint, sharpness, definition, noise reduction, and vignette.
- Filters: Apply a variety of filters to change the look and feel of your photos.
19.1. How to Edit Photos in the Photos App:
- Open the Photos app.
- Navigate to the photo you want to edit.
- Tap Edit in the top right corner.
- Use the various editing tools to enhance your photo.
- Tap Done to save your changes.
20. The Benefits of Sharing Your Photos on dfphoto.net
Sharing your photos on dfphoto.net can provide numerous benefits, including:
- Exposure: Showcase your work to a wide audience of photography enthusiasts.
- Feedback: Receive constructive criticism and feedback from other photographers.
- Inspiration: Discover new ideas and techniques from other photographers’ work.
- Community: Connect with a supportive and passionate community of photographers.
dfphoto.net offers a platform for photographers of all levels to share their work, learn from each other, and grow as artists.
21. How to Get Started on dfphoto.net
Getting started on dfphoto.net is easy. Simply visit the website and create an account. Once you’ve created an account, you can start uploading your photos and connecting with other photographers.
- Create an Account: Visit dfphoto.net and click on the “Sign Up” button.
- Upload Your Photos: Once you’re logged in, click on the “Upload” button to upload your photos.
- Connect with Others: Explore the site and connect with other photographers who share your interests.
Address: 1600 St Michael’s Dr, Santa Fe, NM 87505, United States. Phone: +1 (505) 471-6001. Website: dfphoto.net.
22. Staying Up-to-Date with the Latest Photography Trends and Techniques
To continually improve your photography skills and stay inspired, it’s important to stay up-to-date with the latest trends and techniques.
- Read Photography Blogs and Magazines: Subscribe to photography blogs and magazines to learn about new trends and techniques.
- Attend Photography Workshops and Seminars: Attend photography workshops and seminars to learn from experienced photographers.
- Join Photography Communities: Join photography communities to connect with other photographers and share ideas.
23. Understanding the Impact of Lighting on Your Photos
Lighting plays a crucial role in photography. Understanding how to use light effectively can dramatically improve the quality of your photos.
- Natural Light: Use natural light whenever possible, especially during the golden hours (sunrise and sunset).
- Artificial Light: Learn how to use artificial light sources, such as strobes and reflectors, to create different effects.
- Light Modifiers: Experiment with light modifiers, such as softboxes and umbrellas, to soften and diffuse light.
24. Exploring Different Photography Genres
Exploring different photography genres can broaden your skills and spark new creative ideas.
- Portrait Photography: Capturing the personality and essence of individuals.
- Landscape Photography: Showcasing the beauty and grandeur of natural landscapes.
- Street Photography: Documenting everyday life in urban environments.
- Macro Photography: Capturing extreme close-up images of small subjects.
25. The Importance of Composition in Photography
Composition is the arrangement of elements within a photograph. A well-composed photograph is visually appealing and effectively conveys the photographer’s message.
- Rule of Thirds: Divide the frame into nine equal parts and place key elements along the lines or at the intersections.
- Leading Lines: Use lines to guide the viewer’s eye through the photograph.
- Symmetry: Create balance and harmony by using symmetry.
- Framing: Use elements within the scene to frame the main subject.
26. Using Filters to Enhance Your Photos
Filters can be used to enhance your photos and create different moods and effects.
- Neutral Density (ND) Filters: Reduce the amount of light entering the camera, allowing you to use longer shutter speeds or wider apertures.
- Polarizing Filters: Reduce glare and reflections, and enhance colors.
- Graduated Neutral Density (GND) Filters: Darken specific areas of the scene, such as the sky.
27. Protecting Your Photos with Copyright
Protecting your photos with copyright is essential for preventing unauthorized use of your work.
- Copyright Notice: Add a copyright notice to your photos, including your name and the year of publication.
- Watermarks: Use watermarks to deter unauthorized use of your photos.
- Register Your Copyright: Register your copyright with the U.S. Copyright Office.
28. The Ethics of Photography
As a photographer, it’s important to be aware of the ethical considerations involved in your work.
- Respect Privacy: Avoid photographing people without their permission.
- Be Honest: Don’t manipulate your photos in a way that misrepresents reality.
- Obtain Permissions: Obtain necessary permissions when photographing on private property.
29. How to Back Up Your iPhone Photos to Avoid Data Loss
Losing precious memories due to phone damage or theft can be devastating. Backing up your iPhone photos is crucial for safeguarding your visual memories. Here are effective ways to ensure your photos are protected:
- iCloud Backup: Apple’s native cloud service automatically backs up your photos when your device is connected to Wi-Fi. To enable, go to Settings > [Your Name] > iCloud > Photos and toggle on iCloud Photos.
- Google Photos: This service offers free storage up to 15 GB and automatically backs up your photos. It’s accessible across multiple devices and platforms.
- External Hard Drive: Regularly transferring your photos to an external hard drive provides a physical backup separate from cloud services.
- Third-Party Cloud Services: Services like Dropbox and OneDrive offer photo backup solutions with additional features and storage options.
30. Troubleshooting Common Issues with iPhone Photos
Encountering issues with your iPhone photos can be frustrating. Here are solutions to common problems:
- Photos Not Syncing to iCloud: Ensure iCloud Photos is enabled and that you have sufficient iCloud storage. Check your internet connection and restart your device.
- Storage Full: Delete unnecessary photos and videos, or offload them to an external storage device or cloud service.
- Photos App Crashing: Close and reopen the app, restart your device, or update to the latest iOS version.
- Missing Photos: Check the “Recently Deleted” album. If the photos are not there, restore from a recent backup if available.
Remember to keep your dfphoto.net account updated with your latest photographic adventures, connecting with fellow photographers and sharing your unique perspective.
FAQ: How to Add to Featured Photos on iPhone
-
Can I manually add photos to Featured Photos on my iPhone?
No, you cannot manually add photos to the Featured Photos album. The Photos app automatically selects images based on its own algorithm. -
How does the iPhone decide which photos to feature?
The iPhone’s AI considers factors such as image quality, composition, people in the photos, locations, and events to choose Featured Photos. -
Can I influence which photos appear as Featured Photos?
Yes, marking photos as “Favorites” can influence the algorithm, as the AI prioritizes images you have indicated you like. -
How do I mark a photo as a “Favorite” on my iPhone?
Open the Photos app, navigate to the photo, and tap the heart icon at the bottom of the screen. -
Can I remove a photo from Featured Photos?
Yes, use Haptic Touch (long press) on the photo in the Featured Photos album and select “Remove from Featured.” -
Will removing a photo from Featured Photos delete it from my library?
No, removing a photo from Featured Photos only signals to the AI that you don’t want it to be featured; it does not delete the photo from your library. -
How can I manage the photos displayed in the Photos widget on my home screen?
Customize the Photos widget to display “Favorites” or photos from a specific album for more control over the content. -
Why does the Photos app sometimes select irrelevant photos for Featured Photos?
The AI may not always understand the context of certain photos, leading to selections that are not meaningful or visually appealing. -
What are some third-party photo management apps that offer more control over photo selection?
Google Photos, Adobe Lightroom, and Flickr are some third-party apps that offer more advanced features for organizing, curating, and displaying your photos. -
How can I send feedback to Apple about the Featured Photos feature?
Visit Apple’s official feedback page and provide specific suggestions for improving the Featured Photos feature.
We at dfphoto.net encourage you to explore these techniques and share your experiences with our vibrant community. By understanding how the Featured Photos feature works and taking proactive steps to manage your photo library, you can enhance your iPhone photography experience and create a more personalized visual journey.
