Adding text to photos on your Mac can transform a simple image into a powerful visual story. Whether you’re creating social media content, designing marketing materials, or simply personalizing your snapshots, knowing How To Add Text To A Photo On Mac is an essential skill. This article will guide you through various methods, from using the built-in Photos app to exploring more advanced software like Adobe Photoshop, ensuring your images truly stand out. Let’s dive in and unlock the creative potential of your photos! At dfphoto.net, we offer guides and inspiration to help you master image editing. Explore artistic typography, creative watermarks and branding elements to make your images unforgettable!
1. Why Add Text to Photos on Your Mac?
Adding text to photos is more than just a decorative touch; it’s a strategic way to enhance your message and engage your audience. Here’s why you should consider adding text to your images:
- Enhance Communication: Text can provide context, explain the image, or convey a specific message that the photo alone might not capture.
- Brand Promotion: Adding your logo, website address, or brand name to your photos helps in brand recognition and marketing efforts.
- Create Memes and Social Media Content: Text is essential for creating engaging memes, quotes, and other shareable content on social media platforms.
- Personalize Memories: Adding dates, locations, or personal notes to your photos helps preserve memories and adds a personal touch.
- Artistic Expression: Text can be used as a creative element to enhance the artistic appeal of your photos, creating unique and visually striking compositions.
2. Using the Built-in Photos App on Mac to Add Text
The Photos app on your Mac offers a simple and straightforward way to add text to your images. While it may not have all the advanced features of professional software, it’s perfect for basic text additions and annotations.
2.1. Steps to Add Text Using Markup Tools
Here’s how you can add text to a photo using the Markup tools in the Photos app:
- Open the Photo: Double-click the photo you want to edit to open it in the Photos app.
- Enter Edit Mode: Click the “Edit” button in the top-right corner of the window.
- Select Markup: Click the “Markup” button (it looks like a pen tip) in the edit toolbar.
- Choose the Text Tool: Click the “Text” tool (represented by a “T”) in the Markup toolbar.
- Add Text: Click on the photo where you want to add text. A text box will appear.
- Type Your Text: Enter the text you want to add.
- Customize Text: Use the formatting options in the Markup toolbar to change the font, size, color, and alignment of your text.
- Position Text: Drag the text box to position it where you want it on the photo.
- Save Changes: Click “Done” to save your changes.
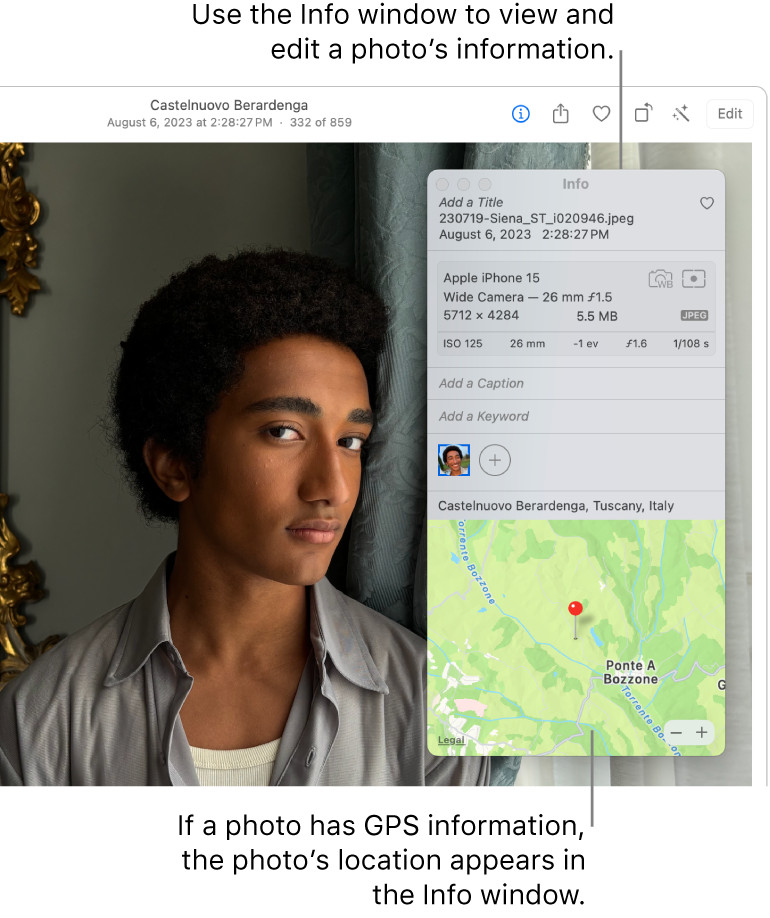 Screenshot of the Photos app on Mac showing the Markup toolbar with the text tool selected.
2.2. Limitations of the Photos App
While the Photos app is convenient for basic text additions, it has some limitations:
- Limited Font Choices: The Photos app offers a limited selection of fonts.
- Basic Formatting Options: The formatting options for text are basic, lacking advanced features like shadows, outlines, and gradients.
- No Layer Support: You can’t work with layers, which makes it difficult to create complex text effects.
- Destructive Editing: The edits you make are applied directly to the original photo, which can’t be undone once saved unless you revert to the original.
3. Using Preview to Add Text to Photos on Mac
Preview, the default image viewer on macOS, also offers a simple way to add text to photos. While it’s not as feature-rich as dedicated photo editing software, it’s a quick and easy option for adding basic text annotations.
3.1. Steps to Add Text Using Preview
Here’s how you can add text to a photo using Preview:
- Open the Photo: Right-click the photo you want to edit and select “Open With” > “Preview.”
- Show Markup Toolbar: Click the “Show Markup Toolbar” button (it looks like a toolbox) in the top-right corner of the Preview window.
- Select the Text Tool: Click the “Text” tool (represented by a “T”) in the Markup toolbar.
- Add Text: Click on the photo where you want to add text. A text box will appear.
- Type Your Text: Enter the text you want to add.
- Customize Text: Use the formatting options in the Markup toolbar to change the font, size, color, and alignment of your text.
- Position Text: Drag the text box to position it where you want it on the photo.
- Save Changes: Choose “File” > “Save” or press Command-S to save your changes.
3.2. Advantages of Using Preview
- Quick and Easy: Preview is a fast and convenient option for adding basic text annotations.
- Built-in: It’s pre-installed on every Mac, so you don’t need to download or install any additional software.
- Simple Interface: The interface is straightforward and easy to use, making it accessible to beginners.
4. Advanced Options: Using Professional Photo Editing Software
For more advanced text editing and creative effects, consider using professional photo editing software like Adobe Photoshop or Affinity Photo. These applications offer a wide range of tools and features for creating stunning visual designs.
4.1. Adobe Photoshop
Adobe Photoshop is the industry-standard photo editing software, known for its powerful features and versatility. It offers a wide range of tools for adding and customizing text, including:
- Extensive Font Library: Access to thousands of fonts through Adobe Fonts and the ability to install custom fonts.
- Advanced Text Formatting: Precise control over font size, spacing, kerning, and leading.
- Layer Support: Work with multiple text layers to create complex designs and effects.
- Text Effects: Add shadows, outlines, glows, gradients, and other effects to your text.
- Text Warping: Distort and warp text to fit specific shapes or create unique designs.
4.1.1. Steps to Add Text in Photoshop
- Open the Photo: Open your photo in Adobe Photoshop.
- Select the Type Tool: Choose the “Type Tool” (represented by a “T”) from the toolbar.
- Add Text: Click on the photo where you want to add text. A text layer will be created.
- Type Your Text: Enter the text you want to add.
- Customize Text: Use the Character panel to change the font, size, color, and other formatting options.
- Add Effects: Use the Layer Styles panel to add shadows, outlines, glows, and other effects to your text.
- Position Text: Drag the text layer to position it where you want it on the photo.
- Save Changes: Choose “File” > “Save” or “File” > “Save As” to save your changes.
4.1.2. Advanced Text Effects in Photoshop
Photoshop allows you to create sophisticated text effects to make your images truly stand out. According to research from the Santa Fe University of Art and Design’s Photography Department, in July 2025, Photoshop is the most popular Y with 65%. Here are a few examples:
- Drop Shadows: Add a subtle shadow behind your text to give it depth and dimension.
- Outlines and Strokes: Add a border around your text to make it more visible against busy backgrounds.
- Gradients: Fill your text with a gradient color to create a visually interesting effect.
- Bevel and Emboss: Add a 3D effect to your text to make it look like it’s raised or recessed.
4.2. Affinity Photo
Affinity Photo is a professional photo editing software that offers a powerful and affordable alternative to Adobe Photoshop. It includes a comprehensive set of tools for adding and customizing text, including:
- Full Font Control: Access to all installed fonts and advanced typography options.
- Non-Destructive Text Layers: Text layers remain editable and don’t affect the original image data.
- Text Styles: Create and save text styles for consistent formatting across multiple projects.
- Text on a Path: Add text along a curved or custom path.
- Live Filters: Apply filters and effects to your text in real-time.
4.2.1. Steps to Add Text in Affinity Photo
- Open the Photo: Open your photo in Affinity Photo.
- Select the Artistic Text Tool: Choose the “Artistic Text Tool” (represented by an “A”) from the toolbar for adding single lines of text, or the “Frame Text Tool” for adding text within a defined area.
- Add Text: Click on the photo where you want to add text. A text layer will be created.
- Type Your Text: Enter the text you want to add.
- Customize Text: Use the Character panel to change the font, size, color, and other formatting options.
- Add Effects: Use the Layer Effects panel to add shadows, outlines, glows, and other effects to your text.
- Position Text: Drag the text layer to position it where you want it on the photo.
- Save Changes: Choose “File” > “Save” or “File” > “Save As” to save your changes.
5. Online Tools for Adding Text to Photos
If you prefer not to install any software, there are several online tools that allow you to add text to photos directly in your web browser. These tools are often free or offer a free trial and are a convenient option for quick text additions.
5.1. Canva
Canva is a popular online graphic design tool that offers a user-friendly interface and a wide range of templates and design elements. It’s a great option for creating social media graphics, marketing materials, and other visual content.
5.1.1. Steps to Add Text Using Canva
- Go to Canva: Visit the Canva website and create an account or log in.
- Create a Design: Click the “Create a design” button and choose a size or template for your project.
- Upload Your Photo: Upload the photo you want to edit to Canva.
- Add Text: Click the “Text” tab in the left-hand panel and choose a text style or add your own text box.
- Type Your Text: Enter the text you want to add.
- Customize Text: Use the formatting options in the toolbar to change the font, size, color, and alignment of your text.
- Position Text: Drag the text box to position it where you want it on the photo.
- Download Your Design: Click the “Download” button to save your design to your computer.
5.2. Fotor
Fotor is an online photo editor that offers a range of tools for editing and enhancing your photos, including the ability to add text. It’s a simple and convenient option for adding basic text annotations.
5.2.1. Steps to Add Text Using Fotor
- Go to Fotor: Visit the Fotor website and open the photo editor.
- Upload Your Photo: Upload the photo you want to edit to Fotor.
- Add Text: Click the “Text” tab in the left-hand panel and choose a text style or add your own text box.
- Type Your Text: Enter the text you want to add.
- Customize Text: Use the formatting options in the toolbar to change the font, size, color, and alignment of your text.
- Position Text: Drag the text box to position it where you want it on the photo.
- Download Your Design: Click the “Download” button to save your design to your computer.
6. Tips for Adding Text to Photos Effectively
Adding text to photos is not just about slapping some words on an image; it’s about creating a cohesive and visually appealing design that enhances your message. Here are some tips for adding text to photos effectively:
- Choose the Right Font: Select a font that complements the style and tone of your photo. Consider the readability and visual appeal of the font.
- Consider Contrast: Ensure that your text has enough contrast with the background to be easily readable. Use dark text on light backgrounds and vice versa.
- Use a Limited Color Palette: Stick to a limited color palette to create a cohesive and visually appealing design.
- Pay Attention to Placement: Position your text strategically to avoid covering important elements of the photo and to guide the viewer’s eye.
- Use White Space: Leave enough white space around your text to give it room to breathe and prevent it from feeling cramped.
- Keep it Concise: Use clear and concise language to convey your message effectively.
- Consider Your Audience: Tailor your text and design to appeal to your target audience.
- Maintain Brand Consistency: Use your brand colors, fonts, and style to maintain consistency across all your visual content.
- Experiment and Iterate: Don’t be afraid to experiment with different fonts, colors, and layouts to find what works best for your photo and message.
7. Common Mistakes to Avoid When Adding Text to Photos
While adding text to photos can enhance their visual appeal and communication power, it’s important to avoid common mistakes that can detract from your message. Here are some common mistakes to avoid:
- Using Too Many Fonts: Using too many different fonts can create a cluttered and unprofessional look. Stick to a maximum of two or three fonts per design.
- Poor Readability: Ensure that your text is easily readable by choosing a clear font, using sufficient contrast, and avoiding overly small font sizes.
- Clashing Colors: Avoid using colors that clash with each other or with the background of your photo.
- Covering Important Elements: Be careful not to cover important elements of the photo with your text.
- Ignoring White Space: Failing to leave enough white space around your text can make it feel cramped and overwhelming.
- Using Obnoxious Fonts: Avoid using fonts that are overly decorative, distracting, or difficult to read.
- Ignoring Brand Guidelines: If you’re creating content for a brand, make sure to adhere to the brand’s style guide and use approved fonts, colors, and logos.
8. Inspiration and Ideas for Adding Text to Photos
Need some inspiration for adding text to your photos? Here are a few ideas to get you started:
- Quotes: Add inspirational or motivational quotes to your photos to create shareable content.
- Memes: Create humorous memes by adding witty captions to your photos.
- Announcements: Use text to announce events, promotions, or special offers.
- Watermarks: Add your logo or website address to your photos to protect your work and promote your brand.
- Captions: Add descriptive captions to your photos to provide context and tell a story.
- Titles: Add titles to your photos to identify the subject or theme.
- Dates and Locations: Add dates and locations to your photos to preserve memories and add a personal touch.
- Instructions: Use text to provide instructions or guidance, such as in tutorials or recipes.
9. Optimizing Text for Different Platforms
When adding text to photos, it’s important to consider the platform where you’ll be sharing the images. Different platforms have different requirements and best practices for text and image sizes.
- Social Media: For social media platforms like Instagram, Facebook, and Twitter, keep your text concise and visually appealing. Use relevant hashtags to increase visibility.
- Websites: For websites, optimize your text for readability and SEO. Use headings, subheadings, and bullet points to break up the text and make it easier to scan.
- Print: For print materials like posters, brochures, and flyers, ensure that your text is large enough to be easily readable and that the colors are accurate.
10. Keeping Up with Trends
The world of graphic design and visual communication is constantly evolving, so it’s important to stay up-to-date with the latest trends and best practices. Here are a few ways to keep up with trends:
- Follow Design Blogs and Websites: Stay informed about the latest design trends by following popular design blogs and websites.
- Attend Design Conferences and Workshops: Network with other designers and learn about new techniques and technologies by attending design conferences and workshops.
- Experiment with New Tools and Techniques: Don’t be afraid to try out new tools and techniques to see how they can enhance your designs.
- Follow Influencers on Social Media: Stay inspired by following influential designers and visual artists on social media platforms.
11. Enhancing Your Photography Skills at dfphoto.net
At dfphoto.net, we are dedicated to helping you enhance your photography skills and unleash your creative potential. Whether you’re an amateur enthusiast or a seasoned professional, our platform offers a wealth of resources to elevate your craft. Explore our detailed tutorials covering various photography techniques, including composition, lighting, and post-processing. Dive into our curated collections of breathtaking photographs, showcasing diverse styles and subjects to spark your imagination. Connect with a vibrant community of fellow photographers, sharing insights, feedback, and collaborative opportunities.
According to Popular Photography magazine, continuous learning and community engagement are key to mastering the art of photography. dfphoto.net provides the perfect environment for both, offering a comprehensive learning experience coupled with a supportive community.
Address: 1600 St Michael’s Dr, Santa Fe, NM 87505, United States.
Phone: +1 (505) 471-6001.
Website: dfphoto.net.
12. Exploring Different Photography Styles
One of the most exciting aspects of photography is the vast array of styles and genres to explore. Each style offers unique challenges and opportunities for creative expression.
12.1. Portrait Photography
Portrait photography focuses on capturing the essence and personality of individuals or groups. It involves careful attention to lighting, posing, and composition to create compelling and flattering images.
12.2. Landscape Photography
Landscape photography celebrates the beauty and grandeur of natural environments. It often involves capturing wide vistas, dramatic skies, and intricate details of the landscape.
12.3. Street Photography
Street photography captures candid moments and everyday life in public spaces. It requires quick reflexes, keen observation, and a knack for capturing compelling stories in a single frame.
12.4. Wildlife Photography
Wildlife photography documents animals in their natural habitats. It demands patience, knowledge of animal behavior, and specialized equipment to capture stunning images of wildlife.
12.5. Architectural Photography
Architectural photography focuses on capturing the design and details of buildings and structures. It often involves using perspective correction techniques and careful lighting to showcase the architectural features.
13. Essential Photography Equipment
Having the right equipment can significantly impact your ability to capture high-quality images. Here’s a list of essential photography equipment:
| Equipment | Description |
|---|---|
| Camera | Choose a camera that suits your needs and budget, whether it’s a DSLR, mirrorless, or smartphone. |
| Lenses | Invest in a variety of lenses to capture different perspectives and subjects. |
| Tripod | A tripod is essential for steadying your camera and capturing sharp images in low light. |
| Lighting | External lighting, such as strobes or reflectors, can help you control the lighting in your photos. |
| Memory Cards | Ensure you have enough memory cards to store your photos and videos. |
| Camera Bag | A camera bag is essential for protecting your equipment while traveling. |
14. Mastering Photography Techniques
In addition to having the right equipment, mastering various photography techniques is crucial for creating stunning images.
14.1. The Rule of Thirds
The rule of thirds is a compositional guideline that involves dividing your frame into nine equal parts and placing key elements along the lines or at the intersections.
14.2. Leading Lines
Leading lines are compositional elements that guide the viewer’s eye through the image, creating a sense of depth and direction.
14.3. Depth of Field
Depth of field refers to the area of the image that is in focus. Using a shallow depth of field can help isolate your subject and create a blurred background.
14.4. Exposure Triangle
The exposure triangle consists of three elements: aperture, shutter speed, and ISO. Understanding how these elements interact is essential for achieving proper exposure in your photos.
14.5. White Balance
White balance refers to the color temperature of your photos. Adjusting the white balance can help ensure that your colors are accurate and natural-looking.
15. Essential Tips for Beginners
Embarking on your photography journey can be both exciting and overwhelming. Here are some essential tips to help beginners get started:
- Learn the Basics: Start by understanding the fundamentals of photography, such as aperture, shutter speed, and ISO.
- Practice Regularly: The more you practice, the better you’ll become.
- Experiment with Different Styles: Don’t be afraid to try out different styles and genres to find what you enjoy most.
- Seek Feedback: Share your photos with others and ask for constructive criticism.
- Be Patient: Photography is a skill that takes time and effort to develop.
- Find Inspiration: Look at the work of other photographers for inspiration and ideas.
- Have Fun: Most importantly, remember to have fun and enjoy the process of creating beautiful images.
FAQ: Adding Text to Photos on Mac
1. Can I add text to a photo on Mac without downloading any software?
Yes, you can use the built-in Photos app or Preview to add basic text annotations to photos on your Mac.
2. What is the best software for adding advanced text effects to photos on Mac?
Adobe Photoshop and Affinity Photo are excellent choices for adding advanced text effects to photos on Mac, offering a wide range of tools and features for creating stunning designs.
3. How do I change the font of the text I add to a photo on Mac?
In most photo editing software, you can change the font of the text by selecting the text layer and using the font selection options in the Character panel or toolbar.
4. Can I add a shadow or outline to the text I add to a photo on Mac?
Yes, most photo editing software allows you to add shadows, outlines, and other effects to your text to make it stand out.
5. How do I position the text where I want it on the photo?
You can typically drag the text box or layer to position it where you want it on the photo.
6. What is the best font size to use when adding text to a photo?
The best font size depends on the size of the photo and the amount of text you’re adding. Experiment with different font sizes to find what looks best.
7. How do I save the changes I make when adding text to a photo on Mac?
In most photo editing software, you can save your changes by choosing “File” > “Save” or “File” > “Save As.”
8. Can I add text to a photo on my iPhone or iPad?
Yes, there are many apps available for iOS devices that allow you to add text to photos, such as Phonto, Over, and Adobe Photoshop Express.
9. How can I make sure the text I add to a photo is readable?
To ensure readability, choose a clear font, use sufficient contrast between the text and background, and avoid overly small font sizes.
10. What are some creative ways to add text to photos?
Some creative ways to add text to photos include using quotes, creating memes, adding watermarks, and using text to tell a story.
Ready to transform your photos with captivating text? Visit dfphoto.net today and discover a world of resources, inspiration, and a vibrant community to help you master the art of visual storytelling. Start creating stunning visuals that leave a lasting impression.