Adding photos to a Word document enhances visual appeal and provides context to your text. If you’re looking for ways on How To Add Photos To A Word Document, dfphoto.net is here to guide you through the process, ensuring your documents are both informative and visually appealing. Whether you’re a professional photographer or a hobbyist, mastering image insertion will significantly improve your document creation skills, enabling you to produce professional-looking reports, newsletters, and more, enriching your visual storytelling capabilities with image integration techniques and visual content management.
1. Understanding the Basics of Inserting Photos in Word
Let’s explore the different methods for inserting pictures, the supported image formats, and how to prepare your photos for optimal use in Word documents.
1.1. What are the Methods to Insert Photos into a Word Document?
Yes, there are several ways to insert photos. You can insert them from a file, copy and paste, or drag and drop. Each method offers flexibility depending on your workflow and source of images.
- From File: Use the “Insert” tab, then “Pictures,” and select “This Device” to browse and insert an image from your computer.
- Copy and Paste: Copy an image from a web browser or another application and paste it directly into your Word document.
- Drag and Drop: Simply drag an image file from your desktop or a folder directly into your Word document.
1.2. What Image Formats are Compatible with Microsoft Word?
Word supports a wide range of image formats, ensuring compatibility with various types of images. The most common formats include JPEG, PNG, GIF, TIFF, and BMP.
- JPEG (Joint Photographic Experts Group): Ideal for photographs due to its efficient compression, which reduces file size while maintaining good image quality.
- PNG (Portable Network Graphics): Best for images with transparency or graphics with sharp lines and text, as it offers lossless compression.
- GIF (Graphics Interchange Format): Suitable for simple animations and images with limited color palettes.
- TIFF (Tagged Image File Format): Used for high-quality images in professional photography and publishing, as it preserves image detail without compression.
- BMP (Bitmap): An uncompressed format that retains the highest image quality but results in larger file sizes.
1.3. How Should I Prepare Photos Before Inserting Them into Word?
Preparing your photos beforehand optimizes their appearance and reduces the document size. Consider cropping, resizing, and compressing your images before inserting them into Word.
- Cropping: Use an image editing tool to crop unnecessary parts of the image, focusing on the key elements you want to highlight.
- Resizing: Adjust the image dimensions to fit the intended space in your document. High-resolution images can slow down Word and increase file size unnecessarily.
- Compressing: Reduce the file size of your images using compression tools. Word also offers built-in compression options, but using external tools beforehand can provide more control.
- Color Correction: Adjust brightness, contrast, and color balance to ensure images look their best within the document.
- File Format Conversion: If your image is in an uncommon format, convert it to a more compatible format like JPEG or PNG to ensure it displays correctly in Word.
2. Step-by-Step Guide to Inserting Photos
Here’s a detailed walkthrough of the most common methods. By following these steps, you can confidently insert photos into your Word documents, regardless of the source or format of the images.
2.1. How to Insert a Photo from a File on Your Computer?
Inserting a photo directly from your computer is a straightforward process. Follow these steps to add images stored on your device into your Word document:
- Open Your Word Document: Launch Microsoft Word and open the document where you want to insert the photo.
- Position the Cursor: Click on the exact location in the document where you want the image to appear.
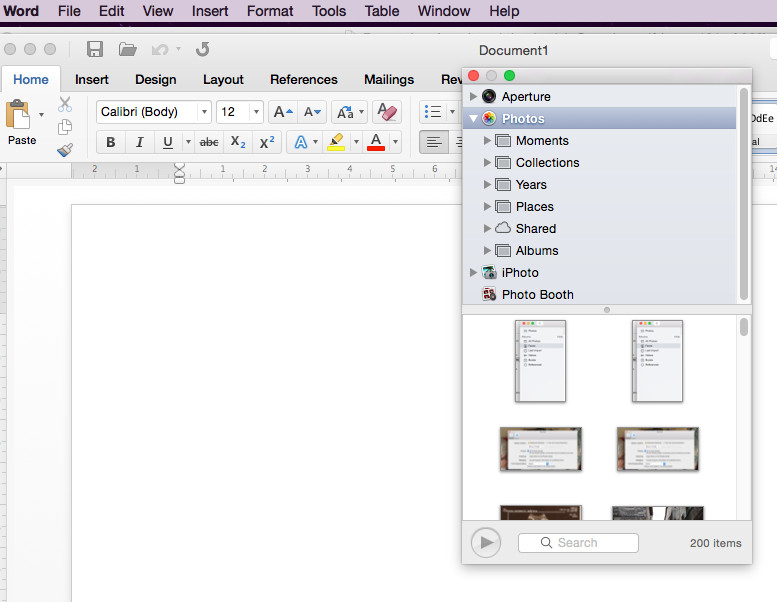
- Go to the Insert Tab: In the Word ribbon at the top, click on the “Insert” tab.
 Insert Tab Ribbon highlighting Pictures option, showcasing how to add local image files.
- Select Pictures: In the “Illustrations” group, click on the “Pictures” button. This will open a dropdown menu.
- Choose “This Device”: From the dropdown menu, select “This Device…” This option allows you to browse your computer’s files.
- Browse and Select the Image: A file explorer window will appear. Navigate to the folder where your image is stored, select the image file, and click the “Insert” button.
2.2. Can I Copy and Paste Photos Directly into Word?
Yes, copying and pasting is a quick way to insert photos from various sources, like web browsers or other applications, into your Word document:
- Find the Image: Locate the image you want to copy from a website, email, or another application.
- Copy the Image: Right-click on the image and select “Copy Image” (or the equivalent option in the source application).
- Open Your Word Document: Open Microsoft Word and navigate to the document where you want to insert the image.
- Position the Cursor: Click on the exact location in the document where you want the image to appear.
- Paste the Image: Right-click in the desired location and select “Paste” (or press Ctrl+V on Windows, or Cmd+V on Mac). The image will appear in your document.
2.3. What is the Drag-and-Drop Method for Adding Photos?
The drag-and-drop method offers a convenient way to insert photos directly from your desktop or a folder into your Word document.
- Open Your Word Document: Launch Microsoft Word and open the document where you want to insert the photo.
- Arrange Windows: Position the Word document and the folder containing your image so that both are visible on your screen.
- Locate the Image: Find the image file in the folder.
- Drag and Drop: Click on the image file and, while holding down the mouse button, drag it to the desired location in your Word document.
- Release the Mouse Button: Release the mouse button to drop the image into the document. The image will appear in your document at the selected location.
3. Optimizing Image Placement and Layout in Word
Mastering image placement and layout can significantly enhance the visual appeal and readability of your Word documents. Let’s explore the various layout options available in Word and how to use them effectively.
3.1. How Can I Use Text Wrapping Options Effectively?
Text wrapping determines how text flows around an image. Word offers several options, each suited for different layout needs.
-
Square: The text wraps around the image in a square shape, creating a clean, defined border around the image.
-
Tight: The text wraps closely around the contours of the image, following its shape. This works best with images that have well-defined edges and no background.
-
Through: Similar to Tight, but allows text to fill in any open areas within the image, provided the image has transparent parts.
-
Top and Bottom: The text appears above and below the image, preventing text from running alongside it. This is useful for ensuring the image doesn’t disrupt the flow of text.
-
Behind Text: The image is placed behind the text, allowing the text to overlay the image. This is often used for watermarks or subtle background images.
-
In Front of Text: The image is placed in front of the text, obscuring any text it covers. This is useful for creating layered effects or when the image is purely decorative.
To access these options:
- Select the Image: Click on the image in your Word document.
- Go to the “Picture Format” Tab: This tab appears in the ribbon when an image is selected.
- Click on “Wrap Text”: In the “Arrange” group, click the “Wrap Text” button. A dropdown menu will appear with the available options.
- Choose a Text Wrapping Option: Select the desired text wrapping option from the menu. The text will automatically adjust around the image according to your selection.
3.2. What is the Difference Between “In Line with Text” and Other Layout Options?
“In Line with Text” treats the image as if it were a character in the text. Other layout options provide more flexibility in positioning the image independently of the text flow.
- In Line with Text: This option places the image directly in the text flow, behaving like a character. The image moves with the text as you add or delete content. It’s simple but offers less control over precise placement.
- Other Layout Options (e.g., Square, Tight, Through): These options allow you to move the image independently of the text. The text wraps around the image based on the selected wrapping style. You can drag the image to any location on the page, and the text will reflow accordingly.
3.3. How Do I Position Images Precisely in My Document?
For precise placement, use the “Position” options or manually drag the image. Adjusting the layout settings can also help achieve the desired alignment and placement.
- Using the “Position” Options:
- Select the Image: Click on the image in your Word document.
- Go to the “Picture Format” Tab: This tab appears in the ribbon when an image is selected.
- Click on “Position”: In the “Arrange” group, click the “Position” button. A dropdown menu will appear with preset positioning options.
- Choose a Position: Select a position from the menu (e.g., “Top Left with Square Text Wrapping”). The image will move to the selected position with the corresponding text wrapping.
- Manually Dragging the Image:
- Select the Image: Click on the image in your Word document.
- Ensure Text Wrapping is Enabled: Make sure a text wrapping option other than “In Line with Text” is selected (e.g., Square, Tight).
- Drag the Image: Click and hold the mouse button on the image, then drag it to the desired location on the page.
- Release the Mouse Button: Release the mouse button to drop the image in the new position.
- Adjusting Layout Settings:
- Right-Click on the Image: Right-click on the image and select “Size and Position…” from the context menu.
- Open the Layout Dialog Box: A dialog box will appear with options to adjust the image size, position, and text wrapping.
- Adjust Position Settings: In the “Position” tab, you can specify the exact horizontal and vertical position of the image relative to the page, margins, or other objects.
- Adjust Text Wrapping Settings: In the “Text Wrapping” tab, you can fine-tune the text wrapping style and distance from the text.
4. Editing and Formatting Photos Directly in Word
Word provides a range of editing tools that allow you to enhance and format your images directly within the document.
4.1. What Basic Image Corrections Can I Perform in Word?
Word allows you to perform basic image corrections such as adjusting brightness, contrast, sharpness, and color saturation.
- Adjusting Brightness and Contrast:
- Select the Image: Click on the image in your Word document.
- Go to the “Picture Format” Tab: This tab appears in the ribbon when an image is selected.
- Click on “Corrections”: In the “Adjust” group, click the “Corrections” button. A dropdown menu will appear with preset options for brightness and contrast.
- Choose a Correction Option: Select a preset option or click “Picture Corrections Options…” at the bottom of the menu to open the “Format Picture” pane.
- Adjust Settings in the Format Picture Pane: In the “Format Picture” pane, you can manually adjust the “Sharpness,” “Brightness,” and “Contrast” sliders to fine-tune the image.
- Adjusting Color Saturation and Tone:
- Select the Image: Click on the image in your Word document.
- Go to the “Picture Format” Tab: This tab appears in the ribbon when an image is selected.
- Click on “Color”: In the “Adjust” group, click the “Color” button. A dropdown menu will appear with preset options for color saturation and tone.
- Choose a Color Option: Select a preset option or click “Picture Color Options…” at the bottom of the menu to open the “Format Picture” pane.
- Adjust Settings in the Format Picture Pane: In the “Format Picture” pane, you can adjust the “Saturation,” “Color Tone,” and “Recolor” options to modify the image’s color properties.
4.2. How Do I Crop or Resize a Photo in Word?
Cropping and resizing are essential for fitting images perfectly into your document layout. Word provides easy-to-use tools for these adjustments.
- Cropping an Image:
- Select the Image: Click on the image in your Word document.
- Go to the “Picture Format” Tab: This tab appears in the ribbon when an image is selected.
- Click on “Crop”: In the “Size” group, click the “Crop” button. Crop handles will appear around the image.
- Adjust the Crop Area: Click and drag the crop handles to define the area you want to keep. You can crop from the sides, top, or corners.
- Click “Crop” Again: Once you’re satisfied with the crop area, click the “Crop” button again to apply the changes.
- Resizing an Image:
- Select the Image: Click on the image in your Word document.
- Go to the “Picture Format” Tab: This tab appears in the ribbon when an image is selected.
- Adjust Size Using Handles: Click and drag the corner handles to resize the image proportionally. Dragging the side handles will change the width or height independently, which may distort the image.
- Specify Exact Dimensions: In the “Size” group, you can enter precise values for the “Height” and “Width” of the image. Ensure the “Lock aspect ratio” checkbox is selected to maintain the image’s proportions while resizing.
4.3. Can I Add Borders or Styles to My Photos?
Yes, Word allows you to add borders, apply picture styles, and use picture effects to enhance the visual appearance of your photos.
- Adding Borders to Photos:
- Select the Image: Click on the image in your Word document.
- Go to the “Picture Format” Tab: This tab appears in the ribbon when an image is selected.
- Click on “Picture Border”: In the “Picture Styles” group, click the “Picture Border” button. A dropdown menu will appear with options for border color, weight, and dashes.
- Choose Border Options: Select a color from the color palette, choose a weight (thickness) for the border, and select a dash style if desired. The border will be applied to the image.
- Applying Picture Styles:
- Select the Image: Click on the image in your Word document.
- Go to the “Picture Format” Tab: This tab appears in the ribbon when an image is selected.
- Browse Picture Styles: In the “Picture Styles” group, browse the available picture styles. These styles include preset combinations of borders, shadows, and frames.
- Apply a Style: Click on a picture style to apply it to the image.
- Adding Picture Effects:
- Select the Image: Click on the image in your Word document.
- Go to the “Picture Format” Tab: This tab appears in the ribbon when an image is selected.
- Click on “Picture Effects”: In the “Picture Styles” group, click the “Picture Effects” button. A dropdown menu will appear with options for shadow, reflection, glow, soft edges, bevel, and 3-D rotation.
- Choose an Effect: Select an effect category and then choose a specific effect from the submenu. The effect will be applied to the image.
5. Advanced Tips and Tricks for Working with Photos in Word
Delve into some advanced techniques to elevate your photo handling skills in Word.
5.1. How Can I Link Photos Instead of Embedding Them?
Linking photos instead of embedding them reduces the file size of your Word document. However, ensure the linked photos remain in the same location for the links to work.
- Open Your Word Document: Launch Microsoft Word and open the document where you want to insert the photo.
- Go to the Insert Tab: In the Word ribbon at the top, click on the “Insert” tab.
- Select Pictures: In the “Illustrations” group, click on the “Pictures” button. This will open a dropdown menu.
- Choose “This Device”: From the dropdown menu, select “This Device…” This option allows you to browse your computer’s files.
- Browse and Select the Image: A file explorer window will appear. Navigate to the folder where your image is stored, select the image file.
- Click the Drop-Down Arrow on the Insert Button: Instead of clicking the “Insert” button directly, click the small drop-down arrow next to it.
- Choose “Link to File”: From the drop-down menu, select “Link to File.” This will insert the image into your document as a link to the original file.
5.2. What are Picture Captions and How Do I Add Them?
Picture captions provide context and descriptions for your images. Word allows you to easily add and manage captions.
- Select the Image: Click on the image in your Word document to select it.
- Right-Click on the Image: Right-click on the selected image.
- Select “Insert Caption”: From the context menu, choose “Insert Caption…” The “Caption” dialog box will appear.
- Customize the Caption:
- Label: Choose a label for the caption (e.g., “Figure,” “Table,” “Equation”). You can create a new label by clicking the “New Label…” button.
- Caption: Enter the descriptive text for the caption in the “Caption” field.
- Position: Choose whether the caption should appear above or below the image using the “Position” dropdown menu.
- Numbering: Click the “Numbering…” button to customize the numbering format (e.g., “1, 2, 3” or “I, II, III”).
- Click “OK”: Click the “OK” button to insert the caption. The caption will appear next to the image in the specified position.
5.3. How Do I Group Multiple Photos Together?
Grouping multiple photos allows you to treat them as a single object, making it easier to move, resize, or format them.
- Insert All Photos: Insert all the photos you want to group into your Word document.
- Select the First Photo: Click on the first photo to select it.
- Select Additional Photos: Hold down the “Ctrl” key (or “Cmd” key on Mac) and click on each additional photo to select them. All selected photos will be highlighted.
- Right-Click on One of the Selected Photos: Right-click on any one of the selected photos.
- Select “Group”: From the context menu, choose “Group” and then click “Group” again. The selected photos will now be grouped together into a single object.
6. Troubleshooting Common Image Issues in Word
Let’s address some common problems you might encounter while working with photos in Word and how to resolve them.
6.1. Why are My Photos Blurry or Low Resolution?
Photos may appear blurry due to low resolution or excessive compression. Ensure your original images are high resolution and avoid over-compressing them when inserting them into Word.
- Check the Original Image Resolution:
- Before inserting the image into Word, check its resolution. Right-click on the image file, select “Properties” (on Windows) or “Get Info” (on Mac), and look for the dimensions (e.g., 1920×1080 pixels) and DPI (dots per inch).
- Ensure the resolution is high enough for the intended size in your document. For example, an image that looks sharp at 3×5 inches might appear blurry if enlarged to 8×10 inches.
- Avoid Excessive Compression:
- When inserting images into Word, avoid using high compression settings. Word automatically compresses images to reduce file size, but excessive compression can degrade image quality.
- To adjust compression settings, go to “File” > “Options” > “Advanced” and look for the “Image Size and Quality” section. Make sure the “Default resolution” is set to a higher DPI (e.g., 220 DPI) and that the “Discard editing data” option is unchecked.
- Disable Compression for Specific Images:
- If you want to ensure that a specific image is not compressed, right-click on the image in Word, select “Format Picture,” and go to the “Picture” tab. Under “Compress,” uncheck the “Compress pictures” option.
- Re-insert the Image:
- If an image appears blurry after being inserted, try re-inserting it. Sometimes, the initial insertion process might have introduced compression or scaling issues.
6.2. How Do I Fix Photos That Are Distorted or Stretched?
Distortion occurs when resizing images non-proportionally. Always resize images using the corner handles to maintain their aspect ratio.
- Select the Distorted Image: Click on the image in your Word document to select it.
- Check the Aspect Ratio:
- Go to the “Picture Format” tab in the ribbon.
- In the “Size” group, look at the “Height” and “Width” values. If the aspect ratio (the ratio of width to height) is not maintained, the image will appear distorted.
- Unlock Aspect Ratio (if necessary):
- If the “Lock aspect ratio” checkbox is unchecked, the height and width can be adjusted independently, leading to distortion.
- Click the small dialog box launcher in the bottom-right corner of the “Size” group to open the “Layout” dialog box.
- In the “Size” tab, ensure that the “Lock aspect ratio” checkbox is checked.
- Resize Proportionally:
- To resize the image without distortion, drag one of the corner handles while the “Lock aspect ratio” is enabled. This will ensure that the height and width are adjusted proportionally.
- Alternatively, enter a new value for either the height or width in the “Size” group, and Word will automatically adjust the other dimension to maintain the aspect ratio.
- Reset the Picture (if necessary):
- If the distortion is severe and you cannot easily correct it, you can reset the picture to its original state.
- In the “Picture Format” tab, click the “Reset Picture” button in the “Adjust” group. This will remove any formatting changes and restore the image to its original size and aspect ratio.
6.3. What If My Linked Photos Are Not Displaying?
Linked photos may not display if the original files have been moved or renamed. Update the links in Word to point to the new location or name of the files.
- Check the Linked File’s Location:
- Ensure that the linked image file has not been moved, renamed, or deleted from its original location. If the file is no longer in the same folder or has been renamed, Word will not be able to display it.
- Open the “Links” Dialog Box:
- Go to “File” in the Word ribbon and select “Info.”
- In the “Related Documents” section, look for “Edit Links to Files.” If there are linked files in the document, this option will be available. Click on it.
- Alternatively, you can press “Alt + F9” to show the field codes in your document. Linked images will appear as complex field codes.
- Update the Links:
- In the “Links” dialog box, you will see a list of all linked files in the document. If a link is broken (e.g., the “Status” column shows “Error: file not found”), select the broken link and click the “Change Source…” button.
- Browse to the new location of the image file and select it. Click “OK” to update the link.
- Repeat this process for any other broken links in the document.
- Refresh the Display:
- After updating the links, press “F9” to refresh the display and update the images in the document.
- If pressing “F9” does not update the images, try closing and reopening the document.
- Re-link the Images (if necessary):
- If you cannot locate the original image files, you may need to re-insert the images into the document and choose the “Link to File” option again.
7. Best Practices for Using Photos in Word Documents
Following these guidelines can help you create visually appealing and effective documents. Let’s explore some key best practices.
7.1. What is the Optimal Image Resolution for Word Documents?
Aim for a resolution of 150-300 DPI for images in Word documents. This provides a good balance between image quality and file size.
- Understand DPI (Dots Per Inch):
- DPI refers to the number of dots per inch in an image. A higher DPI generally means a sharper and more detailed image. However, it also results in a larger file size.
- Determine the Intended Use:
- If the document is primarily for on-screen viewing (e.g., email attachments, online reports), a resolution of 150 DPI is usually sufficient. This provides a good balance between image quality and file size.
- If the document is intended for printing, a resolution of 300 DPI is recommended. This ensures that the images appear sharp and detailed when printed.
- Check the Image Dimensions:
- Ensure that the image dimensions (width and height in pixels) are appropriate for the size at which the image will be displayed in the document.
- For example, if you want an image to appear at 4×6 inches in the document, an image with dimensions of 1200×1800 pixels (at 300 DPI) would be suitable.
- Adjust Image Resolution in Image Editing Software:
- Use image editing software such as Adobe Photoshop, GIMP, or online tools to adjust the resolution of the images before inserting them into Word.
- In the image editing software, open the image and go to “Image” > “Resize” or “Image Size.”
- Set the desired resolution (DPI) and adjust the dimensions accordingly.
- Avoid Upscaling Images:
- Avoid increasing the resolution of low-resolution images (upscaling), as this can result in blurry or pixelated images. It is always better to start with a high-resolution image and reduce the resolution if necessary.
7.2. How Can I Maintain a Consistent Visual Style?
Use consistent formatting, picture styles, and color palettes throughout your document to create a professional and cohesive look.
- Choose a Consistent Font and Color Scheme:
- Select a font and color scheme that aligns with the overall tone and purpose of the document. Use the same font for headings, body text, and captions throughout the document.
- Limit the number of colors used in the document to a maximum of three or four to avoid a cluttered or disjointed appearance.
- Apply Consistent Picture Styles:
- Use the same picture styles for all images in the document to create a unified look. This includes using the same borders, shadows, and effects for all images.
- Create a custom picture style and apply it to all images to ensure consistency.
- Use Consistent Image Sizes and Placement:
- Maintain consistent image sizes and placement throughout the document. Use the same dimensions for similar types of images and place them in a consistent location on the page.
- Use the “Position” options in Word to align images precisely and ensure that they are evenly spaced.
- Maintain Consistent Text Wrapping:
- Use the same text wrapping option for all images in the document to ensure that text flows smoothly around the images.
- Adjust the distance between the images and the text consistently to create a clean and professional look.
- Use a Template:
- Create a Word template with predefined styles, formatting, and image placeholders. This will ensure that all documents created using the template have a consistent visual style.
7.3. Should I Compress Images in Word to Reduce File Size?
Yes, compressing images in Word is a good practice to reduce file size, but use it judiciously to avoid sacrificing image quality.
- Assess the Need for Compression:
- Before compressing images, assess whether it is necessary. If the Word document already has a small file size, compressing images may not be required.
- Consider the intended use of the document. If it is primarily for on-screen viewing, a slightly larger file size may be acceptable. If it is for printing or sharing via email, reducing the file size may be more important.
- Use Word’s Built-in Compression Options:
- Word provides built-in compression options that allow you to reduce the file size of images without significantly sacrificing image quality.
- To access these options, select an image in the document and go to the “Picture Format” tab in the ribbon.
- Click the “Compress Pictures” button in the “Adjust” group.
- Choose an Appropriate Compression Level:
- In the “Compress Pictures” dialog box, choose an appropriate compression level. Word offers several options, including:
- “Print (220 ppi): excellent quality on most printers and screens”
- “Web (150 ppi): good for webpages and projectors”
- “Email (96 ppi): minimizes document size for sharing”
- Select the compression level that best balances image quality and file size.
- In the “Compress Pictures” dialog box, choose an appropriate compression level. Word offers several options, including:
- Apply Compression to All Images in the Document:
- To apply the compression settings to all images in the document, make sure the “Apply to all pictures in this document” checkbox is selected in the “Compress Pictures” dialog box.
- Test the Compressed Images:
- After compressing the images, review the document to ensure that the image quality is still acceptable.
- Zoom in on the images to check for any noticeable loss of detail or sharpness.
- If the image quality is not satisfactory, try using a lower compression level or consider using external image editing software to optimize the images before inserting them into Word.
8. Examples of Creative Photo Usage in Word Documents
Let’s explore some inspiring ways to use photos creatively in various types of Word documents.
8.1. How Can I Create a Photo Album in Word?
Creating a photo album in Word is a great way to showcase your images in a visually appealing format. Use captions, borders, and creative layouts to enhance the presentation.
- Set Up the Document:
- Open Microsoft Word and create a new document.
- Set the page size and margins to your desired specifications. A common page size for photo albums is 8.5 x 11 inches with narrow margins.
- Insert Photos:
- Go to the “Insert” tab in the ribbon and click the “Pictures” button.
- Select the photos you want to include in the album and insert them into the document.
- Arrange Photos on the Page:
- Adjust the size and position of the photos on each page to create a visually appealing layout.
- Use the “Wrap Text” options to control how the text flows around the images. The “Square” or “Tight” options work well for photo albums.
- Consider using multiple photos per page to maximize space and create interesting compositions.
- Add Captions and Descriptions:
- Add captions and descriptions to each photo to provide context and tell a story.
- Select each image and right-click on it. Choose “Insert Caption” from the context menu.
- Enter a descriptive caption for each photo. You can customize the caption label, numbering, and position.
- Add Borders and Styles:
- Add borders and styles to the photos to enhance their visual appeal.
- Select each image and go to the “Picture Format” tab in the ribbon.
- Use the “Picture Border” options to add a border around the photo. You can customize the color, weight, and style of the border.
- Use the “Picture Styles” options to apply preset styles such as frames, shadows, and reflections to the photos.
- Create a Cover Page:
- Design a cover page for the photo album with a title, a cover photo, and any other relevant information.
- Use Word’s text formatting tools to create an attractive title and description.
- Add a Table of Contents (Optional):
- If the photo album is lengthy, consider adding a table of contents to help readers navigate the album.
- Use Word’s “Table of Contents” feature to automatically generate a table of contents based on the captions and headings in the document.
- Review and Finalize:
- Review the photo album to ensure that all photos are correctly placed, captioned, and formatted.
- Make any necessary adjustments to improve the overall layout and presentation.
8.2. How Can I Incorporate Photos into a Newsletter?
Incorporating photos into a newsletter enhances its visual appeal and engagement. Use a combination of images, text, and creative layouts to create an attractive and informative newsletter.
- Set Up the Document:
- Open Microsoft Word and create a new document.
- Set the page size and margins to your desired specifications. A common page size for newsletters is 8.5 x 11 inches with narrow margins.
- Consider using a pre-designed newsletter template or create your own custom template.
- Create a Header:
- Design a header for the newsletter with the newsletter title, logo, and other branding elements.
- Use Word’s text formatting tools to create an attractive and eye-catching header.
- Insert Articles and Content:
- Insert the articles and content for the newsletter. Use headings, subheadings, and bullet points to organize the content and make it easy to read.
- Keep the articles concise and engaging to capture the reader’s attention.
- Incorporate Photos:
- Incorporate photos into the newsletter to enhance its visual appeal and illustrate the content.
- Select the photos that are relevant to the articles and insert them into the document.
- Adjust the size and position of the photos to create a visually balanced layout.
- Use Text Wrapping:
- Use the “Wrap Text” options to control how the text flows around the photos. The “Square” or “Tight” options work well for newsletters.
- Experiment with different text wrapping options to create interesting layouts.
- Add Captions and Descriptions:
- Add captions and descriptions to the photos to provide context and inform the reader.
- Use Word’s “Insert Caption” feature to add captions to the photos.
- Create a Footer:
- Design a footer for the newsletter with the newsletter name, date, contact information, and copyright notice.
- Use Word’s text formatting tools to create a professional-looking
