Adding photos into iMovie is a straightforward process that enhances your video projects with visual storytelling and dfphoto.net is here to guide you through it. By seamlessly integrating still images, you can create engaging slideshows, illustrate key points, or simply add depth to your movies. This guide will show you how to import and use photos effectively in iMovie, covering everything from basic import methods to advanced editing techniques. Ready to transform your videos? Let’s dive in with photo editing and video creation!
1. Understanding iMovie’s Photo Integration
iMovie is a powerful video editing tool developed by Apple, designed for both beginners and experienced video editors. It allows users to create professional-looking videos with various media types, including photos. The integration of photos into iMovie projects provides a way to add visual interest, tell stories, and enhance the overall quality of your videos. Knowing how iMovie handles photos will ensure a smoother and more creative editing experience.
1.1. Why Use Photos in iMovie?
Photos can significantly enhance your iMovie projects. They can be used to:
- Tell a Story: Illustrate events, people, or places with still images.
- Add Visual Interest: Break up long video clips and maintain viewer engagement.
- Provide Information: Display graphs, charts, or text-based images.
- Create Montages and Slideshows: Compile a series of photos to create a dynamic visual sequence.
1.2. Supported Photo Formats
iMovie supports a wide range of image formats, ensuring compatibility with most digital cameras and devices. The commonly supported formats include:
- JPEG (.jpg): A widely used format for photographs due to its efficient compression.
- PNG (.png): Ideal for images with transparency and graphics requiring sharp details.
- TIFF (.tiff): A high-quality format often used for professional photography and archiving.
- HEIC (.heic): A newer format used by Apple devices for better compression and image quality.
1.3. Understanding Aspect Ratios
Aspect ratios are crucial when integrating photos into your iMovie projects. The aspect ratio defines the proportion of the image’s width to its height. Common aspect ratios include:
- 16:9: The standard widescreen format used in most modern videos and displays.
- 4:3: An older format that was commonly used in traditional televisions and cameras.
Using photos with the same aspect ratio as your video project (typically 16:9) will prevent black bars from appearing on the sides or top of the image. If your photos have a different aspect ratio, iMovie provides tools to crop and adjust them to fit the project seamlessly.
2. Importing Photos into iMovie
The first step to using photos in iMovie is importing them into your project. There are several ways to import photos, each with its advantages.
2.1. Importing from the Photos Library
iMovie integrates seamlessly with the Photos app on macOS, making it easy to access your entire photo library directly from iMovie.
Steps:
- Open iMovie: Launch the iMovie application on your Mac.
- Create a New Project: Click on “Create New” and select “Movie” to start a new project.
- Access the Photos Library: In the iMovie interface, look for the “Libraries” list on the left side. You should see “Photos Library” listed.
- Browse Your Photos: Click on “Photos Library” to browse your photos and albums. You can view your photos by moments, collections, or albums.
- Select Photos: Find the photos you want to import and select them.
- Drag and Drop: Drag the selected photos into your iMovie timeline. You can place them between video clips or create a slideshow sequence.
Troubleshooting Tips:
- Photos Library Not Showing: If you don’t see the Photos Library in the Libraries list, ensure that your Photos Library is set as the system library. To do this, quit Photos, hold down the Option key while opening Photos, and choose the library you want to designate as the System Photo Library. Then, go to Photos > Preferences > General and click “Use as System Photo Library.”
- Permissions: Make sure iMovie has the necessary permissions to access your Photos Library. You can check and adjust these settings in System Preferences > Security & Privacy > Privacy > Photos.
2.2. Importing from Files and Folders
If your photos are stored in files and folders on your computer, you can import them directly into iMovie.
Steps:
- Open iMovie: Launch the iMovie application.
- Create a New Project: Click on “Create New” and select “Movie.”
- Import Media: Click the “Import Media” button in the iMovie toolbar. This will open a Finder window.
- Locate Your Photos: Navigate to the folder where your photos are stored.
- Select Photos: Select the photos you want to import. You can select multiple photos by holding down the Command key while clicking on each one.
- Click “Import Selected”: Click the “Import Selected” button to import the photos into iMovie.
- Drag and Drop: Drag the imported photos from the iMovie media browser into your timeline.
Tips for Organizing Files:
- Create Folders: Organize your photos into folders based on events, dates, or themes. This makes it easier to find and import the photos you need.
- Naming Conventions: Use consistent naming conventions for your photo files. This can help you quickly identify and locate specific images.
2.3. Importing from External Devices
You can also import photos directly from external devices like SD cards, USB drives, or cameras.
Steps:
- Connect the Device: Connect the external device to your Mac.
- Open iMovie: Launch the iMovie application.
- Create a New Project: Click on “Create New” and select “Movie.”
- Import Media: Click the “Import Media” button.
- Select the Device: In the Finder window, select your external device from the list of available sources.
- Browse and Select Photos: Browse the device to find the photos you want to import and select them.
- Click “Import Selected”: Click the “Import Selected” button to import the photos into iMovie.
- Drag and Drop: Drag the imported photos from the iMovie media browser into your timeline.
Best Practices for External Devices:
- Eject Properly: Always eject the external device properly after importing your photos to avoid data corruption.
- Backup: Before formatting or reusing the external device, ensure that you have backed up your photos to a safe location.
3. Editing Photos in iMovie
Once your photos are imported into iMovie, you can edit them to enhance their appearance and fit them seamlessly into your video project.
3.1. Adjusting Duration
By default, iMovie sets a standard duration for each photo, but you can adjust this to control how long each image appears on screen.
Steps:
- Select the Photo: Click on the photo in your timeline to select it.
- Adjust the Edges: Hover your cursor over the edge of the photo until you see the adjustment arrow.
- Drag to Adjust: Click and drag the edge of the photo to lengthen or shorten its duration.
- Precision Adjustment: For more precise control, use the “Clip Trimmer” by selecting the photo and pressing “T” on your keyboard. This allows you to enter the exact duration you want.
Tips for Setting Duration:
- Match the Pace: Adjust the duration of your photos to match the overall pace of your video.
- Visual Complexity: Give more time to photos with complex details or important information.
- Transitions: Consider the transition effects you are using and adjust the duration accordingly.
3.2. Cropping and Rotating
iMovie provides tools to crop and rotate your photos, allowing you to focus on specific areas or correct the orientation.
Steps:
- Select the Photo: Click on the photo in your timeline.
- Access Cropping Tools: Click the “Cropping” button in the viewer toolbar (it looks like a rectangle).
- Choose a Cropping Style:
- Fit: This option fits the entire photo within the video frame, adding black bars if necessary.
- Crop to Fill: This option crops the photo to fill the video frame, eliminating black bars. You can then drag the photo to adjust the visible area.
- Ken Burns: This option adds a slow zoom and pan effect to the photo, creating a dynamic visual.
- Rotate: Use the rotate buttons to rotate the photo clockwise or counterclockwise.
Creative Uses for Cropping:
- Focus on Key Elements: Crop the photo to highlight the most important elements.
- Create Visual Interest: Use the Ken Burns effect to add movement and dynamism.
- Correct Orientation: Rotate photos that were taken in the wrong orientation.
3.3. Enhancing Colors and Adjusting Audio
iMovie includes tools to enhance the colors and adjust the audio of your photos, allowing you to create a consistent and polished look.
Steps:
- Select the Photo: Click on the photo in your timeline.
- Access Color Adjustments: Click the “Color” button in the viewer toolbar (it looks like a paint palette).
- Adjust Color Settings:
- Exposure: Adjust the overall brightness of the photo.
- Contrast: Adjust the difference between the light and dark areas of the photo.
- Saturation: Adjust the intensity of the colors in the photo.
- Audio Adjustments: If your photo has audio, you can adjust the volume, add effects, or remove the audio altogether.
Tips for Color Correction:
- Consistency: Ensure that the colors of your photos are consistent with the overall tone of your video.
- Subtlety: Make subtle adjustments to avoid over-processing the photos.
- Audio Balance: If using audio, balance the audio levels with the rest of your video.
4. Adding Transitions and Effects
Transitions and effects can add a professional touch to your iMovie projects, making the integration of photos more seamless and visually appealing.
4.1. Applying Transitions
Transitions are visual effects that smooth the change from one photo to the next.
Steps:
- Open the Transitions Browser: Click the “Transitions” button in the iMovie toolbar.
- Browse Transitions: Browse the available transitions, such as “Cross Dissolve,” “Slide,” and “Wipe.”
- Drag and Drop: Drag your desired transition between two photos in your timeline.
- Adjust Duration: Adjust the duration of the transition by clicking on it in the timeline and using the adjustment handles.
Popular Transition Styles:
- Cross Dissolve: A smooth fade from one photo to the next.
- Slide: One photo slides in to replace the previous one.
- Wipe: A line sweeps across the screen, revealing the next photo.
4.2. Adding Effects
iMovie offers a variety of visual effects that can enhance the appearance of your photos.
Steps:
- Select the Photo: Click on the photo in your timeline.
- Open the Effects Browser: Click the “Video Effects” button in the viewer toolbar (it looks like a star).
- Browse Effects: Browse the available effects, such as “Black & White,” “Sepia,” and “Dream.”
- Apply Effect: Click on an effect to apply it to the selected photo.
- Adjust Effect Settings: Some effects have adjustable settings, allowing you to customize their appearance.
Creative Effect Ideas:
- Black & White: Convert color photos to black and white for a classic look.
- Sepia: Add a warm, vintage tone to your photos.
- Dream: Create a soft, ethereal look with a dreamy effect.
4.3. Using Overlays and Titles
Overlays and titles can add context and information to your photos, making them more engaging and informative.
Steps:
- Open the Titles Browser: Click the “Titles” button in the iMovie toolbar.
- Browse Titles: Browse the available title styles, such as “Lower Third,” “Centered,” and “Scrolling.”
- Drag and Drop: Drag your desired title style onto your photo in the timeline.
- Edit Text: Double-click on the title in the viewer to edit the text.
- Customize Appearance: Use the formatting tools to customize the font, size, color, and alignment of the text.
Tips for Effective Titles:
- Keep it Concise: Use short, clear titles that convey essential information.
- Choose Readable Fonts: Select fonts that are easy to read against the background of your photos.
- Coordinate Colors: Coordinate the colors of your titles with the overall color scheme of your video.
5. Animating Photos with the Ken Burns Effect
The Ken Burns effect is a popular technique for adding motion to still photos, making them more dynamic and engaging. iMovie makes it easy to apply and customize this effect.
5.1. What is the Ken Burns Effect?
The Ken Burns effect involves slowly zooming in or out and panning across a photo, creating the illusion of movement. This technique is named after documentary filmmaker Ken Burns, who frequently used it in his films to bring historical photos to life.
5.2. Applying the Ken Burns Effect in iMovie
Steps:
- Select the Photo: Click on the photo in your timeline.
- Access Cropping Tools: Click the “Cropping” button in the viewer toolbar.
- Select “Ken Burns”: Choose the “Ken Burns” option from the cropping styles.
- Adjust Start and End Frames:
- Start: Drag and resize the green frame to define the starting area of the effect.
- End: Drag and resize the red frame to define the ending area of the effect.
- Preview: Preview the effect to see how it looks. Adjust the start and end frames as needed.
5.3. Customizing the Ken Burns Effect
- Zoom Direction: You can control whether the effect zooms in or out by adjusting the relative sizes of the start and end frames.
- Pan Direction: You can control the direction of the pan by positioning the start and end frames in different areas of the photo.
- Duration: The duration of the Ken Burns effect is determined by the overall duration of the photo in your timeline.
Tips for Effective Use:
- Subtlety: Use the Ken Burns effect subtly to avoid distracting viewers.
- Focus on Key Elements: Use the effect to draw attention to important elements in the photo.
- Smooth Transitions: Ensure that the transitions between photos with the Ken Burns effect are smooth and seamless.
6. Creating Slideshows with Music
Combining photos with music can create powerful and emotional slideshows. iMovie makes it easy to add and synchronize music with your photos.
6.1. Adding Music to Your Project
Steps:
- Open the Audio Browser: Click the “Audio” button in the iMovie toolbar.
- Browse Music: Browse the available music tracks in your iTunes library, GarageBand library, or iMovie’s sound effects library.
- Drag and Drop: Drag your desired music track into the timeline, placing it in the music well below your photos.
6.2. Synchronizing Music with Photos
Tips for Synchronization:
- Match the Mood: Choose music that matches the mood and tone of your photos.
- Sync to Key Moments: Synchronize key moments in your music with important events in your photos.
- Adjust Volume: Adjust the volume of the music so that it complements the photos without overpowering them.
6.3. Adjusting Audio Levels
Steps:
- Select the Audio Clip: Click on the music clip in your timeline.
- Adjust Volume: Use the audio adjustment handles to raise or lower the volume of the clip.
- Fade In/Out: Add fade-in and fade-out effects to the beginning and end of the clip for a smoother transition.
- Audio Ducking: Use the “Audio Ducking” feature to automatically lower the volume of the music when there is dialogue or narration in your video.
Tips for Audio Mixing:
- Balance: Balance the audio levels of your music, dialogue, and sound effects to create a professional mix.
- Clarity: Ensure that the audio is clear and easy to understand.
- Consistency: Maintain consistent audio levels throughout your video.
7. Optimizing Photos for iMovie
Optimizing your photos before importing them into iMovie can improve performance and ensure the best possible visual quality.
7.1. Resizing Photos
Large, high-resolution photos can slow down iMovie and consume significant storage space. Resizing your photos to a more manageable size can improve performance without sacrificing visual quality.
Recommended Sizes:
- 1920×1080 pixels: For Full HD videos.
- 1280×720 pixels: For HD videos.
Tools for Resizing:
- Preview (macOS): Open the photo in Preview, go to Tools > Adjust Size, and enter the desired dimensions.
- Adobe Photoshop: Use the “Image Size” command to resize the photo and adjust the resolution.
- Online Resizing Tools: Use online tools like TinyPNG or iLoveIMG to resize your photos quickly and easily.
7.2. Choosing the Right File Format
The file format of your photos can affect their visual quality and file size.
Recommended Formats:
- JPEG (.jpg): A good balance between image quality and file size. Ideal for most photographs.
- PNG (.png): Best for images with transparency and graphics requiring sharp details.
7.3. Color Profiles
Color profiles ensure that the colors in your photos are displayed accurately on different devices.
Recommended Color Profile:
- sRGB: A standard color profile that is widely supported by most devices and applications.
Converting Color Profiles:
- Adobe Photoshop: Use the “Convert to Profile” command to convert your photos to the sRGB color profile.
- Preview (macOS): Open the photo in Preview, go to Tools > Assign Profile, and choose the sRGB profile.
8. Advanced Tips and Tricks
For those looking to take their iMovie skills to the next level, here are some advanced tips and tricks for working with photos.
8.1. Using Green Screen with Photos
You can use green screen effects to combine photos with video clips, creating visually stunning compositions.
Steps:
- Import Your Media: Import your green screen video clip and the photo you want to use as the background.
- Place the Photo: Place the photo in the timeline below the green screen video clip.
- Apply the Green Screen Effect: Select the green screen video clip and click the “Video Overlay Settings” button in the viewer toolbar. Choose “Green/Blue Screen” from the overlay options.
- Adjust Settings: Adjust the settings to remove the green screen and reveal the photo background.
8.2. Creating Stop Motion Animations
You can create stop motion animations by stringing together a series of photos, each with a slight change in position or appearance.
Steps:
- Take Your Photos: Take a series of photos, making small adjustments between each shot.
- Import into iMovie: Import all of your photos into iMovie.
- Adjust Duration: Select all of the photos in the timeline and adjust their duration to a very short interval (e.g., 0.1 seconds).
- Preview: Preview your stop motion animation and adjust the duration as needed.
8.3. Using Keyboard Shortcuts
Using keyboard shortcuts can speed up your workflow and make editing photos in iMovie more efficient.
Useful Shortcuts:
- Command + I: Import Media
- Command + B: Cut Clip
- Command + Z: Undo
- Spacebar: Play/Pause
- T: Open Clip Trimmer
9. Common Issues and Troubleshooting
Even with a straightforward process, you might encounter some issues while adding photos to iMovie. Here’s how to troubleshoot common problems.
9.1. Photo Quality Issues
Problem: Photos appear blurry or pixelated in iMovie.
Solution:
- Check Original Resolution: Ensure your original photos are high resolution.
- Optimize Photo Size: Resize photos to match your project’s resolution (e.g., 1920×1080 for 1080p projects).
- Use High-Quality Formats: Prefer JPEG or PNG formats for better image quality.
9.2. Photos Not Appearing in iMovie
Problem: Photos from your library or files aren’t showing up in iMovie.
Solution:
- System Photo Library: Make sure your Photos Library is set as the System Photo Library.
- iMovie Permissions: Ensure iMovie has permission to access your Photos Library in System Preferences > Security & Privacy > Privacy > Photos.
- File Format Compatibility: Verify that your photos are in a supported format (JPEG, PNG, TIFF, HEIC).
9.3. Duration and Timing Problems
Problem: Setting the duration of photos is difficult, or photos aren’t syncing with audio.
Solution:
- Manual Adjustment: Drag the edges of the photo clips in the timeline to adjust duration.
- Clip Trimmer: Use the Clip Trimmer for precise duration settings.
- Beat Matching: Align photos with the music beats by listening carefully and adjusting the clip positions.
9.4. Transition and Effect Issues
Problem: Transitions are not smooth, or effects are not applying correctly.
Solution:
- Render Transitions: Ensure transitions are fully rendered for smooth playback.
- Effect Compatibility: Check if effects are compatible with the photo format.
- Clear Cache: Clear iMovie’s cache to resolve any temporary glitches.
9.5. iMovie Performance Issues
Problem: iMovie is slow or crashes when working with photos.
Solution:
- Close Other Apps: Close unnecessary applications to free up system resources.
- Optimize Media: Reduce the size and resolution of your photos.
- Update iMovie: Ensure you are using the latest version of iMovie.
- Restart Your Mac: Restarting can help clear temporary issues and improve performance.
10. Inspiring Ideas for Using Photos in iMovie
Need some inspiration? Here are creative ideas for using photos in your iMovie projects.
10.1. Travel Montages
Create engaging travel montages by combining photos and video clips from your trips. Use dynamic transitions, upbeat music, and text overlays to highlight key locations and experiences.
10.2. Family History Videos
Compile old family photos and videos to create a heartfelt family history video. Add narration, interviews, and historical context to tell your family’s story.
10.3. Product Demonstrations
Showcase your products by creating demonstration videos with photos and video clips. Use titles and annotations to highlight features and benefits.
10.4. Event Highlights
Create highlight reels of events like weddings, parties, and conferences. Combine photos and videos with music and testimonials to capture the atmosphere.
10.5. Educational Content
Use photos and illustrations to create educational videos. Animate images, add text overlays, and use a clear voiceover to explain complex topics.
10.6. Before-and-After Transformations
Showcase before-and-after transformations, such as home renovations or fitness journeys. Use side-by-side photos and smooth transitions to highlight the changes.
10.7. Time-Lapse Videos
Create time-lapse videos by combining photos taken over a period of time. Highlight natural phenomena, construction projects, or personal growth.
11. Staying Updated with iMovie Features
To make the most of iMovie, stay updated with its latest features and updates.
11.1. Following Apple’s Announcements
Keep an eye on Apple’s official announcements for new iMovie features, improvements, and updates.
11.2. Reading Tech Blogs and Forums
Stay informed by reading tech blogs, forums, and communities dedicated to video editing and iMovie.
11.3. Watching Tutorials
Watch tutorials on YouTube and other platforms to learn new techniques and workflows in iMovie.
11.4. Experimenting
Experiment with different features, effects, and techniques in iMovie to discover what works best for your projects.
12. Why dfphoto.net is Your Go-To Resource for Photography and iMovie Tips
At dfphoto.net, we understand the power of visual storytelling. That’s why we’re dedicated to providing you with the best resources for photography and video editing. Here’s how dfphoto.net can help you enhance your iMovie projects:
12.1. Expert Tutorials and Guides
dfphoto.net offers expert tutorials and guides on various photography and video editing topics. Whether you’re a beginner or an experienced creator, you’ll find valuable information to improve your skills.
12.2. Creative Inspiration
Get inspired by our curated collections of stunning photographs and video projects. Explore new ideas and techniques to bring your creative vision to life.
12.3. Community Support
Connect with a community of passionate photographers and video editors. Share your work, ask questions, and get feedback from fellow creators.
12.4. Equipment Reviews and Recommendations
Stay up-to-date with the latest photography and video equipment. Read our in-depth reviews and recommendations to make informed purchasing decisions.
12.5. Exclusive Tips and Tricks
Unlock exclusive tips and tricks to optimize your photography and video editing workflow. Learn how to get the most out of your tools and software.
By leveraging the resources at dfphoto.net, you can elevate your iMovie projects and create visually captivating content that resonates with your audience.
Address: 1600 St Michael’s Dr, Santa Fe, NM 87505, United States
Phone: +1 (505) 471-6001
Website: dfphoto.net
FAQ: Adding Photos Into iMovie
1. How do I import photos from my iPhone to iMovie on Mac?
You can import photos from your iPhone to iMovie on Mac by using AirDrop, iCloud Photos, or connecting your iPhone via USB.
2. What photo formats are compatible with iMovie?
iMovie supports JPEG, PNG, TIFF, and HEIC photo formats.
3. How do I change the duration of a photo in iMovie?
Select the photo in the timeline and drag the edges to adjust the duration, or use the Clip Trimmer for precise settings.
4. Can I add music to a slideshow in iMovie?
Yes, you can add music from your iTunes library, GarageBand, or iMovie’s sound effects library to your slideshow.
5. How do I apply the Ken Burns effect to a photo in iMovie?
Select the photo, click the Cropping button, choose “Ken Burns,” and adjust the start and end frames.
6. Why are my photos blurry in iMovie?
Ensure your original photos are high resolution and optimize them for your project’s resolution.
7. How do I fix photos not showing up in iMovie?
Make sure your Photos Library is set as the System Photo Library and that iMovie has the necessary permissions.
8. How do I create a stop motion animation in iMovie?
Import a series of photos with slight changes, adjust their duration to a short interval (e.g., 0.1 seconds), and preview the animation.
9. Can I use green screen effects with photos in iMovie?
Yes, place the photo below the green screen video clip and apply the “Green/Blue Screen” effect.
10. What are some creative ideas for using photos in iMovie?
Creative ideas include travel montages, family history videos, product demonstrations, event highlights, educational content, and before-and-after transformations.
In conclusion, integrating photos into iMovie projects is a great way to enhance storytelling and create visually appealing videos. By following these guidelines and leveraging the resources at dfphoto.net, you can master the art of adding and editing photos in iMovie. So, start exploring, experimenting, and creating amazing video projects today!
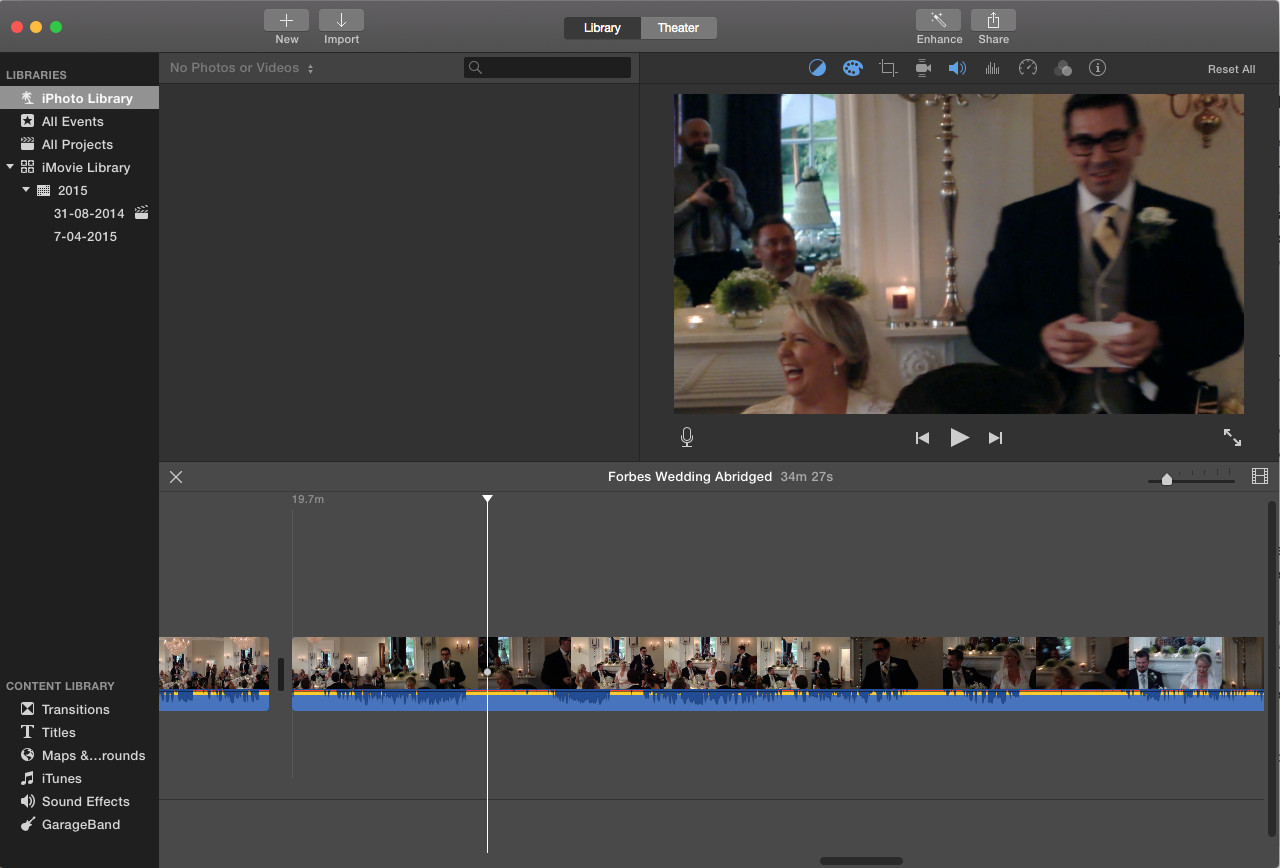 Adding Photos Into Imovie Interface
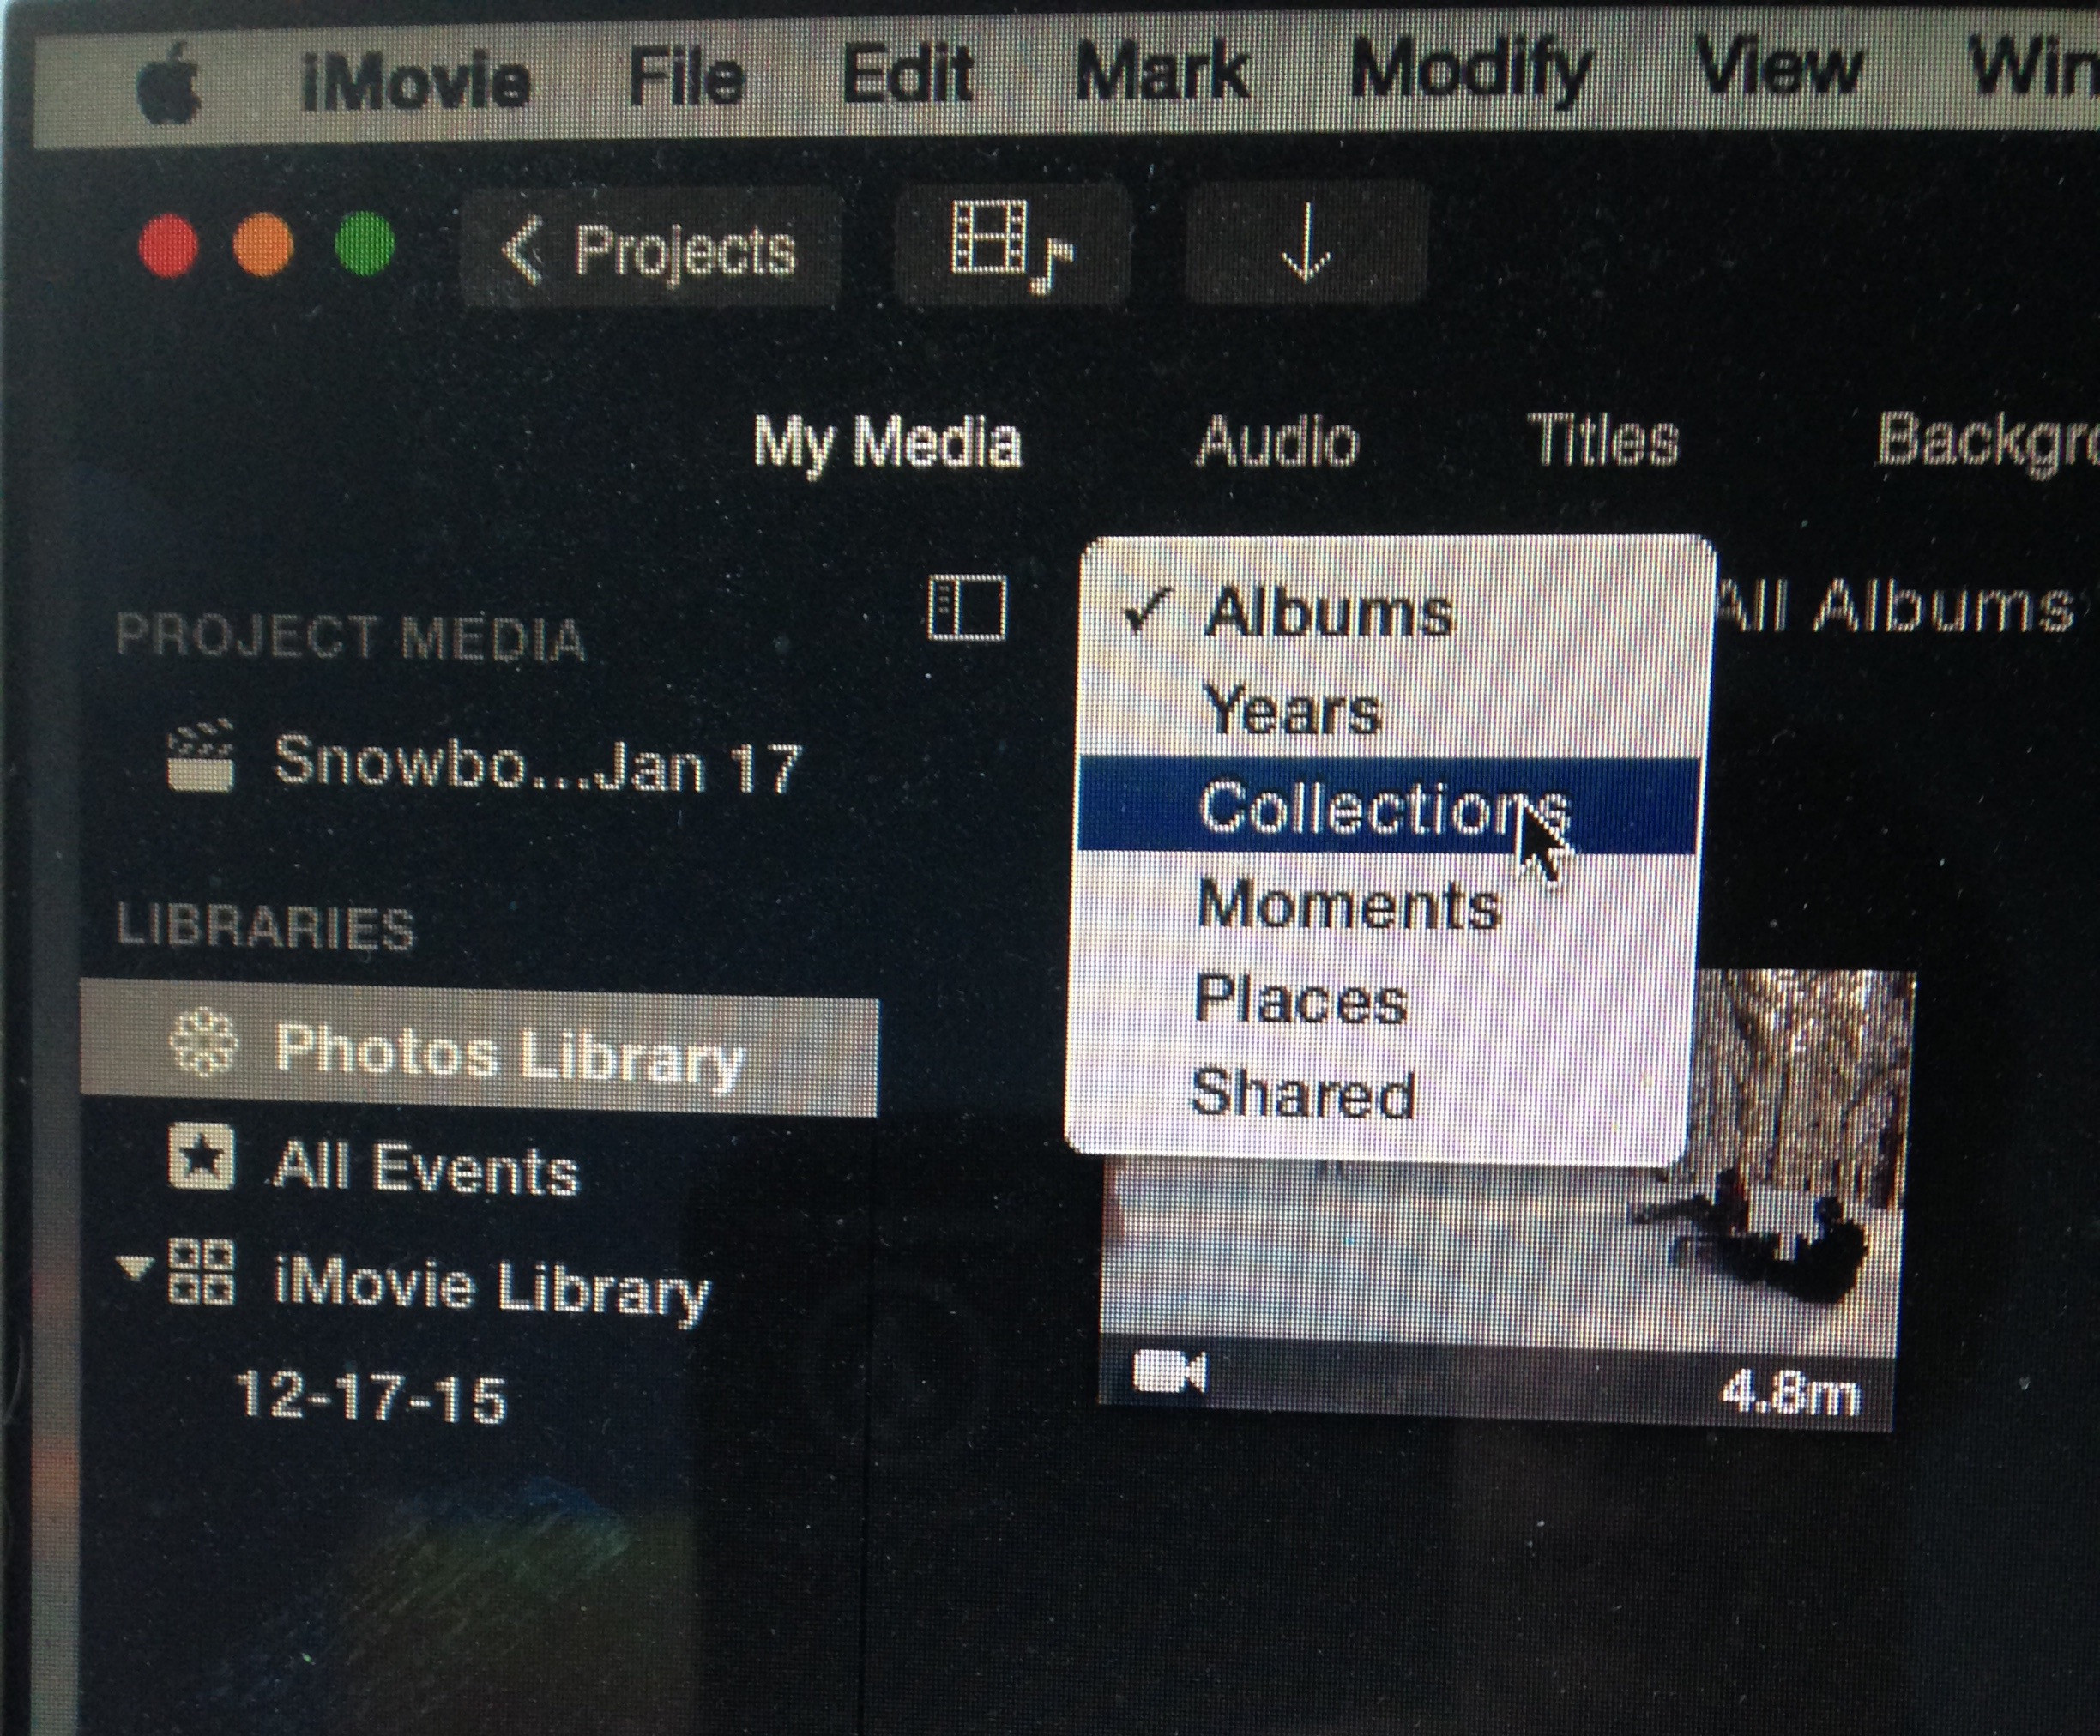 Accessing Photos from Library