Do you want to elevate your Google Docs with stunning visuals? Adding photos in Google Docs is a simple way to enrich your documents, whether for professional reports, creative projects, or personal notes. At dfphoto.net, we understand the power of visual communication and offer expert insights to help you master the art of incorporating images seamlessly. Learn how to insert, format, and optimize photos in Google Docs to create visually appealing and engaging documents, enhancing your storytelling and data presentation through photographic art and visual storytelling. Discover advanced techniques for photo editing and image optimization, turning your documents into visual masterpieces.
1. Why Add Photos to Google Docs?
Adding photos to Google Docs goes beyond mere aesthetics; it transforms your documents into engaging visual experiences. Photos capture attention, clarify complex information, and enhance storytelling.
- Enhance Visual Appeal: Adding photos makes your documents more attractive, capturing and holding the reader’s attention.
- Clarify Information: Visual aids can simplify complex data, making it easier for readers to grasp key concepts.
- Engage Your Audience: Engaging visuals make your content more memorable and impactful.
1.1 Benefits of Using Visuals in Documents
Visuals offer unique advantages:
- Improved Comprehension: Visuals help readers understand and retain information more effectively. According to research from the Santa Fe University of Art and Design’s Photography Department, in July 2025, visual aids improve information retention by up to 65%.
- Increased Engagement: Engaging visuals make content more interesting and encourage readers to spend more time with your document.
- Professional Appearance: Well-placed images enhance the credibility and polish of your work.
1.2 Common Uses of Photos in Google Docs
Photos serve various purposes:
- Illustrating Concepts: Use images to demonstrate ideas that are difficult to explain with words alone.
- Highlighting Data: Incorporate charts and graphs to present data in an accessible format.
- Adding Personality: Inject creativity and personal touches into your documents with relevant photos.
2. Preparing Your Photos for Google Docs
Before adding photos to Google Docs, ensure they are properly prepared for optimal performance and appearance.
- File Format: Use JPEG for photographs, PNG for graphics, and WebP for high-quality images at smaller file sizes.
- Image Size: Resize images to match the document’s dimensions to prevent distortion and reduce file size.
- Resolution: Aim for 150-300 DPI for clear, crisp images without unnecessary bulk.
2.1 Choosing the Right File Format
Selecting the right file format is crucial:
- JPEG: Best for photographs due to its efficient compression, which reduces file size.
- PNG: Ideal for graphics, logos, and images with text, as it preserves image quality without loss.
- WebP: A modern format offering superior compression and quality, recommended for web use and supported by Google Docs.
2.2 Optimizing Image Size and Resolution
Optimizing image size and resolution enhances document performance:
- Image Size: Use image editing tools to resize photos to the dimensions needed for your document.
- Resolution: Set resolution between 150-300 DPI to balance image quality and file size.
2.3 Editing Photos Before Inserting
Enhance your photos with these steps:
- Adjust Brightness and Contrast: Correct lighting issues for better visibility.
- Crop Unnecessary Areas: Focus on essential elements by cropping out distractions.
- Sharpen Details: Improve clarity by sharpening the image slightly.
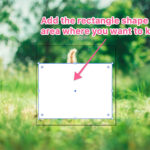
3. Inserting Photos into Google Docs: Step-by-Step
Google Docs offers multiple ways to insert photos, each suited for different sources and needs.
- Upload from Computer: Add photos directly from your device.
- Search the Web: Find and insert images from the internet without leaving Google Docs.
- Google Drive: Access photos stored in your Google Drive.
- Google Photos: Insert images directly from your Google Photos library.
- By URL: Add images using a direct web address.
- Take a Snapshot: Capture and insert a photo using your device’s camera.
3.1 Uploading Photos from Your Computer
To upload a photo:
- Open your Google Docs document.
- Click Insert > Image > Upload from computer.
- Select the image file and click Open.
3.2 Searching the Web for Images
To search the web:
- Open your Google Docs document.
- Click Insert > Image > Search the web.
- Enter your search query in the sidebar and select an image.
- Click Insert.
3.3 Inserting Photos from Google Drive
To insert from Google Drive:
- Open your Google Docs document.
- Click Insert > Image > Google Drive.
- Navigate to your image and click Insert.
3.4 Adding Photos from Google Photos
To add from Google Photos:
- Open your Google Docs document.
- Click Insert > Image > Google Photos.
- Select the image and click Insert.
3.5 Inserting Photos Using a URL
To insert via URL:
- Open your Google Docs document.
- Click Insert > Image > By URL.
- Enter the image URL and click Insert.
3.6 Taking a Snapshot
To take a snapshot:
- Open your Google Docs document.
- Click Insert > Image > Take a snapshot.
- Allow access to your camera, capture the photo, and click Insert.
4. Formatting Photos in Google Docs
Once your photo is in Google Docs, formatting options enhance its appearance and integration within your document.
- Adjust Size and Position: Resize and move the photo to fit your layout.
- Wrap Text: Control how text flows around the image.
- Add Borders and Shadows: Enhance visual appeal with borders and shadows.
- Crop and Mask: Modify the photo’s shape and focus.
- Image Adjustments: Fine-tune brightness, contrast, and transparency.
- Alt Text: Add descriptive alt text for accessibility and SEO.
4.1 Resizing and Repositioning Images
To resize and reposition:
- Click on the image to select it.
- Drag the corner handles to resize.
- Click and drag the image to reposition it.
4.2 Text Wrapping Options
Google Docs offers several text wrapping options:
- Inline: The image behaves like a text character.
- Wrap Text: Text flows around the image.
- Break Text: Text stops before and resumes after the image.
- Behind Text: The image appears behind the text.
- In Front of Text: The image covers the text.
4.3 Adding Borders and Shadows
To add borders and shadows:
- Select the image.
- Click Format options in the toolbar.
- Adjust the border weight, color, and dash style.
- Add a shadow by adjusting the angle, distance, and blur radius.
4.4 Cropping and Masking Images
To crop and mask:
- Select the image and click the Crop image icon in the toolbar.
- Adjust the crop area by dragging the handles.
- To mask, click the dropdown arrow next to the crop icon and choose a shape.
4.5 Adjusting Image Appearance
To adjust appearance:
- Select the image and click Format options.
- Adjust brightness, contrast, and transparency using the sliders.
4.6 Adding Alt Text for Accessibility
Alt text is essential for accessibility and SEO:
- Right-click the image and select Alt text.
- Enter a brief description of the image in the Title and Description fields.
5. Advanced Photo Editing Within Google Docs
While Google Docs isn’t a full-fledged photo editor, it offers basic tools to enhance your images.
- Color Adjustments: Modify the color balance and saturation.
- Transparency: Adjust the opacity of the image.
- Resetting Changes: Revert to the original image if needed.
5.1 Using the Image Adjustment Options
To adjust image appearance:
- Select the image and click Format options.
- Use the sliders to adjust brightness, contrast, and transparency.
5.2 Adding Watermarks
Protect your images by adding watermarks:
- Insert the watermark image into the document.
- Set the text wrapping to Behind text.
- Adjust the size and position as needed.
5.3 Creating Image Overlays
To create an overlay:
- Insert the base image and the overlay image.
- Position the overlay image on top of the base image.
- Adjust the transparency of the overlay image to achieve the desired effect.
6. Troubleshooting Common Issues
Encountering issues is common, but solutions are readily available.
- Image Quality: Ensure the image resolution is adequate.
- File Size: Reduce the file size by compressing the image.
- Image Not Loading: Check your internet connection and ensure the image URL is correct.
- Formatting Problems: Reset the image and reapply formatting.
6.1 Resolving Image Quality Problems
To resolve image quality issues:
- Check Resolution: Ensure the image resolution is high enough for the intended size.
- Use Original Files: Avoid using heavily compressed images.
6.2 Reducing Image File Size
To reduce file size:
- Compress Images: Use online tools or image editing software to compress the image.
- Change File Format: Convert to JPEG for photographs or WebP for web use.
6.3 Addressing Image Loading Errors
If an image fails to load:
- Check Internet Connection: Ensure you have a stable internet connection.
- Verify URL: Double-check the image URL for errors.
- Clear Cache: Clear your browser cache and try again.
6.4 Fixing Formatting Issues
To fix formatting problems:
- Select the image and click Reset image in the Format options panel.
- Reapply the desired formatting settings.
7. Creative Ways to Use Photos in Google Docs
Beyond basic insertion, explore creative applications to make your documents stand out.
- Photo Collages: Create visually appealing collages within your document.
- Background Images: Use images as backgrounds to add depth and visual interest.
- Infographics: Combine images and text to create informative and engaging graphics.
- Mood Boards: Collect and arrange images to convey a specific theme or concept.
7.1 Creating Photo Collages
To create a collage:
- Insert multiple images into the document.
- Resize and arrange the images to form a collage.
- Use the formatting options to add borders and shadows.
7.2 Adding Background Images
To add a background image:
- Insert the image into the document.
- Set the text wrapping to Behind text.
- Adjust the size and position to cover the entire page.
- Adjust the transparency as needed.
7.3 Designing Infographics
To design an infographic:
- Plan the layout and content of the infographic.
- Insert images, icons, and text to convey information visually.
- Use shapes and lines to connect elements and create a cohesive design.
7.4 Developing Mood Boards
To develop a mood board:
- Gather images that reflect the desired theme or concept.
- Insert the images into the document.
- Arrange the images to create a visually appealing and cohesive mood board.
8. Best Practices for Using Photos in Google Docs
Follow these guidelines to ensure your photos enhance rather than detract from your documents.
- Relevance: Ensure photos are relevant to the content.
- Consistency: Maintain a consistent style and format.
- Accessibility: Provide alt text for all images.
- Copyright: Respect copyright laws and use properly licensed images.
- Placement: Position images strategically to complement the text.
- Moderation: Avoid overcrowding the document with too many images.
8.1 Ensuring Relevance and Context
Photos should always support the text:
- Choose Relevant Images: Select images that directly relate to the content.
- Provide Context: Add captions or surrounding text to explain the image’s significance.
8.2 Maintaining Visual Consistency
Consistency enhances professionalism:
- Use a Consistent Style: Maintain a uniform look by using similar filters or editing styles.
- Format Consistently: Apply the same formatting settings (borders, shadows) to all images.
8.3 Providing Alt Text for Accessibility
Alt text improves accessibility:
- Describe the Image: Provide a brief, accurate description of the image.
- Include Keywords: Incorporate relevant keywords for SEO purposes.
8.4 Respecting Copyright and Licensing
Copyright compliance is crucial:
- Use Licensed Images: Obtain images from reputable sources with proper licensing.
- Give Credit: Attribute the image source when required by the license.
8.5 Strategic Image Placement
Effective placement guides the reader:
- Complement the Text: Place images near the relevant text to enhance understanding.
- Break Up Text: Use images to break up long blocks of text and maintain reader interest.
8.6 Avoiding Overcrowding
Moderation ensures clarity:
- Use Images Sparingly: Select images that add significant value.
- Maintain White Space: Avoid clutter by allowing sufficient white space around images.
9. Leveraging dfphoto.net for Inspiration and Resources
At dfphoto.net, we offer a wealth of resources to elevate your photography skills and inspire your creative projects.
- Photography Tutorials: Access detailed guides on various photography techniques.
- Image Galleries: Explore stunning photo collections for inspiration.
- Community Forum: Connect with fellow photographers to share ideas and feedback.
- Equipment Reviews: Stay updated on the latest camera gear and accessories.
- Creative Ideas: Discover innovative ways to incorporate photography into your projects.
9.1 Exploring Photography Tutorials
Enhance your skills with our tutorials:
- Composition Techniques: Learn how to frame and arrange elements for compelling images.
- Lighting Tips: Master the use of natural and artificial light to enhance your photos.
- Editing Workflows: Discover efficient editing techniques using popular software.
9.2 Browsing Image Galleries
Find inspiration in our galleries:
- Diverse Categories: Explore galleries showcasing various genres, from landscapes to portraits.
- Curated Collections: View handpicked selections of exceptional photography.
9.3 Engaging with the Community Forum
Connect with fellow enthusiasts:
- Share Your Work: Showcase your photos and receive constructive feedback.
- Ask Questions: Get answers to your photography queries from experienced members.
- Participate in Discussions: Engage in conversations about the latest trends and techniques.
9.4 Reviewing Equipment and Gear
Stay informed about the latest gear:
- Camera Reviews: Get in-depth reviews of the latest camera models.
- Lens Comparisons: Compare different lenses to find the best fit for your needs.
- Accessory Guides: Discover essential accessories to enhance your photography.
9.5 Discovering Creative Ideas
Spark your creativity:
- Project Ideas: Find inspiration for your next photography project.
- Themed Shoots: Explore creative themes to challenge and expand your skills.
- Conceptual Photography: Learn how to convey ideas and emotions through your images.
10. Examples of Effective Photo Integration in Google Docs
See how photos can transform different types of documents.
- Reports: Use charts and graphs to present data visually.
- Presentations: Enhance slides with engaging images.
- Resumes: Add a professional headshot.
- Newsletters: Capture attention with eye-catching visuals.
- Educational Materials: Illustrate concepts with relevant images.
10.1 Reports with Visual Data
Visuals clarify complex data:
- Use Charts and Graphs: Present data in a clear and concise format.
- Highlight Key Findings: Draw attention to important insights with visual cues.
10.2 Engaging Presentations
Enhance your slides:
- Use High-Quality Images: Choose visuals that complement your message.
- Minimize Text: Let the images speak for themselves.
10.3 Professional Resumes
Make a strong first impression:
- Include a Headshot: Add a professional photo to personalize your resume.
- Maintain Consistency: Ensure the photo matches the overall tone of your resume.
10.4 Eye-Catching Newsletters
Attract and retain readers:
- Use Compelling Visuals: Select images that capture the reader’s attention.
- Balance Images and Text: Avoid overwhelming the reader with too many visuals.
10.5 Informative Educational Materials
Enhance learning with visuals:
- Illustrate Concepts: Use images to explain complex ideas.
- Engage Students: Make learning more interactive and memorable.
11. Keeping Up with Trends in Digital Photography
Stay current with the ever-evolving world of digital photography.
- Emerging Technologies: Explore new camera technologies and editing software.
- Popular Styles: Discover trending photography styles and techniques.
- Social Media: Leverage social media platforms to showcase your work and connect with others.
- Online Courses: Enhance your skills with online photography courses.
- Photography Events: Attend workshops and conferences to learn from industry experts.
11.1 Exploring New Technologies
Stay informed about advancements:
- Mirrorless Cameras: Learn about the benefits of mirrorless camera systems.
- AI Editing Tools: Discover how artificial intelligence is transforming photo editing.
11.2 Discovering Trending Styles
Keep your work fresh:
- Minimalist Photography: Explore the beauty of simplicity in your images.
- Aerial Photography: Capture stunning perspectives from above.
11.3 Leveraging Social Media
Connect with a global audience:
- Share Your Photos: Showcase your best work on platforms like Instagram and Facebook.
- Engage with Others: Connect with fellow photographers and build your network.
11.4 Taking Online Courses
Enhance your knowledge:
- Learn from Experts: Access courses taught by experienced photographers.
- Improve Your Skills: Develop new techniques and refine your existing skills.
11.5 Attending Photography Events
Network and learn:
- Workshops: Participate in hands-on workshops to improve your skills.
- Conferences: Attend industry conferences to learn about the latest trends and technologies.
12. Frequently Asked Questions (FAQ) About Adding Photos in Google Docs
- Can I add photos directly from my phone to Google Docs?
Yes, you can add photos directly from your phone to Google Docs by using the Google Docs app and uploading from your phone’s storage or Google Photos. - How do I ensure the photos in my Google Docs look sharp and clear?
To ensure your photos look sharp, use high-resolution images and optimize them for web use before inserting them into Google Docs. - Is it possible to add captions to photos in Google Docs?
Yes, you can add captions by inserting a text box below the image and typing your caption. - Can I create a photo album within a Google Docs document?
While you can’t create a traditional photo album, you can insert multiple images and arrange them in a visually appealing way within your document. - How do I prevent photos from shifting when I edit my Google Docs?
To prevent photos from shifting, set the text wrapping option to “Fix position on page” under the image options. - What is the best way to align photos with text in Google Docs?
The best way to align photos with text is to use the “Wrap text” option and adjust the margins and spacing as needed. - Can I add animated GIFs to Google Docs?
Yes, you can add animated GIFs to Google Docs, and they will play within the document. - How do I compress photos within Google Docs to reduce file size?
Google Docs automatically compresses images to some extent, but you can further reduce file size by compressing the images before uploading them. - Is it possible to link photos in Google Docs to external websites?
Yes, you can link photos to external websites by selecting the image, clicking the “Insert link” icon, and entering the URL. - How do I ensure that my photos are accessible to people with disabilities in Google Docs?
Ensure your photos are accessible by adding descriptive alt text, which helps people with visual impairments understand the image.
Conclusion: Enhance Your Documents with Visuals
Adding photos to Google Docs transforms your documents into engaging, informative, and visually appealing masterpieces. By following the guidelines and techniques outlined in this comprehensive guide, you can effectively integrate images to enhance your storytelling, clarify complex information, and captivate your audience. Visit dfphoto.net for more in-depth tutorials, inspiring galleries, and a vibrant community to support your photographic journey. Unlock the power of visual communication and elevate your documents today, explore photography techniques, browse inspiring images, and connect with fellow photographers at dfphoto.net! For expert guidance and more inspiration, visit us at 1600 St Michael’s Dr, Santa Fe, NM 87505, United States, call us at +1 (505) 471-6001, or explore our website at dfphoto.net.