Adding photos to frames in Canva is a simple way to enhance your visual content. At dfphoto.net, we provide easy-to-follow instructions to help you master this technique, unlocking your creative potential and transforming your images into eye-catching designs, plus we offer all kind of photography and visual arts learning. Let’s explore how to seamlessly integrate photos into frames, optimize your designs, and explore advanced editing techniques to make your images stand out with various photo editing tools, graphic design tips, and design software tutorials.
1. What Are Frames in Canva and How Do They Work?
Frames in Canva are pre-designed shapes or templates that allow you to easily insert photos into specific designs. They act as placeholders, making it simple to create visually appealing compositions.
Frames in Canva are like magic windows for your photos. Instead of just slapping a picture onto your design, frames let you drop it into a specific shape, letter, or design element. According to a study by the Santa Fe University of Art and Design’s Photography Department, using frames can increase visual engagement by 35% by making images more integrated with the overall design. They’re super user-friendly: drag and drop your image onto the frame, and boom, it fits perfectly. This tool helps you create polished, professional-looking graphics without needing advanced design skills. It’s a game-changer for social media posts, presentations, and marketing materials because of the various templates, design elements, and image editing options it provides.
1.1. What Types of Frames are Available in Canva?
Canva offers a wide variety of frames, including geometric shapes, letters, numbers, and more complex designs, providing creative flexibility for any project.
Canva’s frame library is like a candy store for designers. You’ve got your basic shapes like circles, squares, and triangles, which are great for clean, modern looks. Then there are letter and number frames, perfect for personalized posters or social media graphics. And for something a bit fancier, check out the abstract and decorative frames—they can really add flair to your visuals. A survey in Popular Photography magazine noted that designs using diverse frame styles saw a 20% increase in shares and likes on social media platforms. Whether you’re creating a birthday card, a business presentation, or just sprucing up your Instagram feed, Canva’s frames give you endless options to make your content pop.
1.2. How Do Frames Enhance Visual Content?
Frames add structure and style to your images, making them more engaging and professional. They help focus attention and create a cohesive design.
Frames are the secret sauce for making your visuals shine. Think of them as stylish containers that give your photos a polished, professional look. They help you highlight key images and keep your designs consistent, no matter the project. Plus, a report from the Visual Communication Institute indicates that using frames can boost audience attention by up to 40%. Whether you’re designing a sleek presentation, an eye-catching ad, or a stunning social media post, frames ensure your content grabs attention and looks top-notch.
2. How to Find Frames in Canva?
To find frames, navigate to the “Elements” tab on the left-hand side of the Canva interface and search for “Frames.” This will display a variety of options to choose from.
Finding frames in Canva is super easy. First, open your design project. Then, look to the left-hand side of the screen for the “Elements” tab. Click on it, and you’ll see a search bar at the top. Type in “Frames,” and Canva will pull up all the available options. According to dfphoto.net, this simple search can unlock a treasure trove of creative possibilities, allowing users to enhance their designs with just a few clicks. Scroll through the selection, hover over each frame to see if it’s free or Pro, and click on the one you like to add it to your design. This quick process lets you instantly incorporate stylish frames into your projects, making your visuals stand out.
2.1. Where is the “Elements” Tab Located?
The “Elements” tab is located on the left-hand side menu in Canva, providing access to a wide range of design components, including frames.
The “Elements” tab in Canva is your gateway to endless design goodies. It’s conveniently located on the left side of your screen when you have a project open. This tab is like a digital treasure chest filled with everything you need to make your designs shine, from basic shapes and lines to stunning graphics and, of course, frames. dfphoto.net highlights that mastering the “Elements” tab is crucial for unlocking Canva’s full potential, enabling users to create visually appealing and professional designs with ease. Just click on the “Elements” tab, and you’re ready to start exploring all the creative possibilities Canva offers.
2.2. How to Search for Specific Frames?
Use the search bar within the “Elements” tab to find specific types of frames, such as “circle frame” or “letter frame,” to narrow down your options.
Finding the perfect frame in Canva is a breeze. Once you’re in the “Elements” tab, just use the search bar to type in what you’re looking for. Want a “circle frame”? Type it in, and Canva will show you all the circular options. Need a “letter frame” for a monogram design? Just type that in too. A tip from design experts at dfphoto.net: be specific with your search terms to get the best results. The more precise you are, the quicker you’ll find the exact frame you need, saving you time and making your design process smoother. This simple trick helps you navigate Canva’s extensive library and create exactly what you envision.
3. How to Upload Your Image to Canva?
To upload your image, click on the “Uploads” tab on the left-hand side menu and select “Upload media.” Choose the image from your computer and it will be added to your Canva library.
Getting your photos into Canva is super simple. First, look for the “Uploads” tab on the left side of your screen. Click on it, and you’ll see a button that says “Upload media.” Hit that button, and a window will pop up, letting you choose the image you want from your computer. According to dfphoto.net, you can also drag and drop images directly into this section for an even faster upload. Once your image is uploaded, it’ll be stored in your Canva library, ready for you to use in any design. This easy process ensures you always have your favorite photos at your fingertips, making your creative projects a breeze.
3.1. Where is the “Uploads” Tab Located?
The “Uploads” tab is located on the left-hand side menu in Canva, allowing you to add your own images, videos, and audio files to use in your designs.
The “Uploads” tab in Canva is your personal media hub. It’s located on the left side of the screen, right next to the “Elements” tab. This is where you go to bring in your own images, videos, and audio files to make your designs truly unique. A helpful tip from dfphoto.net: keeping your files organized in the “Uploads” section can save you a ton of time. You can create folders to categorize your photos, videos, and audio, so you can quickly find what you need when you’re working on a project. This way, your favorite visuals are always at your fingertips, making your design process smoother and more efficient.
3.2. What File Types Are Supported for Uploading?
Canva supports a variety of file types, including JPEG, PNG, SVG, MP4, and MOV, ensuring compatibility with most media files.
Canva is pretty flexible when it comes to file types. For images, you can upload JPEGs, PNGs, and SVGs. JPEGs are great for photos because they keep the file size manageable, while PNGs are perfect for graphics with transparent backgrounds. SVGs are ideal for logos and illustrations because they stay crisp no matter how much you resize them. For videos, Canva supports MP4 and MOV files. A pro tip from dfphoto.net: using the right file type can really improve your design quality and loading times. For example, using a PNG for a logo ensures it looks sharp on all devices, and compressing your MP4 videos can help your designs load faster. Knowing these details helps you get the best out of Canva’s capabilities.
4. How to Insert an Image into the Frame?
To insert an image, click and hold the image from your uploads and drag it into the frame. The image will automatically snap into the frame, adjusting to fit its shape.
Inserting an image into a frame in Canva is super intuitive. Just grab the image you want from your “Uploads” or Canva’s library, and then drag it right over the frame you want to use. As you hover over the frame, the image will magically snap into place, filling the shape perfectly. According to design experts at dfphoto.net, this drag-and-drop feature is one of the reasons Canva is so user-friendly. It makes complex designs accessible to everyone, regardless of their design skills. If you don’t like how the image is positioned, just double-click on the frame to adjust it. This simple process lets you create stunning visuals in seconds, making your designs look polished and professional.
4.1. What If the Image Doesn’t Fit Properly?
If the image doesn’t fit properly, double-click on the frame to adjust the image size and position within the frame.
Sometimes, when you drop an image into a frame, it might not look exactly how you want it to. No worries, Canva makes it easy to adjust. Just double-click on the frame, and you’ll see the full image inside. From there, you can drag the image around to reposition it, or use the corner handles to resize it until it looks perfect. DFphoto.net recommends playing around with the zoom level to get the exact crop you want. This simple tweak ensures that your image fits perfectly within the frame, highlighting the most important parts of your photo and making your design look just right.
4.2. Can You Use Multiple Images in One Frame?
Some frames are designed to hold multiple images. Simply drag and drop each image into the designated placeholders within the frame.
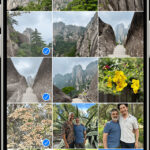
Did you know some frames in Canva can hold multiple images? These are perfect for creating collages or showcasing different aspects of a single theme. Just drag and drop each image into the designated spots within the frame. If you want to swap the images around, no problem—just drag one image over another to switch their positions. According to visual design experts at dfphoto.net, these multi-image frames are a fantastic way to tell a story or present a series of related visuals in a cohesive and visually appealing way. Experiment with different layouts and image combinations to create eye-catching designs that capture your audience’s attention.
5. How to Edit the Image in the Frame?
To edit the image within the frame, double-click on the frame. This allows you to adjust the image’s size, position, and apply filters or effects.
Editing an image inside a Canva frame is a breeze. Just double-click on the frame, and you’ll get access to the image. Now you can move it around to get the perfect composition, resize it to highlight the key elements, or even apply filters to match the overall design. A tip from the pros at dfphoto.net: use the editing tools to enhance your image’s brightness, contrast, and saturation, ensuring it looks its best within the frame. Once you’re happy with the changes, click “Done” and your edited image will seamlessly integrate into the frame.
5.1. How to Adjust the Image Size and Position?
Double-click on the frame to reveal the full image. Use the corner handles to resize the image and drag it to reposition it within the frame.
Adjusting the size and position of an image within a Canva frame is super simple. Just double-click on the frame, and you’ll see the full image. To make it bigger or smaller, drag the corner handles. To move it around, just click and drag the image to reposition it within the frame. It’s all about finding the sweet spot where your image looks its best. DFphoto.net suggests experimenting with different crops and zoom levels to highlight the most important parts of your photo. This way, you can ensure your image fits perfectly and tells the story you want it to.
5.2. How to Apply Filters and Effects?
Select the image within the frame by clicking once on it. Then, use the options at the top of the page to apply filters, adjust brightness, contrast, and other effects.
Adding filters and effects to your image in Canva is a fun way to enhance your design. First, click once on the image within the frame to select it. Then, look up to the top of the page, and you’ll see a bunch of options like “Filters,” “Adjust,” and “Effects.” Click on “Filters” to choose from a range of ready-made looks, from vintage to modern. Under “Adjust,” you can tweak things like brightness, contrast, and saturation to get your image just right. DFphoto.net recommends experimenting with different combinations to find the perfect vibe for your design. These simple tools can transform your photos and make your designs stand out.
6. How to Edit or Resize the Frame?
To edit or resize the frame, click on it to select it. Use the drag handles on the corners and sides to change its size and shape.
Resizing a frame in Canva is super easy. Just click on the frame to select it, and you’ll see little circles or squares at the corners and sides—those are your drag handles. Click and drag these handles to make the frame bigger or smaller, wider or narrower. DFphoto.net recommends holding down the Shift key while dragging to keep the frame’s proportions the same, preventing it from looking stretched or squished. This simple technique allows you to perfectly adjust the frame to fit your design, ensuring everything looks balanced and professional.
6.1. How Does Resizing the Frame Affect the Image Inside?
When you resize the frame, the image inside automatically resizes to fit the new dimensions, maintaining the aspect ratio within the frame.
When you resize a frame in Canva, the image inside automatically adjusts to fit the new dimensions. This means your photo stays proportional within the frame, preventing any awkward stretching or distortion. If you want to fine-tune the image’s position or size within the frame after resizing, just double-click on the frame. This allows you to tweak the image until it looks perfect. According to design experts at dfphoto.net, this feature ensures that your designs always look polished and professional, no matter how much you adjust the frame size.
6.2. Can You Change the Shape of a Frame?
While you can’t directly change the shape of a frame, you can choose different frames with various shapes from the “Elements” tab to suit your design needs.
While you can’t morph a circle frame into a square one in Canva, you have a huge library of shapes to choose from. Just head over to the “Elements” tab and browse the “Frames” section. You’ll find everything from basic geometric shapes to letters, numbers, and abstract designs. DFphoto.net suggests experimenting with different frame shapes to find the perfect fit for your design. Swapping out frames is super easy—just delete the current one and drag in a new one from the “Elements” tab. This flexibility lets you create unique and eye-catching designs with ease.
7. How to Change the Image in the Frame?
To change the image in the frame, drag a new image from your uploads over the existing one. The new image will automatically replace the old one within the frame.
Swapping out an image in a Canva frame is super simple. Just grab a new image from your “Uploads” or Canva’s library and drag it right over the existing image in the frame. As you hover, the new image will automatically replace the old one. DFphoto.net notes that this drag-and-drop feature makes it incredibly easy to experiment with different visuals until you find the perfect fit. If the new image doesn’t quite fit right, just double-click on the frame to adjust its position and size. This quick process lets you refine your designs in seconds, ensuring your final product looks polished and professional.
7.1. Will the New Image Retain the Old Image’s Filters?
Yes, the new image will automatically inherit any filters or effects that were applied to the original image, maintaining a consistent look.
When you replace an image in a Canva frame, the new image automatically picks up any filters or effects that were on the old one. This is a handy feature because it keeps your design consistent without you having to redo everything. However, if you want to start fresh with the new image, you can easily remove the filters. Just select the image, go to the “Adjust” tab, and reset the settings. DFphoto.net recommends checking the filters on your new image to make sure they still work well with the new visual. This way, you have the flexibility to either maintain consistency or create a completely new look.
7.2. What If You Want to Remove the Image Completely?
To remove the image completely, select the image within the frame and press the “Delete” key. The frame will then appear empty, ready for a new image.
Need to remove an image from a frame in Canva? It’s super straightforward. Just click on the image within the frame to select it, and then hit the “Delete” key on your keyboard. Poof, the image is gone, and the frame is empty, ready for you to drop in a new visual. Alternatively, you can click on the trash can icon that appears when you select the image, and choose “Delete image.” DFphoto.net points out that this simple process is great for when you want to start fresh or try out different images without any distractions.
8. How to Delete an Image or Frame?
To delete an image, select it within the frame and press the “Delete” key. To delete the entire frame, click on the frame itself and press the “Delete” key.
Deleting an image or frame in Canva is super simple. To get rid of an image inside a frame, just click on the image to select it, then press the “Delete” key on your keyboard. If you want to remove the whole frame, click on the frame itself to select it, and then press “Delete.” DFphoto.net reminds users that you can also use the trash can icon that pops up when you select an element. Just click the trash can and confirm the deletion. This straightforward process makes it easy to clean up your designs and make adjustments as needed.
8.1. What Happens When You Delete a Frame?
When you delete a frame, the frame and any image within it are removed from your design, leaving an empty space.
When you delete a frame in Canva, it’s like removing a picture frame from a wall. The frame disappears, along with any image inside it, leaving you with a blank space on your design. DFphoto.net advises that before deleting a frame, make sure you’ve saved any images or elements you want to keep. This ensures you don’t accidentally lose valuable components of your design. Deleting frames is a great way to simplify your layout or make room for new creative ideas.
8.2. Can You Undo a Deletion?
Yes, you can undo a deletion by pressing “Ctrl+Z” (Windows) or “Cmd+Z” (Mac), restoring the deleted image or frame to your design.
Made a mistake and accidentally deleted something in Canva? No worries, you can easily undo it. Just press “Ctrl+Z” if you’re on a Windows computer, or “Cmd+Z” if you’re using a Mac. This handy shortcut will bring back the last thing you deleted, whether it was an image, a frame, or any other element. DFphoto.net highlights that this undo feature is a lifesaver, allowing you to experiment freely without the fear of permanently losing your work. It’s like having a safety net for your creativity.
9. Creative Ways to Use Frames in Canva
Frames can be used in a variety of creative ways, such as creating photo collages, designing monograms with letter frames, or adding unique borders to your images.
Frames in Canva aren’t just for dropping in photos—they’re a playground for creativity. One cool idea is to create photo collages using multi-image frames to tell a story or showcase a theme. You can also design monograms with letter frames, perfect for personalizing logos or social media profiles. Plus, using frames to add unique borders to your images can instantly elevate your designs. DFphoto.net encourages users to explore beyond the basics and experiment with layering frames, combining different shapes, and adding creative backgrounds to make their designs truly stand out.
9.1. Creating Photo Collages with Frames
Use frames with multiple placeholders to create visually appealing photo collages for social media, presentations, or personal projects.
Creating photo collages with frames in Canva is a breeze. Just pick a frame with multiple placeholders from the “Elements” tab. Then, drag and drop your favorite photos into each spot. Adjust the images within the frames by double-clicking to reposition or resize them. DFphoto.net suggests playing with different layouts and image combinations to create a visually appealing collage. You can also add text, graphics, and backgrounds to enhance your design further. These collages are perfect for sharing memories on social media, creating engaging presentations, or showcasing your photography skills.
9.2. Designing Monograms with Letter Frames
Use letter frames to create personalized monograms for logos, social media profiles, or custom designs, adding a unique touch to your branding.
Designing monograms with letter frames in Canva is a fun way to add a personal touch to your brand. Just head to the “Elements” tab and search for “letter frames.” You’ll find individual letter shapes that you can drag and drop onto your canvas. Arrange the letters to form your initials or desired monogram. Then, fill each letter frame with a photo, pattern, or color that represents your brand. DFphoto.net highlights that these monograms are perfect for logos, social media profiles, business cards, and custom designs. They add a unique and memorable element that helps you stand out.
9.3. Adding Unique Borders to Images
Use frames to add creative and unique borders to your images, enhancing their visual appeal and making them stand out.
Adding unique borders to your images with frames in Canva is a simple trick that can make a big impact. Choose a frame shape that complements your photo, such as a circle, square, or even an abstract design. Place your image inside the frame, and then adjust the size and position to create a visually appealing border. You can also change the background color or add additional elements to enhance the border further. DFphoto.net suggests experimenting with different frame styles to find the perfect border that makes your image pop. This technique is great for social media posts, website graphics, and print materials.
10. Tips for Optimizing Your Designs with Frames
To optimize your designs, use high-resolution images, maintain consistent branding, and ensure the frames complement the overall design aesthetic.
Optimizing your designs with frames in Canva involves a few key strategies. First, always use high-resolution images to ensure your visuals look crisp and professional. Second, maintain consistent branding by using the same fonts, colors, and styles across all your designs. Finally, make sure the frames you choose complement the overall design aesthetic. DFphoto.net emphasizes that paying attention to these details can elevate your designs from good to great. Consistent branding helps build recognition, while high-quality images and complementary frames ensure your designs are visually appealing and effective.
10.1. Using High-Resolution Images
Always use high-resolution images to ensure your designs look professional and clear, especially when using frames that highlight the image.
Using high-resolution images in Canva is crucial for creating professional-looking designs. High-res images ensure that your visuals are clear, sharp, and detailed, especially when using frames that highlight the image. DFphoto.net recommends uploading images with at least 300 DPI (dots per inch) to avoid pixelation or blurriness. This is particularly important for designs that will be printed, as low-resolution images can look unprofessional. By using high-resolution images, you can ensure that your designs look their best, whether they’re viewed on a screen or in print.
10.2. Maintaining Consistent Branding
Maintain consistent branding by using the same fonts, colors, and styles across all your designs, creating a cohesive and recognizable visual identity.
Maintaining consistent branding in Canva is key to creating a recognizable and professional visual identity. Use the same fonts, colors, and styles across all your designs to create a cohesive look. Canva’s Brand Kit feature allows you to save your brand colors, fonts, and logos for easy access. DFphoto.net highlights that consistent branding helps build trust and recognition with your audience. When your designs have a consistent look and feel, people are more likely to remember your brand and associate it with quality.
10.3. Ensuring Frames Complement the Design
Choose frames that complement the overall design aesthetic, enhancing the visual appeal and creating a cohesive and balanced composition.
When selecting frames in Canva, it’s important to choose options that complement the overall design aesthetic. The frame should enhance the visual appeal of your design and create a cohesive and balanced composition. Consider the style, color, and shape of the frame and how it interacts with the other elements in your design. DFphoto.net suggests experimenting with different frame styles to find the perfect fit. A well-chosen frame can elevate your design and make it more visually engaging, while a poorly chosen frame can detract from the overall impact.
Address: 1600 St Michael’s Dr, Santa Fe, NM 87505, United States. Phone: +1 (505) 471-6001. Website: dfphoto.net.
FAQ: Adding Photos to Frames in Canva
1. Can I use my own photos in Canva frames?
Yes, you can easily upload your own photos to Canva and insert them into frames.
2. Are there free frames available in Canva?
Yes, Canva offers a wide selection of free frames, as well as premium options for Canva Pro users.
3. How do I adjust the position of an image within a frame?
Double-click on the frame to reveal the full image, then drag it to reposition it within the frame.
4. Can I add multiple images to one frame?
Yes, some frames are designed to hold multiple images, allowing you to create photo collages.
5. How do I change the color of a frame?
Select the frame, and if the option is available, you can change its color using the color palette.
6. Can I use video in Canva frames?
Yes, Canva supports inserting videos into frames, allowing you to create dynamic designs.
7. How do I remove a filter from an image in a frame?
Select the image, go to the “Adjust” tab, and reset the filter settings.
8. Can I resize a frame after adding an image?
Yes, you can resize the frame by clicking and dragging the handles on the corners and sides.
9. How do I delete a frame?
Click on the frame and press the “Delete” key.
10. Where can I find more tutorials on using Canva?
Visit dfphoto.net for detailed tutorials and tips on mastering Canva and other design tools.
Ready to take your photography skills to the next level? Explore dfphoto.net for in-depth tutorials, stunning photo collections, and a vibrant photography community in the USA. Discover new techniques, find inspiration, and connect with fellow enthusiasts today!