Increasing the DPI (dots per inch) of a photo is crucial for achieving sharp, high-quality prints. This guide explores different methods for enhancing DPI, from simple metadata adjustments to advanced AI-powered upscaling techniques. We’ll help you understand the difference between changing DPI metadata and true resolution enhancement for optimal print results.
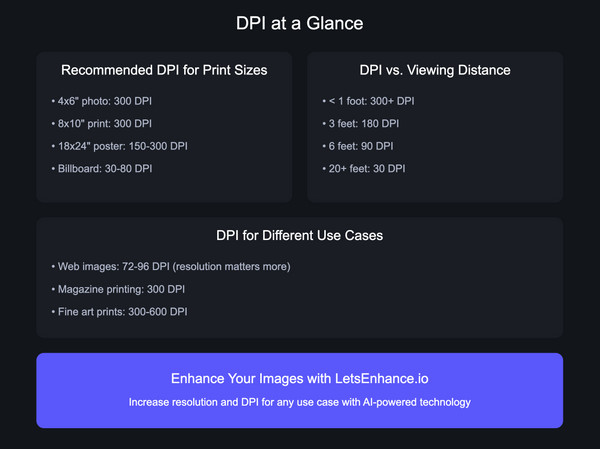 Infographic "Key DPI concepts": Recommended DPI for different print sizes, viewing distances, and use cases.
Understanding DPI and Its Impact on Print Quality
Before diving into how to add DPI, it’s essential to understand what DPI is and why it matters. DPI refers to the number of ink dots a printer deposits per inch of paper. Higher DPI generally translates to finer detail and sharper images in print. However, simply changing the DPI value in the file’s metadata doesn’t improve the actual image quality. For that, you need to increase the pixel dimensions (resolution).
DPI vs. PPI: While often used interchangeably, DPI and PPI (pixels per inch) are technically different. PPI represents the pixel density of a digital image, while DPI refers specifically to the printer’s output.
Image Resolution: The total number of pixels in an image (width x height) determines its resolution. Higher resolution allows for larger prints without losing sharpness.
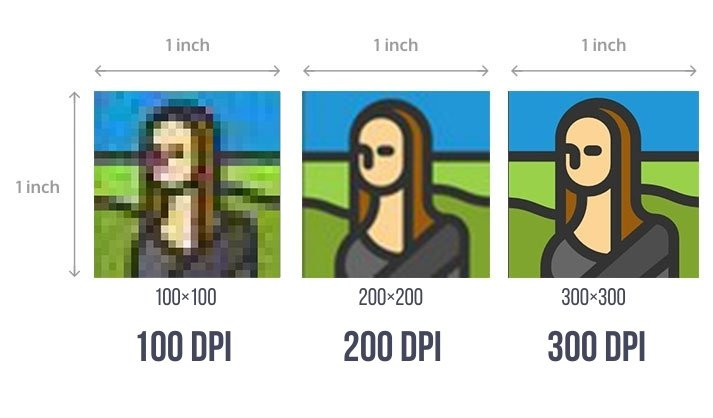 Image at 100, 200, and 300 DPI / PPI
Methods for Adding DPI to a Photo
1. AI-Powered Upscaling with LetsEnhance
LetsEnhance utilizes advanced AI algorithms to increase both the resolution and DPI of images, resulting in significantly sharper and larger prints.
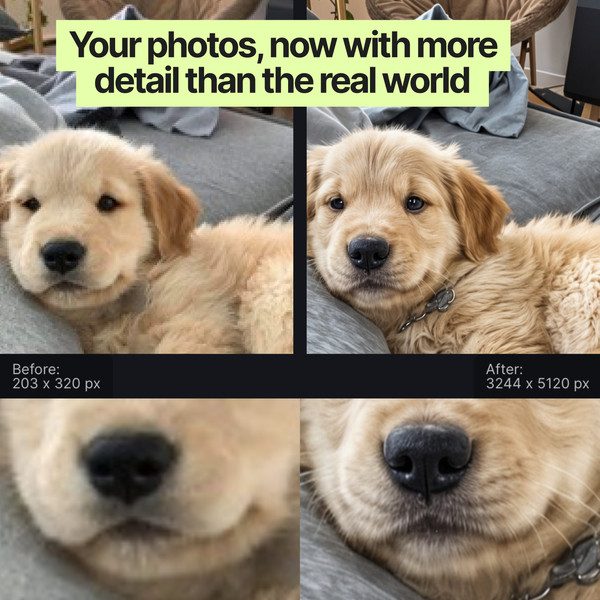 Left – original low-res image. Right – LetsEnhance upscaled version
Steps:
- Upload your image to LetsEnhance.
- Choose a preset or customize the desired resolution and DPI (default is 300 DPI). Remember to increase both width and height for true resolution enhancement.
- Select an upscaling model based on your image type (e.g., photo, art, text).
- Start processing and download the enhanced image.
2. Changing DPI Metadata (Without Affecting Resolution)
For online platforms with specific DPI requirements, you can modify the DPI metadata without changing the actual image. This won’t improve print quality but might satisfy upload criteria.
Tools:
- Photoshop: Image > Image Size, uncheck “Resample,” adjust DPI.
- GIMP: Image > Print Size, adjust X resolution (DPI).
- Online DPI Converters: Various free tools available (e.g., convert.town/image-dpi).
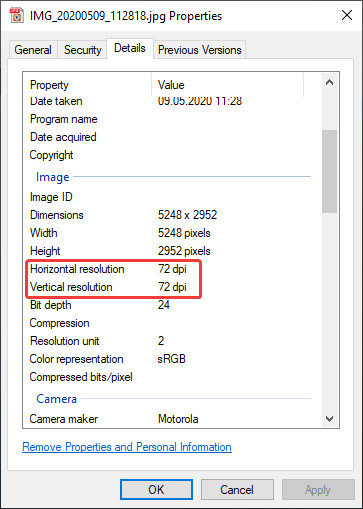 Image properties in Windows File Explorer
Choosing the Right DPI for Printing
The ideal DPI for printing depends on several factors:
- Viewing Distance: Closer viewing requires higher DPI (e.g., 300-400 DPI for photo books). Posters viewed from a distance can use lower DPI (e.g., 100-200 DPI).
- Subject Matter: Images with intricate details benefit from higher DPI.
- Paper Type: Coated glossy paper supports higher DPI than uncoated paper.
Conclusion
Adding more DPI to a photo involves either changing the metadata or increasing the actual resolution through upscaling. For truly sharper prints, focus on enhancing resolution using AI-powered tools like LetsEnhance. Consider factors like viewing distance and subject matter when determining the optimal DPI for your printing needs. Remember, a higher resolution is the key to achieving crisp, detailed prints.