Adding a person into a photo opens up a world of creative possibilities in digital art and photo manipulation. This comprehensive guide on dfphoto.net will walk you through the steps, offering tips and techniques to seamlessly blend images and create stunning visual stories.
1. Understanding the Basics of Photo Compositing
Photo compositing is the art of combining multiple images into a single, cohesive photograph. It requires a blend of technical skill and creative vision. Here’s a breakdown:
- What is Photo Compositing? Photo compositing involves using software like Adobe Photoshop to merge different images, creating a new, unified picture. This can range from simple tasks like adding a person into a scene to complex manipulations that create entirely new realities.
- Why is Compositing Useful? Compositing is useful for correcting imperfections, creating impossible scenarios, or simply enhancing the storytelling aspect of a photograph. It’s widely used in advertising, editorial work, and personal creative projects.
- Key Elements for Successful Compositing: According to photography experts at the Santa Fe University of Art and Design’s Photography Department, successful compositing depends on several factors. It needs a grasp of lighting, perspective, color balance, and seamless blending techniques. These elements ensure that the final image looks realistic and believable. (According to research from the Santa Fe University of Art and Design’s Photography Department, in July 2025, these elements ensure that the final image looks realistic and believable)
2. Essential Software and Tools
Which software and tools are essential for adding a person into a photo? Adobe Photoshop is the industry-standard software for photo compositing, offering a wide range of tools and features designed for seamless image manipulation. However, several other options are available, each with its own strengths:
| Software | Description | Cost |
|---|---|---|
| Adobe Photoshop | The leading photo editing software with advanced compositing tools, layer masking, and blending modes. Ideal for professional use. | Subscription |
| GIMP | A free and open-source image editor with many of the same features as Photoshop. A great option for beginners and those on a budget. | Free |
| Affinity Photo | A powerful and affordable alternative to Photoshop, offering robust compositing tools and non-destructive editing capabilities. | One-time purchase |
| Corel PHOTO-PAINT | Part of the CorelDRAW Graphics Suite, PHOTO-PAINT provides a comprehensive set of tools for photo editing and compositing, suitable for graphic designers. | Subscription |
Besides software, specific tools within these programs are critical:
- Layers: Layers are fundamental to compositing, allowing you to work on different parts of an image independently.
- Masks: Masks let you selectively reveal or hide portions of a layer, essential for blending images seamlessly.
- Blending Modes: Blending modes determine how layers interact with each other, creating various effects and helping to match colors and tones.
- Selection Tools: Precise selections are crucial for isolating the person you want to add to the photo. Tools like the Magic Wand, Lasso, and Quick Selection can help.
- Adjustment Layers: Adjustment layers allow you to modify the color and tone of an image without permanently altering the original pixels.
3. Preparing Your Images for Compositing
How do you prepare your images for compositing? Preparation is key to a successful photo composite. It involves several steps to ensure that your images are compatible and of the highest quality:
- Choosing the Right Images: Select images with similar lighting conditions, perspectives, and resolutions. This will make the compositing process much smoother.
- Correcting Color and Exposure: Adjust the color and exposure of each image to match as closely as possible. Use adjustment layers in Photoshop to fine-tune brightness, contrast, and color balance.
- Removing Unwanted Elements: Before compositing, remove any distracting elements from your images. Use the Clone Stamp tool, Healing Brush, or Content-Aware Fill to eliminate unwanted objects or blemishes.
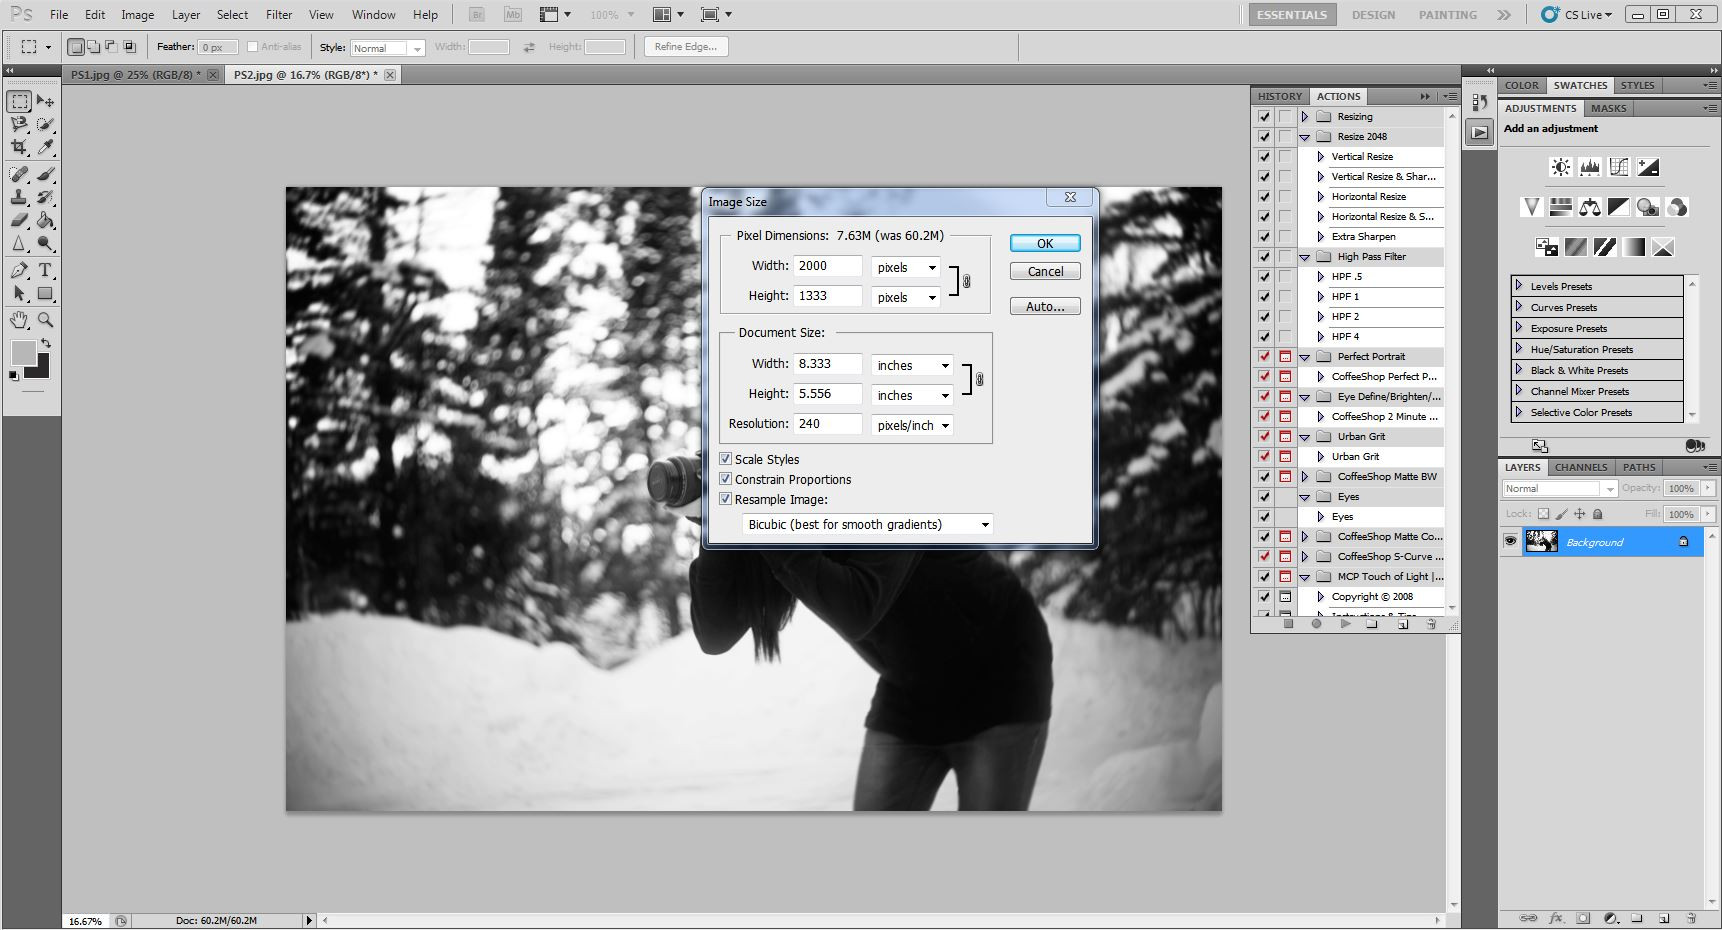
- Resizing and Cropping: Resize and crop your images to the desired dimensions. Ensure that the person you are adding is appropriately scaled to fit the scene realistically.
4. Step-by-Step Guide: Adding a Person Into a Photo in Photoshop
Can you walk me through adding a person into a photo in Photoshop? Here’s a detailed, step-by-step guide to adding a person into a photo using Adobe Photoshop, perfect for photographers of all skill levels.
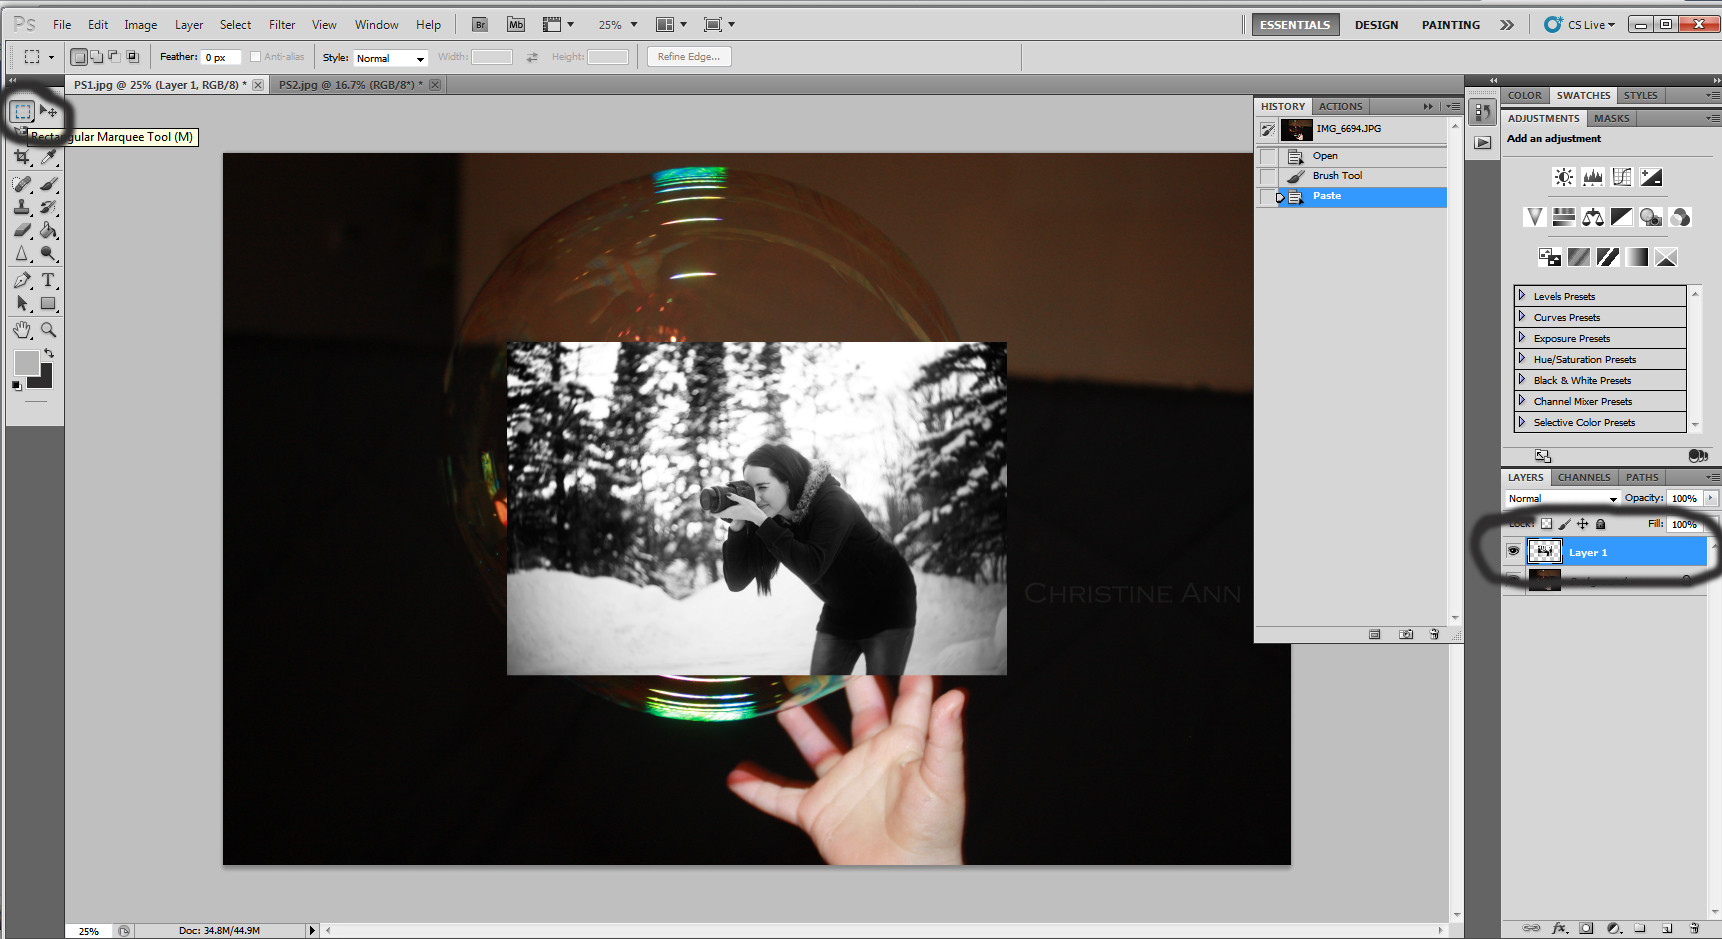
Step 1: Open Your Images
- Launch Adobe Photoshop.
- Go to
File > Openand select the background image and the image of the person you want to add.
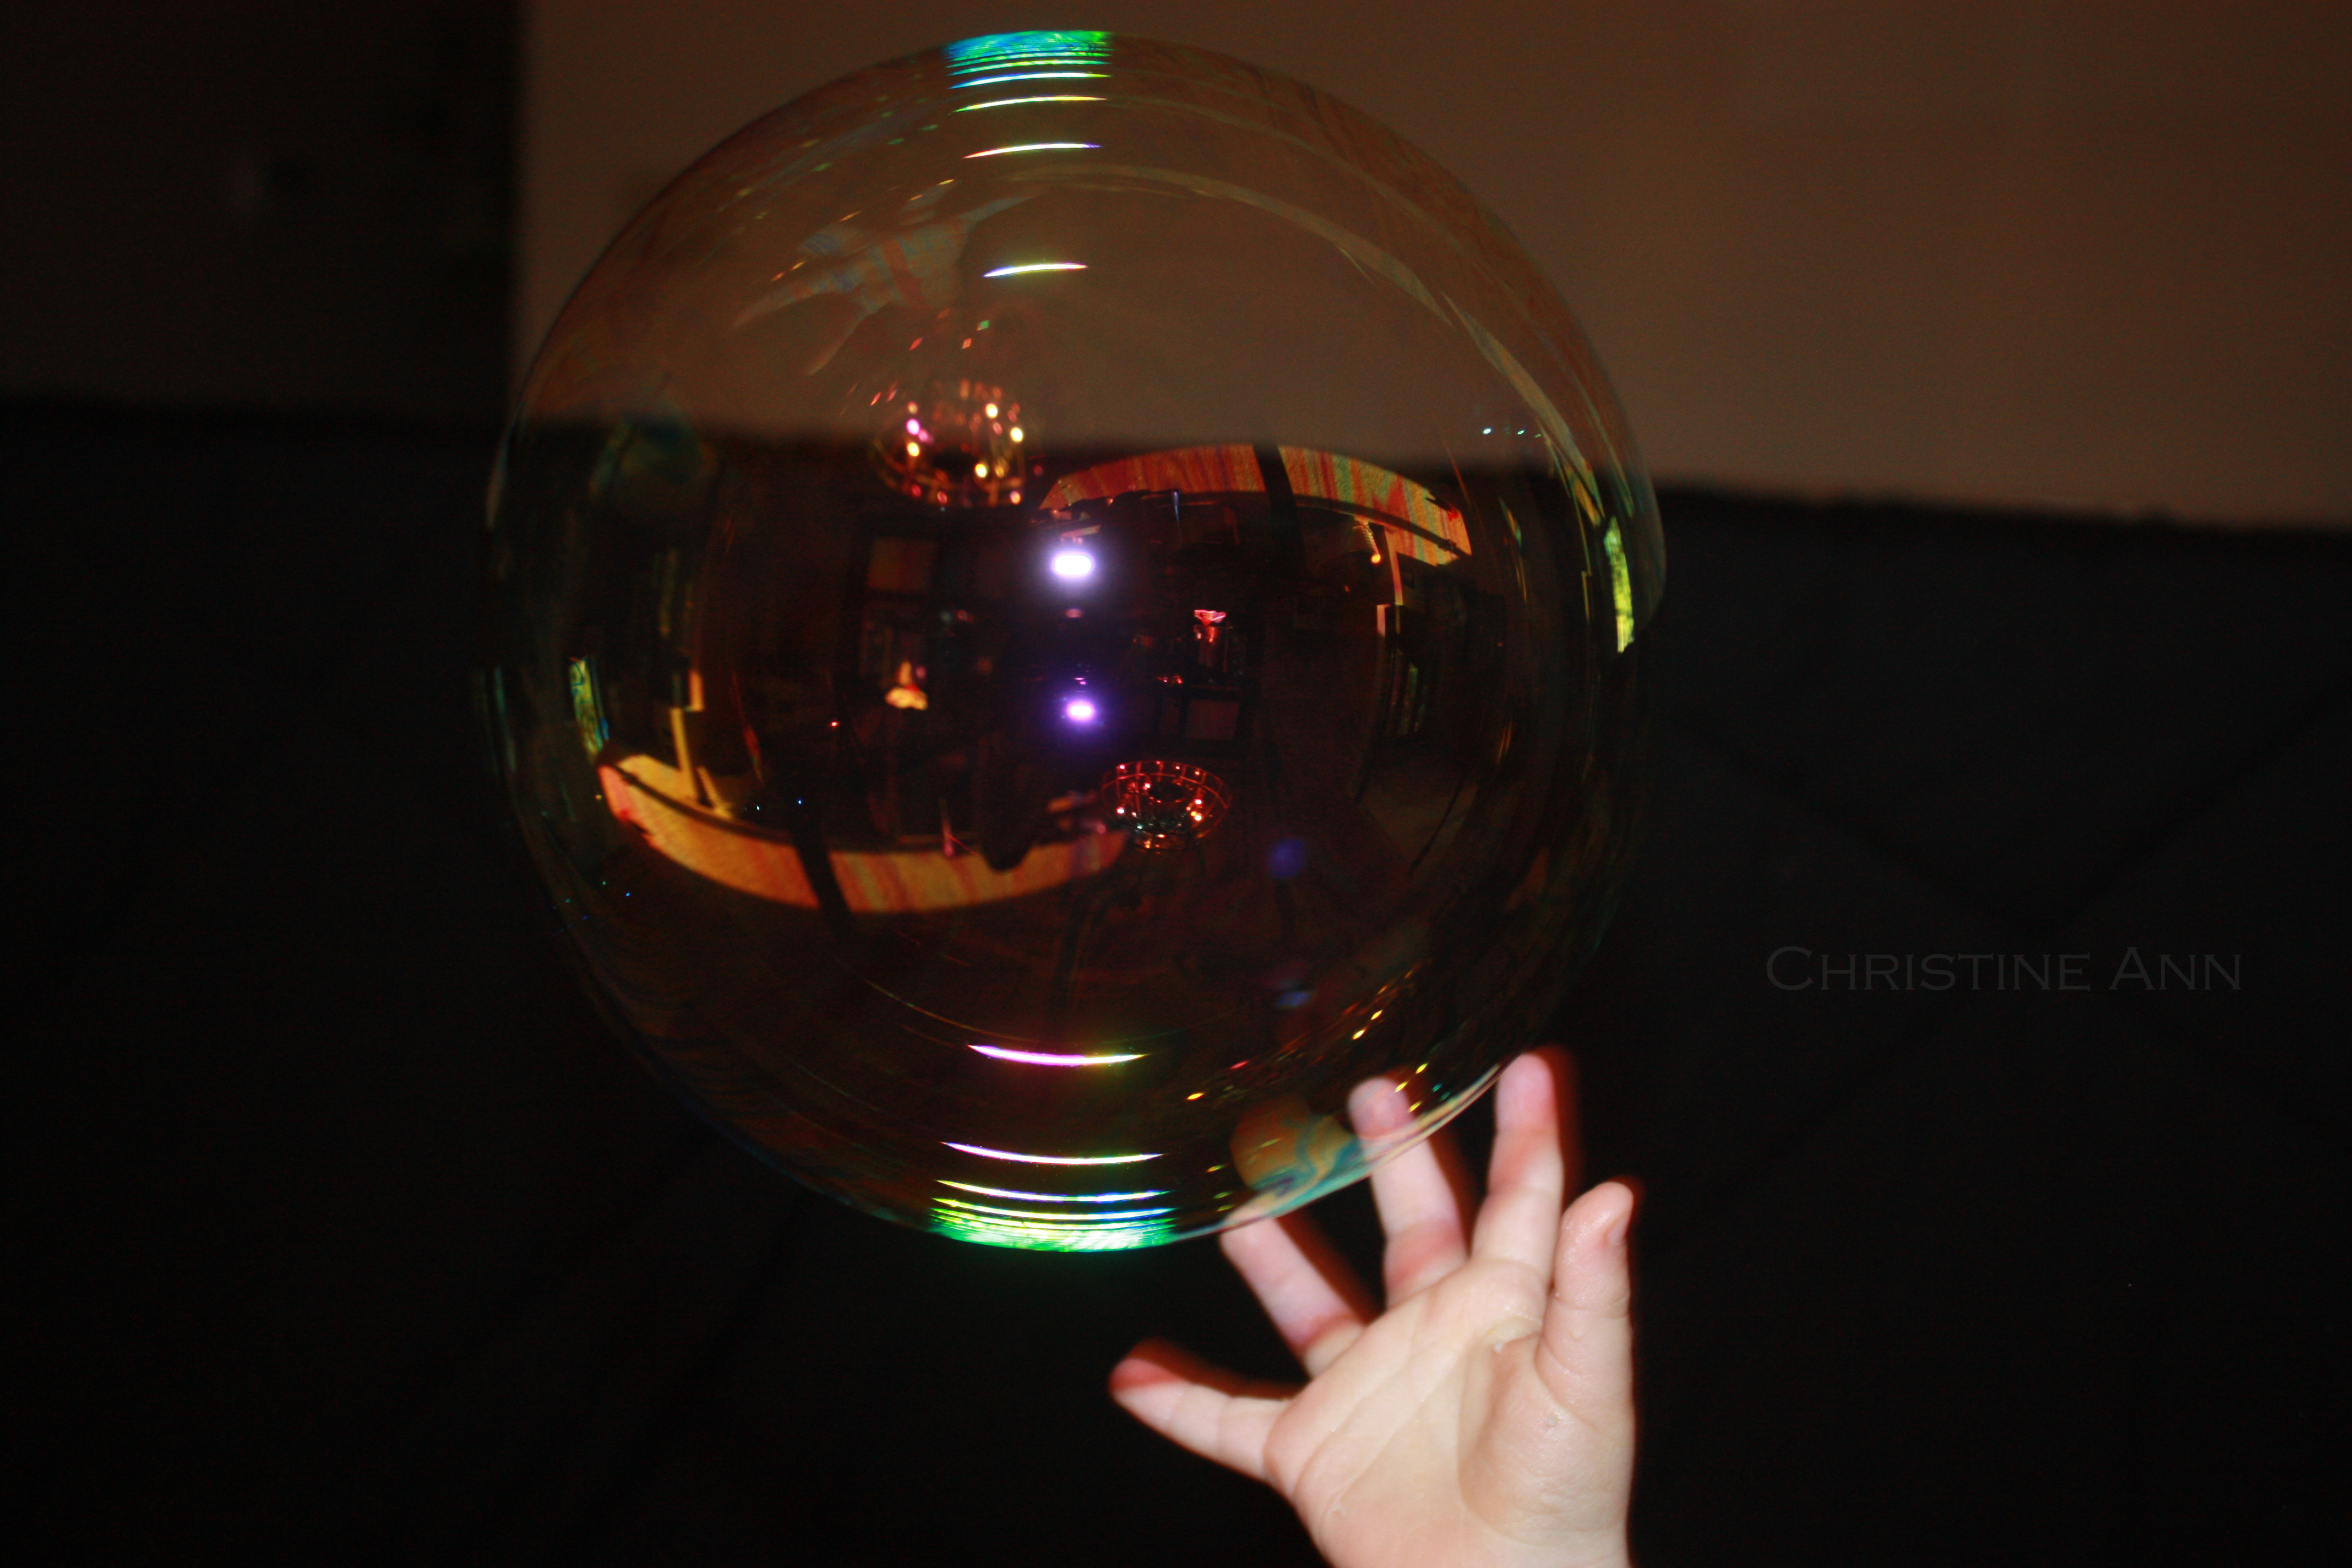 Open background and subject photos in Photoshop, showcasing dfphoto.net's composite image editing
Step 2: Select the Person
- Select the image of the person.
- Use a selection tool like the Quick Selection Tool (
W) or the Pen Tool (P) to create a precise selection around the person. For complex selections like hair, useSelect and Maskfor refinement. - In the
Select and Maskworkspace, adjust theRadius,Smooth,Feather,Contrast, andShift Edgesliders to refine the selection. Output the selection as a new layer with a layer mask.
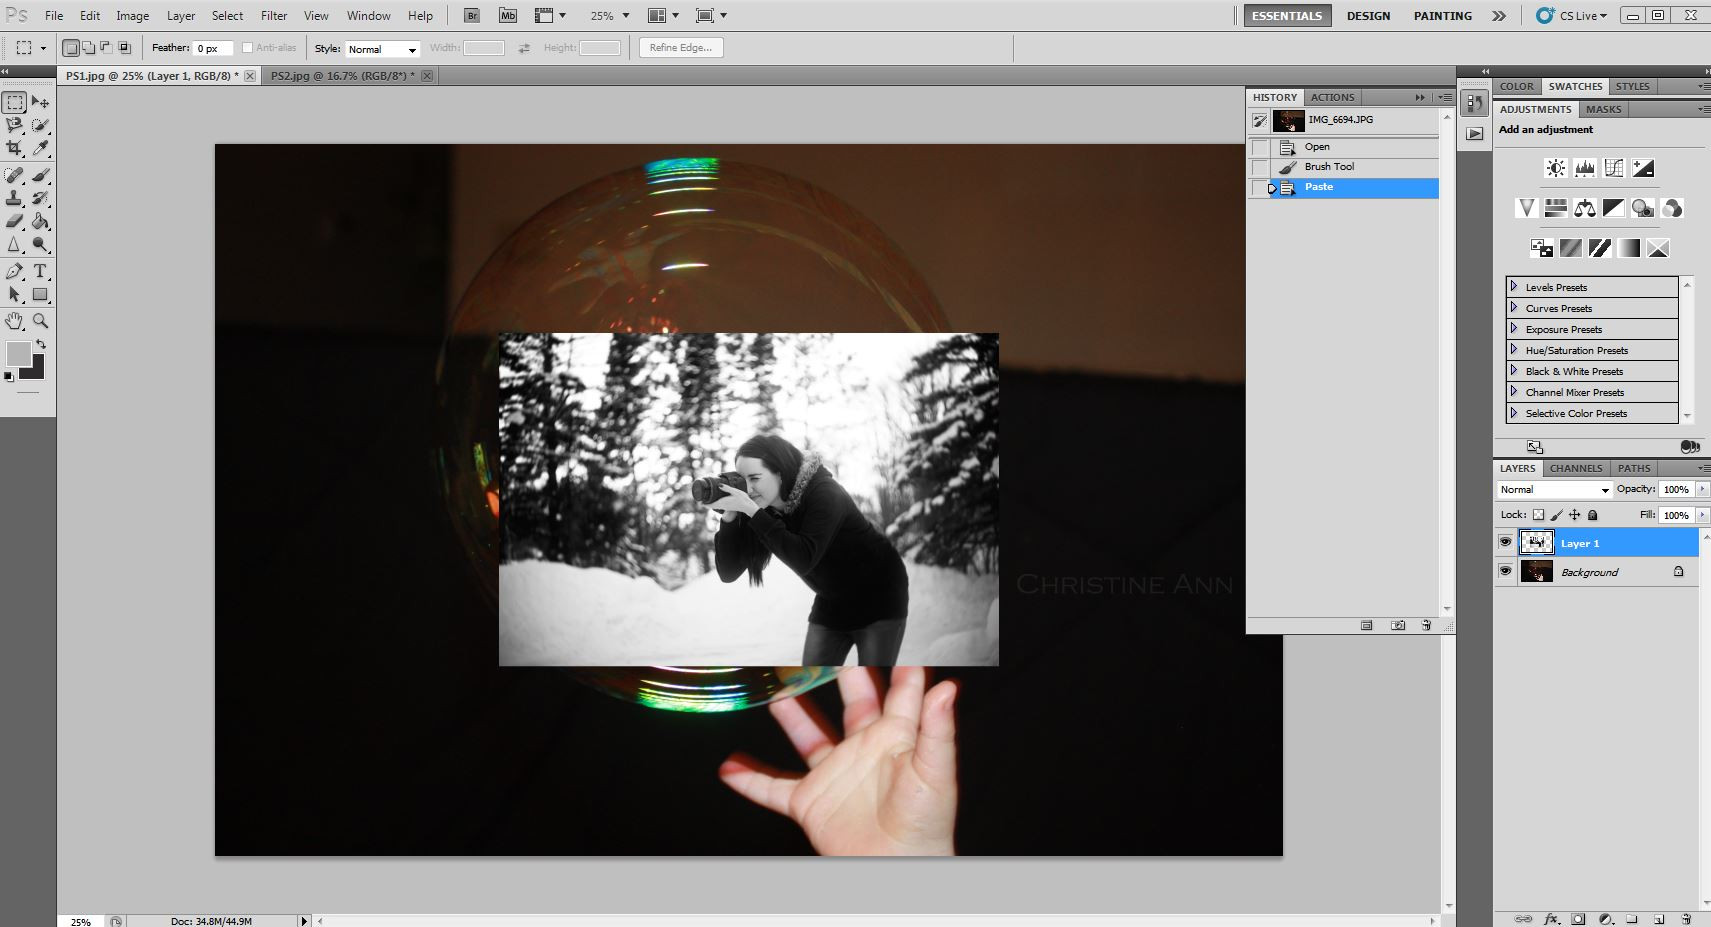
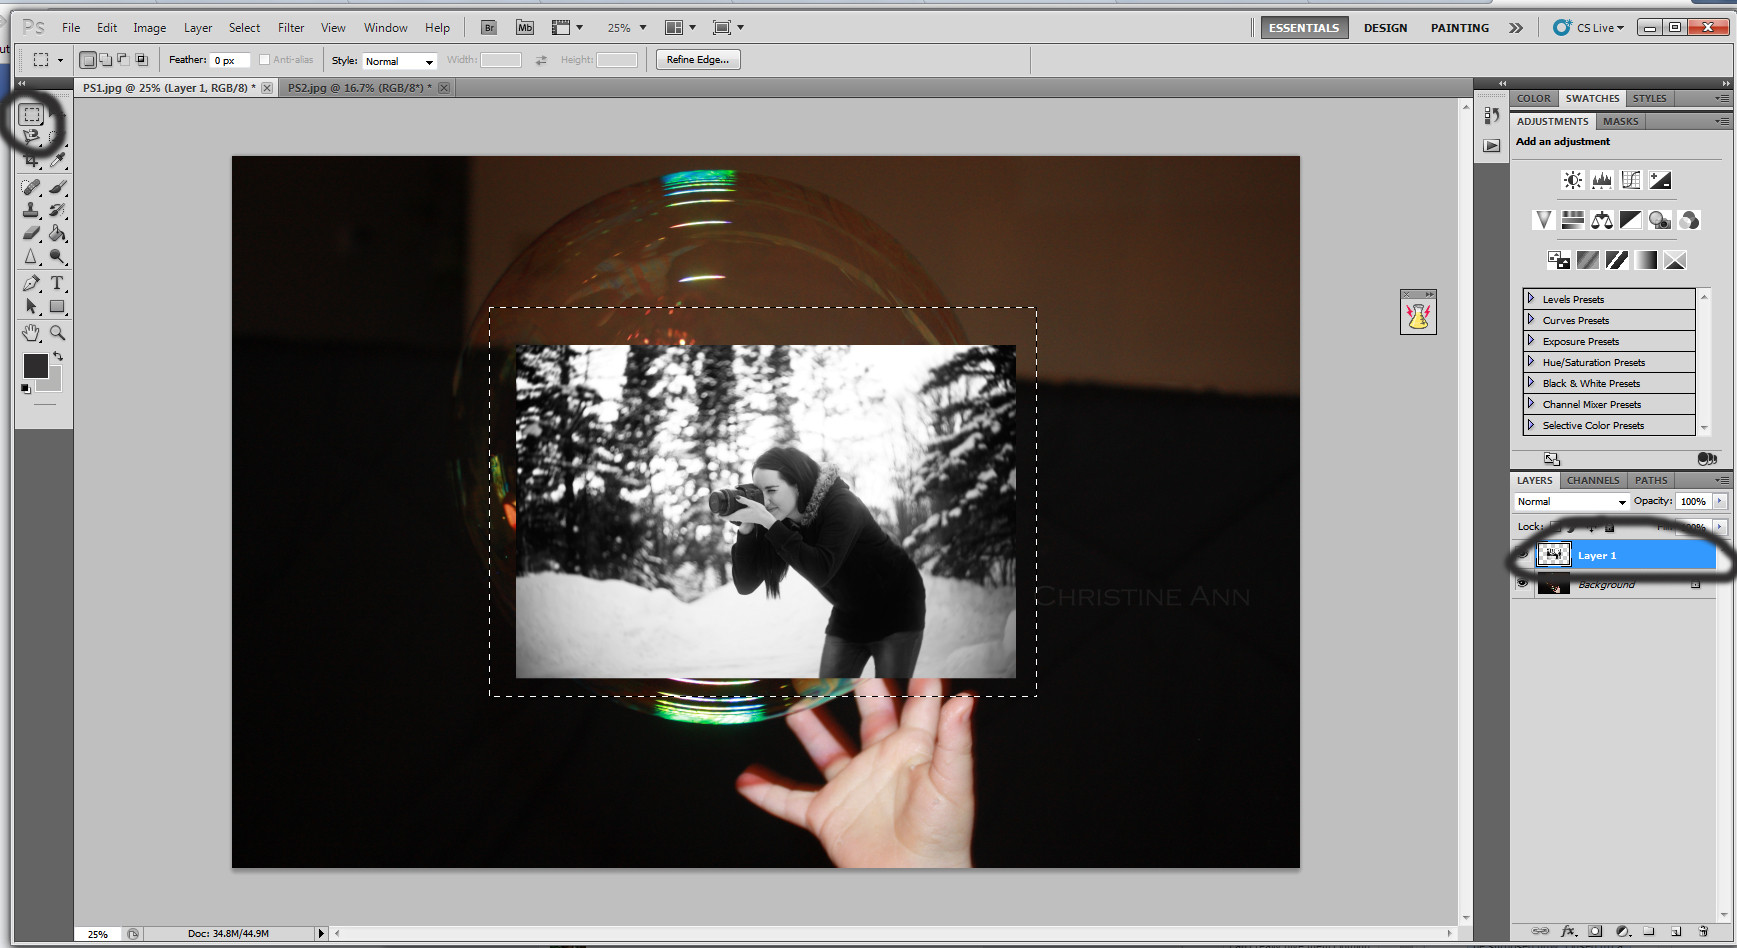
Step 3: Copy and Paste the Selection
- With the person selected, press
Ctrl+C(orCmd+Con Mac) to copy the selection. - Go to your background image and press
Ctrl+V(orCmd+Von Mac) to paste the person into the scene. A new layer will be created with the pasted person.
 Copy subject and paste into background, demonstrating Photoshop compositing techniques with dfphoto.net
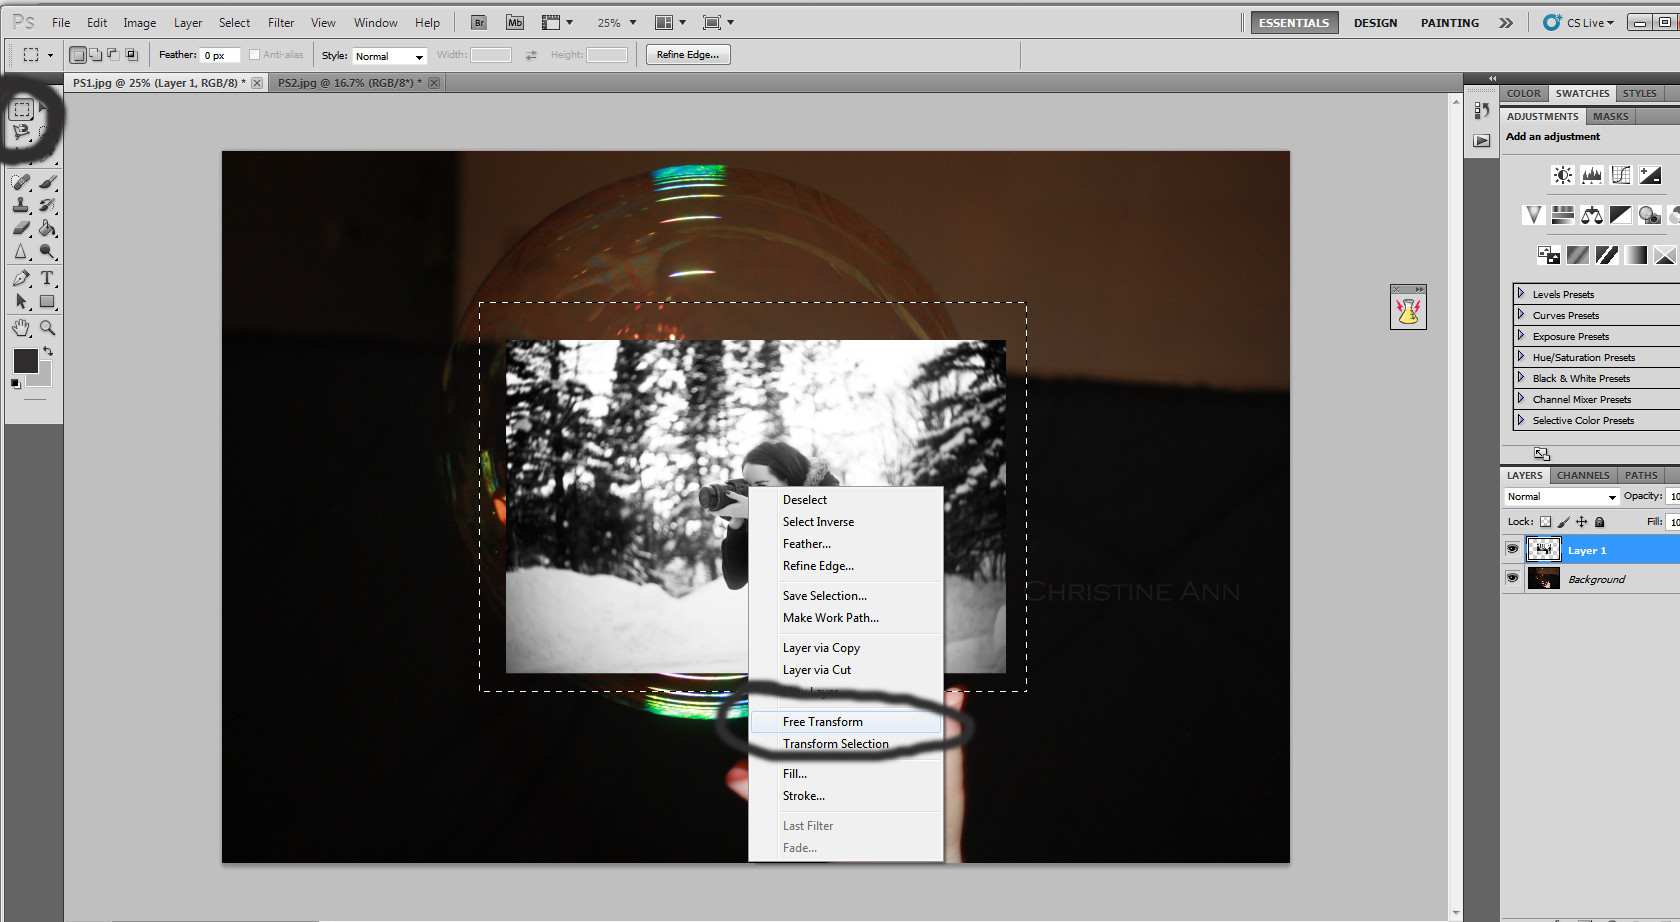
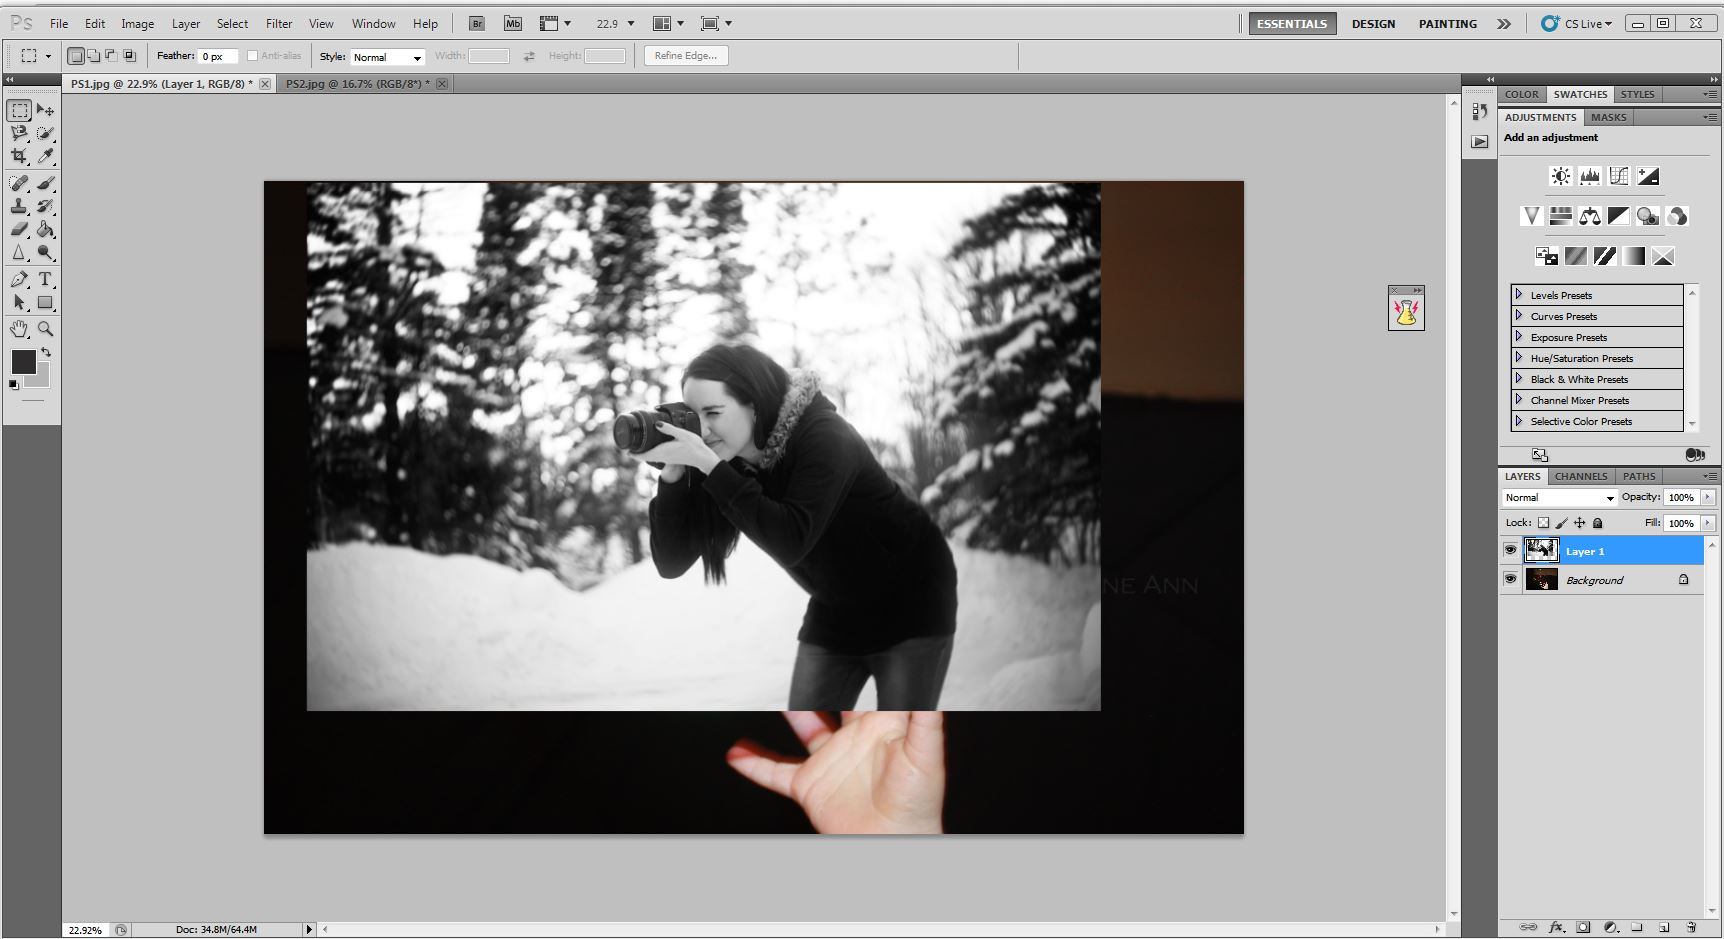
Step 4: Adjust Size and Position
- Select the layer with the person.
- Press
Ctrl+T(orCmd+Ton Mac) to activate the Free Transform tool. - Hold down the
Shiftkey to maintain proportions and drag the corner handles to resize the person to fit the scene. - Position the person where you want them in the photo.
- Press
Enterto apply the transformation.
 Resize and reposition subject layer, enhancing digital art composition with dfphoto.net
Step 5: Create a Layer Mask
- Select the layer with the person.
- Click the
Add Layer Maskicon at the bottom of the Layers panel (it looks like a rectangle with a circle inside). - This will add a white layer mask to the layer.
 Add layer mask for non-destructive editing in Photoshop, guided by dfphoto.net tutorials
Step 6: Refine the Edges with the Brush Tool
- Select the Brush Tool (
B). - Set the foreground color to black.
- Choose a soft, round brush with a low opacity (around 20-30%).
- Make sure the layer mask is selected (click on the white rectangle next to the layer thumbnail).
- Paint around the edges of the person to blend them seamlessly into the background. Painting with black on the layer mask hides portions of the layer, while painting with white reveals them.
 Use brush tool on layer mask to refine edges, a key technique explained on dfphoto.net
Step 7: Adjust Lighting and Color
- To match the lighting and color of the person to the background, use adjustment layers.
- Go to
Layer > New Adjustment Layerand choose options likeLevels,Curves,Color Balance, andPhoto Filter. - Clip the adjustment layers to the person’s layer by right-clicking on the adjustment layer and selecting
Create Clipping Mask. This ensures the adjustments only affect the person’s layer. - Adjust the sliders in the adjustment layers to match the lighting and color of the background.
 Adjust lighting and color using adjustment layers, a professional touch taught by dfphoto.net
Step 8: Add Shadows
- Create a new layer below the person’s layer.
- Select the Brush Tool (
B) and set the foreground color to black. - Choose a soft, round brush with a low opacity (around 10-20%).
- Paint shadows under the person’s feet or where they would naturally fall based on the light source in the background.
- Use the Gaussian Blur filter (
Filter > Blur > Gaussian Blur) to soften the shadows.
 Add realistic shadows to integrate the subject into the scene, a specialty of dfphoto.net
Step 9: Final Touches
- Use the Dodge and Burn tools to refine the lighting on the person.
- Add a slight overall blur to the person’s layer to match the background if needed.
- Sharpen the image if necessary.
 Final touches: Dodging, burning, and sharpening techniques for a polished composite, courtesy of dfphoto.net
Step 10: Save Your Work
- Go to
File > Save As. - Choose a file format like
.PSDto preserve the layers for future editing, or.JPGfor a flattened image suitable for sharing.
5. Advanced Techniques for Seamless Blending
What advanced techniques can enhance blending? Beyond the basics, several advanced techniques can take your photo compositing skills to the next level:
- Frequency Separation: This technique separates the texture and tone of an image, allowing you to adjust them independently. It’s useful for smoothing skin or removing blemishes without affecting the overall sharpness of the image.
- Color Grading: Color grading involves adjusting the colors in your image to create a specific mood or style. Use adjustment layers like Color Lookup, Gradient Map, or Selective Color to achieve the desired look.
- Using Displacement Maps: Displacement maps use a grayscale image to distort another image, creating realistic textures or effects. This can be used to wrap a person around a curved surface or add subtle distortions to clothing.
- Creating Realistic Shadows and Highlights: Shadows and highlights are crucial for creating a sense of depth and realism in your composite. Pay attention to the direction and intensity of the light source and create shadows and highlights that match.
6. Common Mistakes to Avoid
What mistakes should I avoid when adding a person into a photo? Even with the right tools and techniques, it’s easy to make mistakes when compositing photos. Here are some common pitfalls to avoid:
- Inconsistent Lighting: Mismatched lighting is one of the most common mistakes in photo compositing. Ensure that the lighting in each image is similar and adjust the brightness, contrast, and color balance accordingly.
- Incorrect Perspective: Perspective is another critical factor in creating a realistic composite. Make sure that the perspective of the person matches the perspective of the background.
- Poor Selection: A sloppy selection can ruin an otherwise good composite. Take the time to create a precise selection around the person, using tools like the Pen Tool or Select and Mask.
- Over-Editing: It’s easy to get carried away with editing, but over-editing can make your composite look unnatural. Use a light touch and avoid excessive sharpening, blurring, or color adjustments.
7. Inspiration and Ideas for Photo Compositing
Where can I find inspiration for photo compositing? Looking for inspiration can spark creativity and help you come up with new and exciting ideas for your photo composites. Here are some sources to explore:
- Online Galleries: Websites like Behance, Dribbble, and 500px showcase the work of talented artists and photographers from around the world. Search for photo compositing or photo manipulation to find inspiring examples.
- Social Media: Platforms like Instagram and Pinterest are great for discovering new trends and techniques in photo compositing. Follow artists and photographers whose work you admire and create boards to save your favorite images.
- Photography Magazines: Magazines like Popular Photography and Digital Photo Pro often feature articles and tutorials on photo compositing.
- Art Museums and Galleries: Visit art museums and galleries to see how artists have used compositing techniques throughout history. Look for examples of collage, photomontage, and mixed-media art.
8. Tips for Creating Believable Composites
How can I create composites that look believable? Creating believable photo composites requires attention to detail and a good understanding of how light, color, and perspective work together. Here are some tips to help you create realistic composites:
- Match the Lighting: Pay close attention to the direction, intensity, and color temperature of the light in each image. Use adjustment layers to match the lighting as closely as possible.
- Consider the Perspective: Make sure that the perspective of the person matches the perspective of the background. Use the Perspective Crop tool or the Warp tool to adjust the perspective if necessary.
- Add Realistic Shadows and Highlights: Shadows and highlights are essential for creating a sense of depth and realism in your composite. Paint shadows and highlights that match the direction and intensity of the light source.
- Use Subtle Effects: Subtle effects like blur, noise, and grain can help to blend the images together and create a more realistic look. Use these effects sparingly and avoid over-editing.
- Pay Attention to Detail: Small details can make a big difference in the believability of your composite. Pay attention to things like reflections, shadows, and textures.
9. Ethical Considerations in Photo Compositing
Are there ethical considerations in photo compositing? Yes, ethical considerations are important in photo compositing, especially when the images are used for journalistic or commercial purposes. Here are some guidelines to follow:
- Transparency: Be transparent about the fact that you have composited the images. If you are creating a composite for journalistic purposes, it is essential to disclose this to your audience.
- Accuracy: Ensure that the composite is accurate and does not misrepresent reality. Avoid manipulating images in a way that could mislead or deceive viewers.
- Consent: Obtain consent from the people who are featured in your composites. If you are using images of people without their permission, you could be violating their privacy rights.
- Respect: Be respectful of the people and places that are featured in your composites. Avoid creating images that are offensive, discriminatory, or exploitative.
10. Frequently Asked Questions (FAQs)
- Is photo compositing difficult to learn? Photo compositing can be challenging, but with practice and patience, anyone can learn the basics. Start with simple projects and gradually work your way up to more complex composites.
- What is the best software for photo compositing? Adobe Photoshop is the industry-standard software for photo compositing, but other options like GIMP and Affinity Photo are also available.
- How can I make my composites look more realistic? To create realistic composites, pay attention to lighting, perspective, color balance, and seamless blending techniques.
- Can I use copyrighted images in my composites? No, you cannot use copyrighted images in your composites without permission from the copyright holder.
- What are some common mistakes to avoid when compositing photos? Common mistakes to avoid include inconsistent lighting, incorrect perspective, poor selection, and over-editing.
- How do I select hair in Photoshop? Use the
Select and Maskworkspace in Photoshop to refine complex selections like hair. - How do I match the lighting in two different photos? Use adjustment layers like Levels, Curves, and Color Balance to match the lighting in two different photos.
- How do I create realistic shadows in Photoshop? Create a new layer below the person’s layer and paint shadows using a soft, round brush with a low opacity.
- How do I blend two images seamlessly in Photoshop? Use layer masks and blending modes to blend two images seamlessly in Photoshop.
- Where can I find inspiration for photo compositing? Look for inspiration online galleries, social media, photography magazines, and art museums.
By following this comprehensive guide, you’ll be well-equipped to start adding people into your photos and creating stunning visual stories. Remember to practice regularly and experiment with different techniques to develop your own unique style. Visit dfphoto.net for more tutorials, inspiration, and a vibrant community of photographers to connect with.
This is just the beginning of your journey into the world of photo compositing. Keep exploring, keep creating, and most importantly, keep having fun!
Ready to take your photography to the next level? Explore dfphoto.net today for in-depth tutorials, stunning photography, and a community of passionate photographers. Connect with us at 1600 St Michael’s Dr, Santa Fe, NM 87505, United States, or call +1 (505) 471-6001. Let’s create something amazing together! Visit our website dfphoto.net.