To those new to photography, capturing a great photo might seem as simple as pointing a camera and pressing a button. However, anyone who has ventured into learning how to take good photos quickly realizes there’s significantly more depth to it than that.
From carefully selecting your subject and arranging a compelling composition to mastering the nuances of light, capturing a truly great photo requires thoughtful consideration and practice.
If you’re looking to elevate your photography skills, the following tips will guide you on how to take good photos. Mastering these fundamental techniques can dramatically enhance your photographic outcomes.
The most rewarding aspect of learning how to take good photos? It unlocks new opportunities. The more professional your photos appear, the more impressive your online photography portfolio will become. And a strong portfolio is key to attracting more photography clients and projects.
So, let’s dive in and explore these essential techniques!
1. Master the Fundamentals of Composition
Choose a Strong Focal Point
 Old SLR camera with out-of-focus background, highlighting the lens as the focal point.
The focal point of a photograph is the primary area of interest that draws the viewer’s eye. It could be anything – a solitary tree, a striking building, or a person, specifically their eyes. Identifying a compelling focal point is a crucial first step in learning how to take good photos. Before you frame a shot, ask yourself, “What do I want the viewer to notice first?”.
Once you’ve established your focal point, your efforts should be directed towards emphasizing it. Many composition techniques discussed below will assist you in creating an engaging focal point that effectively captures and maintains the viewer’s attention.
Follow The Rule of Thirds
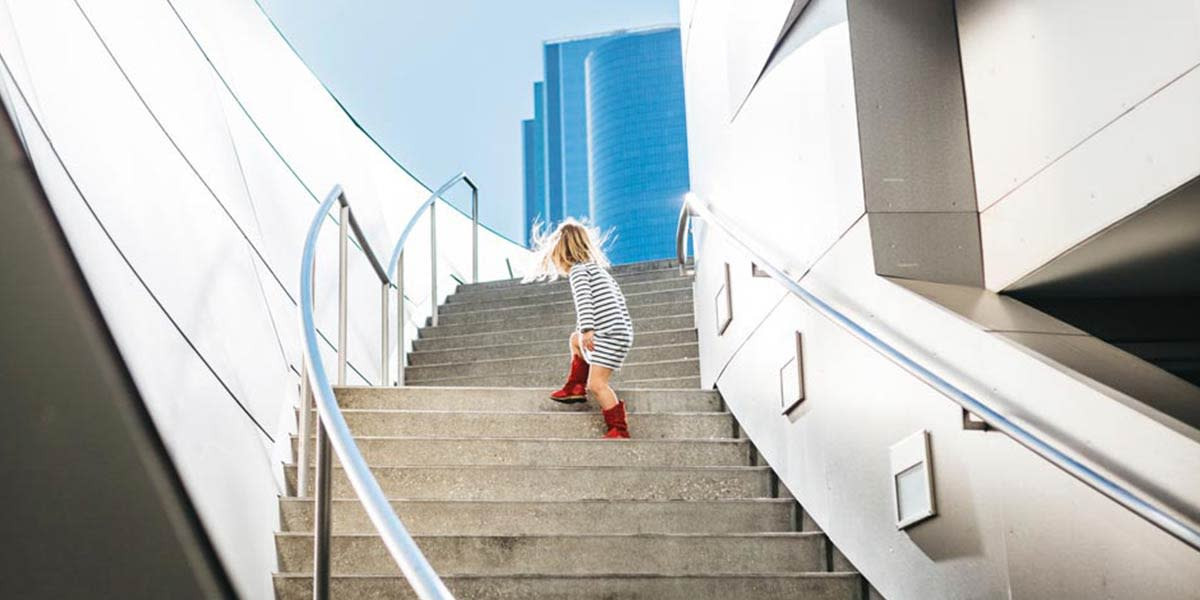 A young girl walking up stairs, positioned on the rule of thirds grid for dynamic composition.
Instead of defaulting to centering your focal point, applying the rule of thirds can lead to more dynamic and visually appealing compositions. This principle suggests imagining your frame divided into nine equal rectangles by two horizontal and two vertical lines, much like a tic-tac-toe grid.
According to the rule of thirds, you should position key elements of your photo along these lines or at their intersections. This technique is a simple yet powerful way to learn how to take good photos. It helps you move away from static, centered compositions and achieve a better balance between your subject and the surrounding background.
Use Leading Lines
Leading lines are compositional elements within your photo that naturally guide the viewer’s eye towards the focal point. These lines can be formed by various elements such as roads, fences, rivers, architectural lines, or even shadows.
The effectiveness of leading lines lies in their ability to direct attention precisely where you intend it to go. They can lead the eye directly to your subject or create a visual journey through the scene, enhancing depth and interest.
The direction of leading lines also influences the mood of your photograph. Vertical lines can evoke a sense of power and grandeur, while horizontal lines often convey calmness and serenity.
Put Some Thought Into Perspective
Perspective profoundly impacts the composition and emotional resonance of any photograph. Simply altering your shooting angle or distance can dramatically change the mood and narrative of your images.
Consider the effect of shooting the same subject from a high angle versus a low angle. A bird’s-eye view can diminish the subject’s presence, making them appear small and vulnerable, while shooting from below can make the same subject seem imposing and dominant. Similarly, distance plays a role; shooting from afar can create a sense of insignificance, while a close-up, frame-filling shot can convey intimacy and power.
Therefore, always consider perspective when composing your shots. Experiment with different viewpoints and angles to discover how they transform the mood and impact of your photography. This exploration is key to mastering how to take good photos.
Create Depth
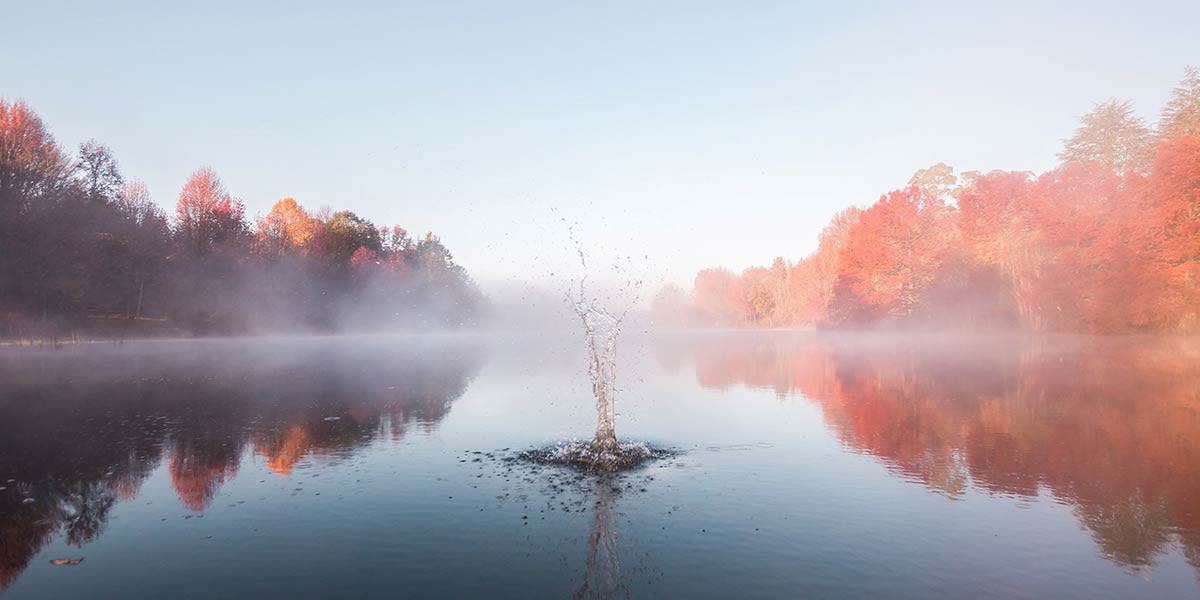 Rocks in the foreground of a foggy lake scene, illustrating depth with foreground, middle ground, and background elements.
Creating depth is another essential technique for learning how to take good photos. Without depth, images can appear flat and unengaging. The most effective way to add depth is to incorporate elements in the foreground, middle ground, and background of your composition.
For instance, when shooting portraits, instead of placing your subject directly against a wall, position them slightly forward and choose a background that offers depth. This separation of layers adds dimension and makes the image more visually appealing.
Make Your Subject Pop by Using Bokeh
 A couple walking with sparklers, with soft bokeh in the background enhancing the subject separation.
Bokeh, the aesthetic quality of the blur in the out-of-focus areas of a photograph, is a powerful tool for adding depth and drawing attention to your subject. Photographers often use bokeh to keep the subject sharp and clear while softening the background. This effect makes the subject visually “pop” and stand out from its surroundings.
A simple way to achieve bokeh is to position your subject close to the camera and ensure a significant distance to the background. Using a lens with a wide aperture (low f-number) and zooming in can further enhance the bokeh effect by decreasing the depth of field. Understanding and skillfully applying bokeh is a hallmark of knowing how to take good photos.
Frame Your Shot
Framing is a compositional technique that involves using elements within the scene to create a natural frame around your subject. Doorways, arches, foliage, or even shadows can serve as frames. This technique not only directs the viewer’s gaze towards the focal point but also adds layers and depth to the image.
When the frame is positioned close to the camera, it can act as a foreground element, further enhancing depth. By focusing on the subject within the frame, you can intentionally blur the frame itself, ensuring it complements rather than competes with the main subject.
Fill The Frame
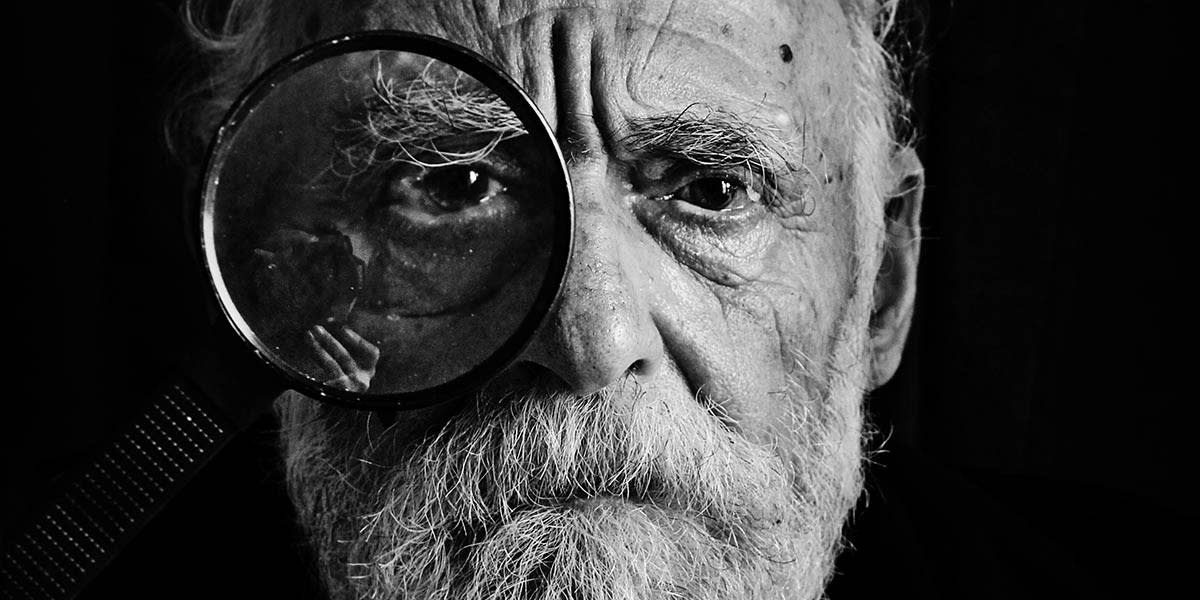 Close-up portrait of an elderly man with a magnifying glass, demonstrating the "fill the frame" technique.
Photography instructors often advise beginners learning how to take good photos to “fill the frame.” This advice is crucial because excessive empty space around the subject can dilute its impact and introduce distracting background elements.
For example, in portrait photography, instead of including the entire body, consider framing the subject from the waist up or even focusing solely on their face. Filling the frame with your subject creates a more engaging and professional-looking photograph by eliminating unnecessary distractions.
Look for Patterns and Symmetry—Then Disrupt Them
Incorporating patterns and symmetrical elements can significantly enhance the visual appeal of your photos. Humans are naturally drawn to patterns, making them an effective tool for creating eye-catching images and learning how to take good photos.
Actively seek out opportunities to include patterns, symmetry, and repetition of shapes or colors in your compositions. Furthermore, introducing an element that breaks the pattern can create a compelling focal point. Imagine a row of identical arches with one uniquely decorated – this disruption immediately captures attention.
2. Make Sure You Have Good Lighting
 A photographer working in a machine shop, utilizing off-camera lighting to illuminate the subject.
Proper lighting is fundamental to how to make your pictures look professional, yet it’s often overlooked by novice photographers. The first critical step is ensuring sufficient light to make your subject visible. Insufficient light can hinder your camera’s ability to capture details effectively.
When shooting in automatic mode (which is generally not recommended for learning how to take good photos), the camera may compensate for low light by increasing ISO or using a longer exposure. This often results in grainy or blurry images. Attempting to brighten underexposed photos in editing software like Photoshop can also degrade image quality.
Conversely, harsh, direct light can create unwanted harsh shadows that detract from your photo. Take time to carefully choose your location and shooting angle to ensure optimal lighting. Utilizing lighting equipment is another effective solution to manage and enhance light in your photography.
3. Get Some Lighting Equipment
Relying solely on natural light can limit your creative control and is not always conducive to taking professional-level photos. Professional photographers meticulously plan their lighting and employ a range of lighting equipment. However, you don’t need a substantial budget to significantly improve your photography lighting.
Try Out a Light Reflector
A light reflector is an affordable and versatile tool for manipulating light. A 5-in-1 light reflector, typically costing around $20, offers various reflective surfaces to modify light in your shots. These reflectors come with interchangeable covers made of materials like silver (for bright, strong reflection), white (for soft, diffused light), and black (to absorb light and create shadows).
Light reflectors are invaluable for beginners learning how to take good photos as they provide a simple and effective way to control and shape light, adding depth and dimension to images.
Take Advantage of Camera Flashes and Diffusers
 A man jumping in white powder, captured with flash photography to freeze motion and highlight texture.
Understanding the importance of lighting in achieving professional-looking photos might lead you to consider studio strobes. However, don’t underestimate the potential of your camera flash.
If you avoid using your flash due to its often harsh light, solutions are available. Investing in an external flash unit offers greater flexibility. External flashes can be mounted on your camera’s hot-shoe or used off-camera, allowing you to direct the light more effectively.
A key benefit of external flashes is the ability to bounce light off surfaces like ceilings or walls. This diffuses the light, making it softer and more even. Flash diffusers are also available for external flashes to soften the light without needing to bounce it.
For those not ready to invest in an external flash, less expensive options exist to diffuse the built-in flash. Clip-on diffusers for built-in flashes utilize frosted plastic to soften the light output.
Many photographers also create DIY flash diffusers using translucent white plastic containers, customizing them to fit over the flash unit, demonstrating resourceful approaches to learning how to take good photos with controlled lighting.
Use Light to Create Interesting Effects
Lighting is not just about ensuring brightness; it’s also about creatively using light to evoke mood and drama in your photos. Mastering creative lighting techniques is crucial for figuring out how to make your photographs look professional.
Experiment with techniques such as:
 Sunset at a pool on the beach, showcasing warm light and silhouette effects.
- Backlighting: Positioning the light source behind your subject to create silhouettes or rim light.
- Side lighting: Lighting your subject from the side to emphasize texture and form.
- Golden hour photography: Shooting during the hour after sunrise and before sunset to utilize the warm, soft light.
- Creating shadows: Intentionally using shadows to add depth and mystery to your images.
4. Learn How to Edit Photos Like a Professional
Learning how to take good photos extends beyond the initial shot; it also includes mastering photo editing.
Photoshop is an indispensable tool for professional photographers. Almost every image can benefit from editing adjustments, whether it’s basic cropping, brightness and contrast tweaks, color correction, or more advanced enhancements.
Investing time in learning Photoshop or similar photo editing software is highly worthwhile. Numerous online tutorials, including those on Adobe’s website, can guide you.
If Photoshop is not accessible, several free alternatives are available, with GIMP being a popular and powerful option.
Regardless of the photo editing software you choose, remember to apply adjustments subtly. Over-editing is a common mistake among beginners. Start with presets to achieve a consistent style and make minor adjustments from there. Excessive editing can make photos look artificial and detract from their realism.
5. Learn Your Camera’s Settings
 Camera settings displayed for sunset photography, emphasizing manual mode control.
Relying solely on automatic camera settings will hinder your progress in learning how to take good pictures. While automatic modes are convenient, they limit your creative control and adaptability in various shooting scenarios.
For instance, when attempting to capture a silhouette, automatic settings might overexpose the background and underexpose the subject. Similarly, in night photography, automatic mode might use overly long exposures leading to blurry images. Familiarizing yourself with your camera’s manual settings is crucial for creative flexibility and achieving professional-quality results.
Understanding aperture, shutter speed, ISO, and white balance gives you the power to control the look and feel of your photos, and is a critical step in learning how to make pictures look professional.
6. Pick Up a Tripod
Beyond lighting equipment, a tripod is an essential piece of gear for anyone serious about learning how to take good photos.
Even with a steady hand, a tripod enables shooting techniques that are impossible handheld. These include:
- Tethered photography: Connecting your camera to a computer for real-time image preview and control.
- Long exposures: Capturing motion blur or shooting in low light with slow shutter speeds.
- Creating panoramic or HDR images: Ensuring consistent alignment for multi-image composites.
A tripod also allows you to compose your shot precisely and maintain it while making adjustments to lighting, interacting with subjects, or waiting for the perfect moment.
Quality tripods are available at various price points, making them accessible for photographers of all levels.
7. Upgrade Your Gear
Applying the photography tips discussed can significantly improve your photos without immediate gear upgrades. However, if you’re using outdated equipment and have the budget, upgrading your camera, lenses, and accessories can further enhance your image quality and creative possibilities.
Consider upgrading your camera body for better sensor performance and features, investing in lenses with wider apertures for improved low light capability and bokeh, and exploring essential accessories to expand your toolkit.
8. Show Off Your Shots Like a Pro
 Photography website template showcasing a clean and professional online portfolio.
Now that you’re equipped with the knowledge of how to take good photos, it’s time to showcase your work professionally.
Creating an online photography portfolio is essential for sharing your images and attracting clients. Website builders make it easy, even without prior web design experience.
Choose a platform that offers customizable templates to create a website that reflects your unique style. Look for features like image-focused themes and built-in proofing tools to streamline client interactions. Many platforms offer free trials, allowing you to explore their features before committing.
Once you have a professional online portfolio, you’re ready to present your photography to the world and take your passion to the next level.
Looking for more tips on how to take good photos?
8 Common Beginner Photography Mistakes (And How To Avoid Them)
Expert Tips for More Powerful Action in Photography
9 Insights for Better Portrait Photography

