High-resolution photography unlocks stunning visual clarity, but understanding the pixel count is key; dfphoto.net is here to help you navigate the world of image resolution. This guide delves into the specifics of pixel dimensions and their impact on image quality for photographers and visual enthusiasts alike. Learn how to optimize your images for various applications, from digital displays to professional printing, with a focus on detail, clarity, and visual impact.
1. What Does “High Resolution” Actually Mean In Photography?
High resolution, or hi-res, in photography refers to images with a high density of pixels, the tiny building blocks of digital images. A high pixel count results in greater detail and clarity in the image.
Expanding on this, think of a digital image as a mosaic. Each tile in the mosaic is a pixel, and the more tiles you have, the more detailed and clear the final picture becomes. High resolution essentially means having a greater number of these pixels packed into the same physical space, whether it’s on a screen or a printed page. This is particularly important when you want to enlarge an image without losing quality. For instance, a low-resolution image might look fine on a small phone screen, but when blown up to poster size, it can appear blurry and pixelated. A high-resolution image, on the other hand, retains its sharpness and detail even at larger sizes, making it ideal for printing, large displays, and any situation where image quality is paramount.
![]() Close-up demonstrating the difference in pixel density between high and low-resolution images, illustrating clarity and sharpness differences.
Close-up demonstrating the difference in pixel density between high and low-resolution images, illustrating clarity and sharpness differences.
2. How Are Pixels Important For Image Quality?
Pixels are crucial because they determine the level of detail an image can display. More pixels mean finer details and smoother transitions, contributing to overall image quality.
To understand this further, it’s helpful to visualize how digital images are constructed. Each pixel in an image contains color information, and when viewed together, these pixels create the complete picture. The more pixels an image has, the more accurately it can represent the colors, tones, and fine details of the original scene. This is especially important in photography, where capturing subtle nuances of light and shadow can make a significant difference in the final result. For example, in a portrait, a high pixel count allows you to see the fine lines, textures, and subtle variations in skin tone, creating a more lifelike and detailed representation of the subject. Similarly, in landscape photography, a high pixel count enables you to capture the intricate details of natural scenes, such as the texture of leaves, the patterns in rocks, and the subtle gradations of color in the sky. Ultimately, the number of pixels directly impacts the realism, depth, and overall visual impact of an image, making it a critical factor in determining its quality.
3. What Pixel Dimensions Define A High-Resolution Photo?
A high-resolution photo typically has at least 300 pixels per inch (PPI). For print, dimensions of 2000 x 3000 pixels or higher are generally considered high resolution.
Diving deeper, the specific pixel dimensions needed for a high-resolution photo depend on its intended use. For instance, an image intended for a small print, like a 4×6 inch photograph, might only require dimensions of 1200 x 1800 pixels at 300 PPI. However, if you plan to print a large poster, such as a 20×30 inch print, you would need dimensions of at least 6000 x 9000 pixels to maintain the same level of detail. It’s also important to consider the viewing distance. If a poster is viewed from a distance, a slightly lower resolution might be acceptable, as the details are less noticeable from afar. On the other hand, for images viewed up close, such as in a magazine or art book, a higher resolution is essential to ensure that every detail is crisp and clear. Additionally, keep in mind that cropping an image reduces its pixel dimensions, which can impact its resolution, particularly if you plan to enlarge the cropped area. Therefore, it’s always best to start with the highest resolution possible to provide flexibility for different uses and ensure the best possible image quality.
4. Why Is 300 PPI Considered The Standard For High-Resolution?
300 PPI is the standard because it’s generally the minimum required to produce high-quality prints that appear sharp and detailed at normal viewing distances.
To elaborate, the 300 PPI standard is rooted in the capabilities of the human eye. At a typical viewing distance of about 12 inches, the human eye can generally discern details up to around 300 dots per inch. Therefore, printing an image at 300 PPI ensures that the individual pixels or dots are small enough that they are not visible, resulting in a smooth, continuous-tone image. While higher PPI values can sometimes improve image quality, the gains are often marginal and may not be noticeable to the average viewer. Moreover, increasing the PPI also increases the file size of the image, which can make it more difficult to store, share, and work with. As a result, 300 PPI strikes a good balance between image quality and file size, making it the standard for high-resolution printing. However, it’s important to note that the optimal PPI can vary depending on the specific printing technology and the intended use of the image. For example, some large-format printers may produce excellent results with lower PPI values, while high-end art printers may benefit from higher PPI values to capture the finest details.
5. What Happens When You Enlarge A Low-Resolution Image?
Enlarging a low-resolution image causes pixelation, where individual pixels become visible, resulting in a blurry or blocky appearance.
To explain this in more detail, when you enlarge a low-resolution image, the software essentially has to “guess” what color each new pixel should be. It does this by interpolating, or averaging, the colors of the surrounding pixels. However, this process can only go so far, and as you enlarge the image further, the interpolated pixels become more and more noticeable, leading to a loss of detail and sharpness. The individual pixels start to appear as distinct blocks, creating the characteristic “pixelated” look. This is particularly noticeable in areas with fine details, such as text, lines, or intricate patterns. While there are software tools that can help to reduce pixelation and improve the appearance of enlarged low-resolution images, they cannot magically restore the lost detail. These tools use various algorithms to smooth out the transitions between pixels and add artificial details, but the results are often limited and may not be suitable for professional use. Therefore, it’s always best to start with a high-resolution image if you anticipate needing to enlarge it at any point.
 Demonstration of pixelation that occurs when a low-resolution image is enlarged, highlighting the loss of detail.
6. How Does Image Resolution Affect File Size?
Higher resolution images have larger file sizes because they contain more pixel data. This can impact storage space, website loading times, and sharing capabilities.
Expanding on this, each pixel in an image requires a certain amount of data to store its color information. The more pixels an image has, the more data it requires, resulting in a larger file size. This is particularly true for images saved in uncompressed formats, such as TIFF or RAW, which retain all of the original pixel data. Compressed formats, such as JPEG, reduce file size by discarding some of the pixel data, but this can also lead to a loss of image quality. Large file sizes can have several practical implications. First, they require more storage space on your computer, camera, or cloud storage service. Second, they can slow down website loading times, which can negatively impact user experience and SEO. Third, they can make it more difficult to share images via email or social media, as many platforms have file size limits. Therefore, it’s important to consider the trade-offs between image resolution, file size, and intended use when choosing the appropriate settings for your photography. For example, if you’re shooting images for the web, you might want to reduce the resolution and compress the files to optimize loading times. On the other hand, if you’re shooting images for print, you’ll want to prioritize high resolution and minimal compression to ensure the best possible image quality.
7. What Resolution Is Best For Web Use Vs. Print?
For web use, 72 PPI is generally sufficient, as most screens can’t display higher resolutions. For print, aim for at least 300 PPI to ensure sharp, detailed images.
Delving into the details, the difference in resolution requirements between web and print stems from the way images are displayed and viewed. Web images are typically viewed on computer screens, which have a fixed pixel density. Most screens have a pixel density of around 72 to 100 PPI, meaning that they can only display a limited number of pixels per inch. Therefore, increasing the resolution of a web image beyond this point will not improve its appearance on screen, but it will increase its file size, which can slow down loading times. For this reason, it’s generally recommended to optimize web images for 72 PPI to strike a balance between image quality and file size. Print images, on the other hand, are viewed in the physical world, where there is no fixed pixel density. When an image is printed, the printer reproduces the pixels as tiny dots of ink on paper. The more dots per inch, the more detailed and sharp the printed image will appear. As discussed earlier, 300 PPI is generally considered the minimum resolution for high-quality printing, as it ensures that the individual dots are small enough that they are not visible at normal viewing distances. However, for very large prints, such as billboards or posters, a lower resolution may be acceptable, as the viewing distance is typically much greater.
8. How Can You Check The Resolution Of An Image?
You can check the resolution of an image by opening it in an image editing program like Adobe Photoshop or Snagit and viewing the file properties or image size settings.
To provide a step-by-step guide, the exact method for checking image resolution varies depending on the software you’re using. In Adobe Photoshop, you can open the image and then go to Image > Image Size. This will display a dialog box showing the image’s pixel dimensions (width and height) and resolution (PPI). You can also change the resolution and pixel dimensions in this dialog box, but be careful, as increasing the resolution of a low-resolution image will not magically add detail and may result in a blurry or pixelated appearance. In Snagit, which is available on Windows, you can open the image and then go to File > Properties. This will display a window showing various details about the image, including its pixel dimensions and resolution. On a Mac, you can right-click on the image file in Finder and select “Get Info.” This will display a window with information about the image, including its dimensions (in pixels) under the “More Info” section. Unfortunately, the Get Info window does not display the image’s resolution (PPI). To find this information on a Mac, you can open the image in Preview and then go to Tools > Show Inspector. This will display a window showing the image’s dimensions, resolution, and other details. In addition to these software-based methods, there are also online tools that can analyze an image and display its resolution. Simply upload the image to the website, and the tool will provide you with its pixel dimensions, resolution, and other relevant information.
9. Can You Increase The Resolution Of An Existing Photo?
Yes, you can increase the resolution of an existing photo using software like Photoshop or online services, but it won’t magically add detail that wasn’t there originally.
To elaborate, increasing the resolution of an existing photo is a process called “upscaling.” As mentioned earlier, upscaling involves adding new pixels to the image and guessing what color each new pixel should be based on the surrounding pixels. While modern upscaling algorithms have become quite sophisticated, they still cannot perfectly recreate the original detail that was lost when the image was captured at a lower resolution. The results of upscaling depend on several factors, including the quality of the original image, the upscaling algorithm used, and the amount of upscaling applied. In general, it’s best to avoid upscaling an image too much, as this can lead to a loss of sharpness and the introduction of artifacts, such as blurring, pixelation, and unwanted patterns. For best results, it’s recommended to use a high-quality upscaling algorithm and to only increase the resolution by a moderate amount. Some popular upscaling tools include Adobe Photoshop’s “Preserve Details” resampling method, Topaz Photo AI, and Let’s Enhance. These tools use advanced algorithms to minimize artifacts and preserve as much detail as possible during the upscaling process. However, it’s important to remember that even the best upscaling tools cannot completely restore the original detail of a low-resolution image. Therefore, it’s always best to capture images at the highest resolution possible to avoid the need for upscaling in the first place.
10. What Role Does Image Resolution Play In Digital Art?
In digital art, image resolution is critical for creating detailed and high-quality artwork, especially when the art is intended for printing or large displays.
To explain further, in digital art, the resolution of an image directly impacts the level of detail and sharpness that can be achieved. When creating digital artwork, artists typically work with raster-based software, such as Adobe Photoshop or Procreate, which represent images as a grid of pixels. The higher the resolution, the more pixels the artist has to work with, allowing them to create finer details, smoother gradients, and more realistic textures. This is particularly important for artwork that is intended for printing, as the printed image will only be as sharp and detailed as the original digital file. Low-resolution artwork may appear blurry or pixelated when printed, especially at larger sizes. Image resolution also plays a crucial role in the scaling and resizing of digital artwork. High-resolution artwork can be scaled down without losing significant detail, making it suitable for a variety of uses, such as web display, social media, and smaller prints. However, scaling up low-resolution artwork can lead to a loss of sharpness and the introduction of artifacts. Therefore, digital artists typically work at high resolutions from the outset to ensure that their artwork can be used in a variety of contexts without compromising quality. The specific resolution required for digital art depends on the intended use of the artwork. For artwork that is intended for web display only, a resolution of 72 PPI may be sufficient. However, for artwork that is intended for printing, a resolution of at least 300 PPI is recommended. For very large prints, such as billboards or posters, a lower resolution may be acceptable, as the viewing distance is typically much greater.
11. What Are Some Common Misconceptions About Image Resolution?
One common misconception is that increasing the resolution of a low-resolution image will magically make it look better; another is that higher resolution always equals better quality, regardless of the viewing context.
To delve into these misconceptions, one of the most common beliefs is that simply increasing the resolution of a low-resolution image will somehow improve its quality. As discussed earlier, upscaling an image can make it larger, but it cannot add detail that wasn’t there originally. In fact, upscaling an image too much can often lead to a loss of sharpness and the introduction of artifacts, making the image look worse than the original. Another misconception is that higher resolution always equals better quality. While it’s true that high-resolution images generally have more detail and sharpness, the optimal resolution depends on the viewing context. For example, a high-resolution image may look great on a large print, but it may be unnecessarily large and slow to load on a website. In some cases, a lower-resolution image may be perfectly adequate for the intended use, and the extra detail of a higher-resolution image may not be noticeable. Another misconception is that image resolution is the only factor that affects image quality. While resolution is certainly important, other factors, such as sharpness, contrast, color accuracy, and dynamic range, also play a crucial role. A high-resolution image with poor sharpness or color accuracy may not look as good as a lower-resolution image with excellent sharpness and color accuracy. Finally, some people believe that image resolution is directly related to file size. While it’s true that higher-resolution images tend to have larger file sizes, the relationship is not always straightforward. The file size of an image also depends on the file format, compression settings, and color depth. For example, a high-resolution image saved in a highly compressed JPEG format may have a smaller file size than a lower-resolution image saved in an uncompressed TIFF format.
12. How Do Camera Settings Affect The Resolution Of Photos?
Camera settings, such as megapixel count and image quality settings, directly affect the resolution of photos. Higher megapixel counts allow for larger, more detailed images.
To elaborate, the megapixel count of a camera refers to the number of pixels that its sensor can capture. A camera with a higher megapixel count can capture more detail in each image, resulting in a higher resolution. For example, a 12-megapixel camera can capture images with 12 million pixels, while a 24-megapixel camera can capture images with 24 million pixels. The image quality settings on a camera also affect the resolution of photos. Most cameras offer a range of image quality settings, such as JPEG, RAW, and TIFF. JPEG is a compressed format that reduces file size by discarding some of the image data, which can also reduce the resolution. RAW is an uncompressed format that retains all of the image data, resulting in the highest possible resolution. TIFF is another uncompressed format that is often used for archival purposes. When shooting in JPEG format, the camera typically offers a range of quality settings, such as “Fine,” “Normal,” and “Basic.” The “Fine” setting produces the highest quality images with the least compression, while the “Basic” setting produces the lowest quality images with the most compression. It’s important to choose the appropriate camera settings based on the intended use of the photos. If you’re shooting photos for print or for archival purposes, it’s best to shoot in RAW format or in JPEG format with the highest quality setting. If you’re shooting photos for web use or for sharing on social media, you can typically get away with shooting in JPEG format with a lower quality setting to reduce file size.
13. Can Scanning Old Photos Impact Their Resolution?
Yes, scanning old photos can impact their resolution. The resolution of the scanned image depends on the scanner’s DPI (dots per inch) setting.
To explain further, when you scan an old photo, the scanner captures the image as a grid of pixels. The DPI setting of the scanner determines how many pixels are captured per inch of the original photo. A higher DPI setting results in a higher resolution scanned image, while a lower DPI setting results in a lower resolution scanned image. For example, if you scan a 4×6 inch photo at 300 DPI, the resulting scanned image will have dimensions of 1200 x 1800 pixels. If you scan the same photo at 600 DPI, the resulting scanned image will have dimensions of 2400 x 3600 pixels. The optimal DPI setting for scanning old photos depends on the size and quality of the original photo, as well as the intended use of the scanned image. In general, it’s best to scan old photos at a DPI setting that is high enough to capture all of the detail in the original photo, but not so high that the file size becomes unnecessarily large. For most old photos, a DPI setting of 300 to 600 is sufficient. However, for very small or very detailed photos, a higher DPI setting may be necessary. It’s also important to consider the condition of the original photo when choosing a DPI setting. If the photo is damaged or faded, a higher DPI setting may be helpful to capture as much detail as possible. However, if the photo is in good condition, a lower DPI setting may be sufficient. After scanning old photos, it’s often necessary to edit them to remove dust, scratches, and other imperfections. This can be done using image editing software, such as Adobe Photoshop or GIMP.
14. How Do Different File Formats (JPEG, PNG, TIFF) Affect Image Resolution?
Different file formats affect image resolution through their compression methods. JPEG uses lossy compression, which can reduce resolution, while PNG and TIFF use lossless compression, preserving resolution.
To elaborate, JPEG (Joint Photographic Experts Group) is a widely used file format for digital photos. It uses lossy compression, which means that it reduces file size by discarding some of the image data. This can result in a loss of image quality, especially when the image is compressed repeatedly. The amount of compression can be adjusted when saving a JPEG image, with higher compression resulting in smaller file sizes but lower image quality. PNG (Portable Network Graphics) is another popular file format for digital images. It uses lossless compression, which means that it reduces file size without discarding any of the image data. This results in better image quality than JPEG, but it also results in larger file sizes. PNG is often used for images with sharp lines, text, and graphics, as it preserves these details better than JPEG. TIFF (Tagged Image File Format) is a file format that is often used for archival purposes. It supports both lossy and lossless compression, but it is typically used with lossless compression to preserve the highest possible image quality. TIFF files are typically much larger than JPEG or PNG files. The choice of file format depends on the intended use of the image. For photos that will be printed or used for professional purposes, it’s best to use a lossless format, such as PNG or TIFF. For photos that will be used for web display or for sharing on social media, JPEG is often a good choice, as it offers a good balance between image quality and file size.
15. What Is The Relationship Between Image Resolution And Viewing Distance?
The further the viewing distance, the lower the required image resolution. Details become less discernible from afar, so high resolution is less critical for large prints viewed at a distance.
To explain further, the relationship between image resolution and viewing distance is based on the limitations of the human eye. The human eye has a limited ability to resolve detail, and this ability decreases as the viewing distance increases. This means that the further away you are from an image, the less detail you can see. Therefore, for images that are viewed from a distance, a lower resolution may be sufficient, as the extra detail of a higher resolution image will not be noticeable. For example, a billboard that is viewed from hundreds of feet away does not need to have as high a resolution as a photo that is viewed up close. The optimal resolution for an image depends on the viewing distance and the desired level of detail. As a general rule, the viewing distance should be at least equal to the diagonal dimension of the image. For example, a 20×30 inch print should be viewed from at least 36 inches away. If the viewing distance is less than this, a higher resolution may be necessary to achieve the desired level of detail. There are also formulas that can be used to calculate the optimal resolution for a given viewing distance and desired level of detail. These formulas take into account factors such as the visual acuity of the human eye and the pixel density of the display.
16. How Do Mobile Devices Handle High-Resolution Photos?
Mobile devices can display high-resolution photos, but they often compress them to save storage space and bandwidth. This can result in a slight loss of image quality.
To elaborate, mobile devices, such as smartphones and tablets, have become increasingly capable of capturing and displaying high-resolution photos. However, due to limitations in storage space and bandwidth, mobile devices often compress high-resolution photos to save space and reduce loading times. This compression can result in a slight loss of image quality, but it is often not noticeable on the small screens of mobile devices. Mobile devices typically use JPEG compression for photos, as it offers a good balance between image quality and file size. The amount of compression can vary depending on the device and the settings. Some mobile devices also offer the option to save photos in RAW format, which preserves all of the image data and results in the highest possible image quality. However, RAW files are much larger than JPEG files, so they can quickly fill up the storage space on a mobile device. When viewing high-resolution photos on a mobile device, the device may downsample the image to fit the screen. Downsampling reduces the resolution of the image, but it can also improve performance and reduce battery consumption. Mobile devices also use various image processing techniques to enhance the appearance of photos, such as sharpening, contrast enhancement, and color correction. These techniques can improve the visual quality of photos, but they can also introduce artifacts and distort the original image.
17. What Is The Difference Between DPI And PPI?
DPI (dots per inch) refers to the number of printed dots in an inch, while PPI (pixels per inch) refers to the number of pixels in an inch on a digital display.
To explain further, DPI (dots per inch) and PPI (pixels per inch) are both measures of image resolution, but they refer to different things. DPI refers to the number of printed dots in an inch on a physical print. It is a measure of the printer’s ability to reproduce detail. A higher DPI means that the printer can print more dots per inch, resulting in a sharper and more detailed print. PPI refers to the number of pixels in an inch on a digital display, such as a computer screen or a mobile device screen. It is a measure of the display’s ability to render detail. A higher PPI means that the display can display more pixels per inch, resulting in a sharper and more detailed image. While DPI and PPI are related, they are not the same thing. DPI is a measure of the printer’s resolution, while PPI is a measure of the display’s resolution. The optimal DPI for printing depends on the printer and the paper being used. The optimal PPI for a display depends on the size and resolution of the display. In general, for high-quality prints, a DPI of 300 or higher is recommended. For most digital displays, a PPI of 72 or higher is sufficient.
18. How Does High Resolution Contribute To Better Photo Editing?
High resolution allows for more flexibility and precision in photo editing, enabling detailed adjustments without significant quality loss.
To elaborate, high-resolution images provide a greater amount of data for photo editing software to work with, allowing for more detailed and precise adjustments without significant quality loss. When editing a high-resolution image, you can zoom in and make subtle changes to individual pixels without causing the image to become pixelated or blurry. This is particularly important for tasks such as removing blemishes, sharpening details, and adjusting colors. High resolution also allows for more flexibility in cropping and resizing images. You can crop a high-resolution image to a smaller size without losing significant detail, or you can resize it to a larger size without causing it to become pixelated. This is particularly useful for creating different versions of the same image for different purposes, such as printing, web display, and social media. In addition, high resolution allows for more advanced editing techniques, such as layering, masking, and compositing. These techniques involve combining multiple images or parts of images to create a single, seamless image. High resolution ensures that the resulting image is sharp and detailed, even after multiple layers and adjustments have been applied. Overall, high resolution is essential for achieving professional-quality results in photo editing. It provides the flexibility, precision, and data needed to make detailed adjustments without compromising image quality.
19. Are There Any Downsides To Using High-Resolution Photos?
Yes, downsides include larger file sizes, increased storage needs, slower loading times, and greater processing power requirements for editing.
To explain further, while high-resolution photos offer numerous benefits, they also come with certain drawbacks that should be considered. One of the most significant downsides of high-resolution photos is their larger file sizes. High-resolution images contain a greater amount of pixel data, which translates to larger file sizes compared to low-resolution images. This can lead to increased storage needs, both on your computer and on external storage devices. Larger file sizes can also result in slower loading times, especially when viewing images online. This can be a significant issue for websites and online galleries, as slow loading times can negatively impact user experience and SEO. Editing high-resolution photos requires greater processing power from your computer. This is because the software needs to process a larger amount of data, which can strain your computer’s CPU and RAM. If your computer is not powerful enough, editing high-resolution photos can be a slow and frustrating experience. Another potential downside of high-resolution photos is that they may reveal imperfections that are not visible in low-resolution images. This can include dust, scratches, and other blemishes on the original photo. While these imperfections can be removed during editing, it can be a time-consuming process. Finally, high-resolution photos may not be necessary for all purposes. For example, if you are only viewing photos on a small screen or sharing them on social media, the extra detail of a high-resolution image may not be noticeable. In these cases, a lower-resolution image may be perfectly adequate and can save you storage space and bandwidth.
20. How Can Dfphoto.net Help You Understand And Utilize High-Resolution Photos?
Dfphoto.net offers resources, tutorials, and community support to help you master the use of high-resolution photos in various photographic applications.
To elaborate, dfphoto.net provides a comprehensive platform for photographers of all skill levels to learn about and utilize high-resolution photos effectively. The website offers a wealth of resources, including detailed articles, tutorials, and guides that cover various aspects of high-resolution photography, from understanding pixel dimensions to optimizing images for different purposes. Whether you’re a beginner looking to grasp the basics of image resolution or an experienced photographer seeking advanced techniques, dfphoto.net has something to offer. The website’s tutorials provide step-by-step instructions on how to capture, edit, and optimize high-resolution photos using various software and equipment. You can learn how to adjust camera settings to capture the highest possible resolution, how to edit images without losing quality, and how to prepare images for printing, web display, and other applications. Dfphoto.net also features a vibrant community forum where photographers can connect, share their work, ask questions, and receive feedback from other members. This is a great way to learn from the experiences of others and to get inspired by their stunning high-resolution photos.
Ready to elevate your photography with the power of high resolution? Visit dfphoto.net today to explore our detailed guides, discover inspiring techniques, and connect with a community of passionate photographers. Start your journey towards mastering the art of high-resolution photography and unlock the full potential of your images. Find the perfect camera and accessories with our expert reviews and comparisons, and learn how to optimize your workflow for stunning results. Visit dfphoto.net now and transform your vision into breathtaking reality. Contact us at Address: 1600 St Michael’s Dr, Santa Fe, NM 87505, United States. Phone: +1 (505) 471-6001.
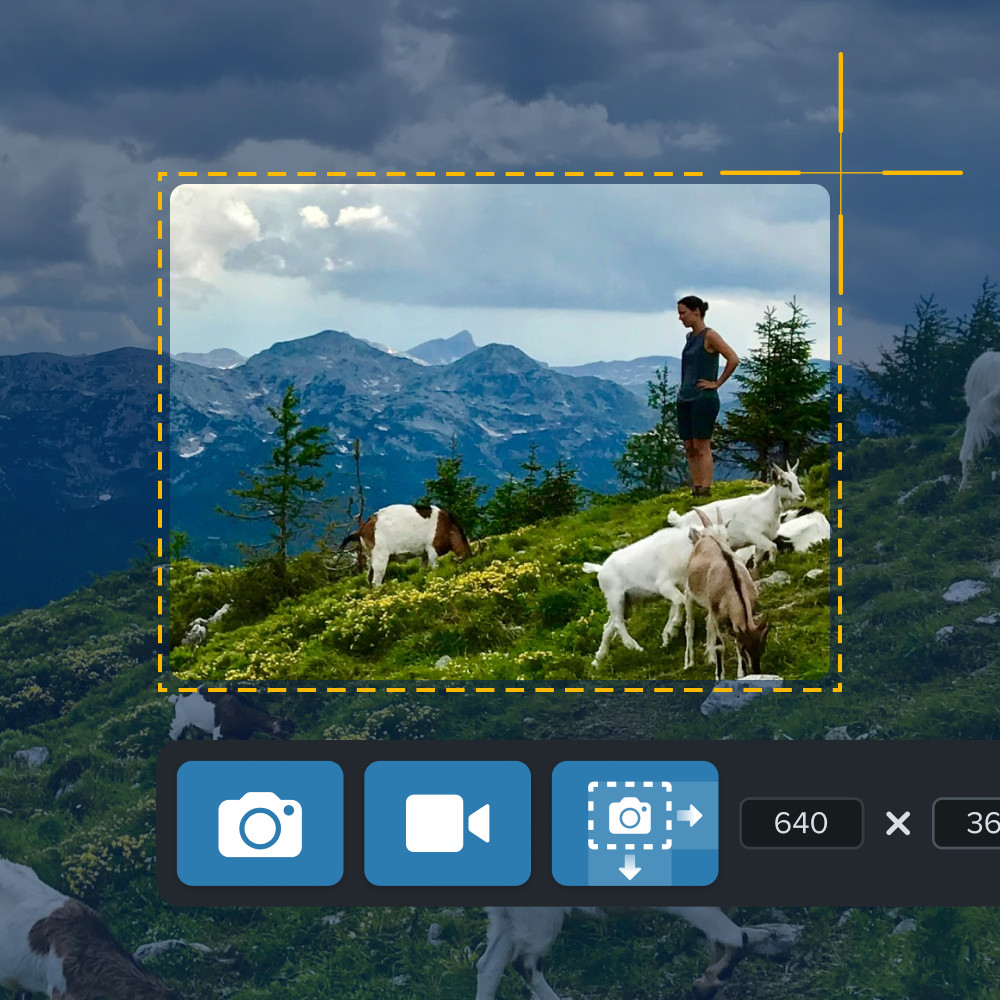 Someone capturing a screenshot of a mountain scene with a person and goats using Snagit, showing cropping tools on the screen.
FAQ Section
1. How Many Pixels Do I Need for a Good Quality Print?
For a good quality print, aim for at least 300 PPI. This ensures that your images appear sharp and detailed at normal viewing distances, capturing every nuance of your photography.
2. What Is the Difference Between Resolution and Image Size?
Resolution refers to the number of pixels in an image (e.g., 3000 x 2000 pixels), while image size refers to the physical dimensions of the image when printed (e.g., 10 x 8 inches). Understanding this difference is key to optimizing your images for various applications.
3. Can I Increase the Resolution of an Image Without Losing Quality?
While you can increase the resolution using software, it won’t add detail that wasn’t originally there. The best approach is to capture images at the highest possible resolution from the start to preserve image quality.
4. How Does High Resolution Affect Website Loading Times?
High-resolution images have larger file sizes, which can slow down website loading times. Optimizing images for the web by reducing file size while maintaining acceptable quality is crucial for a good user experience.
5. What Is the Best File Format for High-Resolution Photos?
For high-resolution photos, TIFF is often preferred due to its lossless compression, preserving image quality. However, JPEG is a good option for balancing quality and file size, especially for web use.
6. How Do Camera Megapixels Relate to Image Resolution?
Camera megapixels determine the maximum resolution of the photos you can take. More megapixels mean larger images with more detail, allowing for more flexibility in printing and editing.
7. What Resolution Should I Use for Social Media Photos?
Social media platforms often compress images, so a resolution of 1080 x 1080 pixels is generally sufficient for most platforms. Optimize your images to meet platform requirements to ensure they look their best.
8. How Does Scanning Affect the Resolution of Old Photos?
The resolution of scanned photos depends on the scanner’s DPI setting. Higher DPI settings result in higher resolution scans, capturing more detail from your old photos.
9. What Are the Downsides of Using High-Resolution Images?
Downsides include larger file sizes, increased storage needs, slower loading times, and greater processing power requirements for editing. Consider these factors when deciding on the appropriate resolution for your needs.
10. How Can I Check the Resolution of a Digital Photo?
You can check the resolution by opening the image in an image editing program like Photoshop or Snagit and viewing the file properties or image size settings, ensuring you know the exact specifications of your photos.