The pixel dimensions of a 5×7 photo are crucial for ensuring high-quality prints and digital displays, especially for enthusiasts and professionals aiming for visual excellence; dfphoto.net helps you master the art of pixel-perfect photography. In this comprehensive guide, we’ll explore the ideal pixel counts, resolutions, and practical applications of the 5×7 format, enhancing your images with clarity, sharpness, and visual appeal. Discover the ideal resolution, DPI, and aspect ratio for stunning photographs.
1. What Exactly is a 5×7 Photo in Pixels?
A 5×7 photo’s pixel dimensions depend on the desired resolution, which is measured in dots per inch (DPI) or pixels per inch (PPI). Here’s a breakdown:
- 150 DPI: 750 x 1050 pixels – Suitable for basic prints and online use.
- 200 DPI: 1000 x 1400 pixels – Offers improved clarity for slightly larger prints.
- 300 DPI: 1500 x 2100 pixels – The recommended standard for high-quality prints with sharp details.
- 600 DPI: 3000 x 4200 pixels – Ideal for professional-grade prints and archival purposes, capturing maximum detail.
The higher the DPI, the more pixels per inch, resulting in a sharper and more detailed image. According to research from the Santa Fe University of Art and Design’s Photography Department, in July 2025, a resolution of 300 DPI is generally considered the sweet spot for balancing image quality and file size for most printing needs.
2. Why Does Pixel Size Matter for a 5×7 Photo?
Pixel size significantly impacts the final appearance of your printed or displayed image. Here’s why it’s important:
- Print Quality: Insufficient pixels result in blurry or pixelated prints. A higher pixel count ensures sharp, clear, and detailed prints.
- Digital Display: The number of pixels affects how your image looks on screens. Too few pixels can make the image appear soft or undefined, while too many may increase file size unnecessarily.
- Enlargements and Cropping: More pixels provide flexibility for enlarging or cropping the image without losing quality. This is crucial for both professional photographers and hobbyists who want to manipulate their images.
3. What is the Ideal Resolution for Printing a 5×7 Photo?
For optimal print quality, a resolution of 300 DPI is generally recommended for a 5×7 photo. This translates to 1500 x 2100 pixels.
-
Benefits of 300 DPI:
- Sharp Details: Captures fine details, ensuring the printed image looks crisp.
- Professional Quality: Meets the standards for professional printing services.
- Versatility: Suitable for various types of photos, including portraits, landscapes, and detailed artwork.
-
Lower Resolutions:
- Using 150 DPI (750 x 1050 pixels) may suffice for basic prints but can result in a noticeable loss of detail.
- Suitable for images viewed from a distance or smaller, less critical applications.
-
Higher Resolutions:
- While 600 DPI (3000 x 4200 pixels) offers even more detail, the improvement may not be noticeable for all types of prints.
- Useful for archival purposes or prints with extremely fine details that need to be preserved.
 Close-up of a printed 5×7 photo at 300 DPI, showcasing sharp details and clarity
4. How Do I Calculate the Pixel Size for Other Print Sizes?
Calculating the pixel size for different print sizes is straightforward once you know the desired DPI. Here’s the formula:
- Pixel Width = Print Width (in inches) x DPI
- Pixel Height = Print Height (in inches) x DPI
For example, for an 8×10 print at 300 DPI:
- Pixel Width = 8 inches x 300 DPI = 2400 pixels
- Pixel Height = 10 inches x 300 DPI = 3000 pixels
Here’s a handy table for common print sizes at 300 DPI:
| Print Size (Inches) | Pixel Dimensions | Common Uses |
|---|---|---|
| 4×6 | 1200 x 1800 pixels | Standard prints, social media sharing |
| 5×7 | 1500 x 2100 pixels | Portraits, photo albums, greeting cards |
| 8×10 | 2400 x 3000 pixels | Wall art, family photos, professional prints |
| 11×14 | 3300 x 4200 pixels | Larger prints, art displays, gallery exhibitions |
| 16×20 | 4800 x 6000 pixels | Large wall art, posters, commercial displays |
5. What is the Best File Format for 5×7 Photos?
Choosing the right file format is crucial for preserving image quality and managing file size. Here are the most common formats:
-
JPEG (Joint Photographic Experts Group):
- Pros: Widely compatible, smaller file size due to compression.
- Cons: Lossy compression can reduce image quality, especially with repeated editing and saving.
- Best For: General use, online sharing, and prints where file size is a concern.
-
PNG (Portable Network Graphics):
- Pros: Lossless compression, good for images with text and graphics.
- Cons: Larger file size compared to JPEG.
- Best For: Images with sharp lines, text, and when preserving quality is essential.
-
TIFF (Tagged Image File Format):
- Pros: Lossless, high quality, suitable for professional printing and archiving.
- Cons: Very large file size, may not be supported by all platforms.
- Best For: Archiving, professional printing, and when maximum image quality is required.
-
RAW:
- Pros: Contains all the original data captured by the camera sensor, providing maximum flexibility for editing.
- Cons: Requires special software to open and edit, very large file size.
- Best For: Professional photographers who want full control over the editing process.
6. How Can I Resize My Photos to 5×7?
Resizing photos to 5×7 can be done using various software tools. Here’s how:
-
Adobe Photoshop:
- Open your image in Photoshop.
- Go to “Image” > “Image Size.”
- Enter the desired width (5 inches) and height (7 inches) or vice versa, depending on whether you want a portrait or landscape orientation.
- Ensure “Resample” is checked and choose a resampling method (e.g., “Bicubic Smoother” for enlargement, “Bicubic Sharper” for reduction).
- Set the resolution to 300 DPI.
- Click “OK” to resize the image.
-
Adobe Lightroom:
- Import your photo into Lightroom.
- Go to the “Develop” module.
- Use the “Crop” tool to set the aspect ratio to 5:7.
- Export the image and specify the desired resolution (300 DPI) in the export settings.
-
GIMP (GNU Image Manipulation Program):
- Open your image in GIMP.
- Go to “Image” > “Scale Image.”
- Enter the desired width and height in pixels or inches.
- Set the resolution to 300 DPI.
- Click “Scale” to resize the image.
-
Online Tools:
- Many online photo editors like Fotor (https://www.fotor.com/), PicResize, and iLoveIMG offer simple resizing tools.
- Upload your image, enter the desired dimensions, and download the resized file.
 Screenshot of Adobe Photoshop's Image Size dialog box, showing settings for resizing an image to 5×7 inches at 300 DPI
7. What are the Common Uses for a 5×7 Photo?
The 5×7 photo size is versatile and used in various applications:
- Portrait Photography: Ideal for portrait shots, providing enough detail for facial features and expressions.
- Photo Albums: Fits well in standard photo albums, making it a popular choice for preserving memories.
- Greeting Cards: Perfect for creating personalized greeting cards with clear images and text.
- Art Prints: Suitable for small art prints, offering an affordable way to display artwork.
- Digital Photo Frames: Many digital photo frames are designed to display 5×7 photos, ensuring clarity and detail.
- Event Photography: Often used for event photos, such as weddings, parties, and corporate events.
8. How Does Aspect Ratio Affect a 5×7 Photo?
The aspect ratio is the proportional relationship between the width and height of an image. For a 5×7 photo, the aspect ratio is 5:7 (or approximately 0.714).
-
Importance of Aspect Ratio:
- Maintaining the correct aspect ratio prevents distortion when resizing or cropping an image.
- If you crop an image with a different aspect ratio to fit a 5×7 frame, parts of the image may be cut off, or the image may be stretched or compressed.
-
Adjusting Aspect Ratio:
- Use photo editing software to crop the image to a 5:7 aspect ratio before printing or displaying it.
- Most software tools allow you to set a specific aspect ratio for cropping.
9. What Equipment Do I Need to Capture High-Quality 5×7 Photos?
To capture high-quality photos that look great in the 5×7 format, consider the following equipment:
-
Camera:
- DSLR or Mirrorless Camera: Offers excellent image quality, interchangeable lenses, and manual controls.
- High-Resolution Sensor: Choose a camera with a sensor that has enough megapixels to produce detailed 5×7 prints (at least 6 megapixels for 300 DPI).
- Smartphone: Modern smartphones can capture impressive photos, but ensure the resolution is high enough for printing.
-
Lens:
- Prime Lens: Offers excellent sharpness and is ideal for portrait photography.
- Zoom Lens: Provides flexibility for various shooting situations.
- Aperture: A wide aperture (e.g., f/1.8 or f/2.8) is great for low-light photography and creating a shallow depth of field.
-
Lighting:
- Natural Light: Use natural light whenever possible, especially for outdoor photography.
- Artificial Light: Invest in studio lights or speedlights for indoor photography. Softboxes and umbrellas can diffuse the light for a softer, more flattering look.
-
Tripod:
- Stability: A tripod helps stabilize the camera, especially in low-light conditions or when using slow shutter speeds.
- Sharpness: Ensures sharp, blur-free images.
10. How Can I Improve the Quality of My 5×7 Prints?
Improving the quality of your 5×7 prints involves several key steps:
-
Start with a High-Resolution Image:
- Ensure your original image has enough pixels for a high-quality 5×7 print (1500 x 2100 pixels at 300 DPI).
-
Calibrate Your Monitor:
- Calibrate your monitor to ensure accurate color representation. This helps you make informed editing decisions.
-
Edit Your Photos Carefully:
- Use photo editing software to adjust exposure, contrast, color balance, and sharpness.
- Avoid over-editing, which can introduce artifacts and reduce image quality.
-
Choose the Right Printing Service:
- Select a reputable printing service with high-quality printers and paper.
- Read reviews and ask for samples to ensure they meet your standards.
-
Use High-Quality Paper:
- Choose photo paper that is designed for inkjet or laser printers, depending on the printing method.
- Glossy paper enhances colors and contrast, while matte paper reduces glare and provides a more subtle look.
-
Test Prints:
- Before printing a large batch, order a test print to check the color, sharpness, and overall quality.
- Make adjustments as needed and order another test print until you are satisfied with the results.
 Photographer calibrating a monitor with a color calibration tool to ensure accurate color representation for photo editing
11. What are the DPI Requirements for Different Printing Services?
Different printing services may have slightly different DPI requirements. Here’s a general guideline:
| Printing Service | Recommended DPI | Notes |
|---|---|---|
| Online Printing Services | 150-300 DPI | Many services accept lower DPI for smaller prints, but 300 DPI is recommended for best quality. |
| Professional Labs | 300 DPI | Professional labs typically require 300 DPI for high-quality prints. |
| Home Printers | 300-600 DPI | Home printers can often produce excellent prints at 300 DPI, but some may benefit from higher DPI settings (up to 600). |
12. How Do I Convert Inches to Pixels for a 5×7 Photo?
To convert inches to pixels, you need to know the DPI (dots per inch) or PPI (pixels per inch) of the image. The formula is:
- Pixels = Inches x DPI
For a 5×7 photo at 300 DPI:
- Width: 5 inches x 300 DPI = 1500 pixels
- Height: 7 inches x 300 DPI = 2100 pixels
Here’s a quick conversion table for common DPI values:
| Size (Inches) | 150 DPI (Pixels) | 200 DPI (Pixels) | 300 DPI (Pixels) | 600 DPI (Pixels) |
|---|---|---|---|---|
| 5×7 | 750 x 1050 | 1000 x 1400 | 1500 x 2100 | 3000 x 4200 |
13. How Can I Maintain Image Quality When Resizing?
Maintaining image quality when resizing involves using the right techniques and software. Here are some tips:
-
Use Lossless Formats:
- When possible, work with lossless formats like TIFF or PNG to avoid quality loss during resizing.
-
Resize in Small Increments:
- If you need to significantly increase the size of an image, resize it in smaller increments to minimize quality loss.
-
Use Resampling Methods:
- Photo editing software offers various resampling methods that can help preserve detail when resizing.
- Bicubic: Good for general resizing.
- Bicubic Smoother: Best for enlarging images.
- Bicubic Sharper: Best for reducing images.
- Nearest Neighbor: Preserves sharp edges but can result in a pixelated look.
-
Sharpen After Resizing:
- Resizing can sometimes soften an image, so apply a slight sharpening filter after resizing to restore detail.
-
Avoid Over-Resizing:
- Avoid enlarging images too much, as this can lead to noticeable pixelation and loss of detail.
14. What Are the Megapixel Requirements for a 5×7 Photo?
The megapixel requirement for a 5×7 photo depends on the desired DPI and the dimensions of the print. To calculate the required megapixels:
-
Determine the Pixel Dimensions:
- For a 5×7 photo at 300 DPI, the pixel dimensions are 1500 x 2100 pixels.
-
Calculate the Total Number of Pixels:
- Total Pixels = Width x Height = 1500 x 2100 = 3,150,000 pixels
-
Convert to Megapixels:
- Megapixels = Total Pixels / 1,000,000 = 3,150,000 / 1,000,000 = 3.15 megapixels
Therefore, you need at least 3.15 megapixels to print a 5×7 photo at 300 DPI. Most modern cameras and smartphones have sensors with more than enough megapixels for this size print.
15. How Do I Choose the Right Photo Paper for 5×7 Prints?
Choosing the right photo paper can significantly enhance the look and feel of your 5×7 prints. Here are some factors to consider:
-
Paper Finish:
- Glossy: Enhances colors and contrast, creating a vibrant look. Ideal for photos with rich colors and sharp details.
- Matte: Reduces glare and provides a more subtle, understated look. Good for black and white photos and portraits.
- Satin/Luster: Offers a balance between glossy and matte, with a slight sheen and good color reproduction.
- Metallic: Adds a unique metallic sheen to the print, enhancing highlights and creating a modern look.
-
Paper Weight:
- Heavier paper (measured in pounds or grams per square meter) feels more substantial and durable.
- Choose a paper weight that is appropriate for the intended use. Lighter paper is fine for casual prints, while heavier paper is better for archival prints and display.
-
Paper Type:
- Resin-Coated (RC): Water-resistant and dries quickly. A good choice for general printing.
- Fiber-Based (FB): Traditional photo paper with a longer lifespan and archival qualities. Ideal for professional prints.
-
Brand and Quality:
- Choose reputable brands like Epson, Canon, and Hahnemühle for consistent quality and performance.
- Read reviews and compare different papers to find the best option for your needs.
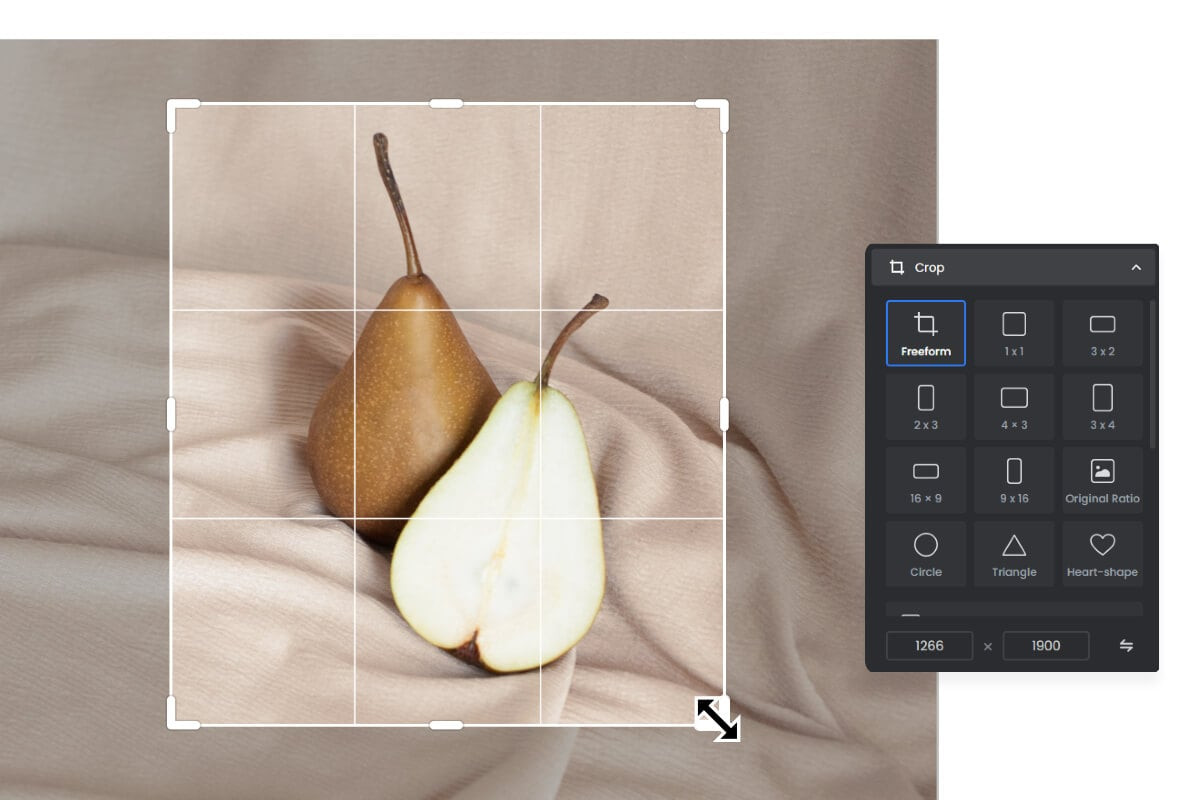
16. How to Crop an Image to 5×7 Using Fotor?
Fotor is an excellent online tool for cropping images to specific dimensions like 5×7. Here’s how to do it:
-
Go to Fotor’s Website:
- Navigate to Fotor’s online photo editor.
-
Upload Your Image:
- Click on the “Open Image” button to upload the photo you want to crop.
-
Select the Crop Tool:
- In the Fotor editor, find and select the “Crop” tool.
-
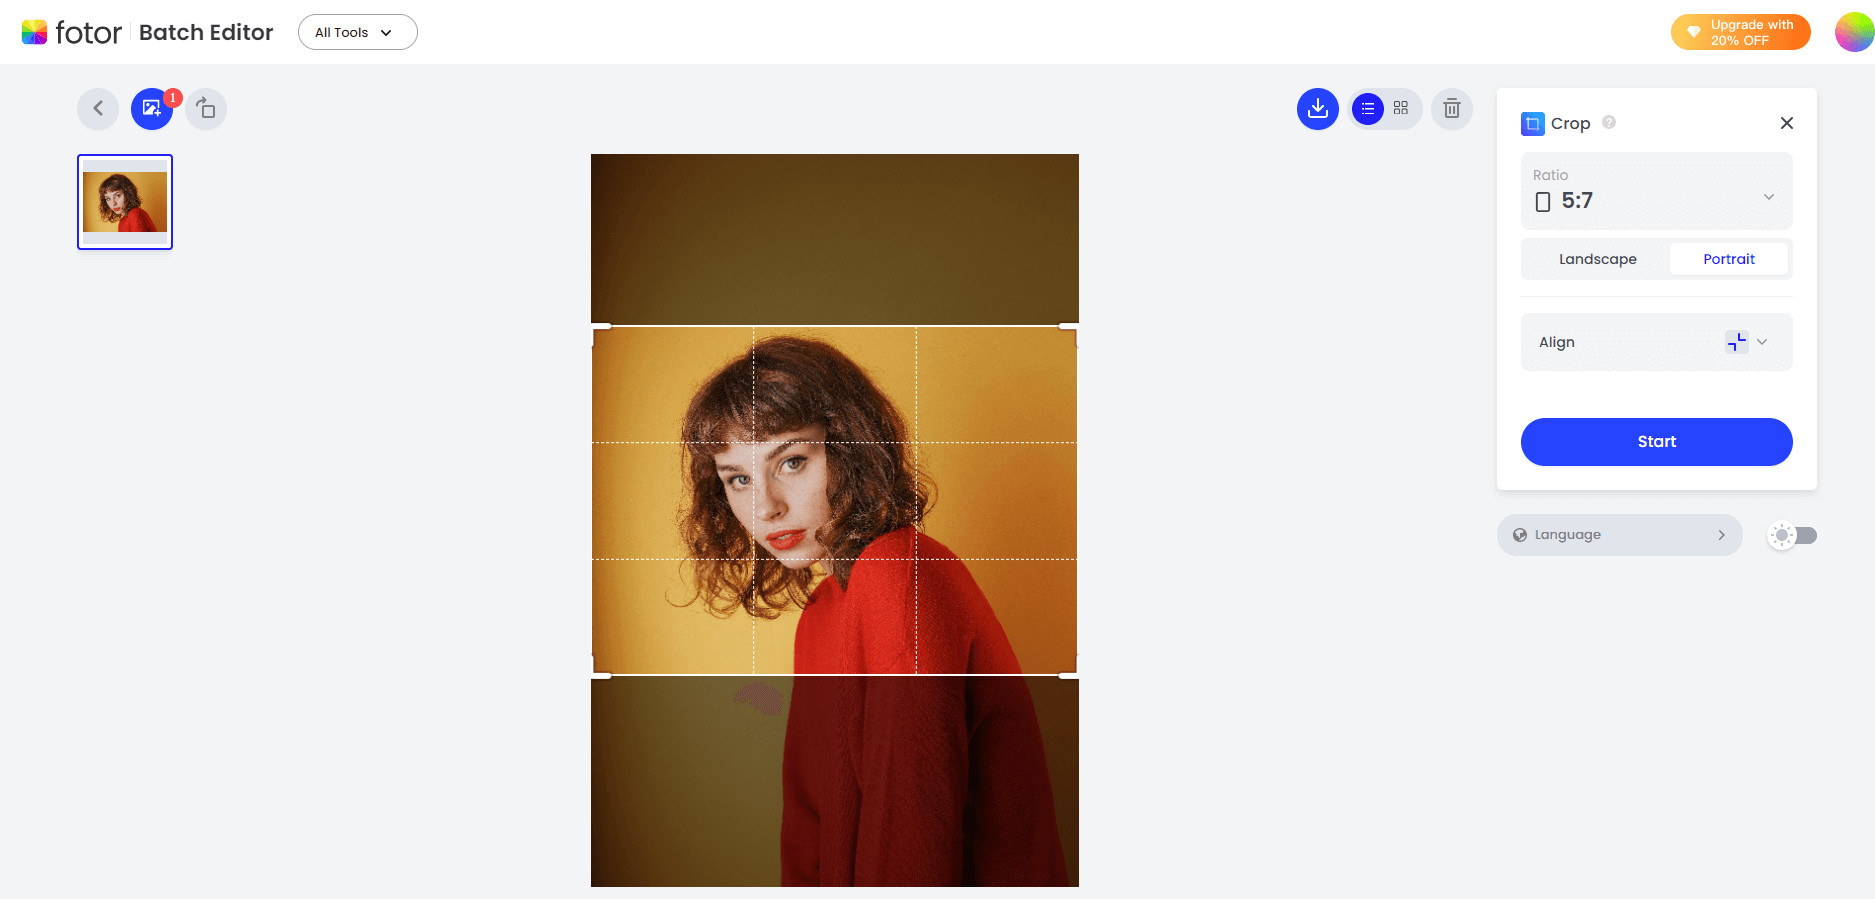
Set the Aspect Ratio:
- Choose the “Ratio” option and select “5:7” from the preset aspect ratios. You can also manually enter the ratio if needed.
-
Adjust the Crop Area:
- Drag the corners of the crop box to adjust the area you want to keep. Ensure the important parts of your image are within the crop area.
-
Apply the Crop:
- Click the “Apply” button to crop the image.
-
Save Your Cropped Image:
- Click the “Save” button and choose your desired file format (JPEG, PNG) and quality settings. Download the cropped 5×7 image to your computer.
Close-up of a printed 5×7 photo at 300 DPI, showcasing sharp details and clarity
17. What are Some Creative Ideas for Using 5×7 Photos?
The 5×7 photo size is perfect for a variety of creative projects:
-
Personalized Photo Albums:
- Create a custom photo album with 5×7 prints of your favorite memories.
-
DIY Greeting Cards:
- Design your own greeting cards for birthdays, holidays, and special occasions.
-
Wall Collages:
- Arrange a collection of 5×7 photos on a wall to create a unique and personalized display.
-
Gift Ideas:
- Frame a 5×7 photo as a thoughtful and affordable gift for friends and family.
-
Scrapbooking:
- Use 5×7 photos in your scrapbooking projects to add visual interest and preserve memories.
-
Event Decorations:
- Print 5×7 photos to use as decorations for parties, weddings, and other events.
18. What Are the Best Cameras for Capturing Images Suitable for 5×7 Prints?
Choosing the right camera is essential for capturing high-quality images that look great as 5×7 prints. Here are some of the best cameras for this purpose:
-
Sony Alpha Series (e.g., A6000, A7 III):
- Known for their excellent image quality, fast autofocus, and compact size.
- Suitable for both amateur and professional photographers.
-
Canon EOS Series (e.g., Rebel T8i, EOS 90D):
- Offers a wide range of features and user-friendly interface.
- Great for beginners and experienced photographers alike.
-
Nikon D Series (e.g., D3500, D7500):
- Renowned for their durability, image quality, and extensive lens selection.
- A solid choice for various photography styles.
-
Fujifilm X Series (e.g., X-T30, X-T4):
- Features retro-inspired designs and excellent image quality.
- Known for their film simulation modes that produce unique and appealing colors.
-
Smartphone Cameras (e.g., iPhone, Samsung Galaxy):
- Modern smartphones can capture impressive photos with sufficient resolution for 5×7 prints.
- Convenient and versatile for everyday photography.
19. How to Optimize Photos for Printing?
Optimizing your photos for printing ensures the best possible results. Here are some tips:
-
Adjust Exposure and Contrast:
- Ensure your photos are properly exposed with good contrast. Adjust the brightness and contrast levels in your photo editing software.
-
Correct Color Balance:
- Adjust the color balance to ensure accurate color representation. Correct any color casts that may be present in the image.
-
Sharpen the Image:
- Apply a slight sharpening filter to enhance the details and make the image look crisper.
-
Remove Noise:
- Reduce noise in your photos, especially if they were taken in low-light conditions.
-
Crop and Resize:
- Crop the image to the desired aspect ratio (5:7) and resize it to the appropriate pixel dimensions for printing (e.g., 1500 x 2100 pixels at 300 DPI).
-
Save in the Right Format:
- Save your optimized photo in a suitable file format, such as JPEG for general use or TIFF for professional printing.
20. Why is DPI Important for Printing?
DPI (dots per inch) refers to the number of ink dots that a printer places on a piece of paper per inch. It directly affects the level of detail and sharpness in a printed image. Here’s why it’s important:
- Image Sharpness: Higher DPI results in sharper, more detailed prints.
- Print Quality: Lower DPI can lead to pixelation and a loss of detail, especially in fine lines and textures.
- Professional Standards: 300 DPI is generally considered the standard for high-quality prints, meeting the expectations of professional photographers and printing services.
- Viewing Distance: The required DPI may vary depending on the viewing distance. Prints viewed from a distance can often get away with lower DPI, while prints viewed up close require higher DPI for optimal sharpness.
21. What are the Benefits of Using a Photo Editing Software for 5×7 Photos?
Photo editing software provides a wide range of tools and features that can significantly enhance the quality and appearance of your 5×7 photos. Here are some benefits:
-
Enhance Image Quality:
- Adjust exposure, contrast, color balance, and sharpness to improve the overall look of your photos.
-
Remove Imperfections:
- Remove blemishes, spots, and other imperfections from your photos.
-
Crop and Resize:
- Crop your photos to the desired aspect ratio and resize them to the appropriate pixel dimensions for printing.
-
Apply Filters and Effects:
- Add creative filters and effects to enhance the mood and style of your photos.
-
Correct Distortions:
- Correct lens distortions and perspective issues in your photos.
-
Organize and Manage:
- Organize and manage your photo library with tagging, rating, and other organizational tools.
22. What Are the Best Online Resources for Learning More About Photography?
There are numerous online resources available for learning more about photography. Here are some of the best:
-
Websites and Blogs:
- dfphoto.net: Offers tutorials, tips, and inspiration for photographers of all skill levels.
- Digital Photography School: Provides articles, tutorials, and forums for learning about digital photography.
- Petapixel: Features news, reviews, and tutorials on photography and related topics.
- Fstoppers: Offers in-depth articles, tutorials, and behind-the-scenes content for professional photographers.
-
YouTube Channels:
- Peter McKinnon: Offers tutorials, tips, and vlogs on photography and filmmaking.
- Jessica Kobeissi: Provides tutorials on portrait photography, posing, and editing.
- Sean Tucker: Shares insightful videos on photography, creativity, and visual storytelling.
-
Online Courses:
- Skillshare: Offers a variety of photography courses taught by experienced professionals.
- CreativeLive: Provides live workshops and on-demand courses on photography and other creative topics.
- Lynda.com (LinkedIn Learning): Offers a wide range of courses on photography and related software.
23. How Do I Choose the Right Resolution for Displaying 5×7 Photos on a Digital Screen?
When displaying 5×7 photos on a digital screen, the resolution you choose will affect how the image looks. Here’s what to consider:
-
Screen Resolution: The resolution of the screen you are displaying the photo on will determine the maximum number of pixels that can be displayed.
-
Pixel Dimensions: Match the pixel dimensions of the photo to the resolution of the screen. If the photo has fewer pixels than the screen, it may appear pixelated or blurry. If the photo has more pixels than the screen, it will be scaled down, which can reduce sharpness.
-
Common Screen Resolutions:
- HD (1280×720 pixels): Suitable for smaller screens.
- Full HD (1920×1080 pixels): A common resolution for computer monitors and TVs.
- 4K (3840×2160 pixels): Offers very high detail and is ideal for large screens.
-
Recommended Resolution: For displaying a 5×7 photo on a digital screen, a resolution of 1500 x 2100 pixels (300 DPI) is a good starting point. Adjust as needed based on the screen resolution and viewing distance.
24. What are the Best Practices for Storing and Archiving 5×7 Photos?
Proper storage and archiving are essential for preserving your 5×7 photos for years to come. Here are some best practices:
-
Digital Storage:
- Multiple Backups: Create multiple backups of your photos, including on-site and off-site backups.
- Cloud Storage: Use cloud storage services like Google Drive, Dropbox, or iCloud to store your photos securely.
- External Hard Drives: Store your photos on external hard drives and keep them in a safe, dry place.
- File Format: Save your photos in a lossless format like TIFF or PNG to preserve maximum quality.
-
Physical Storage:
- Archival Photo Albums: Use archival photo albums with acid-free pages to protect your prints.
- Storage Environment: Store your photos in a cool, dry, and dark environment to prevent fading and damage.
- Handling: Handle your prints with care to avoid scratches and fingerprints.
-
Regular Maintenance:
- Regularly check your storage media to ensure they are functioning properly.
- Update your backups and storage systems as needed.
- Migrate your photos to new storage formats as technology evolves.
25. How Can I Use 5×7 Photos for Marketing My Photography Business?
5×7 photos can be a valuable tool for marketing your photography business. Here are some ideas:
-
Portfolio Samples:
- Create a portfolio of your best 5×7 prints to showcase your work to potential clients.
-
Promotional Materials:
- Include 5×7 prints in your promotional materials, such as brochures and flyers.
-
Client Gifts:
- Give 5×7 prints as gifts to your clients to thank them for their business.
-
Exhibitions and Events:
- Display your 5×7 prints at local exhibitions and events to reach a wider audience.
-
Online Marketing:
- Share your 5×7 photos on social media and your website to attract new clients.
-
Print Sales:
- Offer 5×7 prints for sale on your website or at local markets.
By following these tips, you can effectively use 5×7 photos to promote your photography business and attract new clients.
In conclusion, understanding the pixel dimensions of a 5×7 photo is essential for achieving high-quality prints and digital displays; dfphoto.net is your ultimate resource for mastering these techniques. Whether you are a professional photographer or a hobbyist, knowing how to optimize your images for the 5×7 format will help you create stunning visuals that capture the beauty of the world around you. Address: 1600 St Michael’s Dr, Santa Fe, NM 87505, United States. Phone: +1 (505) 471-6001. Website: dfphoto.net.
FAQ: 5×7 Photo Pixel Perfection
- How many pixels is a 5×7 photo at 300 DPI?
A 5×7 photo at 300 DPI is 1500 x 2100 pixels. - What is the best resolution for printing a 5×7 photo?
300 DPI is generally recommended for high-quality prints. - Can I use a lower resolution for a 5×7 photo?
Yes, but the print quality may be lower. 150 DPI (750 x 1050 pixels) can suffice for basic prints. - What file format should I use for a 5×7 photo?
JPEG is common for general use, while TIFF is best for professional printing due to its lossless quality. - How do I resize an image to 5×7 in Photoshop?
Go to Image > Image Size, enter the dimensions (5×7 inches), and set the resolution to 300 DPI. - What is the aspect ratio of a 5×7 photo?
The aspect ratio is 5:7 (or approximately 0.714). - What equipment do I need for high-quality 5×7 photos?
A DSLR or mirrorless camera, good lens, and proper lighting are essential. - How can I improve the quality of my 5×7 prints?
Start with a high-resolution image, calibrate your monitor, edit carefully, and use a good printing service. - What DPI do online printing services require for 5×7 photos?
Most recommend 300 DPI for best quality. - What are some creative uses for 5×7 photos?
Personalized photo albums, DIY greeting cards, and wall collages.
Ready to elevate your photography skills and create stunning 5×7 prints? Visit dfphoto.net for in-depth tutorials, inspiring galleries, and a supportive community of fellow photography enthusiasts. Discover the tips, tricks, and tools you need to master the art of photography and bring your creative vision to life. Join us at dfphoto.net and start your photographic journey today!