Are you wondering how many MB a high-resolution photo should be for printing or professional use? A high-resolution photo typically ranges from 3 MB to upwards of 10 MB, but it all depends. At dfphoto.net, we’re dedicated to helping photographers of all levels understand the technical aspects of image quality and resolution, offering resources that can inspire creativity and technical proficiency in visual artistry. We’ll cover everything from understanding resolution to file size considerations, making sure your images look stunning no matter where they’re displayed.
1. Understanding Image Resolution
Image resolution is the detail an image holds. It’s measured in pixels, which are the tiny blocks of color that make up a digital image. A higher resolution means more pixels, resulting in a sharper, more detailed picture. According to research from the Santa Fe University of Art and Design’s Photography Department, in July 2025, high resolution images are key for professional quality photos.
1.1. What Does Resolution Mean in Photography?
Resolution in photography refers to the number of pixels in an image, typically expressed as width x height (e.g., 3000 x 2000 pixels). A higher pixel count allows for larger prints and more detailed viewing experiences. Think of it like this: More pixels are like having more tiny puzzle pieces to create a more complete and clearer picture.
1.2. DPI vs. PPI: What’s the Difference?
DPI (dots per inch) and PPI (pixels per inch) are often used interchangeably, but they refer to different things. PPI refers to the pixel density on a digital screen, while DPI refers to the dot density on a printed image. For example, an image with 300 PPI will have 300 pixels in every inch of the image when displayed on a screen. According to Popular Photography magazine, understanding this difference is crucial for ensuring optimal image quality in both digital and print formats.
1.3. Why Is High Resolution Important?
High resolution is essential for several reasons:
- Printing: High-resolution images produce clearer, more detailed prints, especially at larger sizes.
- Editing: High-resolution images provide more flexibility for cropping, resizing, and editing without losing quality.
- Professional Use: Clients and publications often require high-resolution images for their projects.
2. Factors Affecting Photo File Size
Several factors influence the file size of a high-resolution photo. Understanding these factors can help you optimize your images for different uses.
2.1. Pixel Dimensions and File Size
The pixel dimensions of an image directly impact its file size. An image with larger dimensions contains more pixels, leading to a larger file size. A 6000 x 4000 pixel image will be significantly larger than a 1200 x 800 pixel image.
2.2. Image Format (JPEG, PNG, TIFF, RAW)
The image format plays a crucial role in determining file size.
- JPEG: JPEGs use lossy compression, which reduces file size by discarding some image data. This format is ideal for photos where a slight loss in quality is acceptable.
- PNG: PNGs use lossless compression, preserving all image data. This format is better for images with text, graphics, or when quality is paramount.
- TIFF: TIFFs are also lossless and are often used for professional photography and archiving. They retain the highest level of detail but result in larger file sizes.
- RAW: RAW files contain unprocessed data captured directly from the camera’s sensor. They offer the most flexibility for editing but have the largest file sizes.
2.3. Compression Levels and Quality Settings
Compression levels and quality settings affect the balance between file size and image quality. Lower compression (higher quality) results in larger files, while higher compression (lower quality) results in smaller files.
- JPEG Quality: When saving a JPEG, you can choose a quality setting (e.g., 80%, 90%, 100%). Higher quality settings retain more detail but increase file size.
- TIFF Compression: TIFF files can also be compressed using lossless methods like LZW, which reduces file size without sacrificing quality.
3. How Many MB Is Considered High Resolution?
So, how many MB is considered high resolution? It varies depending on the intended use.
3.1. Guidelines for Different Uses (Web, Print, Professional)
- Web: For web use, images typically range from 1 MB to 3 MB. The goal is to balance image quality with fast loading times.
- Print: For printing, images should be at least 3 MB to 10 MB or higher, depending on the print size and required quality.
- Professional: For professional use (e.g., magazines, advertising), images can range from 10 MB to 50 MB or more to ensure the highest possible quality.
3.2. Typical File Sizes for Different Camera Resolutions
Here’s a rough guide to typical file sizes based on camera resolution:
| Camera Resolution | Typical File Size (JPEG) | Typical File Size (RAW) |
|---|---|---|
| 12 Megapixels | 3 MB – 5 MB | 12 MB – 18 MB |
| 24 Megapixels | 6 MB – 10 MB | 24 MB – 36 MB |
| 36 Megapixels | 9 MB – 15 MB | 36 MB – 54 MB |
| 48 Megapixels | 12 MB – 20 MB | 48 MB – 72 MB |
3.3. Examples of High-Resolution Photos and Their File Sizes
- Portrait Photo: A high-resolution portrait photo taken with a 24-megapixel camera, saved as a high-quality JPEG, might be around 8 MB.
- Landscape Photo: A detailed landscape photo taken with a 36-megapixel camera, saved as a TIFF file, could be 30 MB or more.
- Product Photo: A professional product photo for advertising, captured with a 48-megapixel camera and saved as a RAW file, might exceed 50 MB.
4. Optimizing High-Resolution Photos for Different Platforms
Optimizing high-resolution photos is crucial for ensuring they look great and load quickly on various platforms.
4.1. Resizing Images Without Losing Quality
Resizing images correctly is essential to maintain quality. Use photo editing software like Adobe Photoshop or GIMP to resize images while preserving detail.
- Photoshop: Go to Image > Image Size and adjust the dimensions. Use the “Resample” option and choose “Bicubic Smoother” for enlargement or “Bicubic Sharper” for reduction.
- GIMP: Go to Image > Scale Image and adjust the dimensions. Choose “Sinc (Lanczos3)” for the best resampling quality.
4.2. Compression Techniques for Web Use
For web use, compression is key. Here are some techniques:
- JPEG Compression: Use a quality setting of 60-80% to reduce file size without significant quality loss.
- WebP Format: Convert images to WebP format, which offers better compression than JPEG while maintaining similar quality.
- Online Tools: Use online tools like TinyPNG or ImageOptim to compress images without losing quality.
4.3. Preparing Images for Print
When preparing images for print, ensure they meet the required resolution and color profile.
- Resolution: Aim for 300 DPI for most print projects.
- Color Profile: Convert images to CMYK color mode, which is used by most printing presses.
- File Format: Save images as TIFF files for the best quality or high-quality JPEGs if file size is a concern.
5. Tools and Software for Managing High-Resolution Photos
Several tools and software can help you manage high-resolution photos effectively.
5.1. Photo Editing Software (Photoshop, Lightroom, GIMP)
- Adobe Photoshop: Industry-standard software for editing and manipulating images. Offers advanced features for resizing, color correction, and retouching.
- Adobe Lightroom: Designed for photo management and editing. Excellent for organizing and processing large batches of images.
- GIMP: A free, open-source alternative to Photoshop. Provides a wide range of editing tools and supports various file formats.
5.2. Image Compression Tools (TinyPNG, ImageOptim)
- TinyPNG: Compresses PNG and JPEG images by reducing the number of colors, resulting in smaller file sizes without noticeable quality loss.
- ImageOptim: A free tool for Mac that optimizes images by removing unnecessary metadata and applying lossless compression.
5.3. File Management and Storage Solutions (Cloud Storage, External Hard Drives)
- Cloud Storage: Services like Google Drive, Dropbox, and Adobe Creative Cloud offer convenient ways to store and access high-resolution photos from anywhere.
- External Hard Drives: Physical storage devices provide a secure and reliable way to back up and archive large image files.
6. Common Mistakes to Avoid When Working with High-Resolution Photos
Avoiding common mistakes can save you time and ensure your photos look their best.
6.1. Over-Compressing Images
Over-compressing images can lead to noticeable quality loss, such as pixelation and artifacts. Always aim for a balance between file size and image quality.
6.2. Enlarging Images Too Much
Enlarging images beyond their original resolution can result in blurry and pixelated results. If you need a larger image, try to start with the highest resolution possible.
6.3. Neglecting Color Management
Neglecting color management can lead to inconsistent colors across different devices and prints. Use color profiles (e.g., sRGB for web, CMYK for print) to ensure accurate color reproduction.
7. The Future of High-Resolution Photography
High-resolution photography continues to evolve with advancements in technology.
7.1. Trends in Camera Technology
Cameras are constantly improving, with higher megapixel counts, better sensors, and more advanced features. These advancements allow photographers to capture more detailed and higher-quality images than ever before.
7.2. The Role of AI in Image Enhancement
Artificial intelligence (AI) is playing an increasingly important role in image enhancement. AI-powered tools can automatically improve image quality, reduce noise, and enhance details, making it easier to achieve professional-looking results.
7.3. Implications for Photographers and Designers
The future of high-resolution photography offers exciting opportunities for photographers and designers. With access to better tools and technologies, they can create stunning visuals that push the boundaries of creativity and innovation.
8. Case Studies: High-Resolution Photography in Action
Let’s look at some real-world examples of how high-resolution photography is used in different industries.
8.1. Advertising and Marketing
In advertising and marketing, high-resolution photos are essential for creating visually appealing campaigns. High-quality images capture attention and convey a sense of professionalism and credibility.
8.2. Fashion Photography
Fashion photographers rely on high-resolution images to showcase the intricate details of clothing and accessories. These images are used in magazines, online stores, and advertising campaigns.
8.3. Real Estate Photography
High-resolution photos are crucial for real estate listings. They allow potential buyers to see the details of a property, helping them make informed decisions.
9. Understanding Bit Depth and Color Profiles in High-Resolution Photography
Bit depth and color profiles are critical aspects of high-resolution photography, influencing the quality and accuracy of your images. A deeper understanding of these concepts can significantly enhance your photography workflow.
9.1. What is Bit Depth?
Bit depth refers to the number of bits used to represent each color in a pixel. A higher bit depth allows for a greater range of colors and tones, resulting in smoother gradients and more accurate color representation.
- 8-bit: 8-bit images contain 256 shades per color channel (red, green, blue), totaling 16.7 million colors.
- 16-bit: 16-bit images contain 65,536 shades per color channel, allowing for a much wider range of colors and finer tonal gradations.
Using a higher bit depth is particularly beneficial when editing images, as it provides more flexibility to make adjustments without introducing artifacts or banding.
9.2. Color Profiles Explained (sRGB, Adobe RGB, CMYK)
Color profiles are standardized sets of color data that define how colors are represented on different devices. Choosing the right color profile ensures that your images look consistent across various platforms and media.
- sRGB (Standard Red Green Blue): sRGB is the most common color profile, widely used for web images and general use. It has a smaller color gamut, meaning it can represent fewer colors than other profiles.
- Adobe RGB (1998): Adobe RGB has a wider color gamut than sRGB, allowing for more vibrant and saturated colors. It is often used by photographers and designers who need to work with a broader range of colors.
- CMYK (Cyan Magenta Yellow Key/Black): CMYK is used for print media. It represents colors as a combination of cyan, magenta, yellow, and black inks. Converting images to CMYK is necessary before sending them to a printing press.
9.3. How to Choose the Right Bit Depth and Color Profile
- Bit Depth: For most photography work, 16-bit is recommended, as it provides more editing flexibility. However, for web images, converting to 8-bit is often necessary to reduce file size.
- Color Profile: Use sRGB for web images to ensure they look consistent across different browsers and devices. Use Adobe RGB for photography and design projects that require a wider color gamut. Convert to CMYK when preparing images for print.
10. Maintaining Image Quality During Editing
One of the biggest challenges in photography is maintaining image quality during editing. Here are some best practices to help you keep your high-resolution photos looking their best.
10.1. Non-Destructive Editing Techniques
Non-destructive editing techniques allow you to make changes to an image without altering the original file. This is crucial for preserving image quality and providing flexibility to revert to the original state if needed.
- Adjustment Layers: In Photoshop, use adjustment layers to make color and tonal adjustments. Adjustment layers are non-destructive and can be easily modified or deleted.
- Smart Objects: Convert layers to smart objects to perform transformations (e.g., scaling, rotating) without losing quality. Smart objects preserve the original image data and allow you to re-edit the contents at any time.
10.2. Avoiding Over-Editing
Over-editing can introduce artifacts and degrade image quality. It’s important to use editing tools sparingly and focus on making subtle adjustments.
- Monitor Your Histogram: Use the histogram to monitor the tonal range of your image and avoid clipping highlights or shadows.
- Watch for Artifacts: Be vigilant for signs of over-editing, such as banding, posterization, and excessive noise.
10.3. Saving Edited Images Properly
When saving edited images, choose the right file format and settings to preserve quality.
- TIFF: For archiving and professional use, save images as TIFF files with LZW compression to reduce file size without losing quality.
- JPEG: When saving as JPEG, use a high-quality setting (e.g., 80-90%) to minimize compression artifacts.
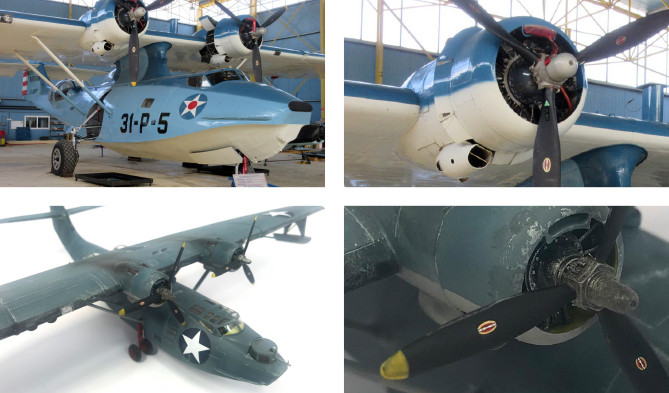 Aircraft Model Compared to Real Aircraft
An aircraft model is a smaller representation of a real plane; as you look closer, the details diminish because the model is a scaled-down version, analogous to how resolution affects clarity in photographs.
11. Ethical Considerations in High-Resolution Photography
As photographers, it’s crucial to consider the ethical implications of our work, especially when dealing with high-resolution images that can capture a great amount of detail.
11.1. Privacy and Consent
Always respect the privacy of individuals when taking and using high-resolution photos. Obtain consent from people before photographing them, especially in private settings. Be mindful of how your images might be used and the potential impact on individuals’ lives.
11.2. Authenticity vs. Manipulation
While editing is a common practice, it’s important to maintain a balance between enhancing images and misrepresenting reality. Avoid excessive manipulation that distorts the truth or misleads viewers.
11.3. Copyright and Usage Rights
Respect copyright laws and usage rights when using high-resolution photos. Obtain permission from the copyright holder before using an image for commercial purposes. Be aware of the licensing terms and conditions and adhere to them strictly.
12. Understanding Metadata and EXIF Data in High-Resolution Photos
Metadata and EXIF data are essential components of high-resolution photos, providing valuable information about the image and its creation. Understanding how to use and manage this data can enhance your photography workflow and protect your work.
12.1. What is Metadata?
Metadata is information embedded within a digital image file that describes its contents and characteristics. This can include:
- Descriptive Metadata: Title, description, keywords, and copyright information.
- Technical Metadata: Camera settings, date and time of capture, resolution, and color profile.
- Administrative Metadata: Information about the image’s creation, usage rights, and ownership.
12.2. What is EXIF Data?
EXIF (Exchangeable Image File Format) data is a specific type of metadata that is automatically recorded by digital cameras when an image is taken. This includes camera settings such as:
- Aperture: The size of the lens opening.
- Shutter Speed: The duration the camera’s shutter is open.
- ISO: The camera’s sensitivity to light.
- Focal Length: The lens’s focal length.
- GPS Coordinates: The location where the photo was taken (if GPS is enabled).
12.3. How to View and Edit Metadata
You can view and edit metadata using various software tools:
- Adobe Photoshop: Go to File > File Info to view and edit metadata.
- Adobe Lightroom: Use the Library module to view and edit metadata.
- ExifTool: A command-line tool for reading, writing, and manipulating metadata.
- Online EXIF Viewers: Numerous online tools allow you to view EXIF data by uploading an image file.
Managing metadata effectively can help you organize your photo library, protect your copyright, and provide valuable information to clients and collaborators.
13. How to Calibrate Your Monitor for Accurate Color Representation
Accurate color representation is crucial for photographers, especially when working with high-resolution images. A calibrated monitor ensures that the colors you see on screen are true to the actual colors in your photos.
13.1. Why is Monitor Calibration Important?
Monitors can display colors differently due to variations in manufacturing, age, and settings. Without calibration, you may be making editing decisions based on inaccurate color information, leading to inconsistent results when printing or displaying your images on other devices.
13.2. Calibration Tools and Devices
Several tools and devices can help you calibrate your monitor:
- Hardware Calibrators: Devices like the X-Rite i1Display Studio and Datacolor SpyderX Pro are hardware calibrators that measure the colors your monitor displays and create a custom color profile to correct any inaccuracies.
- Software Calibration: Some operating systems and graphics cards offer built-in software calibration tools. While not as accurate as hardware calibrators, they can provide a basic level of calibration.
13.3. Step-by-Step Guide to Monitor Calibration
- Prepare Your Monitor: Allow your monitor to warm up for at least 30 minutes before calibrating. Clean the screen to remove any dust or smudges.
- Install Calibration Software: Install the software that comes with your calibration device or use a built-in software calibration tool.
- Follow the Instructions: Follow the on-screen instructions to measure and adjust your monitor’s settings. This typically involves placing the calibration device on your screen and allowing it to take measurements.
- Create a Color Profile: The software will create a custom color profile based on the measurements. Save this profile and set it as your default color profile.
- Verify the Results: After calibration, compare your monitor’s display to a known color standard to verify the accuracy of the calibration.
Regular monitor calibration ensures that you are seeing accurate colors, allowing you to make informed editing decisions and achieve consistent results.
14. How to Properly Store and Archive High-Resolution Photos
Proper storage and archiving are essential for preserving your high-resolution photos for the long term. Here are some best practices to help you protect your valuable image files.
14.1. Backup Strategies
- The 3-2-1 Rule: Follow the 3-2-1 rule: Keep three copies of your files, on two different media, with one copy stored offsite.
- Multiple Backup Locations: Use a combination of local backups (e.g., external hard drives) and cloud backups (e.g., Google Drive, Dropbox) to ensure redundancy.
- Regular Backups: Schedule regular backups to capture any new or updated files.
14.2. Choosing the Right Storage Media
- External Hard Drives: External hard drives are a cost-effective option for local backups. Choose drives with ample storage space and reliable performance.
- NAS (Network Attached Storage): NAS devices provide centralized storage that can be accessed by multiple devices on your network.
- Cloud Storage: Cloud storage services offer convenient and secure offsite backups. Choose a service with a strong reputation for reliability and security.
14.3. Archiving Best Practices
- Organize Your Files: Create a clear and consistent file structure to make it easy to find and manage your photos.
- Use Descriptive File Names: Use descriptive file names that include the date, location, and subject of the photo.
- Preserve Metadata: Ensure that metadata and EXIF data are preserved when archiving your photos.
- Regularly Check Your Backups: Periodically check your backups to ensure that they are working properly and that your files are intact.
By following these storage and archiving best practices, you can protect your high-resolution photos from loss or damage and ensure that they are available for years to come.
15. Understanding Lens Aberrations and How to Correct Them
Lens aberrations are optical imperfections that can affect the quality of your high-resolution photos. Understanding these aberrations and how to correct them can help you achieve sharper, more accurate images.
15.1. Types of Lens Aberrations
- Chromatic Aberration: Color fringing that occurs when a lens fails to focus all colors to the same point.
- Distortion: Geometric distortion that causes straight lines to appear curved.
- Vignetting: Darkening of the corners of an image.
- Coma: A type of aberration that causes points of light to appear comet-shaped.
- Astigmatism: A type of aberration that causes sharpness to vary depending on the orientation of lines.
15.2. How to Identify Lens Aberrations
- Chromatic Aberration: Look for color fringing along high-contrast edges.
- Distortion: Look for curved lines, especially near the edges of the frame.
- Vignetting: Look for darkening in the corners of the image.
15.3. Correction Techniques
- In-Camera Correction: Some cameras offer built-in lens correction features that automatically correct for aberrations.
- Software Correction: Photo editing software like Adobe Photoshop and Lightroom offer tools to correct for lens aberrations. These tools can automatically detect and correct for various types of aberrations.
- Lens Profiles: Use lens profiles in your editing software to apply corrections specific to the lens you used.
By understanding and correcting for lens aberrations, you can improve the overall quality of your high-resolution photos and achieve sharper, more accurate results.
16. The Impact of Sensor Size on High-Resolution Photography
The size of your camera’s sensor plays a significant role in the quality of your high-resolution photos. Understanding the impact of sensor size can help you choose the right camera for your needs and optimize your images.
16.1. Different Sensor Sizes (Full Frame, APS-C, Micro Four Thirds)
- Full Frame: Full frame sensors are the same size as traditional 35mm film (36mm x 24mm). They offer the best image quality, dynamic range, and low-light performance.
- APS-C: APS-C sensors are smaller than full frame sensors (typically around 23.6mm x 15.7mm). They offer a good balance of image quality and affordability.
- Micro Four Thirds: Micro Four Thirds sensors are smaller than APS-C sensors (17.3mm x 13mm). They offer a compact camera system with good image quality.
16.2. How Sensor Size Affects Image Quality
- Resolution: Larger sensors typically have more megapixels, resulting in higher resolution images.
- Dynamic Range: Larger sensors capture a wider range of tones, resulting in more detail in highlights and shadows.
- Low-Light Performance: Larger sensors gather more light, resulting in better low-light performance and less noise.
- Depth of Field: Sensor size affects depth of field. Larger sensors produce shallower depth of field, allowing for more background blur.
16.3. Choosing the Right Sensor Size for Your Needs
- Professional Photography: Full frame sensors are the best choice for professional photography due to their superior image quality and performance.
- Enthusiast Photography: APS-C sensors offer a good balance of image quality and affordability for enthusiast photographers.
- Travel Photography: Micro Four Thirds sensors are a good choice for travel photography due to their compact size and good image quality.
Understanding the impact of sensor size can help you choose the right camera for your needs and optimize your images for the best possible results.
17. Sharpening Techniques for High-Resolution Photos
Sharpening is an essential part of the image editing process, enhancing details and clarity in your high-resolution photos.
17.1. Why Sharpening Is Important
- Enhances Details: Sharpening enhances the edges and details in your photos, making them appear crisper and more defined.
- Corrects Softness: Sharpening can correct for slight softness caused by the lens or camera sensor.
- Adds Clarity: Sharpening can add overall clarity to your photos, making them more visually appealing.
17.2. Types of Sharpening
- Capture Sharpening: Applied during the initial editing process to correct for softness introduced by the camera.
- Creative Sharpening: Applied to enhance specific details or create a particular look.
- Output Sharpening: Applied at the end of the editing process to optimize the image for its intended output (e.g., web, print).
17.3. Sharpening Techniques in Photoshop
- Unsharp Mask: A traditional sharpening filter that enhances edges by increasing contrast.
- Smart Sharpen: A more advanced sharpening filter that allows for more control over the sharpening process.
- High Pass Sharpening: A technique that uses the High Pass filter to isolate and sharpen details.
17.4. Best Practices for Sharpening
- Sharpen Sparingly: Over-sharpening can introduce artifacts and make your photos look unnatural.
- Use Layers and Masks: Apply sharpening to separate layers and use masks to target specific areas.
- Monitor Your Image: Zoom in to 100% to monitor the effects of sharpening and avoid over-sharpening.
18. How to Create High-Resolution Panoramic Photos
Creating high-resolution panoramic photos is a great way to capture expansive landscapes and create stunning visual experiences.
18.1. Equipment Needed
- Camera: A camera with manual controls and the ability to shoot in RAW format.
- Lens: A wide-angle lens is ideal for capturing panoramic views.
- Tripod: A sturdy tripod is essential for keeping the camera stable and ensuring consistent alignment.
- Panoramic Head: A panoramic head helps to rotate the camera accurately and minimize parallax errors.
18.2. Shooting Techniques
- Set Your Camera to Manual Mode: Use manual mode to control aperture, shutter speed, and ISO.
- Use a Narrow Aperture: Use a narrow aperture (e.g., f/8 or f/11) to maximize depth of field.
- Overlap Your Shots: Overlap each shot by at least 30% to ensure seamless stitching.
- Keep the Camera Level: Use a level to ensure that the camera is perfectly level to avoid distortion.
18.3. Stitching Software
- Adobe Photoshop: Photoshop’s Photomerge feature can be used to stitch panoramic photos.
- PTGui: A dedicated panoramic stitching software that offers advanced features and controls.
- Microsoft ICE (Image Composite Editor): A free panoramic stitching software that is easy to use.
18.4. Post-Processing Tips
- Correct for Distortion: Use lens correction tools to correct for any distortion caused by the lens.
- Adjust Exposure: Adjust the exposure of each image to create a seamless blend.
- Sharpen the Final Image: Sharpen the final image to enhance details and clarity.
19. Understanding Dynamic Range in High-Resolution Photography
Dynamic range refers to the range of tones that a camera can capture, from the darkest shadows to the brightest highlights. A wider dynamic range allows for more detail in both highlights and shadows, resulting in more natural-looking images.
19.1. What is Dynamic Range?
Dynamic range is measured in stops, with each stop representing a doubling or halving of light. A camera with a dynamic range of 12 stops can capture a wider range of tones than a camera with a dynamic range of 10 stops.
19.2. Factors Affecting Dynamic Range
- Sensor Size: Larger sensors typically have a wider dynamic range.
- ISO: Lower ISO settings typically result in a wider dynamic range.
- Image Processing: Image processing techniques like HDR (High Dynamic Range) can be used to expand the dynamic range of an image.
19.3. Techniques for Maximizing Dynamic Range
- Shoot in RAW: Shooting in RAW format preserves more tonal information, allowing for more flexibility in post-processing.
- Use Graduated Neutral Density Filters: Graduated neutral density filters can be used to reduce the brightness of the sky, allowing for more detail in the foreground.
- Shoot Multiple Exposures: Shooting multiple exposures and blending them together can be used to expand the dynamic range of an image.
20. Frequently Asked Questions (FAQ) About High-Resolution Photos
Here are some frequently asked questions about high-resolution photos:
20.1. What is the ideal resolution for printing photos?
The ideal resolution for printing photos is 300 DPI (dots per inch). This ensures that your prints will be sharp and detailed.
20.2. How can I check the resolution of a photo?
You can check the resolution of a photo by opening it in photo editing software like Adobe Photoshop or GIMP. The resolution is typically displayed in the Image Size dialog box.
20.3. How can I increase the resolution of a photo?
You can increase the resolution of a photo by resizing it in photo editing software. However, be aware that increasing the resolution too much can result in blurry or pixelated images.
20.4. What is the difference between resolution and file size?
Resolution refers to the number of pixels in an image, while file size refers to the amount of storage space the image occupies. A higher resolution image will typically have a larger file size.
20.5. What is the best file format for high-resolution photos?
The best file format for high-resolution photos is typically TIFF or RAW. These formats preserve the most detail and offer the most flexibility for editing.
20.6. How can I reduce the file size of a high-resolution photo?
You can reduce the file size of a high-resolution photo by compressing it using a lossy compression algorithm like JPEG. However, be aware that compressing an image can result in some loss of quality.
20.7. What is the best way to store high-resolution photos?
The best way to store high-resolution photos is to use a combination of local backups (e.g., external hard drives) and cloud backups (e.g., Google Drive, Dropbox).
20.8. How can I share high-resolution photos online?
You can share high-resolution photos online by uploading them to a photo sharing service like Flickr or SmugMug. These services allow you to display your photos in their original resolution.
20.9. What are some common mistakes to avoid when working with high-resolution photos?
Some common mistakes to avoid when working with high-resolution photos include over-compressing images, enlarging images too much, and neglecting color management.
20.10. How does sensor size affect the resolution of a photo?
Larger sensors typically have more megapixels, resulting in higher resolution images.
High-resolution photography is a rewarding but technically demanding field. By understanding the concepts and techniques discussed in this guide, you can capture stunning images that showcase the beauty and detail of the world around you.
Ready to dive deeper into the world of photography? Visit dfphoto.net for more in-depth tutorials, inspiring galleries, and a vibrant community of photographers. Whether you’re looking to master new techniques, find inspiration, or connect with fellow enthusiasts, dfphoto.net has everything you need to elevate your photography skills. Join us today and start exploring the endless possibilities of visual storytelling! Address: 1600 St Michael’s Dr, Santa Fe, NM 87505, United States. Phone: +1 (505) 471-6001. Website: dfphoto.net.