Uploading photos to a website might seem straightforward, but sometimes you can encounter a few hiccups. If you’re struggling to get your images online, you’re in the right place. This guide will walk you through the common methods and address potential issues, ensuring you can easily share your photos online.
Understanding Common Uploading Methods
Most websites offer a direct way to upload photos, usually through a button or link that says something like “Upload,” “Add Image,” or a similar phrase. This is typically found in areas where you create content, such as:
- Profile Pages: When updating your profile picture on social media or online forums.
- Content Management Systems (CMS): Platforms like WordPress, Wix, or Squarespace use media libraries where you upload images to use in your website content.
- Forums and Comment Sections: Many online communities allow you to attach images to your posts or comments.
- Image Hosting Services: Websites like Imgur or Flickr are specifically designed for uploading and sharing photos.
The process generally involves these steps:
- Locate the Upload Button: Look for the upload option within the webpage’s interface.
- Choose Your Photo: Clicking the upload button will open a file explorer window on your computer or device. Navigate to the folder where your photo is saved.
- Select and Open: Select the photo you want to upload and click “Open” or “Choose.”
- Wait for Upload: The website will upload your photo. The upload time depends on your internet speed and the file size of the image.
- Confirmation: Once uploaded, you should see a confirmation message or your photo displayed on the webpage.
Troubleshooting Common Photo Upload Issues
Sometimes, uploading photos doesn’t go as smoothly as planned. Here are a couple of common problems and how to solve them:
Dealing with HEIC Format Incompatibility
If you’re using an Apple device like an iPhone or Mac, your photos might be saved in HEIC format. While efficient, not all websites readily support HEIC files. You might see your photos greyed out or encounter errors during upload.
 Greyed out HEIC image files in a file browser, indicating potential incompatibility for website upload.
Solution: Convert HEIC to JPEG. JPEG is a universally accepted image format for the web. You can convert HEIC files to JPEG in several ways:
- Using macOS Preview: Open the HEIC image in Preview, then go to “File” > “Export.” In the export options, choose JPEG as the format.
- Online Conversion Tools: Many free online converters can change HEIC to JPEG. Simply search for “HEIC to JPEG converter” in your web browser.
- iPhone Settings (for future photos): To avoid this issue in the future, you can set your iPhone camera to capture photos in “Most Compatible” (JPEG) format under “Settings” > “Camera” > “Formats.”
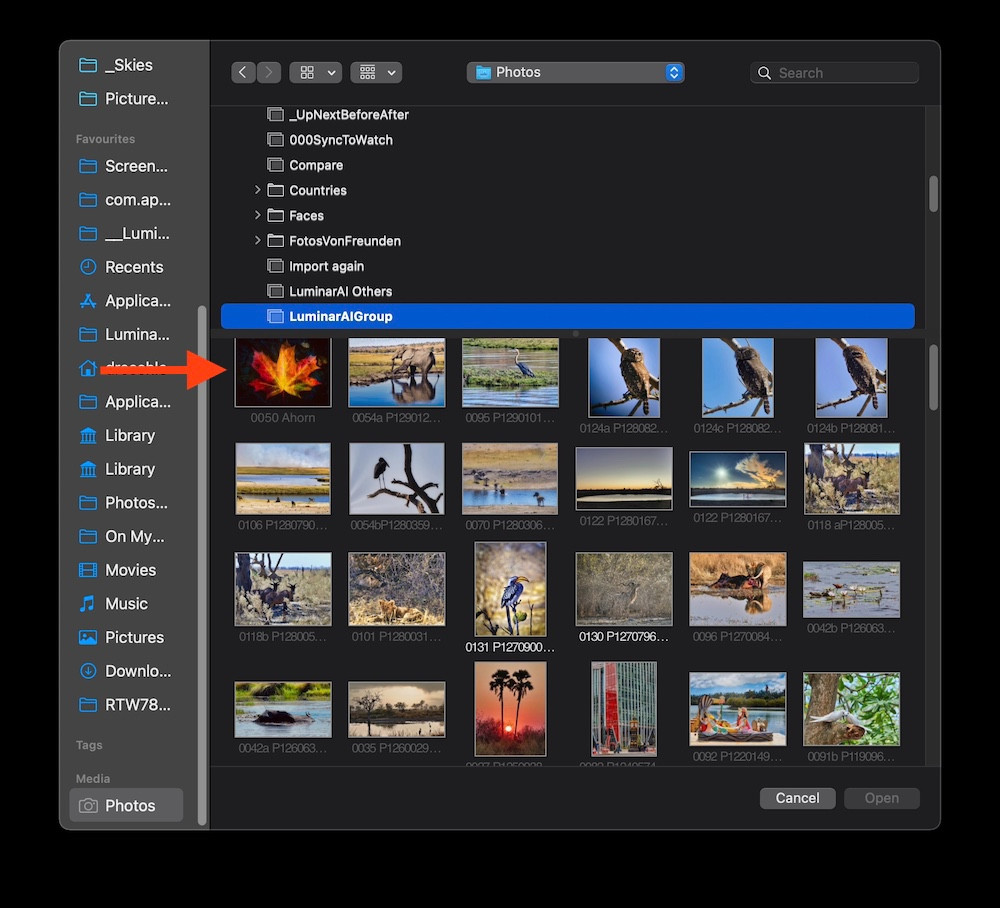
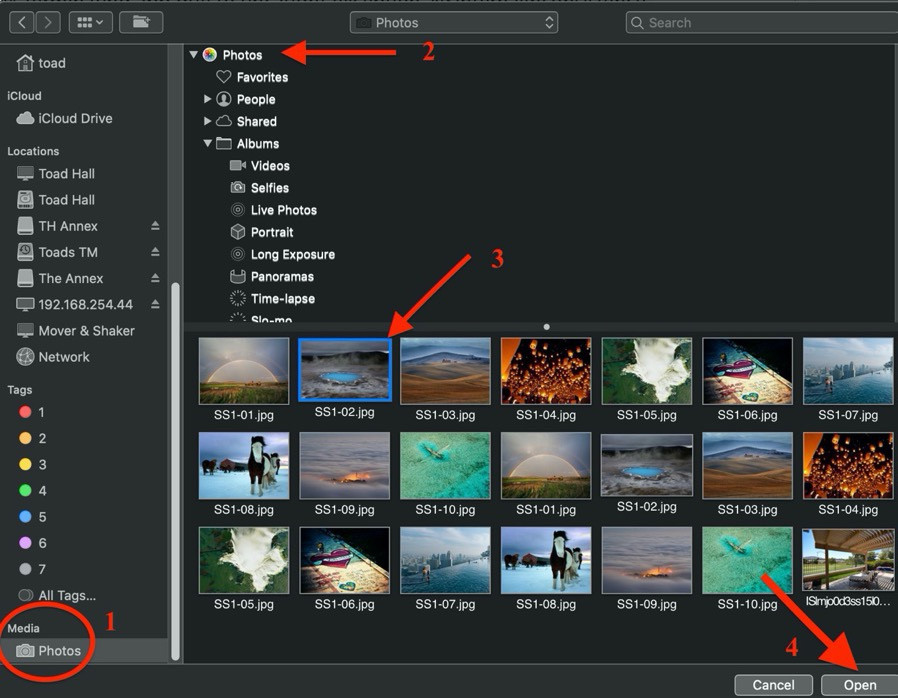
Finding Your Photos in the Media Browser
When uploading from a Mac, websites often provide a “Media Browser” to access your photo libraries directly. However, sometimes users can’t find their photos or the “Media” option seems unavailable.
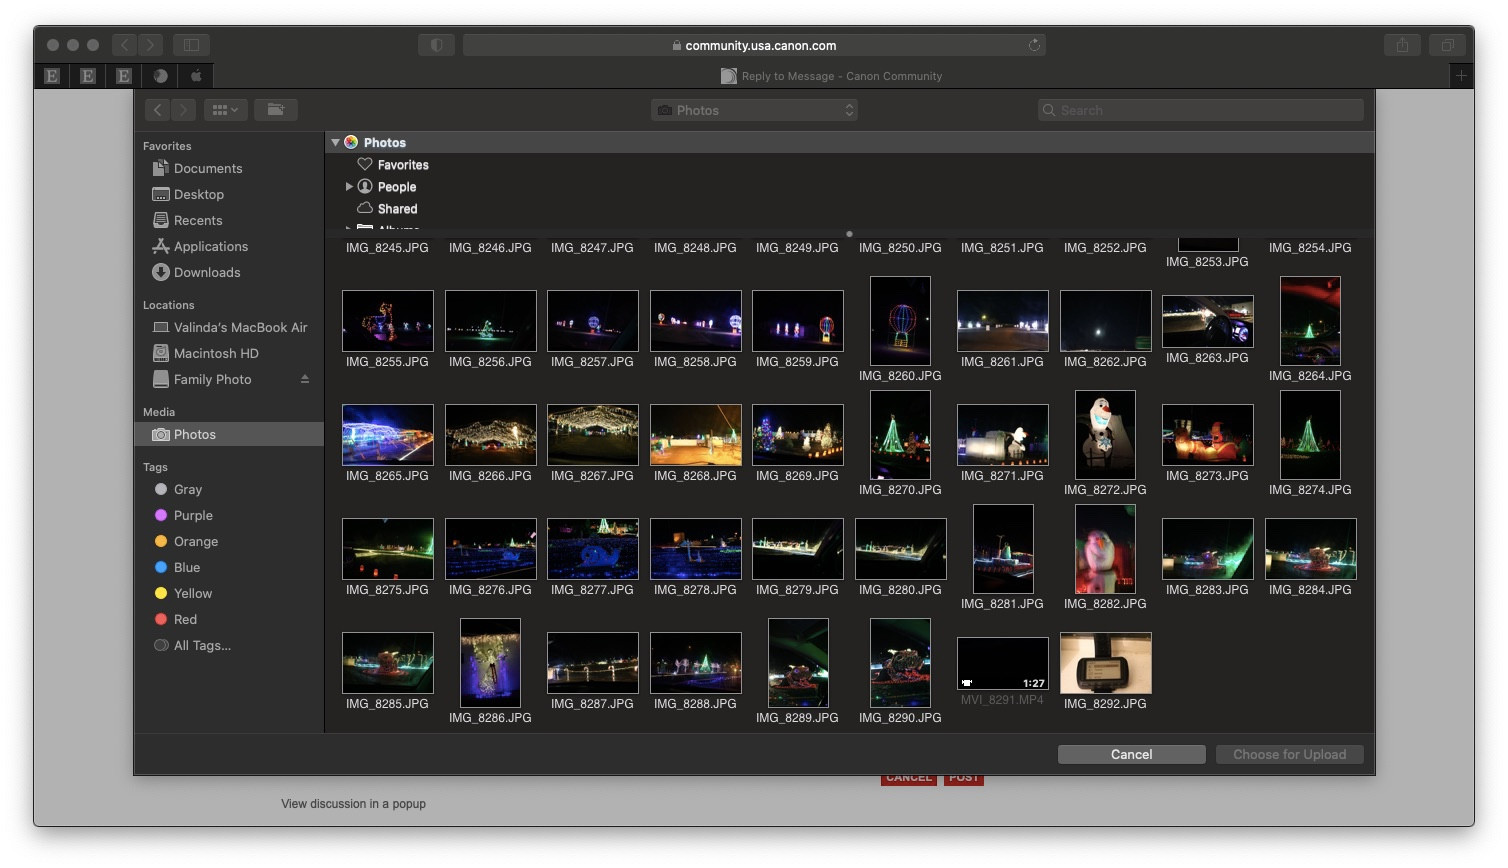 Screenshot showing "Media" option potentially greyed out in a file selection window during website photo upload.
Solution: Use the Browser’s File Upload or Export from Photos.
-
Browser Upload: Even if the “Media” option is unclear, the standard file selection window should still allow you to navigate to “Pictures” or other folders where you store photos.
-
Export and Upload: A reliable method is to export the photo from your Photos app to your desktop or a specific folder.
- Open the Photos app on your Mac.
- Select the photo you want to upload.
- Go to “File” > “Export” > “Export Photo.”
- Choose a location like your Desktop and click “Export.”
- Now, when you upload to the website, you can easily find the photo on your Desktop.
 Screenshots demonstrating the process of uploading a photo to a website using a web browser interface.
This export method ensures your photo is readily accessible for uploading through your web browser.
System Photo Library Considerations
In some cases, issues with accessing your photos through the Media Browser might be related to your System Photo Library settings on macOS.
Solution: Designate a System Photo Library. Ensure your main photo library is set as the System Photo Library in the Photos app preferences. This usually resolves access issues. You can check and set this in Photos app under “Photos” > “Preferences” > “General” and ensure “Use as System Photo Library” is selected (if applicable).
By understanding these methods and troubleshooting steps, you should be well-equipped to upload your photos to any website without frustration. Whether it’s sharing memories, updating your profile, or contributing to online communities, getting your photos online should now be a breeze!