iCloud is Apple’s cloud storage and computing service that seamlessly integrates with all Apple devices, and even Windows PCs, to keep your digital life in sync. For photography enthusiasts and everyday iPhone users alike, iCloud Photos offers a fantastic way to back up precious memories and access them from anywhere. This comprehensive guide will walk you through various methods to upload your photos to iCloud from iPhones, iPads, Macs, and even Windows PCs, ensuring your photos are safe, accessible, and beautifully organized.
Uploading Photos to iCloud from Your iPhone or iPad
The most straightforward way to ensure your iPhone or iPad photos are backed up to iCloud is by enabling iCloud Photos. Here’s how to set it up in a few simple steps:
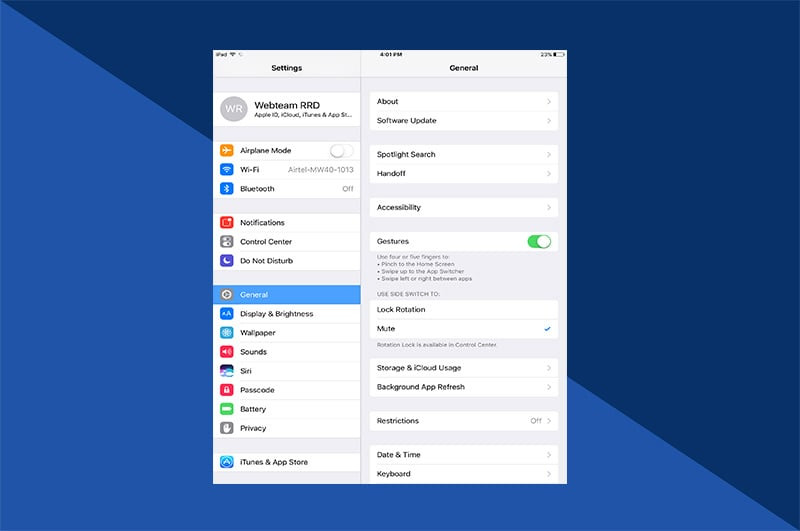
1. Open the Settings App
Locate the Settings app on your iPhone or iPad home screen. It’s represented by a gray cog icon.
 Settings Icon on iPhone Home Screen
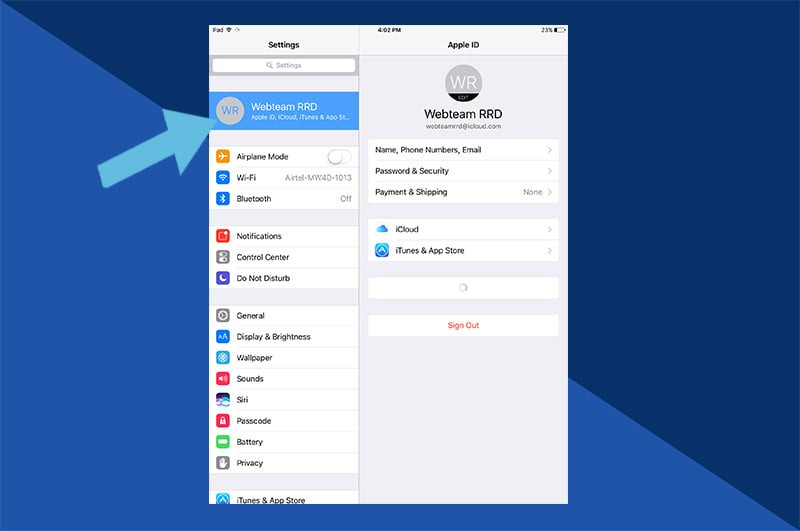
2. Tap on Your Apple ID Profile
At the top of the Settings menu, you will see your name and Apple ID profile. Tap on it to access your Apple ID settings.
 Apple ID Profile Selection in Settings
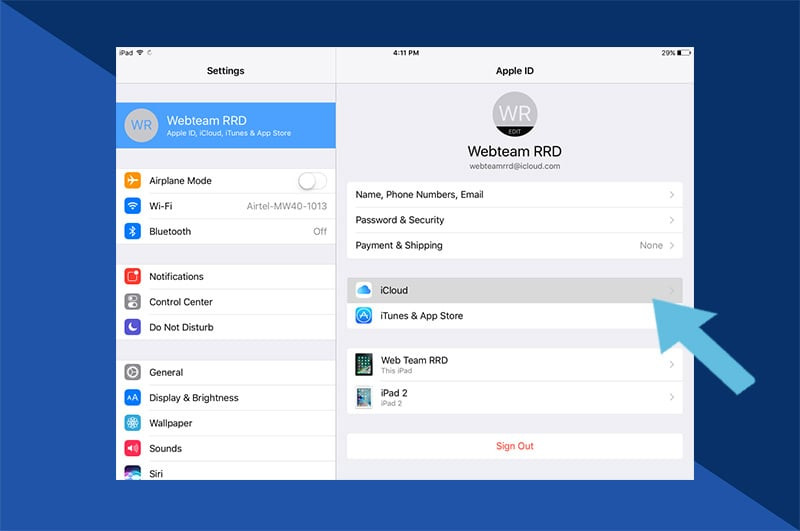
3. Select iCloud
Within your Apple ID settings, find and tap on the “iCloud” option to manage your iCloud settings.
 iCloud Option in Apple ID Settings
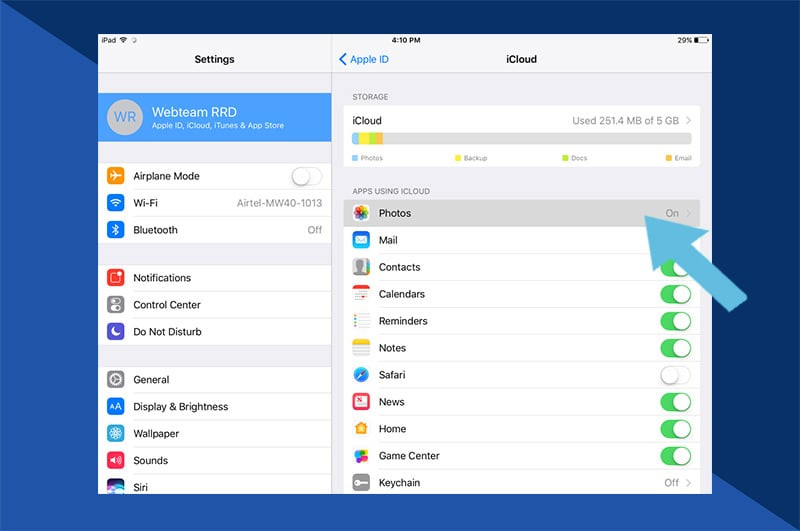
4. Navigate to Photos
In the iCloud settings menu, tap on “Photos” to configure your iCloud Photos preferences.
 Photos Option in iCloud Settings
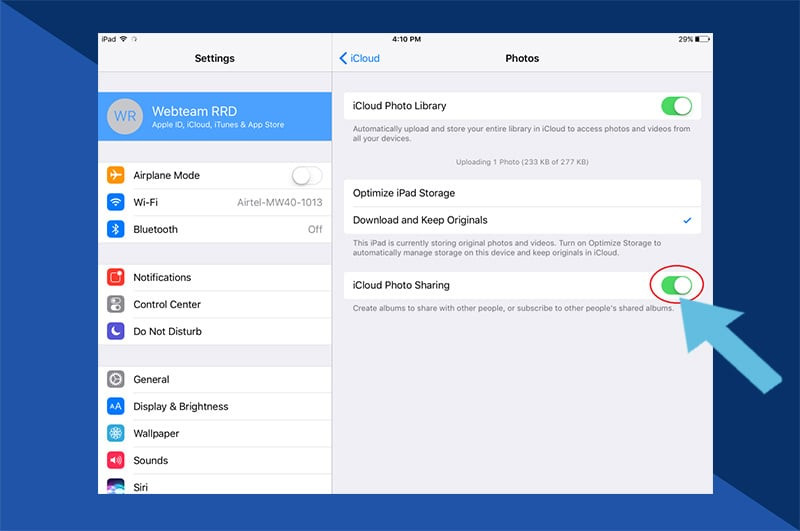
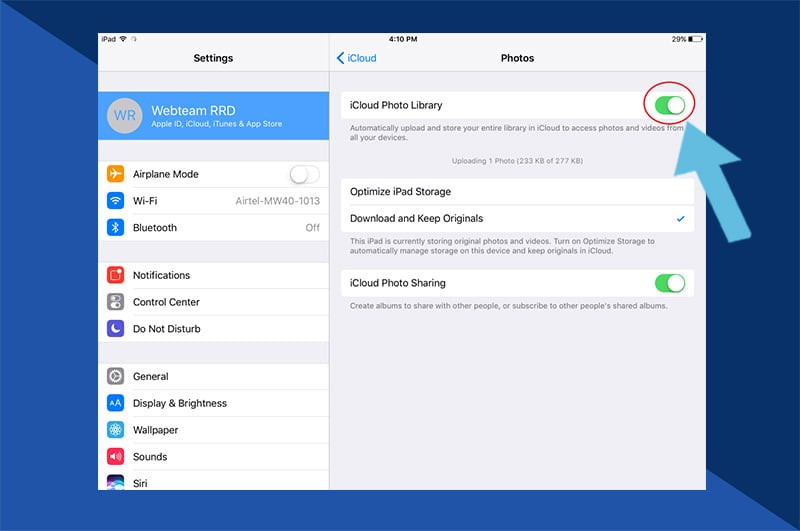
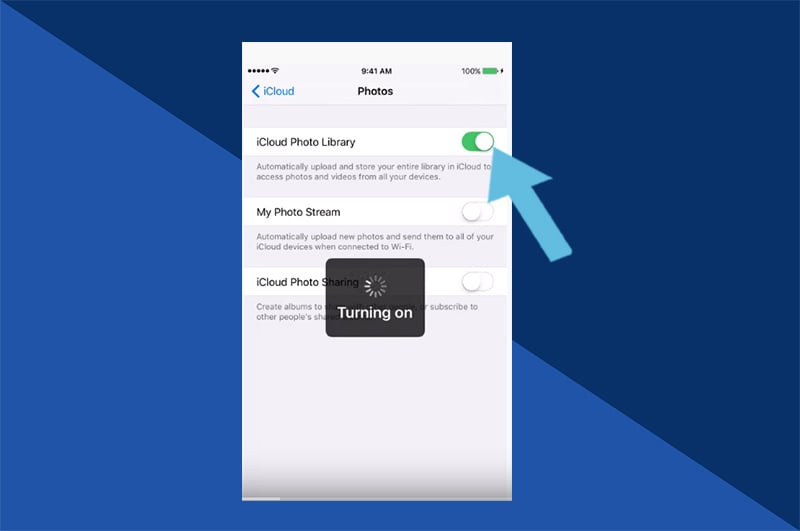
5. Turn on iCloud Photos
You will see a toggle switch next to “iCloud Photos”. If it’s not already green, tap the switch to turn it on. This activates automatic photo uploading to iCloud.
 iCloud Photos Toggle Switch in Photos Settings
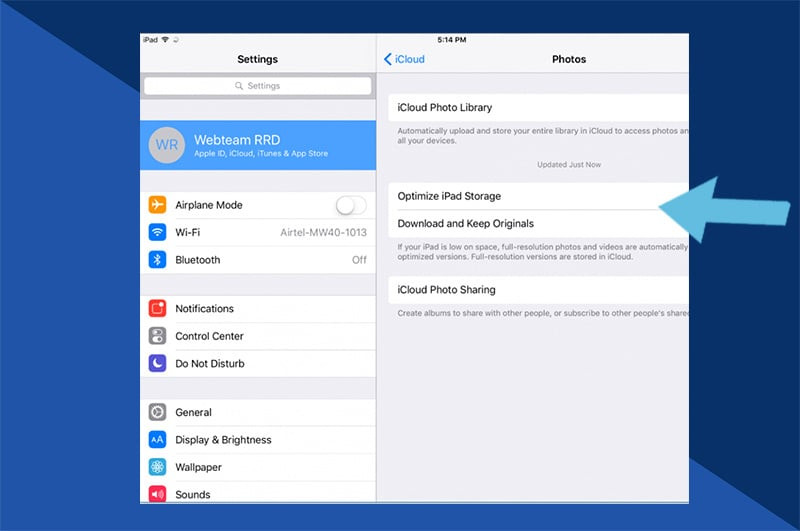
6. Choose Your Storage Preference
After enabling iCloud Photos, you’ll be presented with two storage optimization options:
 iCloud Photo Storage Options: Optimize iPhone Storage and Download and Keep Originals
- Optimize iPhone Storage: This space-saving option keeps smaller, optimized versions of your photos on your device while the original, high-resolution versions are securely stored in iCloud. You can access the full-resolution versions whenever you have an internet connection. This is ideal for users with limited device storage.
 Optimize iPhone Storage Option Explained
- Download and Keep Originals: Selecting this option ensures that all your photos and videos, in their original high resolution, are downloaded and stored on your device, as well as in iCloud. This provides immediate access to the best quality images but requires more storage space on your iPhone or iPad.
 Download and Keep Originals Option Explained
7. Enable “Upload to My Photo Stream” (Optional)
While “My Photo Stream” is an older feature and now largely superseded by iCloud Photos, you may still see the option. Ensure the slider for “Upload to My Photo Stream” is green if you wish to use this feature in conjunction with iCloud Photos for sharing across devices. iCloud Photos is the recommended and more robust solution for most users.
 Upload to My Photo Stream Toggle Switch
With iCloud Photos enabled, your new photos and videos will automatically upload to iCloud whenever your device is connected to Wi-Fi.
Uploading Photos to iCloud from Your Mac
Transferring photos from your Mac to iCloud is incredibly simple thanks to the Photos app integration. Here’s how to upload your photos:
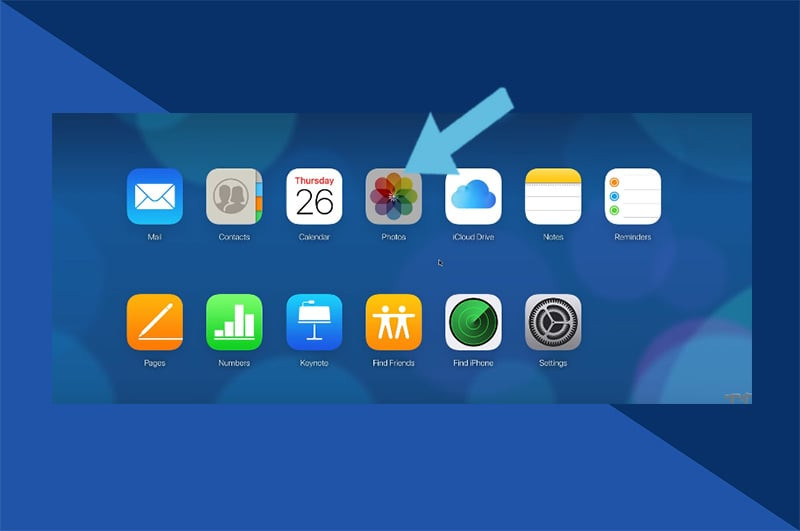
1. Open the Photos App
Launch the Photos application on your Mac. It’s usually found in your Applications folder or on your Dock.
 Photos App Icon on Mac
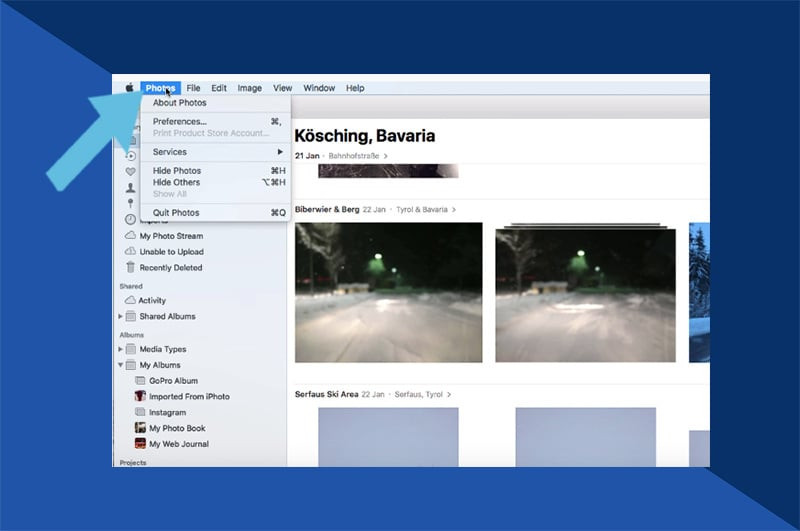
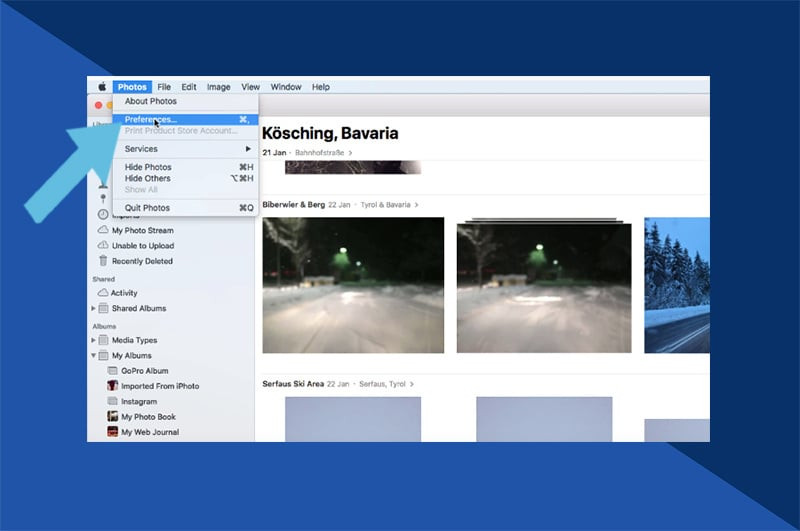
2. Access Photos Preferences
In the menu bar at the top of your screen, click on “Photos” and then select “Preferences” from the dropdown menu.
 Photos Menu in Mac Menu Bar
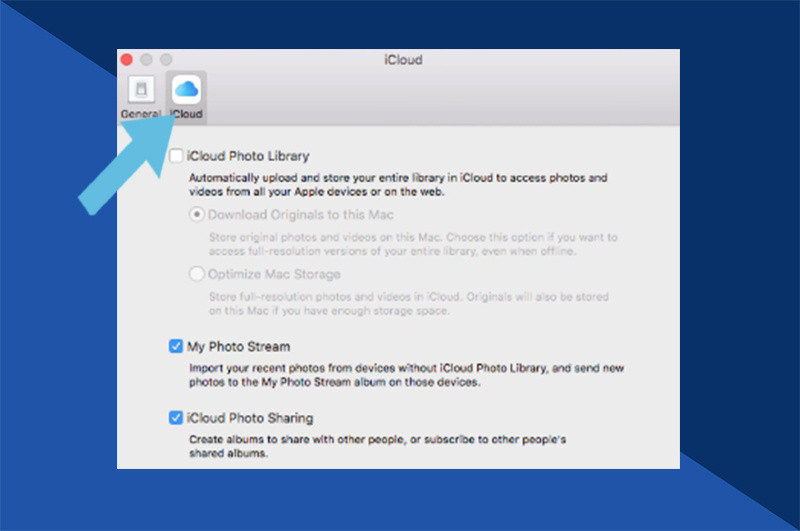
3. Navigate to the iCloud Tab
In the Preferences window, click on the “iCloud” tab to access iCloud Photos settings for your Mac.
 iCloud Tab in Photos Preferences
4. Enable iCloud Photos
Check the box next to “iCloud Photos” to turn it on. This will sync your Mac’s photo library with iCloud.
 iCloud Photos Checkbox in Photos Preferences
5. Choose Storage Optimization (Optional)
Similar to iPhone and iPad, you can choose between “Optimize Mac Storage” and “Download Originals to this Mac,” mirroring the “Optimize iPhone Storage” and “Download and Keep Originals” options. Select the option that best suits your Mac’s storage capacity and your access needs.
- Optimize Mac Storage: Saves space on your Mac by storing optimized versions locally.
- Download Originals to this Mac: Keeps full-resolution originals on your Mac.
 Storage Optimization Options on Mac Photos Preferences
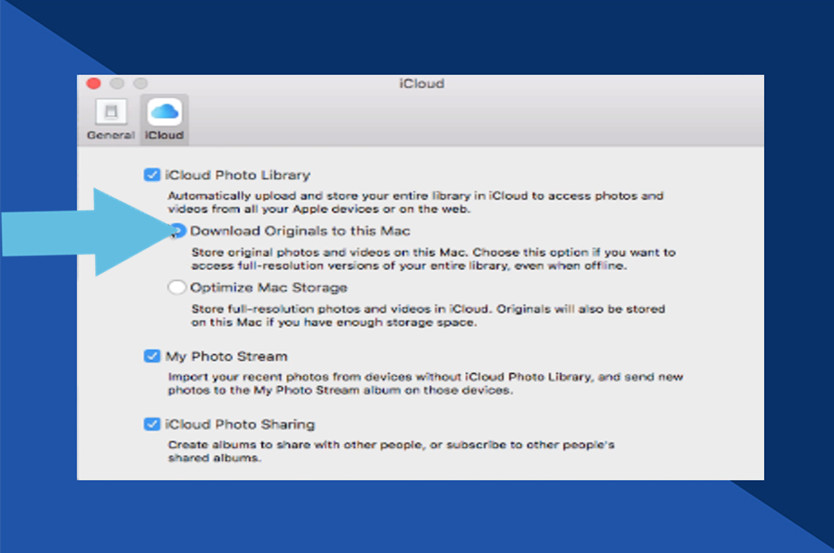 Download Originals to this Mac Option on Mac Photos Preferences
6. Drag and Drop to Upload
Once iCloud Photos is enabled, uploading photos is as easy as dragging and dropping them into the Photos app library. Whether they are from a camera, USB drive, or downloads folder, simply drag the photos into the Photos app window. They will automatically upload to iCloud.
 Drag and Drop Photos into Mac Photos App for iCloud Upload
Uploading Photos to iCloud from a Windows PC
Even if you’re primarily a Windows user, you can still seamlessly upload your photos to iCloud using iCloud for Windows. Here’s how:
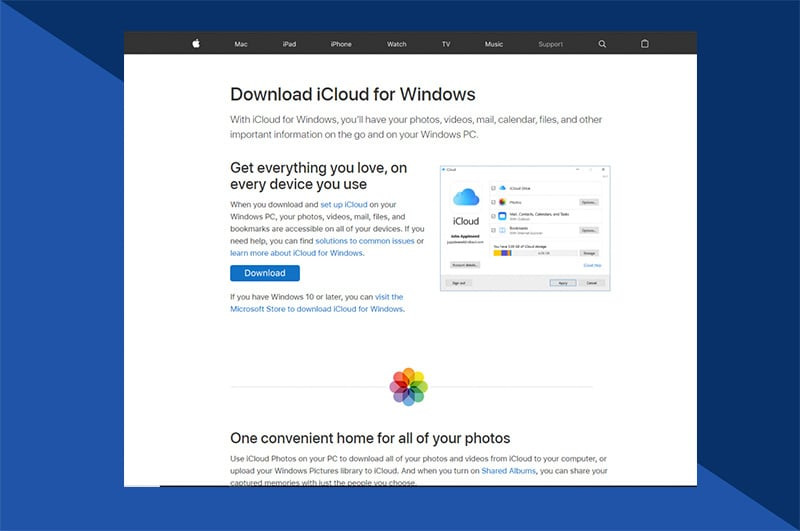
1. Download iCloud for Windows
First, you need to download and install iCloud for Windows from Apple’s support website. Visit the Apple Support page and search for “Download iCloud for Windows” or go directly to Apple Support Download iCloud for Windows.
 Download iCloud for Windows Button
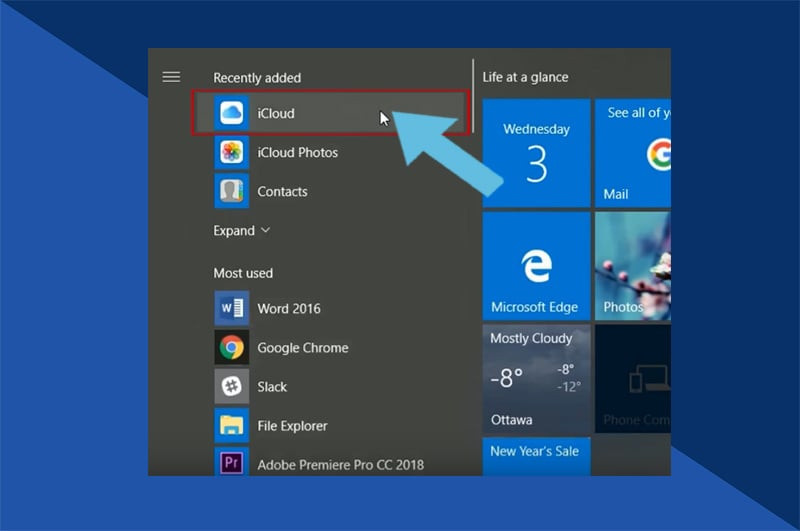
2. Launch iCloud for Windows
After installation, open the iCloud for Windows application. You can find it in your Start Menu.
 iCloud for Windows Application Icon
3. Click Options next to Photos
In the iCloud for Windows interface, locate “Photos” and click the “Options…” button next to it.
 Options Button for Photos in iCloud for Windows
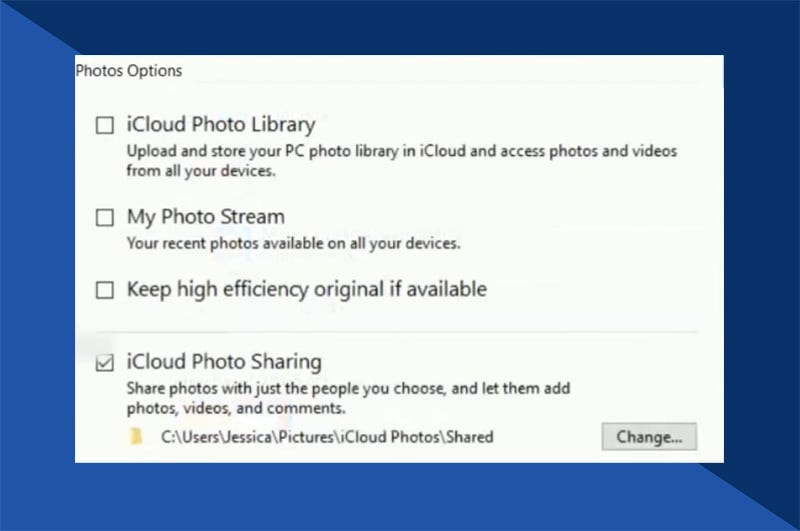
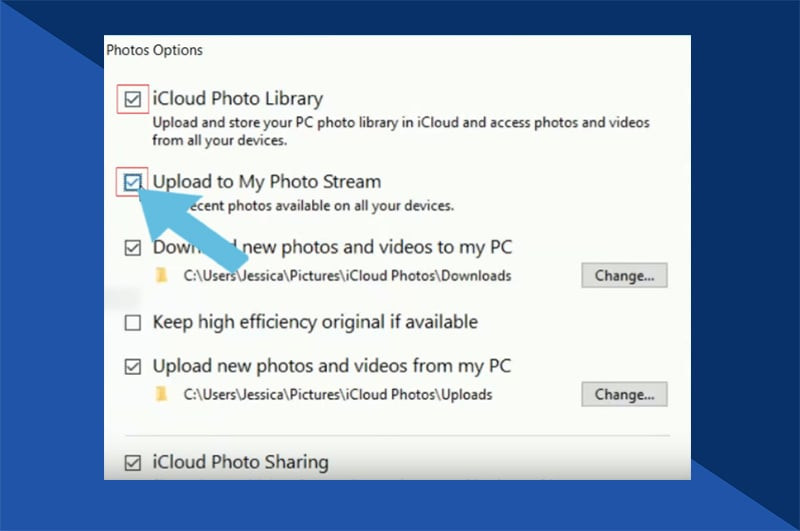
4. Select iCloud Photo Library
In the Photos Options window, ensure that “iCloud Photo Library” is checked. This enables photo syncing with iCloud.
 iCloud Photo Library Checkbox in iCloud for Windows Options
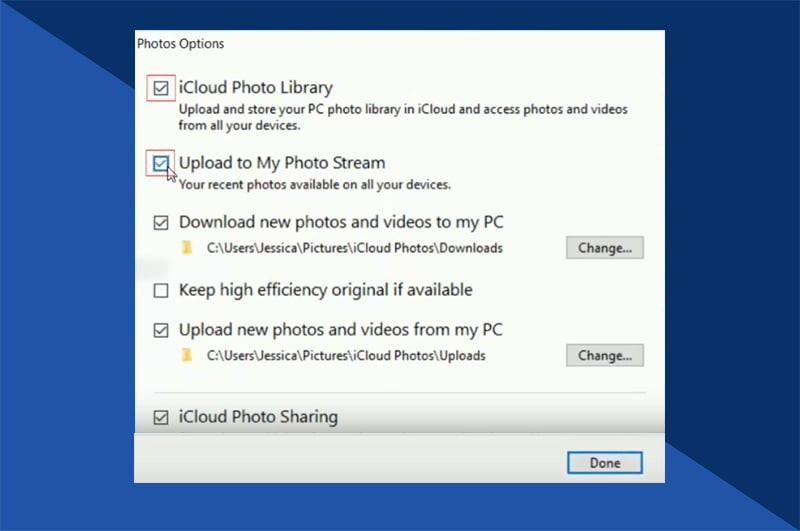
5. Click Done and Apply
Click “Done” to close the Photos Options window, and then click “Apply” in the main iCloud for Windows window to save your settings.
 Done Button in Photos Options and Apply Button in iCloud for Windows
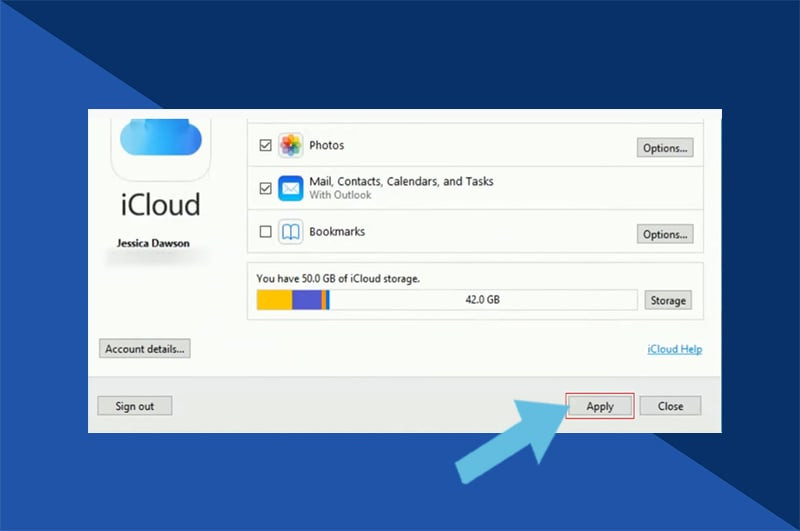 Apply Button in iCloud for Windows
6. Enable iCloud Photo Library on iOS Devices (If Applicable)
If you also use iPhones or iPads, ensure iCloud Photo Library is enabled on those devices as well (as described in the iPhone/iPad section) to allow seamless syncing across all your devices.
 iCloud Photo Library Enabled on iOS Device Setting
7. Open File Explorer and Access iCloud Photos
Open Windows File Explorer. In the Navigation pane on the left, you should now see “iCloud Photos.”
 iCloud Photos in Windows File Explorer Navigation Pane
8. Navigate to “Upload photos & videos”
Within iCloud Photos in File Explorer, you’ll find an “Upload photos & videos” folder.
 Upload photos & videos Folder in iCloud Photos
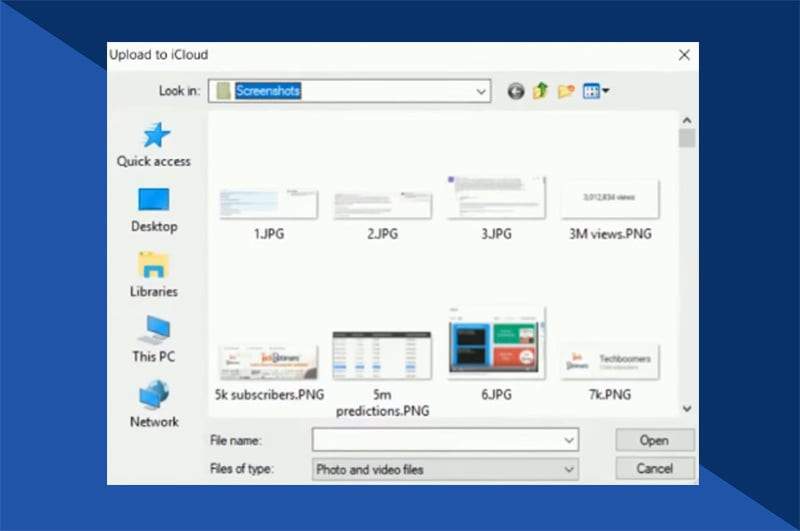
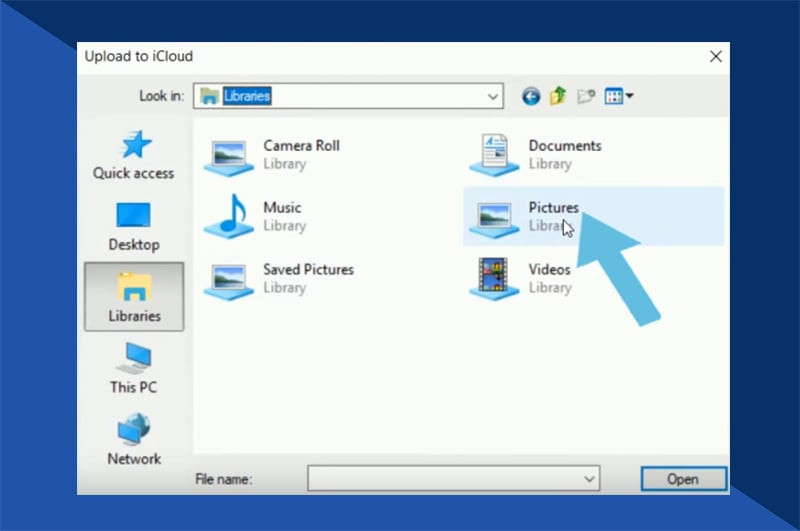
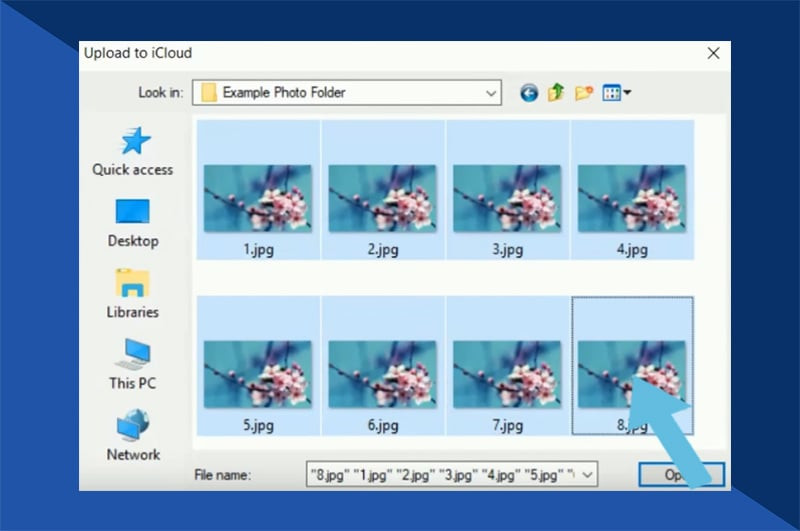
9. Select Photos to Upload
Double-click the “Upload photos & videos” folder. This will open a file selection dialog. Choose the photos and videos you want to upload to iCloud from your PC.
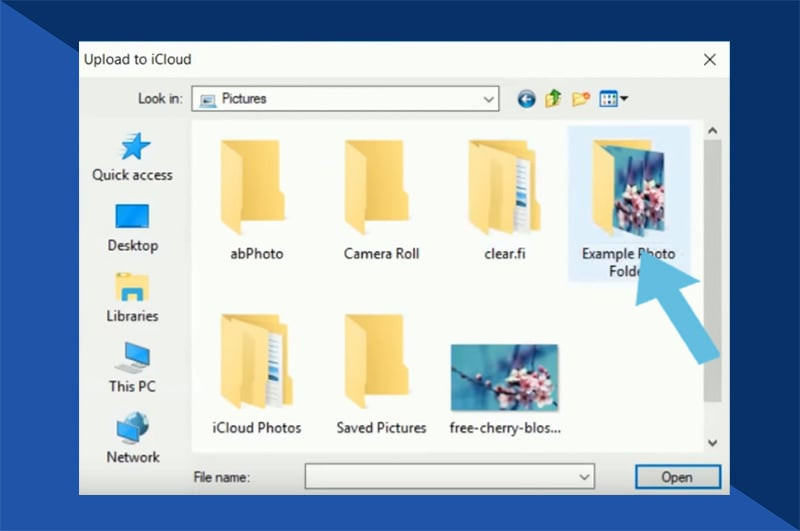 File Selection Dialog for Uploading Photos to iCloud
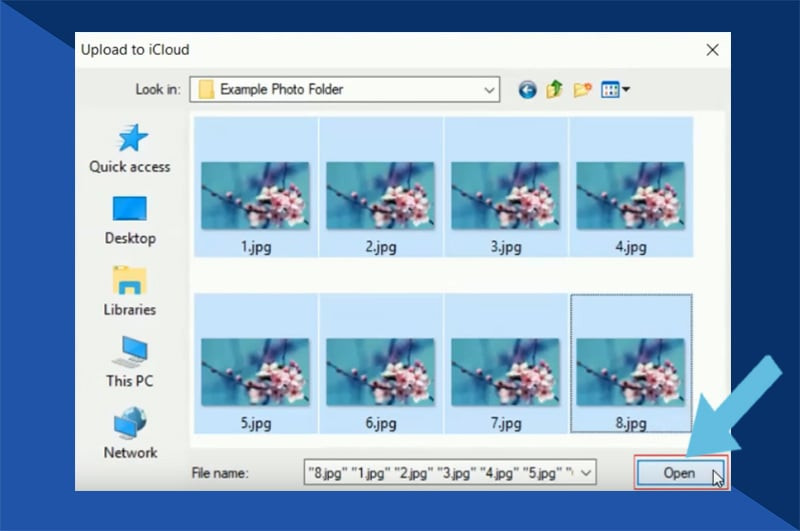
10. Click Open
After selecting your photos, click “Open.” The selected images will begin uploading to iCloud.
 Open Button to Start Photo Upload to iCloud
11. Alternative Drag and Drop Method
You can also directly drag and drop photos and videos into the “Uploads” folder within iCloud Photos in File Explorer for a quicker upload process, especially for multiple files.
 Drag and Drop Photos to iCloud Uploads Folder
Understanding Photo Storage Options on iPhone and iPad
As briefly mentioned earlier, iCloud Photos offers two main ways to manage storage on your iPhone or iPad:
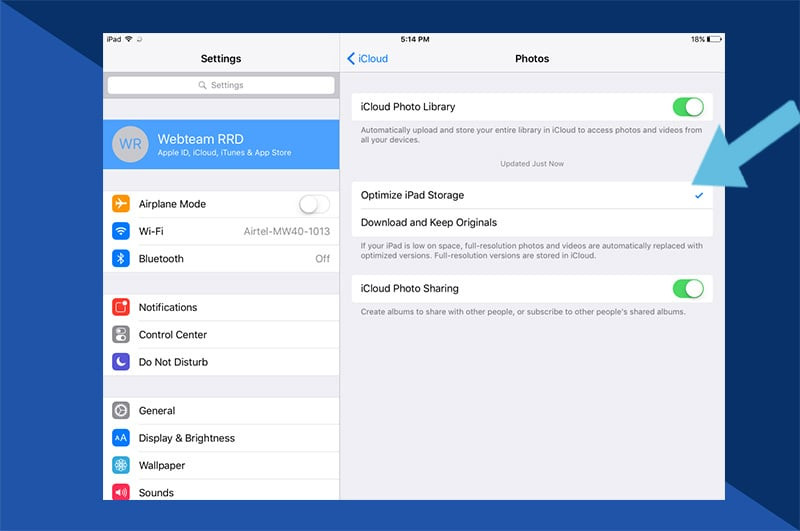
Optimize iPhone Storage
This setting is designed to save space on your device. It works by automatically managing the size of your photo library on your iPhone or iPad. When enabled, full-resolution original photos and videos are stored in iCloud, while smaller, device-optimized versions are kept on your device.
- Pros: Saves significant storage space on your iPhone or iPad, faster syncing and backups, ideal for devices with limited storage.
- Cons: Requires internet access to view full-resolution originals, slight delay when accessing original quality images.
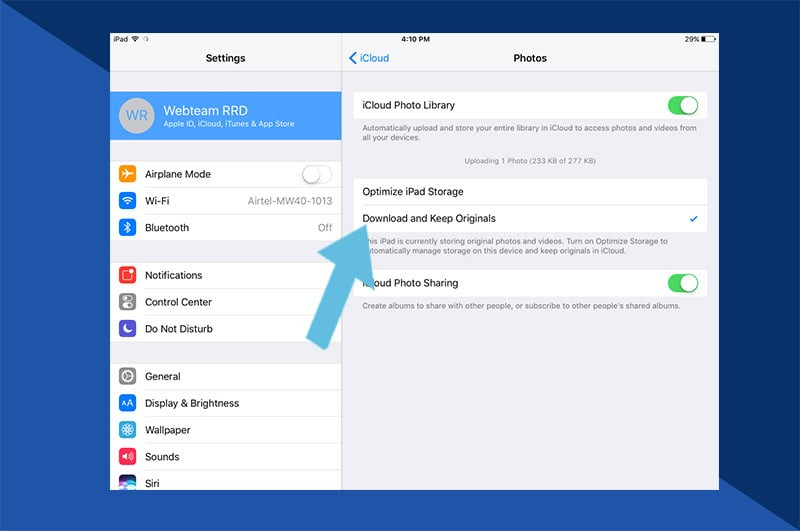
Download and Keep Originals
This option downloads and stores the original, full-resolution versions of all your photos and videos directly on your iPhone or iPad, in addition to storing them in iCloud.
- Pros: Immediate access to high-quality originals without needing internet, best for viewing on larger screens or for editing directly on the device.
- Cons: Consumes significantly more device storage, slower syncing and backups, may not be suitable for devices with limited storage capacity.
Choosing the right option depends on your storage needs and how you prioritize access to your photos.
Troubleshooting Common iCloud Photo Upload Issues
Sometimes, you might encounter issues with photos not uploading to iCloud. Here are common problems and their solutions:
- iCloud Photos Not Enabled: Double-check that iCloud Photos is turned on in your device’s settings (Settings > [Your Name] > iCloud > Photos). Ensure the toggle is green.
- Insufficient iCloud Storage: If your iCloud storage is full, new photos won’t upload. Check your iCloud storage status in Settings > [Your Name] > iCloud. You may need to purchase more storage or delete existing files to free up space.
- Network Connectivity Problems: iCloud upload requires a stable internet connection. Ensure you are connected to Wi-Fi or have cellular data enabled for Photos (Settings > Photos > Cellular Data). Check your network signal strength.
- iCloud Account Login Issues: Verify that you are correctly logged into your iCloud account on your device (Settings > [Your Name]). If you’ve recently changed your Apple ID password, you may need to update your credentials on your devices.
How Long Does Photo Upload to iCloud Take?
The time it takes to upload your photos to iCloud depends on several factors:
- Number of Photos and Videos: A larger library naturally takes longer to upload.
- Internet Connection Speed: Faster internet speeds result in quicker uploads.
- File Sizes: High-resolution photos and videos take longer to upload than smaller files.
If you have a substantial number of photos and videos to upload, it might take several hours or even overnight, especially on slower internet connections.
Checking Upload Status and Pausing:
- On iPhone, iPad, or iPod touch: Go to Settings > [Your Name] > iCloud > Photos. You may see an upload status at the bottom. Alternatively, in the Photos app, go to the Photos tab and scroll to the bottom.
- On Mac: Open the Photos app, click “Photos” in the sidebar, then “Photos” or “Moments” in the toolbar. Scroll to the bottom of your photos to see the upload status. You can also pause uploads if needed from these locations.
Making the Most of Your iCloud Photos
Once your photos are safely uploaded to iCloud, you can enjoy them across all your devices, share them with family and friends, and even use them to create beautiful photo projects. Services like Motif (mentioned in the original article) allow you to transform your iCloud Photos into personalized photo books and gifts, bringing your digital memories into the physical world.
By following this comprehensive guide, you can confidently transfer your photos to iCloud, ensuring they are backed up, organized, and accessible whenever and wherever you need them.