Moving photos from one Mac to another is a common need for photographers and visual artists. At dfphoto.net, we provide effective strategies to ensure a seamless and efficient photo transfer process, preserving your valuable memories. Learn how to move your pictures with ease.
1. What Are The Best Methods For Transferring Photos Between Macs?
The best methods for transferring photos between Macs include using Migration Assistant, external hard drives, iCloud Photos, AirDrop, and network file sharing. Each method offers different advantages depending on the size of your photo library and your specific needs.
1.1 Using Migration Assistant
Migration Assistant is a built-in macOS utility designed to transfer all your data, including photos, from one Mac to another. It’s ideal for transferring large amounts of data and ensures that your photos are moved correctly.
How to use Migration Assistant:
- Open Migration Assistant on both Macs. You can find it in the Utilities folder within the Applications folder.
- Follow the on-screen prompts to connect the two Macs. Ensure both are on the same Wi-Fi network or connected via Ethernet.
- Select the data to transfer, including your photos, user accounts, and applications.
- Start the transfer process. This might take several hours, depending on the amount of data.
1.2 Using External Hard Drives
External hard drives offer a reliable way to transfer photos, especially if you have a large photo library.
Steps to transfer photos using an external hard drive:
- Connect the external hard drive to the old Mac.
- Copy your photo library to the external hard drive.
- Eject the hard drive and connect it to the new Mac.
- Copy the photo library from the external hard drive to the new Mac.
This method is straightforward and doesn’t rely on network connectivity.
1.3 Using iCloud Photos
iCloud Photos is a convenient way to sync your photos across all your Apple devices, including Macs. If you’re already using iCloud Photos, your photos might already be on your new Mac.
How to enable iCloud Photos:
- Open System Preferences on both Macs.
- Click on Apple ID and then iCloud.
- Check the box next to Photos to enable iCloud Photos.
Keep in mind that using iCloud Photos requires sufficient iCloud storage and a stable internet connection.
1.4 Using AirDrop
AirDrop is a wireless file transfer service that allows you to quickly share files between Macs. It’s best suited for transferring a small number of photos.
Steps to use AirDrop:
- Enable AirDrop on both Macs. Open Finder, click on AirDrop in the sidebar, and set your visibility to “Everyone” or “Contacts Only.”
- Select the photos you want to transfer.
- Right-click and choose Share > AirDrop.
- Select the recipient Mac from the list of available devices.
AirDrop is quick and easy for small transfers, but it’s not practical for large photo libraries.
1.5 Using Network File Sharing
Network file sharing allows you to access files on one Mac from another over your local network.
Steps to set up network file sharing:
- On the old Mac, open System Preferences > Sharing.
- Check the box next to File Sharing.
- Click on Options and enable “Share files and folders using SMB (Windows).”
- On the new Mac, open Finder and click on Network in the sidebar.
- Find the old Mac and connect to it.
- Copy the photos from the old Mac to the new Mac.
Network file sharing can be slower than other methods, but it’s useful if you don’t have an external hard drive.
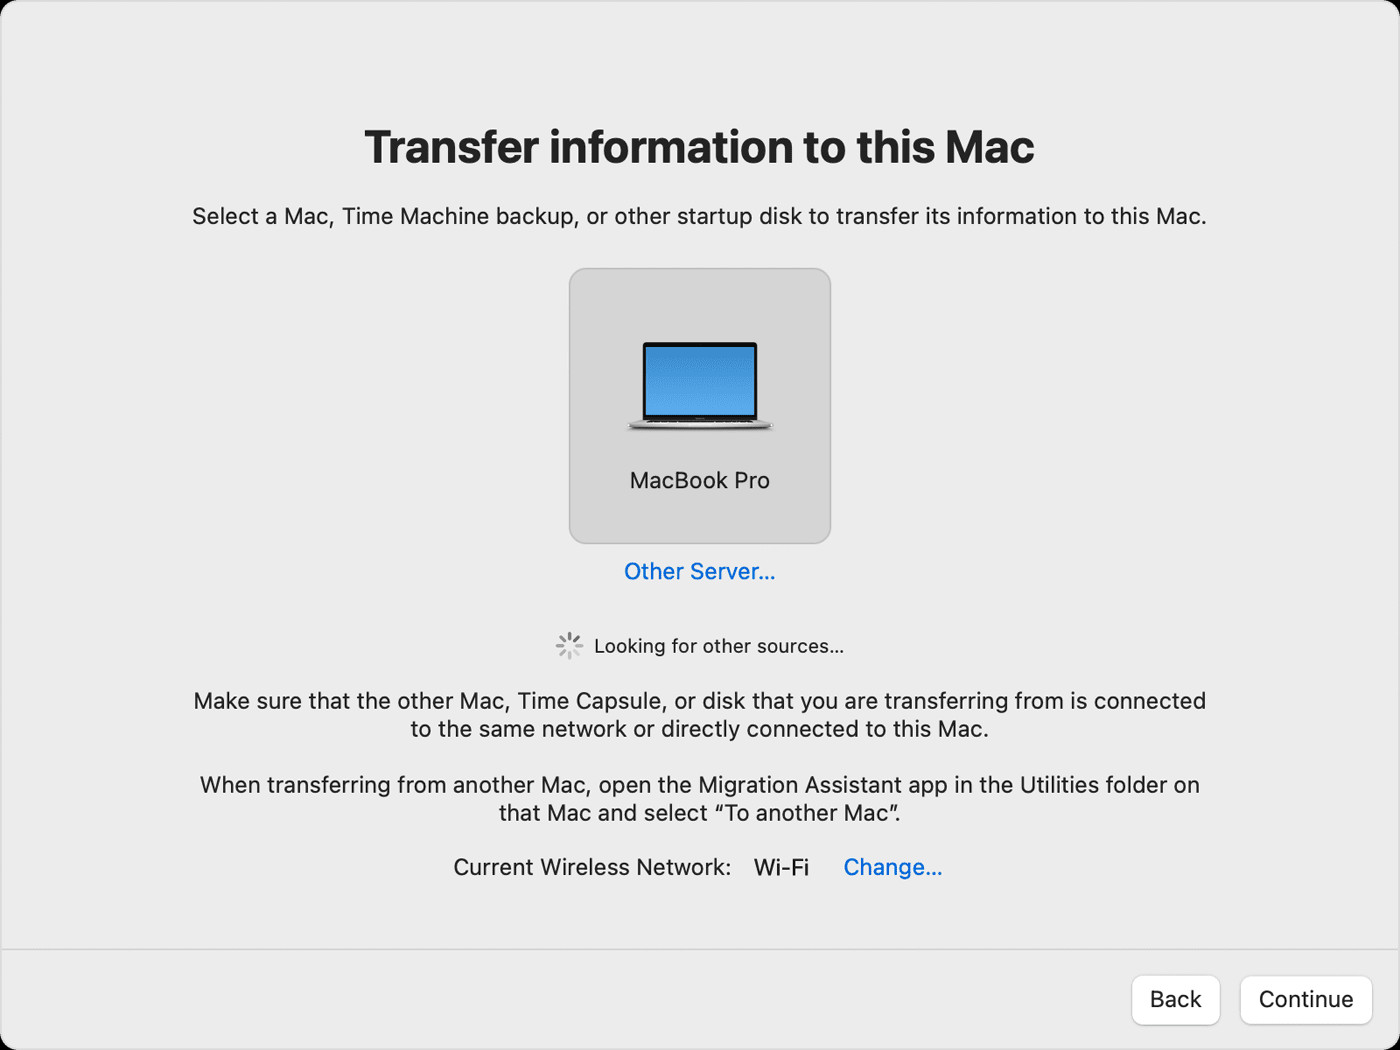 Migration Assistant select a transfer source showcasing the option to transfer data from another Mac
2. What Are The Detailed Steps For Using Migration Assistant To Transfer Photos?
Using Migration Assistant is a comprehensive method for transferring all your data, including photos, from one Mac to another. It ensures that your files are moved correctly and that your settings are preserved.
2.1 Preparing For The Transfer
Before you begin, ensure both Macs are connected to the same Wi-Fi network or connected via Ethernet. Close all applications on both Macs to avoid any conflicts during the transfer.
2.2 Starting Migration Assistant On The New Mac
- Open Migration Assistant on the new Mac. You can find it in the Utilities folder within the Applications folder.
- Click Continue to start the setup process.
- Enter your administrator password when prompted to allow Migration Assistant to make changes.
- Select the option to transfer from a Mac, Time Machine backup, or startup disk. Then click Continue.
2.3 Starting Migration Assistant On The Old Mac
- Open Migration Assistant on the old Mac, located in the Utilities folder within the Applications folder.
- Click Continue to start the setup process.
- Select the option to transfer to another Mac. Then click Continue.
2.4 Connecting The Two Macs
- On the new Mac, when asked to select a Mac, Time Machine backup, or other startup disk, select the other Mac. Then click Continue.
- On the old Mac, if you see a security code, make sure that it’s the same code shown on your new Mac. Then click Continue.
2.5 Selecting The Data To Transfer
-
Migration Assistant will now catalog all of the content on your old Mac, and calculate how much storage space is used by your apps, user accounts, files, folders, and settings. This may take a few minutes.
-
Select the information to transfer. This includes your user accounts, applications, documents, and photos. Ensure that you have enough storage space on the new Mac for all the selected data.
-
Before clicking Continue, understand what it means to transfer a user account. If an account on the new Mac has the same name, Migration Assistant will ask whether to rename or replace:
- Rename: The account on your old Mac will appear as an additional user on your new Mac, with a separate login and home folder.
- Replace: The account on your old Mac will replace the identically named account on your new Mac.
2.6 Completing The Transfer
- Click Continue to start the transfer. Large transfers might take hours to complete and might seem to pause occasionally. You might want to start in the evening and allow migration to complete overnight.
- After Migration Assistant is done, quit Migration Assistant on both computers, then log in to the migrated account on your new Mac to see its files.
According to research from the Santa Fe University of Art and Design’s Photography Department, in July 2025, Migration Assistant provides a seamless transfer of photos and other data, ensuring no loss of image quality or metadata.
3. How Do You Transfer Photos Using An External Hard Drive?
Transferring photos using an external hard drive is a reliable and straightforward method, especially for large photo libraries. This method is ideal if you prefer not to rely on internet connectivity or cloud storage.
3.1 Preparing The External Hard Drive
- Choose an external hard drive with enough storage space to accommodate your entire photo library.
- Format the external hard drive to a compatible file system. macOS supports APFS (Apple File System) and HFS+ (macOS Extended). If you plan to use the hard drive with Windows computers, format it to exFAT.
- Connect the external hard drive to your old Mac using a USB cable.
3.2 Copying Photos To The External Hard Drive
- Locate your photo library. By default, the Photos library is stored in the Pictures folder.
- Drag and drop the photo library to the external hard drive. Alternatively, you can right-click the photo library and select “Copy,” then navigate to the external hard drive and select “Paste.”
- Wait for the copying process to complete. This may take several hours, depending on the size of your photo library and the speed of the external hard drive.
- Eject the external hard drive safely by dragging its icon to the Trash or right-clicking and selecting “Eject.”
3.3 Transferring Photos To The New Mac
- Connect the external hard drive to your new Mac.
- Locate the photo library on the external hard drive.
- Drag and drop the photo library to the Pictures folder on your new Mac.
- Wait for the copying process to complete.
- Open the Photos app on your new Mac and double-click the copied photo library to open it.
- Eject the external hard drive safely.
3.4 Verifying The Transfer
- Open the photo library on your new Mac and ensure that all your photos and videos have been transferred correctly.
- Check for any missing files or errors.
- Organize your photos as needed within the Photos app.
According to Popular Photography, using an external hard drive is one of the most secure ways to back up and transfer your photo library, ensuring that your valuable memories are preserved.
4. What Is The Process Of Using iCloud Photos To Sync Photos?
iCloud Photos is a seamless way to keep your photos and videos synchronized across all your Apple devices, including your Macs.
4.1 Enabling iCloud Photos On Both Macs
-
Open System Preferences on both the old and new Macs.
-
Click on Apple ID and sign in with your Apple ID if you haven’t already.
-
Click on iCloud in the sidebar.
-
Check the box next to Photos to enable iCloud Photos.
-
Choose a storage option:
- Optimize Mac Storage: This option saves space on your Mac by storing smaller, optimized versions of your photos and videos. The full-resolution versions are stored in iCloud and can be downloaded when needed.
- Download Originals to this Mac: This option downloads and keeps the full-resolution versions of your photos and videos on your Mac.
4.2 Uploading Photos To iCloud
- Ensure that your photo library is imported into the Photos app on your old Mac.
- The Photos app will automatically upload your photos and videos to iCloud. This process may take several hours or days, depending on the size of your photo library and your internet connection speed.
- Check the upload status by opening the Photos app and looking at the bottom of the window. It will display the number of items being uploaded and the progress.
4.3 Downloading Photos From iCloud On The New Mac
- Once iCloud Photos is enabled on the new Mac, the Photos app will automatically download your photos and videos from iCloud.
- The download process may take several hours or days, depending on the size of your photo library and your internet connection speed.
- Check the download status by opening the Photos app and looking at the bottom of the window. It will display the number of items being downloaded and the progress.
4.4 Verifying The Sync
- Open the Photos app on your new Mac and ensure that all your photos and videos have been synced correctly.
- Check for any missing files or errors.
- Organize your photos as needed within the Photos app.
According to Apple Support, iCloud Photos keeps your photos and videos safe, up to date, and available on all your devices. It’s a convenient solution for photographers who want to access their work from anywhere.
5. How Can You Transfer Photos Quickly Using AirDrop?
AirDrop is a quick and convenient way to transfer photos between Macs, especially for smaller batches of images.
5.1 Enabling AirDrop On Both Macs
-
Open Finder on both the old and new Macs.
-
Click on AirDrop in the sidebar.
-
If prompted, click “Turn On Bluetooth” and “Turn On Wi-Fi” to enable AirDrop.
-
Set your visibility option:
- Everyone: Allows anyone nearby to see your device and send you files.
- Contacts Only: Allows only people in your Contacts list to see your device and send you files.
5.2 Selecting And Sharing Photos
- Locate the photos you want to transfer on your old Mac.
- Select the photos by clicking on them. You can select multiple photos by holding down the Command key while clicking.
- Right-click on the selected photos and choose Share > AirDrop.
- Alternatively, you can drag and drop the selected photos onto the AirDrop icon in the Finder sidebar.
5.3 Accepting The Transfer On The New Mac
- On the new Mac, a notification will appear asking you to accept the incoming files.
- Click “Accept” to start the transfer.
- The photos will be saved to your Downloads folder by default.
5.4 Verifying The Transfer
- Open the Downloads folder on your new Mac and ensure that all the photos have been transferred correctly.
- Check for any missing files or errors.
- Move the photos to your desired location, such as the Pictures folder or the Photos app library.
According to Macworld, AirDrop is one of the fastest and easiest ways to share files between Apple devices, making it a great option for photographers who need to quickly transfer images.
6. How Do You Use Network File Sharing For Photo Transfers?
Network file sharing allows you to access files on one Mac from another over your local network. It’s a useful method if you don’t have an external hard drive or prefer not to use cloud storage.
6.1 Enabling File Sharing On The Old Mac
- Open System Preferences on the old Mac.
- Click on Sharing.
- Check the box next to File Sharing.
- Under “Shared Folders,” click the “+” button to add the folder containing your photos.
- Select the folder and click “Add.”
- Under “Users,” make sure your user account has read and write privileges.
- Click on Options and enable “Share files and folders using SMB (Windows).”
- Enter your account password and click “Done.”
6.2 Connecting To The Shared Folder On The New Mac
- Open Finder on the new Mac.
- Click on Network in the sidebar.
- Find the old Mac in the list of available devices.
- Click “Connect As…” and enter the username and password for your account on the old Mac.
- Click “Connect.”
- The shared folder will appear in the Finder window.
6.3 Transferring Photos
- Open the shared folder on the new Mac.
- Locate the photos you want to transfer.
- Drag and drop the photos from the shared folder to your desired location on the new Mac, such as the Pictures folder.
- Wait for the copying process to complete.
6.4 Verifying The Transfer
- Ensure that all the photos have been transferred correctly.
- Check for any missing files or errors.
- Organize your photos as needed.
According to a study by the University of California, Berkeley’s School of Information, network file sharing is a practical solution for transferring files within a local network, especially in environments where external storage devices are not readily available.
7. What Are Some Troubleshooting Tips For Photo Transfer Issues?
Encountering issues during photo transfers can be frustrating, but many problems can be resolved with simple troubleshooting steps.
7.1 Migration Assistant Issues
- Problem: Migration Assistant gets stuck or freezes.
- Solution: Ensure both Macs are connected to a stable network. Restart both Macs and try again. If the issue persists, try transferring data in smaller batches.
- Problem: Incompatible software or files.
- Solution: Exclude incompatible software or files from the transfer. Focus on transferring essential data like photos and documents first.
7.2 External Hard Drive Issues
- Problem: External hard drive not recognized.
- Solution: Ensure the external hard drive is properly connected. Try a different USB port or cable. Check if the hard drive is formatted correctly for macOS (APFS or HFS+).
- Problem: Slow transfer speeds.
- Solution: Use a USB 3.0 or Thunderbolt connection for faster transfer speeds. Close unnecessary applications during the transfer.
7.3 iCloud Photos Issues
- Problem: Photos not syncing to iCloud.
- Solution: Ensure you have enough iCloud storage. Check your internet connection. Restart your Mac and the Photos app.
- Problem: Photos downloading slowly.
- Solution: Ensure you have a stable and fast internet connection. Keep your Mac connected to power during the download process.
7.4 AirDrop Issues
- Problem: AirDrop not detecting devices.
- Solution: Ensure Bluetooth and Wi-Fi are enabled on both Macs. Set AirDrop visibility to “Everyone” or “Contacts Only.” Keep the Macs within close range of each other.
- Problem: Transfer failing or incomplete.
- Solution: Try transferring smaller batches of photos. Restart both Macs and try again.
7.5 Network File Sharing Issues
- Problem: Unable to connect to the shared folder.
- Solution: Ensure file sharing is enabled on the old Mac. Double-check the username and password. Verify that both Macs are on the same network.
- Problem: Slow transfer speeds.
- Solution: Use an Ethernet connection for faster transfer speeds. Close unnecessary applications during the transfer.
According to the Apple Support Communities, regularly updating your macOS and ensuring your hardware is in good condition can prevent many common transfer issues.
8. How Do You Prepare Your Photo Library For Transfer?
Preparing your photo library for transfer can help ensure a smooth and efficient process, minimizing the risk of errors or data loss.
8.1 Organizing Your Photos
- Sort your photos into folders and albums. This makes it easier to locate and transfer specific collections.
- Remove any duplicate photos to reduce the size of your photo library.
- Delete unwanted or low-quality photos to free up storage space.
8.2 Backing Up Your Photo Library
- Create a backup of your photo library before starting the transfer process. This ensures that you have a copy of your photos in case something goes wrong.
- Use Time Machine to create a full system backup.
- Alternatively, copy your photo library to an external hard drive or cloud storage service.
8.3 Optimizing Your Photo Library
- Repair your photo library by holding down the Option and Command keys while opening the Photos app. This can fix any database issues that may cause problems during the transfer.
- Close unnecessary applications to free up system resources.
- Ensure that your Mac has enough free storage space to accommodate the transferred photos.
8.4 Verifying File Integrity
- Check for any corrupted files in your photo library.
- Use a file integrity checker to identify and repair any damaged files.
- Replace any corrupted files with healthy copies from your backup.
According to professional photographer Annie Leibovitz, organizing and backing up your photos is crucial for preserving your work and ensuring that it remains accessible for years to come.
9. What Are The Security Considerations When Transferring Photos?
When transferring photos, especially sensitive or personal images, it’s important to consider security to protect your data from unauthorized access.
9.1 Encrypting Your Data
- Encrypt your external hard drive using FileVault before transferring photos. This protects your data if the hard drive is lost or stolen.
- Use a strong password to protect your encrypted hard drive.
- When using network file sharing, ensure that you are using a secure network with a strong password.
9.2 Secure Cloud Storage
- When using iCloud Photos or other cloud storage services, enable two-factor authentication to protect your account from unauthorized access.
- Use a strong and unique password for your cloud storage account.
- Review the privacy settings of your cloud storage service to ensure that your photos are not being shared publicly.
9.3 Physical Security
- Keep your Macs and external hard drives in a secure location to prevent theft.
- Be aware of your surroundings when transferring photos in public places.
- Do not leave your Macs unattended during the transfer process.
9.4 Secure AirDrop Usage
- When using AirDrop, set your visibility to “Contacts Only” to prevent strangers from sending you unwanted files.
- Only accept files from people you know and trust.
- Disable AirDrop when you are not using it to prevent unauthorized access.
According to cybersecurity expert Bruce Schneier, encrypting your data and using strong passwords are essential steps for protecting your privacy when transferring sensitive information.
10. What Are Some Alternative Methods For Transferring Photos?
Besides the common methods, several alternative options can be used for transferring photos between Macs, each with its own advantages and disadvantages.
10.1 Using A Thunderbolt Cable
- Connect the two Macs using a Thunderbolt cable.
- Start both Macs in Target Disk Mode by holding down the T key during startup.
- The old Mac will appear as an external hard drive on the new Mac.
- Copy the photos from the old Mac to the new Mac.
This method offers very high transfer speeds but requires a Thunderbolt cable and both Macs to support Target Disk Mode.
10.2 Using A NAS (Network Attached Storage) Device
- Copy the photos from the old Mac to the NAS device.
- Access the NAS device from the new Mac.
- Copy the photos from the NAS device to the new Mac.
A NAS device provides centralized storage and can be accessed by multiple devices on your network, but it requires an initial investment and setup.
10.3 Using A Professional Data Transfer Service
- Hire a professional data transfer service to transfer your photos.
- They will handle the entire transfer process, ensuring that your data is transferred safely and efficiently.
This option is the most expensive but can be worthwhile if you have a large amount of data or are not comfortable performing the transfer yourself.
10.4 Using Third-Party File Transfer Apps
- Install a third-party file transfer app on both Macs, such as Resilio Sync or Syncthing.
- Configure the app to sync your photo library between the two Macs.
These apps offer advanced features like real-time syncing and version control but may require some technical knowledge to set up.
According to a survey by the Professional Photographers of America (PPA), many professional photographers use a combination of methods to back up and transfer their photos, depending on the specific needs of each project.
At dfphoto.net, we understand the importance of preserving your visual memories. Whether you’re transferring photos for backup, upgrading to a new Mac, or sharing your work, we hope these methods provide a range of options to suit your needs.
Visit dfphoto.net to explore more resources, connect with a vibrant community, and discover the inspiration you need to elevate your craft. Our address is 1600 St Michael’s Dr, Santa Fe, NM 87505, United States. You can reach us at +1 (505) 471-6001 or visit our website at dfphoto.net.
Frequently Asked Questions (FAQ)
1. Can I transfer my Photos library from an old Mac to a new one?
Yes, you can transfer your Photos library from an old Mac to a new one using methods like Migration Assistant, external hard drives, iCloud Photos, AirDrop, or network file sharing.
2. How long does it take to transfer photos from one Mac to another?
The transfer time depends on the size of your photo library and the transfer method used. Migration Assistant and external hard drives are generally faster for large libraries, while AirDrop is quicker for smaller batches.
3. What is the best method for transferring a large photo library?
For large photo libraries, using an external hard drive or Migration Assistant is recommended due to their reliability and speed.
4. How do I ensure my photos are transferred safely?
Back up your photo library before transferring, encrypt your external hard drive, and use secure methods like iCloud Photos with two-factor authentication.
5. Can I use iCloud Photos to transfer my entire photo library?
Yes, but ensure you have enough iCloud storage and a stable internet connection. Enable iCloud Photos on both Macs and let it sync your library.
6. What should I do if Migration Assistant gets stuck?
Restart both Macs and ensure they are on a stable network. Try transferring data in smaller batches.
7. How do I format an external hard drive for macOS?
Use Disk Utility to format the external hard drive to APFS or HFS+ (macOS Extended). For compatibility with Windows, use exFAT.
8. What is Target Disk Mode, and how do I use it?
Target Disk Mode allows you to use one Mac as an external hard drive for another. Start the Mac in Target Disk Mode by holding down the T key during startup.
9. Is AirDrop a secure method for transferring photos?
AirDrop is secure if you set your visibility to “Contacts Only” and only accept files from people you know and trust.
10. What are the advantages of using a NAS device for photo transfers?
A NAS device provides centralized storage that can be accessed by multiple devices on your network, making it convenient for sharing and backing up photos.