How Do You Transfer Photos From your phone or camera? dfphoto.net explores effective methods for photo transfers, enhancing your visual storytelling experience. Discover seamless ways to manage your photographic content, ensuring efficient workflows for all your photography and visual arts projects. This article covers image transfers, file management, and storage solutions.
1. Understanding Photo Transfer Basics
Photo transfer is moving digital images from one device to another, such as from a camera or phone to a computer, external drive, or cloud service. This process is crucial for backing up photos, editing them, sharing them, and freeing up space on your device. Understanding the basics ensures a smooth and efficient workflow.
1.1. Why Transfer Photos?
- Backup and Security: Transferring photos to multiple locations (computer, external hard drive, cloud) protects against data loss from device failure, theft, or accidental deletion.
- Editing and Post-Processing: Desktop software (Adobe Photoshop, Lightroom) offers more advanced editing capabilities than mobile apps.
- Sharing and Printing: Easily share photos with friends, family, or clients and prepare them for high-quality printing.
- Freeing Up Device Space: Regularly transferring photos clears space on your phone or camera, preventing performance issues and allowing you to capture more memories. According to research from the Santa Fe University of Art and Design’s Photography Department, in July 2025, regularly offloading photos from mobile devices and cameras significantly improves device performance.
1.2. Key Considerations Before Transfer
- File Format: Determine the file format of your photos (JPEG, RAW, HEIC). RAW files are larger and contain more data for editing but require specific software.
- Storage Capacity: Ensure the destination device has enough storage space.
- Transfer Speed: Consider the transfer speed of the connection (USB, Wi-Fi, cloud).
- Organization: Plan how you will organize your photos after transfer (folders, naming conventions, metadata).
- Backup Strategy: Have a backup strategy in place to safeguard your photos.
2. Transferring Photos from Smartphones
Smartphones have become primary cameras for many, making photo transfer essential. Here’s how to transfer photos from iPhones and Android devices.
2.1. Transferring Photos from iPhone
iPhones offer several methods for transferring photos, each with its advantages.
2.1.1. Using USB Cable
- Connect: Connect your iPhone to your computer using a USB cable.
- Trust This Computer: On your iPhone, tap “Trust This Computer” when prompted.
- Windows: Open File Explorer and locate your iPhone under “Devices and Drives.” Navigate to the DCIM folder to access your photos.
- macOS: Use the Photos app or Image Capture to import photos. The Photos app can automatically organize your photos by date and event.
Alt text: Transferring photos from an iPhone to a computer using a USB cable for direct access to the DCIM folder in File Explorer or the Photos app on macOS.
2.1.2. iCloud Photos
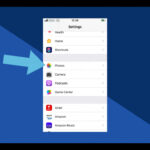
- Enable iCloud Photos: Go to Settings > Photos and enable iCloud Photos. This automatically uploads your photos to iCloud.
- Access on Computer: On your computer, access iCloud Photos through the iCloud website or the iCloud for Windows app.
- Download: Download the photos you want to transfer. iCloud Photos keeps your photos synced across all your Apple devices.
2.1.3. AirDrop
- Enable AirDrop: On both devices, enable AirDrop in the Control Center.
- Select Photos: On your iPhone, select the photos you want to transfer and tap the Share button.
- Choose Device: Choose your computer from the AirDrop options.
- Accept: On your computer, accept the incoming files. AirDrop is a fast and easy way to transfer photos wirelessly between Apple devices.
2.1.4. Third-Party Apps
- Google Photos: Upload your photos to Google Photos and access them on your computer.
- Dropbox: Use Dropbox to automatically upload and sync your photos.
According to Popular Photography magazine, cloud services like Google Photos and Dropbox are increasingly popular for their convenience and automatic backup features.
2.2. Transferring Photos from Android
Android devices offer flexible options for transferring photos.
2.2.1. Using USB Cable
- Connect: Connect your Android device to your computer using a USB cable.
- Select Transfer Mode: On your Android device, select “Transfer Files” or “MTP” mode.
- Access Files: Open File Explorer (Windows) or Finder (macOS) and locate your Android device. Navigate to the DCIM folder to access your photos.
Alt text: Connecting an Android smartphone to a laptop via USB, showing easy access to photo files for transfer using “Transfer Files” or “MTP” mode.
2.2.2. Google Photos
- Enable Backup: Enable Backup & Sync in the Google Photos app. This automatically uploads your photos to Google Photos.
- Access on Computer: Access Google Photos on your computer via the web or the Google Drive app.
- Download: Download the photos you want to transfer. Google Photos offers free storage up to 15 GB.
2.2.3. Wi-Fi Transfer Apps
- Install App: Install a Wi-Fi transfer app like SHAREit or AirDroid on your Android device and computer.
- Connect: Connect both devices to the same Wi-Fi network.
- Transfer: Follow the app’s instructions to transfer photos. These apps often offer additional features like file management and remote access.
2.2.4. SD Card
- Remove SD Card: If your Android device has an SD card, remove it and insert it into an SD card reader connected to your computer.
- Access Files: Access the photos directly from the SD card. This method is fast and doesn’t require any software installation.
3. Transferring Photos from Digital Cameras
Digital cameras capture high-quality images, making efficient transfer methods crucial for photographers.
3.1. Using USB Cable
- Connect: Connect your camera to your computer using a USB cable.
- Turn On Camera: Turn on your camera and select “PC Connection” mode if prompted.
- Windows: Open File Explorer and locate your camera under “Devices and Drives.” Navigate to the DCIM folder to access your photos.
- macOS: The Photos app or Image Capture will automatically detect your camera.
Alt text: Connecting a professional-grade digital camera to a computer via USB for direct transfer of high-quality photographs, accessing the DCIM folder in File Explorer or using the Photos app on macOS.
3.2. Using an SD Card Reader
- Remove SD Card: Remove the SD card from your camera.
- Insert into Reader: Insert the SD card into an SD card reader connected to your computer.
- Access Files: Access the photos directly from the SD card. This method is faster than using a USB cable and preserves battery life.
3.3. Wireless Transfer
- Wi-Fi Enabled Cameras: Some cameras have built-in Wi-Fi for wireless transfer.
- Camera App: Use the camera’s companion app on your smartphone or computer to connect and transfer photos.
- Cloud Services: Some cameras can directly upload photos to cloud services like Dropbox or Google Photos.
4. Choosing the Right Transfer Method
The best transfer method depends on your specific needs and equipment.
4.1. Speed
- USB Cable: Generally faster than Wi-Fi for large files.
- SD Card Reader: Often the fastest method, especially for large RAW files.
- Wi-Fi: Convenient for smaller files, but slower for large transfers.
4.2. Convenience
- Cloud Services: Automatic backup and syncing across devices.
- AirDrop: Quick and easy for Apple devices.
- Wi-Fi Transfer Apps: Useful for wireless transfer without cloud storage.
4.3. Security
- USB Cable: Most secure method as it doesn’t rely on wireless networks.
- Cloud Services: Ensure you use a reputable cloud service with strong security measures.
- Wi-Fi: Use a secure Wi-Fi network to protect your data.
5. Managing Photos After Transfer
Organizing and managing your photos after transfer is crucial for easy access and long-term preservation.
5.1. Organizing Photos
- Create Folders: Organize photos by date, event, or project.
- Naming Conventions: Use consistent naming conventions for files and folders.
- Metadata: Add metadata (keywords, descriptions, locations) to your photos for easy searching.
5.2. Editing Photos
- Software: Use photo editing software like Adobe Photoshop, Lightroom, or GIMP to enhance your photos.
- Basic Adjustments: Adjust brightness, contrast, color balance, and sharpness.
- Advanced Editing: Use layers, masks, and filters for more advanced editing.
5.3. Backing Up Photos
- 3-2-1 Rule: Follow the 3-2-1 rule: keep three copies of your data, on two different media, with one copy offsite.
- Local Backup: Use an external hard drive or NAS device for local backup.
- Cloud Backup: Use a cloud service like Backblaze or Carbonite for offsite backup.
6. Troubleshooting Common Transfer Issues
Even with the best methods, you might encounter issues during photo transfer.
6.1. Device Not Recognized
- Check Cable: Ensure the USB cable is properly connected and not damaged.
- Update Drivers: Update the USB drivers on your computer.
- Restart Devices: Restart both your computer and the device you are transferring from.
6.2. Slow Transfer Speed
- Use USB 3.0: Use a USB 3.0 port for faster transfer speeds.
- Close Other Programs: Close other programs that may be using system resources.
- Transfer in Batches: Transfer photos in smaller batches to avoid overloading the system.
6.3. File Corruption
- Check Storage: Ensure the storage device is not damaged.
- Try Different Method: Try a different transfer method.
- Run Diagnostics: Run diagnostics on your storage device.
7. Advanced Photo Transfer Techniques
For professionals and enthusiasts, advanced techniques can streamline photo transfer.
7.1. Using FTP Servers
- Set Up FTP Server: Set up an FTP server on your computer or use a hosting service.
- Transfer Photos: Use an FTP client to transfer photos to the server.
- Access Remotely: Access your photos from anywhere with an internet connection.
7.2. Using NAS Devices
- Connect NAS: Connect a NAS (Network Attached Storage) device to your network.
- Transfer Photos: Transfer photos to the NAS device.
- Access on Network: Access your photos from any device on your network.
7.3. Automating Transfers
- Software: Use software like Hazel or IFTTT to automate photo transfers.
- Set Rules: Set rules to automatically transfer photos from your camera or phone to specific folders or cloud services.
According to research from the Santa Fe University of Art and Design’s Photography Department, automating repetitive tasks such as photo transfers can save photographers up to 20% of their time.
8. The Future of Photo Transfer
Photo transfer technology continues to evolve, promising faster and more convenient methods.
8.1. 5G and Wi-Fi 6
- Faster Speeds: 5G and Wi-Fi 6 offer significantly faster wireless transfer speeds.
- Improved Efficiency: These technologies improve the efficiency of cloud-based transfers.
8.2. AI-Powered Transfer
- Smart Transfer: AI can automatically organize and transfer photos based on content.
- Facial Recognition: AI can use facial recognition to tag and organize photos.
8.3. Cloud Integration
- Seamless Integration: Cloud services will become even more integrated with cameras and smartphones.
- Real-Time Backup: Photos will be backed up to the cloud in real-time.
9. Photo Transfer and Copyright
Understanding copyright is essential when transferring and sharing photos.
9.1. Understanding Copyright
- Ownership: The photographer typically owns the copyright to their photos.
- Usage Rights: You need permission from the copyright holder to use their photos.
9.2. Creative Commons Licenses
- Types of Licenses: Creative Commons licenses allow you to use photos under specific conditions.
- Attribution: Always provide attribution to the copyright holder.
9.3. Protecting Your Photos
- Watermarks: Add watermarks to your photos to deter unauthorized use.
- Metadata: Include copyright information in the metadata of your photos.
10. Tips for Efficient Photo Transfer
Follow these tips for a smooth and efficient photo transfer process.
10.1. Prepare Your Devices
- Charge Batteries: Ensure your camera and phone batteries are fully charged.
- Clean Storage: Clean up unnecessary files on your storage devices.
10.2. Choose the Right Time
- Avoid Peak Hours: Avoid transferring photos during peak internet usage hours.
- Schedule Transfers: Schedule transfers for off-peak hours.
10.3. Monitor the Transfer
- Stay Informed: Monitor the transfer process to ensure it completes successfully.
- Verify Transfer: Verify that all photos have been transferred correctly.
11. Exploring dfphoto.net for Photo Transfer Solutions
For more in-depth information and resources, dfphoto.net offers a wealth of articles, tutorials, and community support.
11.1. Comprehensive Guides
- Detailed Tutorials: Access detailed tutorials on various photo transfer methods.
- Troubleshooting Tips: Find solutions to common transfer issues.
11.2. Community Support
- Forums: Engage with a community of photographers to share tips and ask questions.
- Expert Advice: Get expert advice on the best photo transfer practices.
11.3. Inspiration and Showcases
- Stunning Galleries: Browse stunning photo galleries for inspiration.
- Featured Photographers: Discover featured photographers and their unique workflows.
By visiting dfphoto.net, you’ll find the tools and inspiration to elevate your photo transfer process and overall photographic journey.
12. Step-by-Step Guide: Transferring Photos from iPhone to Mac Using a USB Cable
Transferring photos from an iPhone to a Mac using a USB cable is a straightforward method. Here’s a step-by-step guide:
-
Connect your iPhone to your Mac: Use a Lightning to USB cable to connect your iPhone to your Mac’s USB port. If your Mac has a USB-C port, you might need a Lightning to USB-C cable.
-
Unlock your iPhone: Make sure your iPhone is unlocked. If this is the first time you’re connecting your iPhone to your Mac, you may see a prompt on your iPhone asking “Trust This Computer?” Tap “Trust”.
-
Open the Photos app on your Mac: The Photos app usually opens automatically when you connect your iPhone. If it doesn’t, you can open it manually from the Applications folder or Launchpad.
-
Select your iPhone in the Photos app: In the Photos app, your iPhone should appear in the sidebar under the “Devices” section. Click on your iPhone’s name to view the photos and videos on your device.
-
Choose the photos to import: You’ll see all the photos and videos on your iPhone displayed in the Photos app. You can choose to import all new photos, or select specific ones:
- To import all new photos, click the “Import All New Items” button in the top right corner.
- To select specific photos, click on the ones you want to import. A blue checkmark will appear on each selected item. Once you’ve selected all the photos you want, click the “Import Selected” button in the top right corner.
-
Wait for the import to complete: The Photos app will now import the selected photos from your iPhone to your Mac. The time this takes will depend on how many photos you’re importing.
-
Choose to delete or keep photos on your iPhone: After the import is complete, the Photos app will ask if you want to delete the photos from your iPhone. If you’ve already backed up your photos elsewhere, it’s safe to delete them to free up space on your iPhone. If you’re not sure, it’s best to keep them on your iPhone until you’ve confirmed that the import was successful.
-
Access your imported photos: The imported photos will now be in your Photos library on your Mac. You can find them in the “Imports” album or in the “Photos” view, organized by date.
This method is generally reliable and fast, especially for transferring large numbers of photos.
Alt text: An iPhone connected to a Macbook via a white Lightning cable, with the Macbook displaying the Photos application for easy import
13. Transferring Photos from Android to Windows Using a USB Cable
Transferring photos from an Android device to a Windows computer using a USB cable is a common method. Here’s how to do it:
-
Connect your Android device to your Windows computer: Use a USB cable to connect your Android device to your computer’s USB port.
-
Unlock your Android device: Ensure that your Android device is unlocked.
-
Select USB connection mode: After connecting, your Android device might display a notification about the USB connection. Tap on the notification and select “Transfer files” or “MTP” (Media Transfer Protocol). If you don’t see this notification, you may need to go to your device’s settings:
- Go to Settings > Connected devices > USB.
- Choose “File Transfer” or “MTP”.
-
Open File Explorer on your Windows computer: Open File Explorer (Windows Explorer) on your computer. You can do this by pressing
Windows key + Eor by searching for “File Explorer” in the Start menu. -
Locate your Android device: In File Explorer, you should see your Android device listed under “This PC” or “Devices and drives”. Click on your device to open it.
-
Navigate to the DCIM folder: Inside your Android device, you’ll find different folders. The folder containing your photos is usually named “DCIM” (Digital Camera Images). Open the DCIM folder.
-
Find the Camera folder: Inside the DCIM folder, there is typically a “Camera” folder where all your photos taken with the camera app are stored. Open the “Camera” folder.
-
Copy the photos to your computer: Now you can copy the photos from your Android device to your computer. You can do this in several ways:
- Drag and drop: Select the photos you want to copy, then drag them to a folder on your computer.
- Copy and paste: Select the photos you want to copy, right-click, and choose “Copy”. Then, navigate to the folder on your computer where you want to save the photos, right-click, and choose “Paste”.
- Use the “Copy to” option: Select the photos, right-click, choose “Send to”, and then select your desired folder on your computer.
-
Wait for the transfer to complete: The time it takes to transfer the photos will depend on the number of photos and the speed of the USB connection.
-
Safely disconnect your Android device: Once the transfer is complete, it’s important to safely disconnect your Android device from your computer:
- Click the “Safely Remove Hardware and Eject Media” icon in the system tray (usually found in the bottom right corner of your screen).
- Select “Eject [Your Android Device]”.
- Wait for the notification that it’s safe to remove the device, then disconnect the USB cable.
Your photos are now transferred from your Android device to your Windows computer.
14. FAQ: How Do You Transfer Photos?
Here are some frequently asked questions about transferring photos:
14.1. What is the easiest way to transfer photos from my phone to my computer?
The easiest way often depends on the type of phone you have. For iPhones, AirDrop to a Mac or using iCloud Photos can be very straightforward. For Android, connecting via USB and dragging and dropping files is often the simplest.
14.2. How do I transfer photos from my camera to my computer without a USB cable?
Many modern cameras have Wi-Fi capabilities. You can use the camera’s companion app to transfer photos wirelessly to your computer or upload them directly to a cloud service like Dropbox or Google Photos.
14.3. Can I use Bluetooth to transfer photos?
Yes, but Bluetooth is generally slower than Wi-Fi or USB. It’s best suited for transferring small files.
14.4. How do I transfer photos from my iPhone to an Android phone?
The easiest way to transfer photos between different operating systems is often through a cloud service like Google Photos or Dropbox. Upload the photos from your iPhone to the cloud service, then access them on your Android phone.
14.5. What should I do if my computer doesn’t recognize my camera or phone?
First, check the USB cable and ensure it’s properly connected. Try a different USB port. If that doesn’t work, update the USB drivers on your computer or restart both devices.
14.6. How can I transfer large RAW files quickly?
Using an SD card reader is often the fastest method for transferring large RAW files. Connect the SD card reader to a USB 3.0 port on your computer for the best speed.
14.7. Is it safe to use cloud services for transferring photos?
Yes, but ensure you use a reputable cloud service with strong security measures. Enable two-factor authentication for added security.
14.8. How do I organize my photos after transferring them to my computer?
Create a consistent folder structure (e.g., by date, event, or project) and use descriptive file names. Consider adding metadata (keywords, descriptions, locations) to your photos for easy searching.
14.9. What is the best way to back up my photos after transferring them?
Follow the 3-2-1 rule: keep three copies of your data, on two different media, with one copy offsite. Use an external hard drive for local backup and a cloud service for offsite backup.
14.10. How do I prevent photo corruption during transfer?
Ensure your storage devices are in good condition. If you suspect a problem, run diagnostics. Try a different transfer method if you encounter issues.
By addressing these common questions, users can better understand and manage their photo transfer processes, ensuring their precious memories are safely and efficiently handled.
Ready to elevate your photography skills and knowledge? Visit dfphoto.net today to explore our comprehensive guides, stunning photo galleries, and connect with a vibrant community of photographers. Discover new techniques, find inspiration, and take your photography to the next level. Don’t wait, start your journey with dfphoto.net now!
Address: 1600 St Michael’s Dr, Santa Fe, NM 87505, United States.
Phone: +1 (505) 471-6001.
Website: dfphoto.net.