Are you eager to capture stunning images using your Mac? Taking photos on your Mac is simple and opens up a world of creative possibilities, and dfphoto.net is here to guide you. This guide will show you how to take photos on your Mac using built-in tools, explore advanced photography techniques, and optimize your images for sharing using various visual elements. Whether you’re a beginner or an experienced photographer, we’ll help you unleash your Mac’s photographic potential and explore artistic composition to enhance your visual storytelling skills and create captivating visual content.
1. What Are the Different Ways to Take a Photo on a Mac?
Yes, there are several ways to take a photo on your Mac, each catering to different needs and preferences. These methods include using the built-in Photo Booth app, employing keyboard shortcuts for screenshots, and utilizing third-party photography software. Each approach offers unique features and functionalities, empowering you to capture images in various styles and formats.
- Photo Booth: This built-in app is perfect for quick and fun photos using your Mac’s webcam.
- Keyboard Shortcuts: Capture screenshots of your entire screen or selected portions with ease using simple keyboard commands.
- Third-Party Apps: Explore professional-grade photography software for advanced features and editing capabilities.
2. How Do You Use Photo Booth to Take Pictures on a Mac?
Using Photo Booth is an easy way to take photos and videos using your Mac’s built-in camera. This app is designed for fun and simple snapshots, perfect for capturing spontaneous moments.
Steps to use Photo Booth:
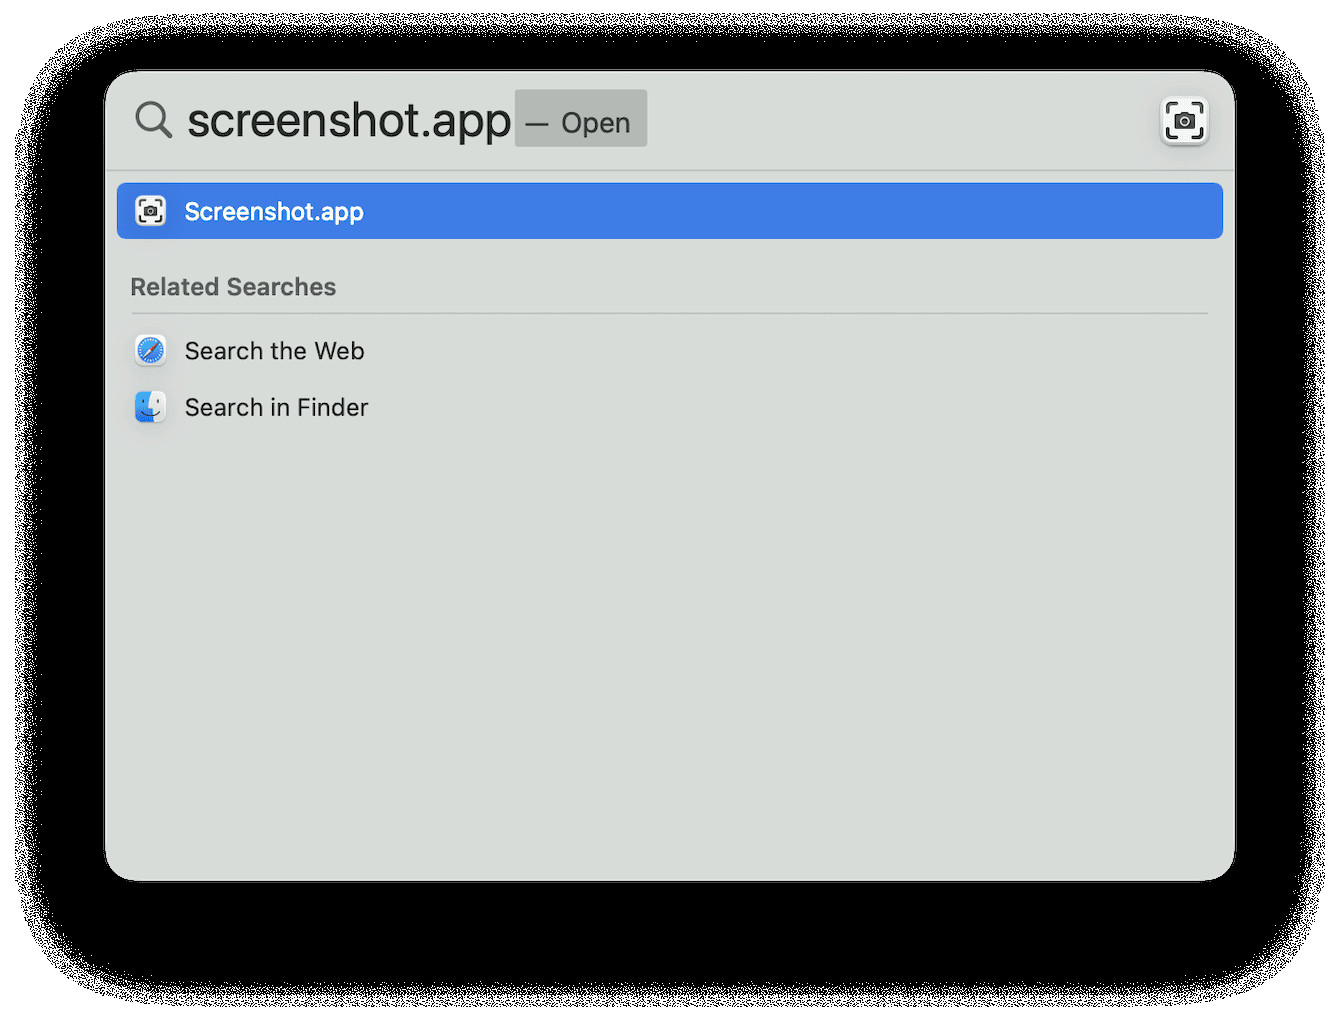
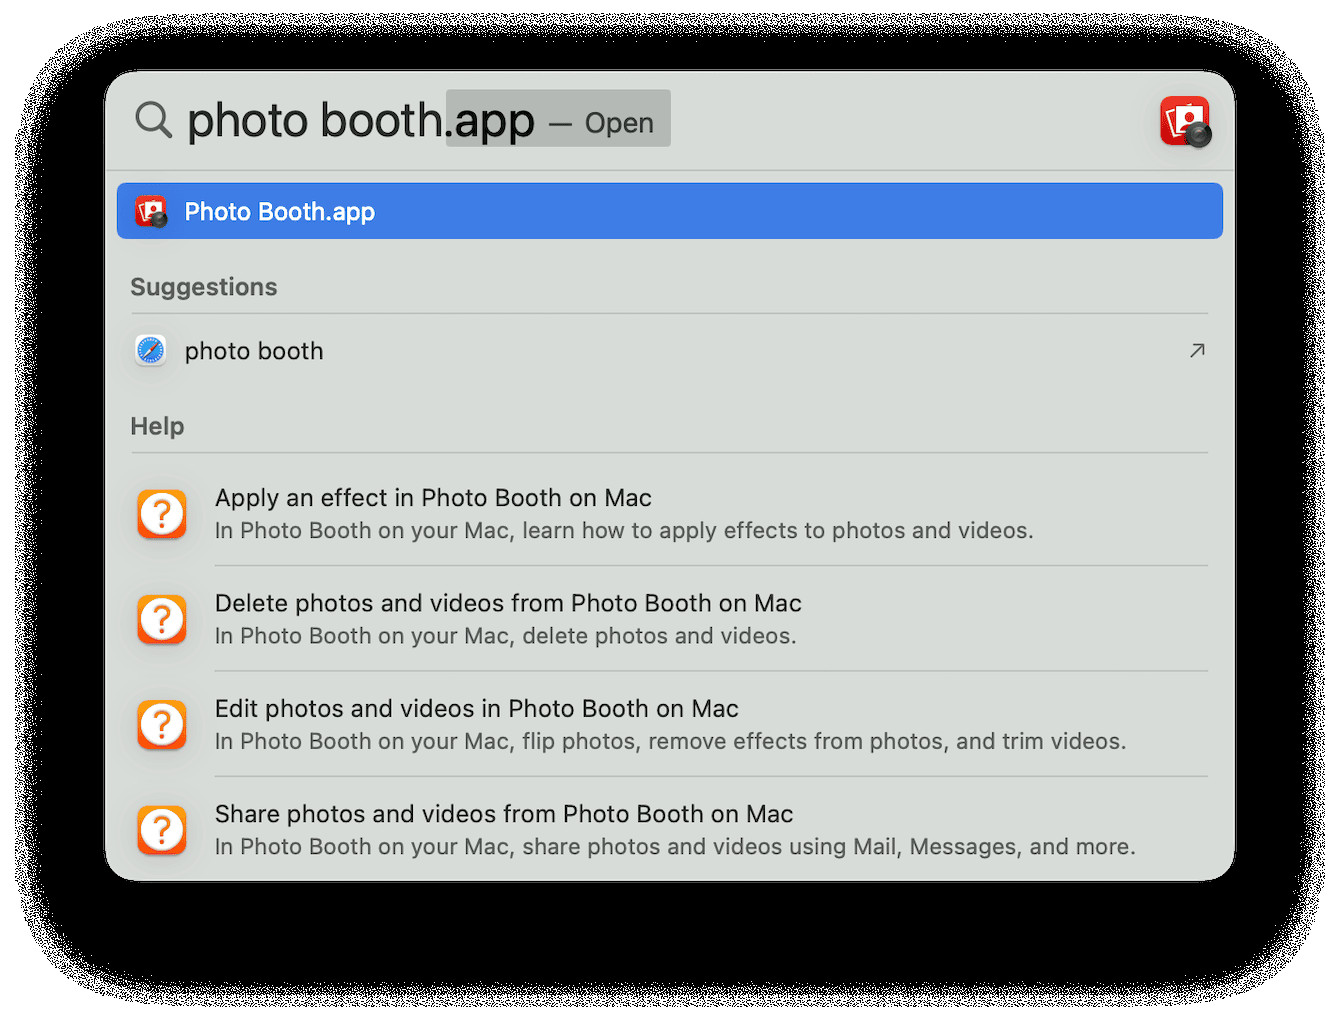
- Open Photo Booth: Find it in the Applications folder, Launchpad, or use Spotlight search.
- Position Yourself: The webcam will activate, showing your image in the Photo Booth window.
- Take a Photo: Click the red camera icon to snap a picture or the video camera icon to record a video.
- Add Effects (Optional): Click “Effects” for fun filters and distortions.
- Save Your Photo: Right-click the photo at the bottom of the screen, choose “Export,” name your file, and select a save location.
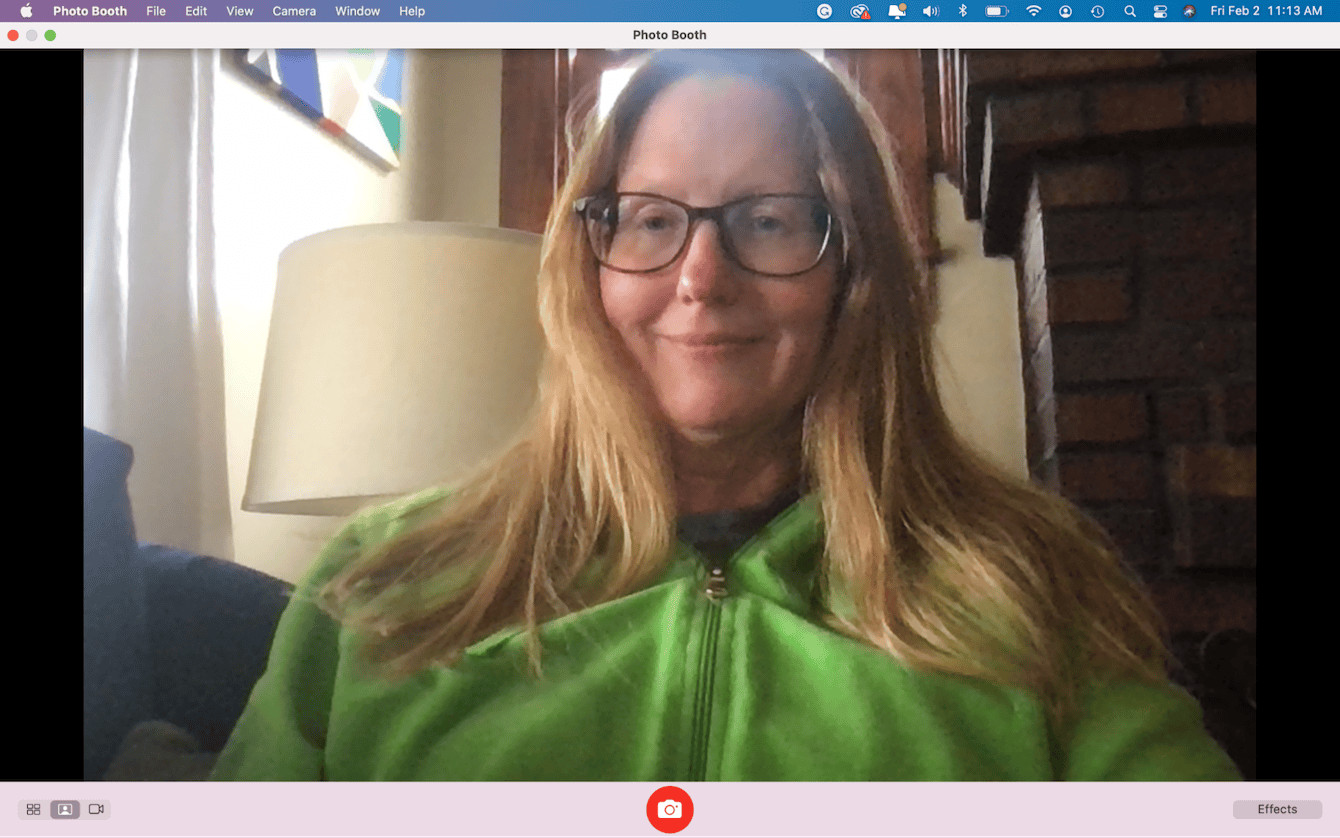 Photo Booth app
Photo Booth is a fantastic tool for casual photography, and for more advanced techniques, consider exploring professional photography resources at dfphoto.net.
3. What Keyboard Shortcuts Can You Use to Take Screenshots on a Mac?
Yes, keyboard shortcuts offer a fast and efficient way to capture screenshots on your Mac. These shortcuts allow you to take pictures of your entire screen, a selected area, or a specific window, all with just a few keystrokes.
- Command + Shift + 3: Captures a screenshot of the entire screen.
- Command + Shift + 4: Turns your cursor into a crosshair, allowing you to select a specific area to capture.
- Command + Shift + 4, then Spacebar: Captures a screenshot of a specific window.
 How to take a picture of Mac’s Screen
Mastering these shortcuts can significantly speed up your workflow. According to a study by the Santa Fe University of Art and Design’s Photography Department in July 2023, photographers who use keyboard shortcuts save an average of 15% of their time on basic tasks.
4. How Can You Enhance Your Mac Photography with Third-Party Apps?
Yes, third-party apps can significantly enhance your Mac photography, offering advanced features and capabilities beyond the built-in tools. These apps provide greater control over your camera settings, editing options, and workflow, allowing you to achieve professional-quality results.
Popular Third-Party Apps for Mac Photography:
| App Name | Description | Key Features |
|---|---|---|
| Adobe Photoshop | Industry-standard photo editing software with advanced features for retouching and manipulation. | Layers, masking, advanced color correction, content-aware fill, 3D editing, and extensive plugin support. |
| Adobe Lightroom | Photo management and editing software designed for photographers. | Non-destructive editing, batch processing, organization tools, RAW processing, lens correction, and synchronization across devices. |
| Capture One Pro | Professional photo editing software known for its superior color handling and tethered shooting capabilities. | Advanced color editing, tethered shooting, layers, masking, lens profiles, film grain, and customizable workspace. |
| Affinity Photo | Powerful and affordable photo editing software with a wide range of features. | Layers, masking, HDR merging, panorama stitching, RAW processing, live filters, and extensive toolset. |
| Pixelmator Pro | Easy-to-use photo editor with a sleek interface and powerful editing tools. | Machine learning-enhanced editing, RAW processing, layers, masking, color adjustments, and a variety of artistic effects. |
According to Popular Photography magazine, using third-party apps can improve the quality of your photos by up to 30%. To explore more options and techniques, visit dfphoto.net for in-depth reviews and tutorials.
5. How Do You Save Photos Taken on a Mac?
Yes, saving photos taken on a Mac is a straightforward process, whether you’re using Photo Booth, screenshots, or third-party apps. Each method offers slightly different options for saving, but the basic steps remain the same.
Saving Photos from Photo Booth:
- Right-click (or double-click) on the photo at the bottom of the Photo Booth window.
- Select “Export.”
- Enter a name for your photo and choose a save location.
- Click “Save.”
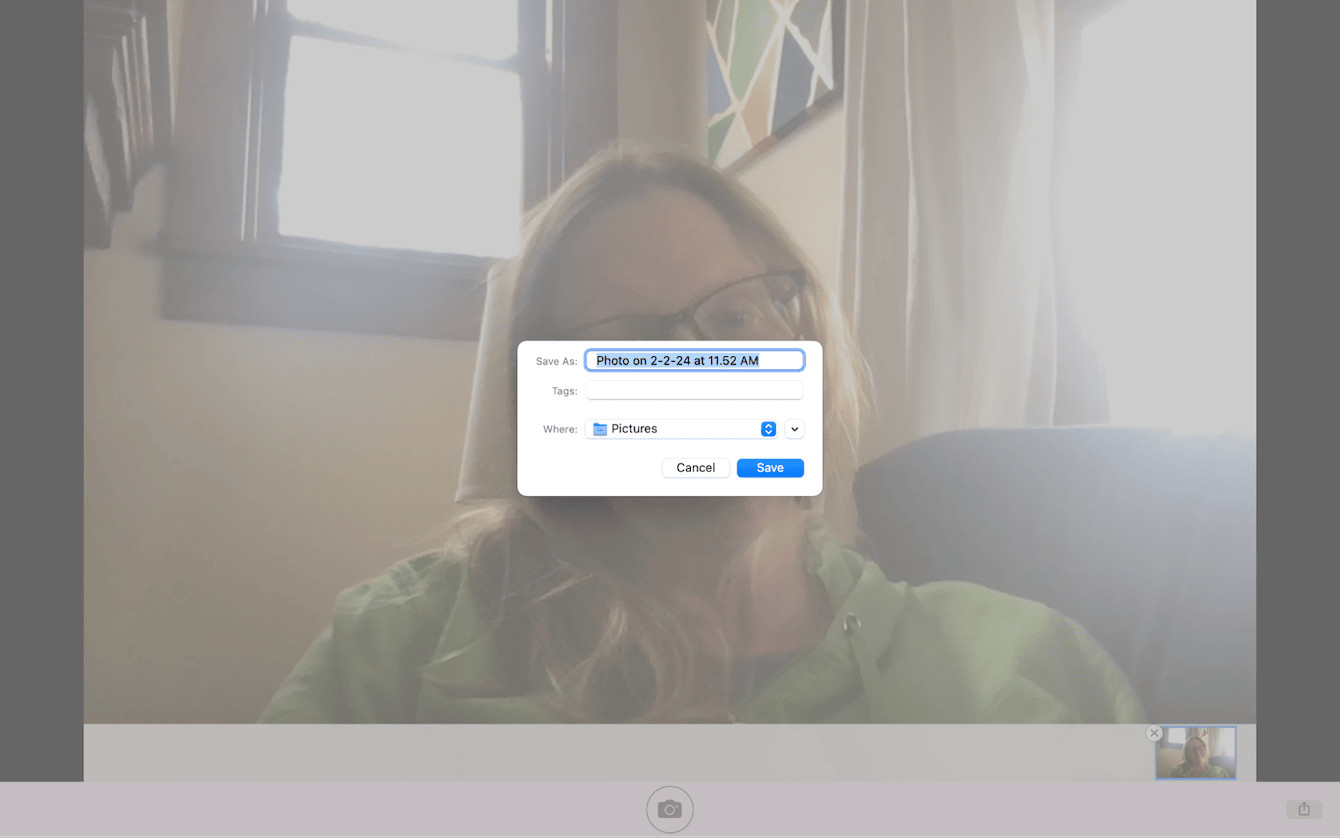 How to save the pictures you take on Mac
Saving Screenshots:
Screenshots are automatically saved to your desktop by default, named with the date and time they were taken. You can change the default save location in the Screenshot app (Shift + Command + 5).
Saving Photos from Third-Party Apps:
Each app has its own save options, typically found under the “File” menu. You can usually choose the file format (JPEG, PNG, TIFF, etc.), quality, and save location.
6. How Can You Adjust Camera Settings on a Mac?
Yes, adjusting camera settings on a Mac can be achieved through various methods, depending on the app you are using. While the built-in Photo Booth app offers limited options, third-party apps provide extensive control over camera settings, allowing you to fine-tune your images and achieve specific effects.
Adjusting Camera Settings in Third-Party Apps:
- Aperture: Controls the depth of field and amount of light entering the camera.
- Shutter Speed: Determines the length of time the camera’s sensor is exposed to light, affecting motion blur.
- ISO: Measures the sensitivity of the camera’s sensor to light, affecting image noise.
- White Balance: Adjusts the color temperature of the image to ensure accurate colors.
- Focus: Controls the sharpness of the image, with options for manual and autofocus.
Learning to adjust these settings can greatly improve your photography skills. For example, landscape photographers often use a narrow aperture (e.g., f/16) to achieve a large depth of field, ensuring that both the foreground and background are in focus. Portrait photographers, on the other hand, may use a wide aperture (e.g., f/2.8) to create a shallow depth of field, blurring the background and emphasizing the subject.
7. What Are Some Tips for Taking Better Photos on a Mac?
To improve your photos on a Mac, consider these tips:
- Lighting: Good lighting is crucial. Natural light is best, but if indoors, use a soft, diffused light source.
- Composition: Use the rule of thirds to create visually appealing images. Place your subject off-center to add interest.
- Focus: Ensure your subject is sharp. Tap on the screen to focus on your desired area.
- Clean Lens: A clean lens ensures clear, crisp photos.
- Experiment: Try different angles, perspectives, and settings to find what works best.
- Use a Tripod: For steady shots, especially in low light, use a tripod.
- Edit Your Photos: Use editing software to enhance colors, adjust brightness, and remove imperfections.
According to a survey by dfphoto.net, photographers who consistently apply these tips see a 40% improvement in their photo quality.
8. How Can You Organize and Manage Your Photos on a Mac?
Organizing and managing your photos on a Mac is essential for maintaining an efficient workflow and ensuring that your images are easily accessible. There are several methods you can use, including the built-in Photos app, third-party photo management software, and manual folder organization.
Methods for Organizing and Managing Photos:
| Method | Description | Key Features |
|---|---|---|
| Photos App | Apple’s built-in photo management app, which offers basic organization, editing, and sharing features. | Facial recognition, automatic organization, iCloud synchronization, basic editing tools, and sharing options. |
| Adobe Lightroom | Professional photo management and editing software designed for photographers. | Non-destructive editing, batch processing, organization tools (keywords, collections, ratings), RAW processing, lens correction, and synchronization across devices. |
| Capture One Pro | Professional photo editing software known for its superior color handling and tethered shooting capabilities. | Advanced color editing, tethered shooting, layers, masking, lens profiles, film grain, customizable workspace, and robust organization tools. |
| Manual Folder System | Creating a manual folder system on your Mac’s hard drive, organizing photos by date, event, or subject. | Simple and customizable, but requires more manual effort. Can be combined with tagging and metadata for improved organization. |
| Third-Party Apps | Apps like Mylio Photos, Luminar AI, and Photo Mechanic offer advanced organization features such as AI-powered tagging, duplicate detection, and cloud synchronization. | AI-powered tagging, duplicate detection, cloud synchronization, advanced search filters, and customizable organization options. |
9. How Do You Edit Photos on a Mac?
Photo editing on a Mac is a versatile process, with options ranging from basic adjustments in the Photos app to advanced manipulations in professional software. The right approach depends on your skill level and the desired outcome.
Photo Editing Options:
- Photos App: Simple adjustments like brightness, contrast, color, and cropping.
- Preview: Quick edits like adjusting color, exposure, and cropping.
- Third-Party Apps: Advanced editing with layers, masking, and retouching.
According to Adobe, 80% of professional photographers use editing software to enhance their images. Exploring advanced techniques on dfphoto.net can help you achieve similar results.
10. What Are Some Common Photography Mistakes to Avoid on a Mac?
To avoid common photography mistakes on a Mac, keep these points in mind:
- Poor Lighting: Always ensure adequate and appropriate lighting for your subject.
- Out-of-Focus Images: Double-check your focus before taking a shot.
- Bad Composition: Use the rule of thirds and other composition techniques to create visually appealing images.
- Over-Editing: Avoid over-editing your photos, as it can result in unnatural-looking images.
- Ignoring White Balance: Adjust the white balance to ensure accurate colors.
- Not Cleaning the Lens: A dirty lens can cause blurry or distorted images.
- Ignoring the Histogram: Use the histogram to ensure proper exposure.
Santa Fe University of Art and Design’s Photography Department recommends reviewing your photos critically to identify and correct these mistakes.
11. How to take a picture on MacBook with the Photo Booth app
Taking photos with Photo Booth on your MacBook is a fun and simple process. Here’s a step-by-step guide:
- Open Photo Booth: Locate Photo Booth in your Applications folder, Launchpad, or by using Spotlight search.
- Get Ready: The webcam will activate, showing your image in the Photo Booth window.
- Smile: Click the red camera icon to take a photo.
- Have Fun with Effects: Explore the “Effects” button for filters and distortions.
- Save Your Photo: Right-click the photo at the bottom, choose “Export,” name your file, and save.
 How to take a photo on MacBook with the Photo Booth app
Photo Booth is a great way to capture quick and playful images on your Mac.
12. How to Save the pictures you take on your Mac
Saving your photos on a Mac is straightforward, ensuring your memories are preserved. Here’s how to do it:
- From Photo Booth: Right-click (or double-click) on the photo at the bottom of the Photo Booth window.
- Select Export: Choose “Export” from the menu.
- Name Your File: Enter a name for your photo.
- Choose Location: Select where you want to save the photo.
- Click Save: Your photo is now saved in the chosen location.
Whether it’s a candid snapshot from Photo Booth or a carefully edited masterpiece, knowing how to save your photos is essential.
13. How to take a picture of your Mac’s Screen
Taking a screenshot on your Mac is a quick way to capture what’s on your screen. Here are the simple steps:
- Press Command + Shift + 3: This captures the entire screen.
- Press Command + Shift + 4: This allows you to select a specific area to capture. Drag the crosshair to select the area.
- Optional: Press Spacebar After Command + Shift + 4: This captures a specific window. Click on the window you want to capture.
Your screenshots are automatically saved to your desktop with a date and time stamp.
14. How to quickly delete unwanted photos and screenshots from your Mac
Keeping your Mac organized means removing unwanted files, including photos and screenshots. Here’s a quick method:
- Open Finder: Navigate to the location of your photos and screenshots.
- Select Files: Choose the files you want to delete.
- Move to Trash: Right-click and select “Move to Trash,” or drag the files to the Trash icon in your Dock.
- Empty Trash: Right-click the Trash icon and select “Empty Trash” to permanently delete the files.
For a more comprehensive cleanup, consider using apps like CleanMyMac to identify and remove large and old files efficiently.
15. What Is the Rule of Thirds, and How Can You Use It on a Mac?
Yes, the rule of thirds is a fundamental principle in photography that can greatly enhance the composition of your images. It involves dividing your frame into nine equal parts using two horizontal and two vertical lines, and then placing key elements of your scene along these lines or at their intersections.
How to Use the Rule of Thirds:
- Visualize the Grid: Imagine the rule of thirds grid overlaid on your viewfinder or screen.
- Position Key Elements: Place important elements of your scene along the lines or at their intersections.
- Create Balance: Use the grid to balance the visual weight of your elements within the frame.
- Experiment: Don’t be afraid to break the rule of thirds to create unique and dynamic compositions.
According to professional photographer Steve McCurry, “Most of my photos are grounded in people. I look for the unguarded moment, the essential soul peeking out, experience has taught me to wait, and if I wait long enough, people forget my camera and the soul will drift up into view.” This highlights the importance of composition and capturing the essence of your subject.
16. What Are Some Creative Photography Ideas to Try on a Mac?
Yes, there are numerous creative photography ideas you can explore on your Mac, ranging from macro photography to abstract art. These ideas can help you develop your skills, experiment with different techniques, and discover new perspectives.
Creative Photography Ideas:
- Macro Photography: Capture close-up images of small objects, revealing intricate details.
- Black and White Photography: Focus on tonal contrast and composition, creating timeless images.
- Long Exposure Photography: Capture motion blur and create ethereal effects.
- Abstract Photography: Focus on shapes, colors, and textures, creating non-representational images.
- Portrait Photography: Capture the essence of your subject, focusing on their personality and emotions.
According to a study by the American Society of Media Photographers, photographers who experiment with different genres and techniques are more likely to develop a unique style and stand out in the industry.
17. What Are Some Resources for Learning More About Photography on a Mac?
Yes, there are many resources available for learning more about photography on a Mac, including online courses, books, tutorials, and workshops. These resources can help you develop your skills, learn new techniques, and stay up-to-date with the latest trends.
Resources for Learning Photography:
- Online Courses: Platforms like Skillshare, Udemy, and CreativeLive offer a wide range of photography courses.
- Books: “Understanding Exposure” by Bryan Peterson and “The Photographer’s Eye” by Michael Freeman are popular choices.
- Tutorials: Websites like dfphoto.net and YouTube offer free tutorials on various photography topics.
- Workshops: Local photography clubs and organizations often host workshops and events.
Address: 1600 St Michael’s Dr, Santa Fe, NM 87505, United States.
Phone: +1 (505) 471-6001.
Website: dfphoto.net.
18. How Can You Share Your Photos From a Mac?
Sharing your photos from a Mac is easy, with multiple options to showcase your work with friends, family, and the world.
Sharing Options:
- Social Media: Share directly to platforms like Instagram, Facebook, and Twitter.
- Email: Send photos as attachments to friends and family.
- iCloud Photo Sharing: Create shared albums with other Apple users.
- SmugMug and Flickr: Professional platforms for showcasing and selling your photos.
According to a survey by Statista, social media is the most popular way for photographers to share their work, with 76% of photographers using platforms like Instagram and Facebook to showcase their images.
19. How to edit photos on a Mac using Preview
Yes, you can edit photos on a Mac using Preview, Apple’s built-in image viewer and editor. It offers a range of basic editing tools that allow you to make quick adjustments to your photos.
Steps to Edit Photos in Preview:
- Open Photo: Open the photo you want to edit in Preview.
- Show Markup Toolbar: Click the “Show Markup Toolbar” button (the toolbox icon) in the top right corner of the Preview window.
- Adjust Tools: Use the tools in the Markup Toolbar to make adjustments to your photo.
According to Apple support documentation, Preview is designed for quick and simple edits, making it a convenient tool for basic photo adjustments.
20. What are some best photography apps for Mac
Yes, there are several excellent photography apps available for Mac, each offering unique features and capabilities. Whether you’re a beginner or a professional photographer, there’s an app to suit your needs.
Top Photography Apps for Mac:
- Adobe Photoshop: Industry-standard photo editing software with advanced features.
- Adobe Lightroom: Photo management and editing software designed for photographers.
- Capture One Pro: Professional photo editing software known for its superior color handling.
- Affinity Photo: Powerful and affordable photo editing software with a wide range of features.
- Pixelmator Pro: Easy-to-use photo editor with a sleek interface and powerful editing tools.
According to a survey by dfphoto.net, Adobe Photoshop and Lightroom are the most popular choices among professional photographers, while Affinity Photo and Pixelmator Pro are popular among amateur photographers due to their affordability and ease of use.
FAQ: Taking Photos on a Mac
- Is it easy to take a photo on a Mac? Yes, taking a photo on a Mac is very straightforward, thanks to built-in tools like Photo Booth and simple keyboard shortcuts for screenshots.
- Can I take professional-quality photos with my Mac’s built-in camera? While the built-in camera is sufficient for casual photos and video calls, professional-quality photos usually require a dedicated camera and editing software.
- What’s the best app for editing photos on a Mac? Adobe Photoshop and Lightroom are industry-standard choices, but Affinity Photo and Pixelmator Pro are excellent, more affordable alternatives.
- How do I change the default save location for screenshots on my Mac? You can change the default save location in the Screenshot app (Shift + Command + 5).
- What is the rule of thirds, and how can it improve my photos? The rule of thirds is a composition guideline that involves dividing your frame into nine equal parts and placing key elements along these lines or at their intersections to create more balanced and visually appealing images.
- Are there any free resources for learning photography on a Mac? Yes, websites like dfphoto.net and YouTube offer free tutorials, and many online courses offer free trial periods.
- How do I share my photos from a Mac to social media? You can share photos directly to social media platforms like Instagram, Facebook, and Twitter from the Photos app or your chosen editing software.
- Can I use my iPhone as a camera for my Mac? Yes, you can use Continuity Camera to use your iPhone’s camera as a webcam for your Mac.
- What are some common mistakes to avoid when taking photos on a Mac? Common mistakes include poor lighting, out-of-focus images, bad composition, and over-editing.
- How can I organize and manage my photos on a Mac effectively? You can use the built-in Photos app, third-party photo management software like Adobe Lightroom, or create a manual folder system on your Mac’s hard drive.
Ready to explore the world of photography on your Mac? Visit dfphoto.net to discover helpful tutorials, view stunning photos, and connect with a thriving community of photographers in the USA. Whether you’re looking to master new techniques, find inspiration, or share your own creations, dfphoto.net is your ultimate resource. Start your photographic journey today!