Ever been captivated by a sprawling landscape or a breathtaking cityscape that you wished you could capture in a single photo? That’s the magic of panoramic photography. Panoramic photos allow you to extend your field of view, enabling you to immortalize those wide, sweeping scenes that regular photos simply can’t do justice. If you’re wondering how to achieve this effect with just your phone, you’re in the right place.
Most modern smartphones, both Android and iPhones, come equipped with a built-in panorama mode in their camera app. However, if you’re looking for more specialized features or your phone lacks this option, there are also numerous panoramic photo apps available for download.
Understanding Panoramic Photography
Before diving into the how-to, let’s clarify what “panoramic” actually means. While we often recognize a panoramic picture when we see one, understanding the definition can help appreciate the technique even more.
Panorama refers to an expansive and uninterrupted view of a surrounding area. Panoramic is the adjective form, describing something related to or resembling a panorama. So, when we talk about a “panoramic photo,” we’re referring to a photograph that captures a wide field of view, similar to how our eyes perceive a broad scene.
Now that we’ve cleared up the definition, let’s get to the exciting part – taking panoramic pictures!
Step-by-Step Guide: How to Take Panoramic Photos with Your Phone
Taking panoramic photos on your phone is surprisingly straightforward. Here’s a simple guide to get you started:
-
Launch Your Camera App and Select Panorama Mode. Open the camera application on your smartphone. Look for the panorama mode, often labeled as “Pano” or “Panorama” within the camera settings or mode options.
-
Orientation Matters: Choose Vertical or Horizontal Hold. Decide whether you want a horizontal or vertical panorama. For a standard wide landscape panorama, hold your phone vertically (in portrait orientation). Conversely, for a tall, sweeping vertical panorama, hold your phone horizontally (landscape orientation).
-
Direction Control: Set Your Panning Direction. iPhone users will see an arrow on the screen which they can tap to change the direction of the panorama capture (left to right or right to left). Android users typically can start panning in either direction without pre-selecting.
-
Initiate Capture: Tap the Shutter Button. Once you’re ready, tap the shutter button to begin recording your panorama.
-
Pan Steadily: Move Your Phone Across the Scene. Slowly and smoothly move your phone across the scene you wish to capture. Maintain a consistent vertical height and try to keep the phone as level as possible throughout the panning motion.
-
Complete the Panorama: Tap Shutter Again or Let it Auto-Finish. When you have captured your desired field of view, tap the shutter button again to stop. In some cases, if you reach the maximum extent of the panorama guide displayed on your screen, the phone might automatically stop and save the image.
-
Review Your Masterpiece: Find Your Panorama in Your Gallery. Navigate to your phone’s photo gallery or camera roll to view your newly created panoramic photograph.
Pro Tips for Perfect Panoramic Pictures
While the basic steps are easy, mastering panoramic photography involves paying attention to a few key details. Here are tips to help you avoid common issues and create stunning panoramic images:
Slow and Steady Panning is Key
 Hands holding a phone taking a panoramic photo of a cityscape at sunset, with a blurred figure walking in the foreground.
The most challenging aspect of panoramic photography is maintaining a steady hand and panning at the correct speed. This is crucial because jerky or uneven movements can lead to distorted panoramas with jagged edges or black, empty areas.
Aim for a fluid, continuous motion. Panning too slowly can cause image overlap, resulting in strange artifacts. Panning too quickly might lead to blurry sections or veering off the intended path. Most smartphone panorama modes provide an on-screen guide line to help you maintain a consistent horizontal or vertical path, along with prompts to adjust your speed if needed.
Pay attention to these on-screen cues. If your phone advises you to “move slower,” “move faster,” or “move up/down,” try to adjust your movement accordingly. If you struggle with hand-held steadiness, consider using a small smartphone tripod. These are affordable and can significantly improve stability.
Do a Practice Run First
Before you commit to capturing a panorama, take a moment to preview the scene. Activate the panorama mode, but don’t press the shutter yet. Pan across your intended scene while observing the viewfinder. This pre-visualization helps you determine the ideal starting and ending points for your shot. It also allows you to identify any potential problems, such as moving objects entering the frame, unwanted bystanders, or even your own fingers accidentally creeping into the shot.
When you are ready to actually capture the panorama, keep an eye on the image as it stitches together on your screen while you pan. Panoramic modes work by digitally combining a series of overlapping images. You’ll typically see the current frame and a preview of the next frame being captured in real-time. Be aware that the wider the panorama, the more pronounced the curvature effect may appear in the final image.
Don’t Be Afraid to Retry
Perfect panoramic photos rarely happen on the first attempt. Don’t get discouraged if your initial panoramas aren’t flawless. It’s common to need a few tries to get it right, especially when you’re learning. If, during the panning process, the guide arrow suddenly jumps back to the starting point, it indicates that your phone has aborted the shot due to excessive deviation from the correct path. This is a frequent occurrence for beginners. Simply return to your starting position and try again. Practice makes perfect!
Unleash Your Creativity
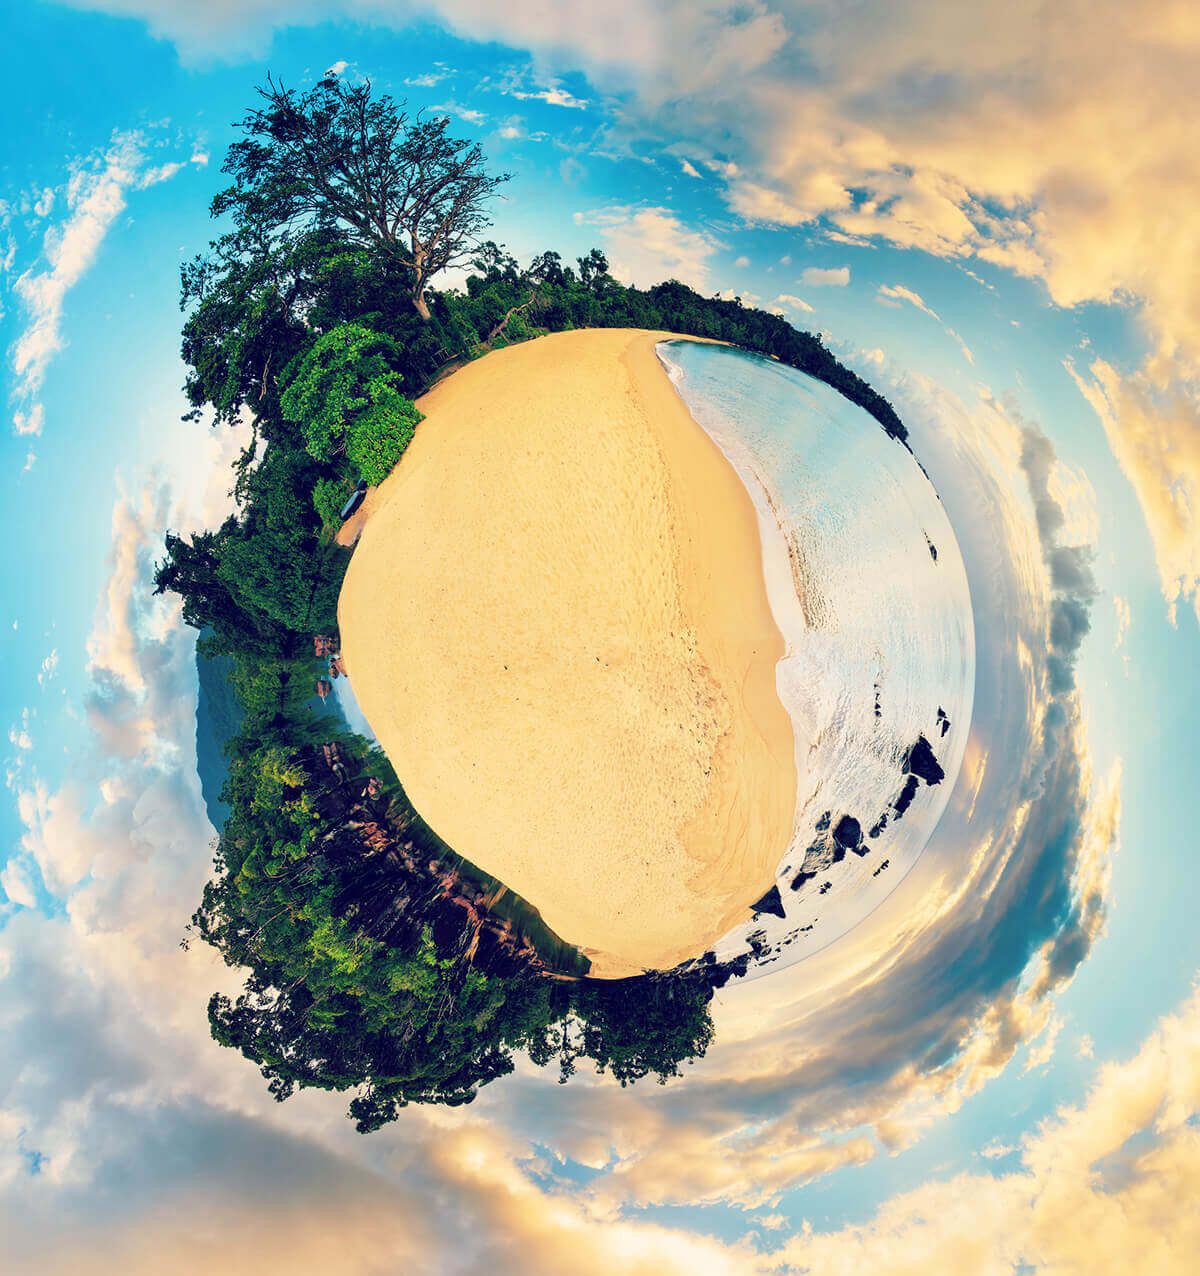 A circular panoramic photo of a park with trees and pathways, resembling a planet surface.
Once you’ve become comfortable with the basic rules of panorama photography, feel free to experiment and break them! Moving your phone in an arc, or slightly up and down while panning, can create unique, perspective-bending effects.
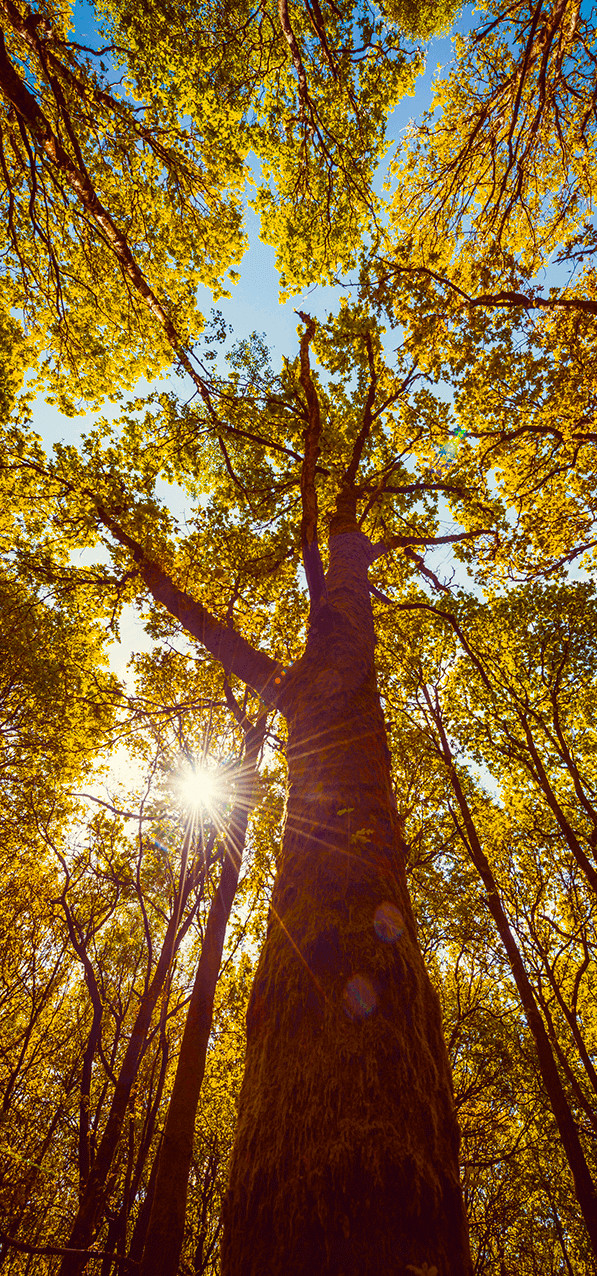 A vertical panoramic photo of a tall building extending high into the sky, emphasizing its height.
Also, don’t overlook the often-underutilized vertical panorama. This technique is fantastic for capturing tall structures like skyscrapers, monuments, towering trees, and waterfalls, emphasizing their height and grandeur.
 A panoramic photo showing a person cloned twice, appearing at the beginning and end of the scene, with a park background.
Another unconventional and fun way to use panoramas is to create a “clone” effect. This technique works best with human subjects or very cooperative pets. Have your subject pose at the starting point of your panorama. After you pan past them, instruct them to quickly move to the end point of your intended panorama frame and pose again. The resulting image will feature multiple versions of your subject in the same panoramic scene, creating a playful and intriguing visual.
Enhance Your Panoramas with Post-Processing Adjustments
A common issue in panoramic photography is uneven exposure. As you pan across a scene, the lighting conditions can change, resulting in some parts of your panorama being darker or brighter than others. If your otherwise perfect panorama suffers from exposure imbalances, consider using a photo editing app like PicMonkey mobile app.
Within the app, you can utilize adjustment tools like Levels to fine-tune the overall exposure of your image, or selectively paint adjustments onto specific areas that need correction.
While editing, you might also want to experiment with Brightness to further refine exposure, boost colors with Saturation, and enhance detail and sharpness with Clarity. Explore paint-on adjustments to precisely target areas needing refinement. And if your panorama ended up with unwanted jagged edges, use the Crop tool to neatly trim them away.
Add Flair with Stickers and Effects
Panoramic photos, with their extended canvas, offer ample space for creative editing. Have fun experimenting with stickers to highlight interesting details within your panorama – arrows can be particularly effective for drawing attention to subtle elements. Paint-on photo effects are also incredibly enjoyable to apply to panoramas due to the elongated format.
Try applying gradient effects like Ombré or selectively adding color tints to sections of your image. You could even experiment with partial black and white conversions to emphasize certain areas. Let your creativity guide you and see what unique and eye-catching results you can achieve. Share your panoramic masterpieces using #picmonkey to inspire others!
Ready to take your panoramic photography to the next level? Download the PicMonkey mobile app today!
Explore More Creative Projects
Discover even more possibilities with PicMonkey: utilize our reshape photo tools, create a color splash image, or find fresh inspiration for your Instagram backgrounds!